
V9
TM
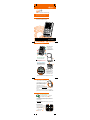
Voice Recording and Playback via MicroSD
No setup or configuration required
Works with all instant voice messengers
®
Works with all Windows , Macintosh systems.
No Drivers Required. MicroSD card not included.
®
Plug & Play,
USB Conference Machine with Voice Recording.
Main Interface and Buttons
5. VoIP Mode Selection Button
6. Recording Button
7. SD Card Reader Mode Button
8. Recording Playback/Pause Button
9. Previous Recording Play Button
VoIP Selection (Green Mode)
Recording Selection (Red Mode)
SD Card Selection (Blue Mode)
*LED colors correspond to the three different modes: / / .Green Red Blue
Other Parts
10. Headphone/earphone jack
11. MicroSD Card Slot
12. Back compartment/Stand
13. USB cable wind up storage
14. Multicolor LED-indicator
Digital Volume Control
1. Volume Up Button
2. Volume Down Button
3. Speaker Mute Button
4. Microphone Mute Button
13
Connection and Installation
1. Open up the back compartment of the V9.
2. Find the USB-cable wind-up storage inside,
gently un-wind USB plug from storage and
connect to any USB port of the computer.
3. Insert MicroSD card into slot.
4. Direct Plug-and-Play, no drivers required.
Supports Windows® XP, Vista and 7, all Macinstosh OS X versions and
Linux OS.
5. In some OS, you might have to go to Sound in the control panel or
System Preferences to select the proper USB driver: VS1000B+ADC
Operation and Function
Normal Mode (VOIP) GREEN Light
1. Upon successful connection, LED-indicator
lights up GREEN, indicating Normal Mode.
2. When LED is Green, speaker and microphone should both be
functioning. If not, check control panel or system preferences if driver
is selected properly.
3. V9 is universal. Works with all Instant Messaging programs, and all
multimedia applications.
Digital Audio Controls
Under Normal Mode or any other
modes, user can adjust volume by
pressing to increase and to
decrease speaker volume.
is speaker mute and is
microphone mute.
VOIP
User Guide

Operation and Function
Recording Mode (RECORD) RED Light
To record, make sure your have inserted MicroSD card
into the proper slot and have V9 in Normal VOIP Mode.
1. Press Recording Button to start record a conversation.
2. The LED indicator turns Red.
3. Press the Recording Button again to stop recording.
4. Each recording must be longer than 5 seconds to register.
5. Press Recording Playback/Pause button to play recordings.
Playback/SD Mode (SD CARD) BLUE Light
During playback or SD Card Reader mode, the LED
indicator will light up Blue.
1. After any recording, press to instantly listen to that recording.
2. To listen to the recording previous to the last recording, press
Previous Recording Play Button.
3. Press one more time to go back one further recording...etc.
1. The V9 acts as a MicroSD Card Reader for viewing all stored files
from your computer. (Windows, Macintosh and Linux supported)
2. Press SD Card Reader Mode Button, LED indicator will flash blue
3. Wait for the computer to recognize the procedure. The first time
will take longer, up to a few minutes.
4. Users can see all the recording in .wav format named according
to the sequence of the recording.
5. Note that in SD Card Reader Mode (Blue), playing the audio files
cannot be heard in V9*. User should save the file on the desktop,
press VoIP Mode Selection Button, wait until the computer
recognize the Audio mode, and then play the file.
SD Card Reader Mode
*Speaker WILL NOT function while MicroSD Card is being read.
Operation and Function
Connecting to an Optional Earphone
Users can switch to private talk during any conversation, simply by
connecting a standard 3.5mm connector earphones to the
Headphone/Earphone Jack. Of course any standard Headphone
with the same connector will work as well.
Once connected, the speaker volume will be cut, so user can enjoy
a private conversation. The microphone will still be activated.
Remember to lower the speaker volume before connection.
Precautions on Safety
- Listening with the headset at high volume may damage your
hearing.
- Place product far away from water, fire, extended exposure of
direct sunlight or magnetic field, and places of excessive dust,
moist, rain, shock or electromagnetic radiation.
- Do not drop your device or subject it to external shock which
may cause malfunction.
- Do not disassemble or attempt to open up the casing of the
conference phone.
- Whenever unplugging the USB plug, apply force to the plug part
only. Jerking the cord instead of the plug may cause damage to
the product.
- Do not use any liquid substance to clean the casing of the
product.
Troubleshooting
Q: The LED-indicator doesn’t light up.
Q: LED has green lights, but there’s no sound.
Q: When I press the volume control buttons on V9, my
computer’s volume doesn’t adjust.
Q: The LED-indicator lights up Cyan or Dimmed-Green,
it’s non-responsive.
A: The V9 LED-indicator should light up all the time when
connected. If it isn’t, either the USB port of the computer is
malfunctioning, of the V9 unit is defective. Switch to another
USB port or another computer to test again.
A: There can be a number of reasons for this, but most commonly
this is the result of the computer not properly selecting the V9
device drivers.
But before you try to adjust the driver settings, first make sure
the computer’s volume setting is set to maximum.
If you are using Windows OS, make sure you turn off all running
applications. Go to Sound settings in Control Panel (differently
named under different version), and under Speaker and
Microphone select VS1000B+ADC as both device drivers.
If you are using Macintosh OS X, go to System Preferences,
select Sound, and under Output and Input, choose the driver
VS1000B+ADC for both. Please refer back to the OS help
for changing device drivers under Linux.
If problem still persists, try restarting the computer with the V9
connected, and if that still doesn’t work, contact your local
distributor for help.
A: This is normal. The volume adjustments for V9 is independent
from any OS, always make sure the computer’s volume
settings is on maximum, then use the V9 to lower the volume
and control.
A: This is the result of the safety circuit for high volume output.
The device cuts all function for user’s safety. Simply unplug V9,
and wait for 10 seconds before reconnecting it. Make sure to
lower the V9 speaker volume from then on, computer’s
volume can remain at max.
SD CARD MODE
VOIP MODE
-
 1
1
-
 2
2


Ask a question and I''ll find the answer in the document
Finding information in a document is now easier with AI
Other documents
-
Laser AO-USBPHWM FAQ
-
Sony ICDTX50 User manual
-
Zebra TC56 User guide
-
Zebra TC75 User guide
-
Sanyo ICR-XPS01M - Xacti Digital Sound Recorder Owner's manual
-
Olympus WS-833 User manual
-
Asus Xonar_U3 User manual
-
Sharper Image Olympus® WS‑853 Digital Voice Recorder Owner's manual
-
Olympus VN-712PCVN-711PCVN-713PC Owner's manual
-
Logitech 915-000139 Datasheet