
PROCEDURE GUIDE
OPERATING
quickchiller
™
PROCESSING REFRIGERATION SYSTEMS

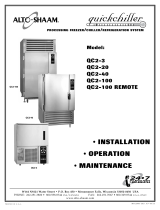
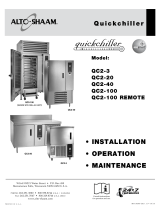
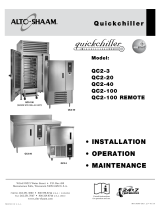
QC-3 THREE-PAN CHILLER
QC-20 FIVE-PAN CHILLER
QC-40 TEN-PAN CHILLER
QC-50 TWELVE-PAN CHILLER
QC-100 TWENTY-PAN CHILLER
EVERY KITCHEN NEEDS A
QUICKCHILLER
IN A SIZE
THAT MAKES SENSE.

quickchiller
™
TABLE OF CONTENTS
QUICKCHILLER INTRODUCTION
Traditional Cook-Serve Kitchens . . . . . . . . . . . . . . .1
Modified Cook-Chill Operations . . . . . . . . . . . . . . .1
Full Cook-Chill Operations . . . . . . . . . . . . . . . . . . .1
Understanding Quick Chill Operation Modes . . . . .16
OPERATION
START-UP PROCEDURE . . . . . . . . . . . . . . . . . . . . .2
SET-UP . . . . . . . . . . . . . . . . . . . . . . . . . . . . . . . . .2
START-UP TEST . . . . . . . . . . . . . . . . . . . . . . . . . . .2
CONTROL PANEL . . . . . . . . . . . . . . . . . . . . . . . . .2
1.0 MAIN MENU . . . . . . . . . . . . . . . . . . . . . . . . . .3
2.0 AUTO CHILL MODE . . . . . . . . . . . . . . . . . . . .3
3.0 TIMED CHILL MODE . . . . . . . . . . . . . . . . . . . .4
4.0 HOLD MODE . . . . . . . . . . . . . . . . . . . . . . . . . .5
4.1 Open Door . . . . . . . . . . . . . . . . . . . . . . . . .5
4.2 Auto Defrost . . . . . . . . . . . . . . . . . . . . . . .6
5.0 DEFROST MODE . . . . . . . . . . . . . . . . . . . . . . .6
5.1 Manual Defrost Message . . . . . . . . . . . . . . .7
6.0 REPORTS . . . . . . . . . . . . . . . . . . . . . . . . . . . .8
6.1 Power Failures . . . . . . . . . . . . . . . . . . . . . .8
6.2 Opening the Door . . . . . . . . . . . . . . . . . . . .8
6.3 Report Selection . . . . . . . . . . . . . . . . . . . . .8
6.4 On-Screen Report View . . . . . . . . . . . . . . . .9
6.5 Printing Reports . . . . . . . . . . . . . . . . . . . . .9
6.5.1 Report Printed as a Table . . . . . . . .10
6.5.2 Report Printed as a Graph . . . . . . .11
7.0 USER SET-UP . . . . . . . . . . . . . . . . . . . . . . . . .12
7.1 Changing the Settings . . . . . . . . . . . . . . . .13
7.1.1 Set Points . . . . . . . . . . . . . . . . . . .13
7.1.2 Time and Date . . . . . . . . . . . . . . . .13
7.1.3 Miscellaneous . . . . . . . . . . . . . . . .12
8.0 SPECIAL FEATURES . . . . . . . . . . . . . . . . . . . .14
8.1 Dip-Switch Access Features . . . . . . . . . . . .14
8.1.1 English to Spanish . . . . . . . . . . . . .14
8.1.2 On-Line Printing . . . . . . . . . . . . . .14
8.1.3 Remaining Dip-Switch Positions . . .15
8.2 Keyboard Accessed Features . . . . . . . . . . .15
8.2.1 Software Versions . . . . . . . . . . . . .15
8.2.2 RTD Temperature Display . . . . . . . .15
8.2.3 Test Printer Port . . . . . . . . . . . . . .15
8.2.4 Dump Configuration . . . . . . . . . . . . .15
9.0 PRINTER HARDWARE NOTES . . . . . . . . . . . .16
QUICKCHILLER USAGE
Initial Quickchiller Operation . . . . . . . . . . . . . . . .17
PRECHILLING THE CABINET . . . . . . . . . . . . . . . .17
Understanding the Chill Processing Cycle . . . . . . .17
—Unpacking Food Probes . . . . . . . . . . . . . . . . . . .18
—Probe Cleaning Procedures . . . . . . . . . . . . . . . .18
Time and Temperature Guidelines . . . . . . . . . . . . . .18
FOOD HANDLING GUIDELINES
Product Covering . . . . . . . . . . . . . . . . . . . . . . . . .19
Portioning and Packaging . . . . . . . . . . . . . . . . . . .19
Production Scheduling . . . . . . . . . . . . . . . . . . . . .20
Analyzing Menu Requirements . . . . . . . . . . . . . . .21
Portion Sizes and Pan Capacities . . . . . . . . . . . . . .21
Determining Batch Size in Total Pans . . . . . . . . . .22
Determining Chiller Pan-Load Capacity . . . . . . . . .22
DETERMINING CHILLER LOAD PROCESSING TIMES .23
Egg . . . . . . . . . . . . . . . . . . . . . . . . . . . . . . . . . .23
Breakfast Meats, Sausage . . . . . . . . . . . . . . . . . .23
Pancakes, Griddle Cakes, French Toast, Waffles . . . . . .23
Meat . . . . . . . . . . . . . . . . . . . . . . . . . . . . . . . . .23
Poultry . . . . . . . . . . . . . . . . . . . . . . . . . . . . . . .23
Fish & Seafood . . . . . . . . . . . . . . . . . . . . . . . . .24
Casseroles and Extended Dishes . . . . . . . . . . . . .24
Salads: Tuna, Chicken, Potato, etc. . . . . . . . . . .24
Quiche & Pot Pies . . . . . . . . . . . . . . . . . . . . . . .24
Baked Beans . . . . . . . . . . . . . . . . . . . . . . . . . . .24
Pasta . . . . . . . . . . . . . . . . . . . . . . . . . . . . . . . .24
Pasta with Sauce . . . . . . . . . . . . . . . . . . . . . . . .24
Gravies & Sauces . . . . . . . . . . . . . . . . . . . . . . . .24
Au Jus . . . . . . . . . . . . . . . . . . . . . . . . . . . . . . .24
Soups . . . . . . . . . . . . . . . . . . . . . . . . . . . . . . . .25
Potatoes . . . . . . . . . . . . . . . . . . . . . . . . . . . . . .25
Rice . . . . . . . . . . . . . . . . . . . . . . . . . . . . . . . . .25
Stuffing . . . . . . . . . . . . . . . . . . . . . . . . . . . . . .25
Vegetables . . . . . . . . . . . . . . . . . . . . . . . . . . . . .25
quickchiller OPERATIONAL OVERVIEW . . . .26
CLEANING & MAINTENANCE
Interior Cleaning . . . . . . . . . . . . . . . . . . . . . . . . .27
Exterior Cleaning . . . . . . . . . . . . . . . . . . . . . . . . .27
Food Trolley Cleaning . . . . . . . . . . . . . . . . . . . . .27
Compressor & Condenser Maintenance . . . . . . . . .27
Model QC-40 Evaporator Condensate Drain Hose . . . . .27
Blast Freezer User Set-Up . . . . . . . . . . . . . . . . . . .28
Cleaning & Maintenance Schedule . . . . . . . . . . . . .30
TRANSPORTATION DAMAGE & CLAIMS . . .31
ALTO-SHAAM® LIMITED WARRANTY . . . .32
W164 N9221 Water Street • P.O. Box 450 • Menomonee Falls, Wisconsin 53052-0450 • U.S.A.
PHONE: 262.251.3800 FAX: 262.251.7067 800.329.8744 U .S . A . ONLY WEBSITE:
800.558.8744
U . S . A ./CANADA 262.251.1907 INTERNATIONAL DIVISION www.alto-shaam.com
®

QUICKCHILLER INTRODUCTION
The Alto-Shaam® Quickchiller
™
is a processing
refrigeration system designed to rapidly and
uniformly cool hot foods for enhanced safety, longer
storage life, and better production efficiency.
The Alto-Shaam® Quickchiller can be effectively
utilized in several types of food service programs:
1. TRADITIONAL COOK-SERVE KITCHENS
Quick-chilling can be used to help streamline
production in operations where foods are
prepared for immediate service. Preparation of
labor intensive entrées can be scheduled for
production the day before service. Quick-
chilling leftovers also provides the ability to use
these items at a later date while maintaining both
safety and product quality.
2. MODIFIED COOK-CHILL OPERATIONS—
where a significant portion of food is cooked for
immediate service; and a smaller portion of
more labor intensive, hot food items are
prepared in advance, chilled, and reheated
when required for service.
3. FULL COOK-CHILL OPERATIONS —
where all hot food production is prepared in
advance of service requirements and held in
refrigerated prepared food inventories. Hot food
preparation takes place over a five-day
production schedule.
The Alto-Shaam Quickchiller produces high-
velocity chilled air which is directed above and
below each pan of food to quickly reduce the
temperature of hot foods from 140°F to 40°F (60°C to
4°C). This high-velocity air removes the insulating
layers of hot, moist heat surrounding hot food
products. As a result, the rate of heat transfer from
the product increases which allows the food to cool
more rapidly.
Rapid reduction in the temperature of hot foods
inhibits the growth of bacteria and provides a safe,
five-day refrigerated storage period from the time of
preparation to the time of service. Enhanced storage
time offers the food service operation considerable
production efficiency. As an example, a daily menu
item is reduced from daily preparation to a two day
a week preparation schedule.
UNDERSTANDING QUICKCHILLER
OPERATION MODES
ALTO-SHAAM quickchiller
™
OPERATION AND PROCEDURE GUIDE
Pg. 1
INTRODUCTION
AUTOMATIC CHILL
This mode provides chill
processing activation and termination
through use of a food probe inserted
into the center of the food.
The cycle is automatically
terminated when the center of the
food reaches 38°F (3°C) as sensed by
the food probe.
HOLD
This mode provides a storage
air temperature of 38°F (3°C) to
hold foods safely upon completion
of chill processing or to keep the
cabinet in a chilled state between
processing cycles.
TIMED CHILL
This mode provides chilling
based on a timed duration.
To protect against product
freezing, the cabinet air sensor may
assume control of chilling until the
selected time has expired. Upon
completion of the timed cycle, the
cabinet automatically reverts to the
hold mode, storing foods safely at
38°F (3°C).

START-UP PROCEDURE
Following electrical installation, the following steps
are necessary to prepare the control for operation.
SET-UP
1. Make certain the main menu (see pg. 3, section 1.0)
appears in the LCD when the breakers are
switched to the ON position. If main menu does
not appear, refer to the start-up procedure located
in the Installation & Maintenance manual.
2. Access the Password screen: Press and hold the
"0" button on the keyboard for a period of 5
seconds. When the Password Entry screen is in
view, enter the password number on the
numerical keyboard.
PASSWORD: 5588744
Following password entry, press "D" on the
keyboard to access the User Setting Menu screen.
If the wrong password number is entered in error,
"Access Denied" will appear in the display. If it
remains in the display longer than 60 seconds, the
locked control panel cover must be opened and
the yellow reset button pressed ONCE. Relock
the control panel and enter the correct password
to gain access to the User Setting Menu screen.
3. Select option "B" and set the correct time and date.
Time must be set in 24 hour format only (military time).
TIME AND DATE MUST BE SET FOR
CHILLER TO OPERATE PROPERLY.
4. Following time and date entry, press "C,"
immediately followed by "D" to return to the Main
Menu screen.
START-UP TEST
1. With the chiller door closed, test the door buzzer
and door switch by entering the hold cycle. Press
"B" on the keyboard when the Main Menu screen
appears on the display. The compressor will
become audible. After a period of 60 seconds, open
the unit door. A buzzer should sound and the
display will prompt the operator to close the door.
2. Close the door and allow the unit to operate for
approximately 10 minutes. Verify the operating
time with the timer which appears in the upper
right-hand corner of the Hold Mode display screen.
If the timer does not indicate the correct amount of
time, begin the SET-UP procedure once again.
3. With the food probes remaining in the
appropriate door holder (no product) verify a
decrease of the temperatures appearing in the
display. The temperatures displayed should start
at the approximate room temperature and
decrease from that point. If any of the
temperatures displayed are above 120°F (49°C),
considerably above normal room temperature,
contact the Alto-Shaam Service Department.
4. Following the 10 minute test operation period,
press "D" on the keyboard to exit the hold mode.
Open the unit door and make certain the interior
walls of the unit are cold.
Additional assistance is available from Alto-Shaam.
OPERATION
ALTO-SHAAM quickchiller
™
OPERATION AND PROCEDURE GUIDE
Pg. 2
™
®
A
B
C
D
QUICK CHILL A
HOLD FOOD B
DEFROST FOOD C
PRINT REPORT D
CE
0
—
CHILLING or HOLDING
1. LOAD FOOD. IF A PRINTOUT IS REQUIRED OR
IF "AUTO-CHILLING" INSERT PRODUCT PROBES.
2. SELECT MODE OF OPERATION "A" OR "B" FROM
THE MENU, THEN FOLLOW PROMPTS.
DEFROSTING
1. REMOVE FOOD FROM UNIT.
2. SELECT MODE "C" FROM MENU, THEN
FOLLOW PROMPTS.
NOTES:
• THE UNIT WILL PERIODICALLY AUTO-DEFROST
WHILE HOLDING.
• REFER TO THE OPERATION MANUAL FOR MORE
DETAILED INFORMATION.
...................
.....................
...............
.................
MENU
SCREEN
CONTROL
KEYBOARD
QUICK
REFERENCE
OPERATION
GUIDE
12:00 MIDNIGHT .=. . . . 00:00
12:30 AM . . . . .=. . . . 00:30
1:00 AM . . . . .=. . . . 01:00
2:00 AM . . . . .=. . . . 02:00
3:00 AM . . . . .=. . . . 03:00
4:00 AM . . . . .=. . . . 04:00
5:00 AM . . . . .=. . . . 05:00
6:00 AM . . . . .- . . . . 06:00
7:00 AM . . . . .=. . . . 07:00
8:00 AM . . . . .=. . . . 08:00
9:00 AM . . . . .=. . . . 09:00
10:00 AM . . . . .=. . . . 10:00
11:00 AM . . . . .= . . . . 11:00
11:30 AM . . . . .= . . . . 11:30
12:00 NOON . . . .=. . . . 12:00
12:30 PM . . . . .=. . . . 12:30
1:00 PM . . . . .=. . . . 13:00
2:00 PM . . . . .=. . . . 14:00
3:00 PM . . . . .=. . . . 15:00
4:00 PM . . . . .=. . . . 16:00
5:00 PM . . . . .=. . . . 17:00
6:00 PM . . . . .=. . . . 18:00
7:00 PM . . . . .=. . . . 19:00
8:00 PM . . . . .=. . . . 20:00
9:00 PM . . . . .=. . . . 21:00
10:00 PM . . . . .=. . . . 22:00
11:00 PM . . . . .=. . . . 23:00
11:30 PM . . . . .=. . . . 23:30
12 HOUR — 24 HOUR TIME
The Alto-Shaam®
Quickchiller™ includes a
microprocessor control
panel which utilizes a
menu screen to guide the
operator through all
operation mode sequences.

1.0 MAIN MENU
The main menu is the starting point for all
functions of the Quickchiller. This includes starting
the hold, defrost, and chill cycles; report printing;
and changing the system configuration.
There are four main options shown on the main
menu screen. These options are selected with
control keyboard buttons "A" through "D."
MAIN MENU SCREEN
2.0 AUTO CHILL MODE
To view the chill menu, press "A" on the
control keyboard.
CHILL MENU SCREEN
To begin the Automatic Chill cycle, press "A" again or
press "D" to cancel and return to the main menu.
When "A" is pressed, the labels "UPPER," "MID," and
"LOWER" appear on the screen. These labels correspond
to the temperature of the food probe(s). "CHILL" also
appears on the screen and indicates the temperature of the
air inside the chiller. The chiller will now begin to
decrease the air temperature until the probes reach chill
set-point.
The operation of the chiller in the Automatic Chill
cycle is dependent on the internal temperature of the
food, therefore, the food probes MUST be used for auto-
chilling. This is the only mode which absolutely requires
the use of the probes.
Whenever a probe chill set-point temperature is
reached, a buzzer will sound and the display
corresponding with the probe position will indicate
"MUTE=A," "MUTE=B," or "MUTE=C." The buzzer
will continue to sound for a period of sixty seconds
or can be stopped by the operator by pressing the
corresponding probe position letter on the control
keyboard. When the buzzer stops, the screen
indicates (DONE) on the corresponding probe
position line.
AUTOMATIC CHILLING SCREEN
(UPPER & MIDDLE PROBES AT CHILL SET POINT)
After all three probes reach set-point, a buzzer will
sound and the last line of the screen will indicate
"HOLD=D." The buzzer will continue to sound for a
period of sixty seconds or can be stopped by the operator
by pressing "D" on the control keyboard.
AUTOMATIC CHILLING SCREEN
(ALL PROBE CHILL SET-POINTS REACHED)
Following the sixty second buzzer or immediately
after the operator presses "D" on the control keyboard, the
Quickchiller will automatically enter the hold mode.
OPERATION
ALTO-SHAAM quickchiller
™
OPERATION AND PROCEDURE GUIDE
Pg. 3
QUICK CHILL . . . . . . . . . . A
HOLD FOOD . . . . . . . . . . . B
DEFROST UNIT . . . . . . . . . C
PRINT REPORT . . . . . . . . . D
AUTOMATIC CHILL . . . . . . . . . A
TIMED CHILL . . . . . . . . . . . . . B
CANCEL . . . . . . . . . . . . . . . . D
UPPER: 37F MUTE=A
MID: 37F (DONE)
LOWER: 41F
CHILL: 38F STOP=D
UPPER: 37F (DONE)
MID: 38F (DONE)
LOWER: 38F (DONE)
CHILL: 38F HOLD=D

3.0 TIMED CHILL MODE
To view the chill menu, press "A" on the keyboard
when the Main Menu screen is displayed.
MAIN MENU SCREEN
Press "B" to display the Timed-Chill Set-Up screen.
CHILL MENU SCREEN
TIMED-CHILL SET-UP SCREEN
The chiller "remembers" the last chill time entered and
uses this time as a default. If the default is acceptable
press "C" and the Load Food screen will appear.
If new chill time parameters are required, press the
number keys "0" through "9" to change the hours and
minutes to the desired time. Following time entry press
"C" for the Load Food screen or press "D" to cancel and
return to the main menu.
TIMED-CHILL LOAD FOOD SCREEN
Load the food into the chiller. If a printout of the chill
temperatures is desired, insert the food product probes.
Press "C" to start the chill cycle or "D" to cancel and return
to the main menu.
TIMED-CHILL SCREEN
The Timed-Chill screen shows the temperature of
the food probe(s) along with the internal cabinet air
temperature. If the food product probes are not
inserted, the probes will sense and display the cabinet
air temperature.
A timer at the upper right displays the remaining chill
time. When the timer reaches zero, the chiller will sound
a buzzer for sixty seconds then automatically enter the
hold mode.
OPERATION
ALTO-SHAAM quickchiller
™
OPERATION AND PROCEDURE GUIDE
Pg. 4
AUTOMATIC CHILL. . . . . . . A
TIMED CHILL . . . . . . . . . . B
CANCEL . . . . . . . . . . . . . . D
ENTER CHILL TIME:
00 HOURS 15 MINUTES
START. . . . . . . . . . . . . . C
CANCEL . . . . . . . . . . . . D
LOAD FOOD AND PUSH:
START. . . . . . . . . . . . . . C
CANCEL . . . . . . . . . . . . D
UPPER: 140F 00:14:59
MID: 169F
LOWER: 120F
CHILL: 80F STOP=D
QUICK CHILL . . . . . . . . . . A
HOLD FOOD . . . . . . . . . . . B
DEFROST UNIT . . . . . . . . . C
PRINT REPORT . . . . . . . . . D

4.0 HOLD MODE
To immediately enter the Hold Food mode, press
"B" on the keyboard when the Main Menu screen is
displayed.
MAIN MENU SCREEN
The unit will activate and the chiller will bring the
cabinet air temperature within a few degrees of the
hold set-point.
HOLD MODE SCREEN
The labels "UPPER," "MID," and "LOWER" all refer to
the internal food probes. The screen displays the current
temperature of these probes in either Celsius or
Fahrenheit. The length of time the hold cycle has been
active is shown in the upper right corner of the screen.
4.1 Open Door
If the door is opened while the chiller is in the hold
mode, a buzzer will sound and a warning message will
appear in the display.
DOOR OPEN WARNING SCREEN
A variation of this warning message will appear
in the display when the door is opened in any cycle;
hold, chill, or defrost. The precise time the door is
opened is recorded in memory and can be obtained
on a print-out.
OPERATION
ALTO-SHAAM quickchiller
™
OPERATION AND PROCEDURE GUIDE
Pg. 5
During the hold or chill cycles, it is
normal for the evaporator fans to
periodically cycle
ON and OFF. The
fans will deactivate when the coil
temperature is greater than 60°F
(16°C) and activate when the coil
temperature drops below 30°F (-1°C).
QUICK CHILL . . . . . . . . . . A
HOLD FOOD . . . . . . . . . . . B
DEFROST UNIT . . . . . . . . . C
PRINT REPORT . . . . . . . . . D
WARNING:
*** UNIT HOLDING ***
PLEASE CLOSE DOOR!
UPPER: 40F 00:20:30
MID: 38F
LOWER: 36F
HOLD: 38F STOP=D

4.2 Auto-Defrost
During the hold mode, the chiller may
automatically enter an Auto-Defrost cycle. This
occurs after the chiller has been holding at least 15
minutes and after the fans have been running for a
cumulative time period of at least 6 hours. During
an Auto-Defrost, the display will show the word
"DEFRSTNG" and a defrost timer will be added to
the display.
AUTO-DEFROST SCREEN
The defrost timer initially begins with a 20
minute time period and counts down to zero. When
it reaches zero, the defrost cycle is terminated. The
defrost heaters will shut off if the temperature of the
coil(s) increases to 16°C (60°F). The defrost time can
be altered by the operator if required. (See the User
Set-Up section for more information.)
To cancel an Auto-Defrost cycle, press "D" while
the defrost cycle is in progress. The chiller will
revert to the Hold Mode, however; because defrost
was not allowed to complete the cycle, the next
Auto-Defrost will begin in one-fourth of the normal
time between cycles.
EXAMPLE: 6 hours ÷ 4 = 1 hour, 30 minutes
If Auto-Defrost completes a full cycle, the next defrost
will occur in 6 hours (factory default).
NOTE: The defrost time period (20 minutes) and the
interval between auto-defrosts (6 hours) are
preset at the factory. If necessary, each of
these settings can be adjusted by the operator.
(See the User Set-Up section for more information.)
OPERATION
ALTO-SHAAM quickchiller
™
OPERATION AND PROCEDURE GUIDE
Pg. 6
UPPER: 40F 00:20:00
MID: 38F 00:19:53
LOWER: 36F
HOLD: 38F DEFRSTNG
AUTO-DEFROST DEPENDS ON THE
FOLLOWING CHILLER CONDITIONS:
1. The fans must be engaged for a cumulative
time period of at least 6 hours (factory default).
2. The chiller must be in the hold cycle and must
be holding for a minimum of 15 minutes.
3. The cabinet air temperature must not be more
than 2°C higher than the hold set-point.

5.0 DEFROST MODE
To initiate a manual defrost cycle, press "C" on the
keyboard when the Main Menu screen is displayed.
MAIN MENU SCREEN
The chiller will display a Defrost Start screen.
Press "C" to start the manual defrost cycle or press "D"
to cancel and return to the main menu screen.
DEFROST CYCLE START SCREEN
If "C" is pressed, a Defrost Cycle screen will appear
in the display.
DEFROST CYCLE SCREEN
The manual defrost cycle automatically terminates
when the 20 minute time period has expired.
Following termination of the manual defrost cycle, the
chiller does not default to Hold Mode. Control Mode
selection is required.
5.1 Manual Defrost Message
The Quickchiller keeps track of how long the fans
and compressors have been running. The chiller uses
this information to determine if defrosting is necessary.
If a defrost is overdue but the chiller does not have the
occasion to apply a normal Auto-Defrost cycle, the
screen will display a "Please Defrost Unit" message.
DEFROST NEEDED SCREEN
The "Please Defrost Unit!" message will be
displayed alternately with the main menu, each for a
period of 3 seconds, and will continue until a
successful defrost has been completed.
If the operator disregards the defrost message and
enters the chill or hold mode, an alternate screen will
be displayed and the defrost required message will no
longer appear. For proper operation of the chiller,
however, a defrost is still required. The "Please Defrost
Unit!" message will reappear whenever the Main Menu
screen is displayed or until a full defrost is
accomplished.
OPERATION
ALTO-SHAAM quickchiller
™
OPERATION AND PROCEDURE GUIDE
Pg. 7
QUICK CHILL . . . . . . . . . . A
HOLD FOOD . . . . . . . . . . . B
DEFROST UNIT . . . . . . . . . C
PRINT REPORT . . . . . . . . . D
* DEFROST CYCLE *
START. . . . . . . . . . . . . . C
CANCEL . . . . . . . . . . . . D
* * DEFROSTING * *
COIL 1: 10F
COIL 2: 12F
00:19:59 STOP=D
FOR OPTIMUM
PERFORMANCE, USE THE
MANUAL DEFROST AT
THE START AND END OF
EACH SERVICE DAY.
PLEASE DEFROST UNIT!

6.0 REPORTS
The Quickchiller automatically records the
temperature of the food product probe(s) and the
cabinet air sensor during all holding and chilling
cycles. These temperatures are stored in internal
memory in report form. The report shows the time
and date the hold or chill cycle starts and ends, along
with the time of day each temperature sample is
recorded. Chiller memory is sufficient to hold up to 12
reports. The extended memory of the Quickchiller
allows the operator to print chill reports daily such as
each morning for the previous day activity. If the
memory is full when a new hold or chill cycle is
started, the oldest report is deleted to gain sufficient
memory for the most current report.
The rate at which temperature samples are
recorded to memory are factory set at 5 minute
intervals. At 5 minute intervals between samples, a
report will record for 25 hours with up to 300 samples
written to each report. Once this limit is reached, no
additional sample temperatures will be recorded.
(See the User Set-Up section for changing the
temperature sample time.)
6.1 Power Failures
If the chiller loses power during a hold or chill
cycle, it writes a message to the report indicating power
was disrupted along with the time of the power failure.
The power failure message counts as one sample of
the 300 maximum per report. After power is restored,
the chiller reverts to the last cycle in progress and
continues the same report.
As long as the chiller is connected to the power
source all reports will remain in memory. In the event
the chiller is disconnected from the power source, a
rechargeable internal battery will retain the report in
memory for approximately 14 days. The internal
battery is automatically recharged when the chiller is
activated and will come up to full charge in 30 hours.
6.2 Opening the Door
If the chiller door is opened during the hold or
chill cycle, it writes a message to the report indicating
the time the door was opened. This message counts as
one sample in the report.
The display indicates a warning message in all
cycles and a buzzer will sound until the door is closed.
6.3 Report Selection
Reports can be viewed on-screen or can be printed.
To access the report function, press “D” on the
keyboard when the Main Menu screen is displayed.
MAIN MENU SCREEN
The Report Selection display will usually indicate
the most current data entries, however, all reports in
memory can be viewed by scrolling through the
information. Press "A" and "B" on the keyboard to
scroll through stored reports.
REPORT SELECTION SCREEN
The first line of the display screen indicates the
report number, the starting (cycle) date, and the time
of the cycle. The second line indicates the ending
(cycle) date and time. The third line indicates the
INITIAL mode of the cycle.
OPERATION
ALTO-SHAAM quickchiller
™
OPERATION AND PROCEDURE GUIDE
Pg. 8
11:50 AM H 37 39 38 38
11.55 AM H 37 39 37 38
11:57 AM * * POWER FAILURE
12:00 AM H 37 39 38 38
12:20 PM H 37 39 38 38
12:22 PM * * * DOOR OPENED
12:05 PM H 37 39 37 38
QUICK CHILL . . . . . . . . . . A
HOLD FOOD . . . . . . . . . . . B
DEFROST UNIT . . . . . . . . . C
PRINT REPORT . . . . . . . . . D
01 01/03 03:30:05 PM
01/03 06:00:10 PM
ACHILL 030 LINE @ 05
A=UP B=DN C=PR D-CAN

ALTO-SHAAM quickchiller
™
OPERATION AND PROCEDURE GUIDE
Pg. 9
EXAMPLE: ACHILL . . . . . . . . . .Auto-Chill
TCHILL . . . . . . . . . .Timed-Chill
HOLD . . . . . . . . . . .Holding
The third line also shows the number of lines (samples)
recorded (30) and the time (in minutes) between samples.
The last line on the screen informs the operator the
"A" and "B" buttons will scroll through the reports in
memory, the "C" button will display the Print Report
screen, and the "D" button will cancel the display and
return to the Main Menu screen.
6.4 On-Screen Report View
If a report has at least 3 samples, it is possible to
view sample times and temperatures on the display
without using a printer. To view the contents of a
report, press "0" on the keyboard when the Report
Selection screen is displayed. A View Report screen
will appear in the display.
VIEW REPORT SCREEN
The 4 digits in the first column represent the time
of day the sample was recorded; 1530 = 15:30 hours or
3:30 PM. The remaining columns indicate the
temperatures of the food product probes in the upper,
middle, and lower positions along with the air
temperature within the cabinet.
The percentage figure in the lower right of the
display indicates the amount of the report that has
been viewed. In other words, if the above report
contains 30 samples, and the first three samples are
displayed, 10% of the report has been viewed by the
operator. By pressing "A" or "B" on the keyboard the
report will scroll in increments of 3 samples. As the
report continues to scroll, the percentage will change
with 50% indicating the 3 middle lines and 100%
indicating the last three lines of the report are in view.
Press "C" to cancel and return to the Report
Selection screen.
6.5 Printing Reports
Reports can be printed to a 40, 80, or a 132
column printer. The chiller hardware is configured
at the factory for either a parallel or serial printer
(not both).
PREPARATION FOR PRINTING REPORTS
(Refer to Section 9.0 for additional information)
1. Connect printer to the power source.
2. Connect printer cable to printer.
3. Connect printer cable to the chiller control. The
interface for the chiller cable connection is
located in the slide-by access panel at the
bottom of the Quickchiller microprocessor
control panel.
To print a report following proper connection to
the printer, press "D" on the keyboard when the
Main Menu screen is displayed.
To access the Print Report screen, press "C"
on the keyboard when the Report Selection
Screen is displayed.
PRINT REPORT SCREEN
Select the type of report required. Press "C" on the
keyboard to print the report as a table of
temperatures. Press "B" to print the report as a
graph. Press "D" to cancel the Print Report screen
and return to the Report Selection screen display.
OPERATION
When an order for a chiller is placed, the
type of printer that will be used must also
be specified so that the chiller hardware
can be properly configured at the factory.
Serial printers are recommended because they
are smaller and easier to handle, however, a
parallel printer is also acceptabl
e.
1530 050 054 056 048
1535 047 050 052 042
1540 045 048 050 040
A=UP B=DN C=CAN 010%
CONNECT PRINTER THEN
START PLOTTING . . . . . . . B
START PRINTING . . . . . . . . C
CANCEL . . . . . . . . . . . . . . D

ALTO-SHAAM quickchiller
™
OPERATION AND PROCEDURE GUIDE
Pg. 10
6.5.1 Report Printed as a Table
Press "C" on the keyboard when the Print Report
screen is displayed to print the report as a table.
The description line printed on the report is
designated by the mode of operation in which the
chiller was engaged when the report was created. If
the chiller was started in a Timed-Chill mode, the
report description is "Timed-Chill." At the end of the
Timed-Chill cycle, however, the chiller entered the
Hold mode. The printout for the Hold portion of the
report will appear on the same report as "Timed-Chill."
or "T."
The letter after the AM/PM indicator for each
sample designates the mode of operation during which
a particular sample was recorded.
EXAMPLE: H . . . . . . . . . Hold
T . . . . . . . . . Timed-Chill
A . . . . . . . . . Auto-Chill
D . . . . . . . . . Defrost
The report indicates the highest and lowest
temperatures recorded for the three food probes with a
space to allow the operator to write-in the designation
of the food item corresponding with each probe. The
report also indicates the total number of samples
recorded along with the time (in minutes) between
each sample.
Printed Table Example
OPERATION
=-=-=-=QUICKCHILLER REPORT=-=-=-=
PRINT DATE: Mar 02 03:35:20 PM
DESCRIPTION: AUTO-CHILL
START TIME: Mar 02 11:04:50 AM
END TIME: Mar 02 03:30:12 PM
HOLD TIME: 000 days 00 hrs 20.18 min
TEMPERATURE UNITS: FAHRENHEIT
HIGH / LOW
UPPER: ____________________ 190 / 37
MIDDLE: ____________________ 180 / 34
LOWER: ____________________ 203 / 39
TIME BETWEEN READS: 05 MIN (55 TOTAL)
UPPER MIDDLE LOWER A I R
11:05 AM A 190 180 203 61
11:10 AM A 176 171 190 77
11:15 AM A 167 163 181 77
11:20 AM A 162 158 176 75
3:05 PM A 39 34 39 19
**HOLD *************************************
3:10 PM H 37 34 39 21
3:15 PM H 37 34 39 27
3:17 PM ** DOOR OPENED
3:20 PM H 37 34 39 30
3:25 PM ** AUTO-DEFROST STARTED
3:30 PM H 39 34 39 38
— END OF REPORT —

ALTO-SHAAM quickchiller
™
OPERATION AND PROCEDURE GUIDE
Pg. 11
6.5.2 Report Printed as a Graph
Press "B" on the keyboard when the Print Report
screen is displayed.
PRINT REPORT SCREEN
The Select Curves screen now appears in
the display.
SELECT CURVES SCREEN
The operator has a choice of a combination
of 4 curves to plot on the graph: UPPER FOOD
PROBE, MIDDLE FOOD PROBE, LOWER FOOD
PROBE, and AIR PROBE.
The quantity and type of plot curves are selected
by pressing "A" on the keyboard which inserts the
letters U, M, L, or A in the bracketed area of the Select
Curves screen in the display. These letters can be
removed from the display by pressing "B" on the
keyboard. Letter selection corresponds with the
following probes.
EXAMPLE: U . . . . . .Upper Probe
M . . . . . .Middle Probe
L . . . . . .Lower Probe
A . . . . . .Air Probe
In addition to the same basic information
contained in the table report printout, data on the
graph report includes temperature ranges at the
top and bottom of the graph. For printout clarity,
when two or more of the characters on the printed
report intersect, the letter character is replaced by
an
*
symbol.
The example shown in the next column indicates a
printout showing the Upper Probe and the Air Probe.
Printed Graph Example
OPERATION
CONNECT PRINTER THEN
START PLOTTING . . . . . . . B
START PRINTING . . . . . . . . C
CANCEL . . . . . . . . . . . . . . D
PLOT CURVES: [ ]
YES . . . . . . . A NO. . . . . . . B
PLOT. . . . . . . . . . . . . . . . . . . C
CANCEL . . . . . . . . . . . . . . . . D
=-=-=-=QUICKCHILLER REPORT=-=-=-=
PRINT DATE: Jan 24 04:46:04 PM
DESCRIPTION: HOLD
START TIME: Jan 24 04:13:37 PM
END TIME: Jan 24 04:36:35 PM
HOLD TIME: 000 days 00 hrs 22.97 min
TEMPERATURE UNITS: FAHRENHEIT
HIGH / LOW
UPPER: ____________________ 59 / 38
MIDDLE: ____________________ 46 / 22
LOWER: ____________________ 48 / 14
TIME BETWEEN READS: 01 MIN (24 TOTAL)
014 022 029 037 044 052 059
04:13 H
04:14 H
04:15 H
04:16 H
04:17 H
04:18 H
04:19 H
04:20 H
04:21 H
04:22 H
04:23 H
04:24 H
04:25 H
04:26 H
04:27 H
04:28 H
04:29 H
04:30 H
04:31 H
04:32 H
04:33 H
04:34 H
04:35 H
04:36 H
014 022 029 037 044 052 059
— END OF REPORT —
*
*
Ua
Ua
*
aU
a U
a U
a U
aU
aU
aU
aU
aU
aU
aU
aU
aU
aU
aU
aU
aU
aU
aU

ALTO-SHAAM quickchiller
™
OPERATION AND PROCEDURE GUIDE
Pg. 12
7.0 USER SET-UP
The ability to change the configuration of the
chiller is accomplished through the use of a special
screen, unavailable under normal operational
modes; and the use of a special access number
(password). This feature has been programmed to
prevent accidental changes or alterations by
unauthorized personnel.
To access the password screen, press and hold the
"0" button on the keyboard for a period of 5 seconds.
PASSWORD ENTRY SCREEN
When the Password Entry screen is in view,
enter the password number on the numerical
keyboard. The password has been programmed to
correspond with the last 7 digits of one of Alto-
Shaam's toll-free telephone numbers:
PASSWORD:
5588744
Following password entry, press "D" on the
keyboard to access the User Setting Menu screen.
USER SETTING MENU SCREEN
The displays available within the User Setting
Menu screen are shown in two basic formats;
WORD or NUMERIC.
Screens shown in a WORD format indicate the
current configuration within the bracketed area. To
change the current setting, press "C" on the keyboard
and the available options will be shown in the
bracketed area (i.e., Fahrenheit or Celsius). To
configure the chiller, the required selection must
appear between the brackets.
EXAMPLE: WORD SETTING SCREEN
Screens accepting NUMERIC values indicate the
high/low limits of an acceptable chiller setting. In the
example shown, the first line indicates probe 1 set-
point (upper probe) in degrees Celsius. The second
line indicates the lowest possible setting on the left, the
highest possible setting on the right, and the current
set-point value in the center of the display. Pressing
"0" through "9" on the numeric keyboard changes the
center number or in this example, the current set-point
value for probe 1.
EXAMPLE: NUMERIC SETTING SCREEN
If the new value entered is outside the allowable
range, a buzzer will sound indicating a necessary
reentry of a value inside the allowable range of
operation. Once the correct value appears, it will be
automatically entered by scrolling to the next display
or will be saved by pressing "D" on the keyboard to
exit and return to the User Setting Menu screen.
All of the user options will incorporate a default
setting which is the factory-set value prior to shipment.
Access to the default setting can be gained by pressing
CE located at the bottom right of the numeric keyboard.
Options which require negative numbers such as
temperature set-points can be entered by pressing the
minus sign located at the bottom left of the numeric
keyboard. Pressing this button will toggle the minus
sign in and out of the display.
Following the selection of an item from the User
Setting Menu screen, access to the particular screen
which requires a configuration change is gained by
scrolling through the available option screens. Press
"A" (NEXT) or "B" (PREV) on the keyboard to scroll
through the available option screens.
OPERATION
Q-CHILLER CONFIGURE
PASSWORD: ________________
Temperature Units
[ Farhen ]
A=NEXT C=CHANGE
B=PREV D=EXIT
Probe 1 Set-Point, C
-20 03 15
A=NEXT C=CHANGE
B=PREV D=EXIT
Set Points . . . . . . . . . . . . A
Time and Date . . . . . . . . . B
Miscellaneous . . . . . . . . . C
Exit . . . . . . . . . . . . . . . . . D
The set-point configurations (factory
defaults) of the Alto-Shaam® Quickchiller
have been established based on the most
current rapid chill processing
standards and extensive product
testing.

ALTO-SHAAM quickchiller
™
OPERATION AND PROCEDURE GUIDE
Pg. 13
7.1 Changing the Settings
Once the User Setting Menu screen is displayed,
the operator is able to change "A" Set Points, "B" Time
and Date, and "C" Miscellaneous which includes
several additional options.
USER SETTING MENU SCREEN
7.1.1 Set Points
Press "A" on the keyboard to access Set-Point
Setting screens. All set-point temperatures must be
reflected in degrees Celsius. Negative numbers can be
entered by pressing the minus sign located at the
bottom left of the numeric keyboard.
7.1.2 Time and Date
Press "B" on the keyboard to access the Time and
Date Setting screen. Current settings are displayed on
the screen and can be changed as required. Time must
be set in 24 hour format only (military time).
TIME AND DATE MUST BE SET FOR THE
CHILLER TO OPERATE PROPERLY.
7.1.3 Miscellaneous
Press "C" on the keyboard to access the
Miscellaneous Setting screens. Miscellaneous screen
options include the following:
TEMPERATURE UNITS: Celsius or Fahrenheit
The temperature scale selected is incorporated
into all printouts and is shown on all
temperature displays.
TIME FORMAT: HH:MM:SS or HH:MM
The operator can choose to display and print
Hour/Minutes/Seconds, or Hours/Minutes only.
KEYBOARD BUZZER: ON or OFF
By selecting ON, a tone will sound each time a
panel button is pressed.
AUTOMATIC DEFROST: ON or OFF
By selecting ON, the chiller will periodically
enter Auto-Defrost while in the Hold mode.
This setting should remain in the
ON position.
DEFROST TIME (min): 1 through 99
Sets the maximum length of time in minutes for
an Auto-Defrost or Manual Defrost cycle. The
recommended defrost cycle is 20 minutes.
SAMPLE PERIOD (min): 0 through 15
Sets the time in minutes between samples on
printed reports. Selecting "0" minutes prints a
sample every 30 seconds. A 5 minute sample
interval is set at the factory.
OPERATION
Set Points . . . . . . . . . . . . A
Time and Date . . . . . . . . . B
Miscellaneous . . . . . . . . . C
Exit . . . . . . . . . . . . . . . . . D
SET-POINT PARAMETERS
TEMP LOW FACTORY HIGH
SCALE SETTING DEFAULT SETTING
Probe 1 Set-Point C -20 4 25
Probe 2 Set-Point C -20 4 25
Probe 3 Set-Point C -20 4 25
Chill Set-Point C -20 -6 0
Hold Set-Point C -20 3 15
Coil 1 Defrost End C 4 16 25
Coil 2 Defrost End C 4 16 25
The set-point configurations (factory
defaults) of the Alto-Shaam
® Quickchiller
have been established based on the most
current rapid chill processing
standards and extensive product
testing.
SET POINT MODIFICATION IS NOT RECOMMENDED.
Refer to the specific model number Installation &
12:00 MIDNIGHT .=. . . . 00:00
12:30 AM . . . . .=. . . . 00:30
1:00 AM . . . . .=. . . . 01:00
2:00 AM . . . . .=. . . . 02:00
3:00 AM . . . . .=. . . . 03:00
4:00 AM . . . . .=. . . . 04:00
5:00 AM . . . . .=. . . . 05:00
6:00 AM . . . . .- . . . . 06:00
7:00 AM . . . . .=. . . . 07:00
8:00 AM . . . . .=. . . . 08:00
9:00 AM . . . . .=. . . . 09:00
10:00 AM . . . . .=. . . . 10:00
11:00 AM . . . . .= . . . . 11:00
11:30 AM . . . . .= . . . . 11:30
12:00 NOON . . . .=. . . . 12:00
12:30 PM . . . . .=. . . . 12:30
1:00 PM . . . . .=. . . . 13:00
2:00 PM . . . . .=. . . . 14:00
3:00 PM . . . . .=. . . . 15:00
4:00 PM . . . . .=. . . . 16:00
5:00 PM . . . . .=. . . . 17:00
6:00 PM . . . . .=. . . . 18:00
7:00 PM . . . . .=. . . . 19:00
8:00 PM . . . . .=. . . . 20:00
9:00 PM . . . . .=. . . . 21:00
10:00 PM . . . . .=. . . . 22:00
11:00 PM . . . . .=. . . . 23:00
11:30 PM . . . . .=. . . . 23:30
12 HOUR — 24 HOUR TIME

ALTO-SHAAM quickchiller
™
OPERATION AND PROCEDURE GUIDE
Pg. 14
8.0 SPECIAL FEATURES
The Alto-Shaam® Quickchiller has been provided
with additional features which are not obvious from
the choices appearing on the main menu. These
features are accessed by changing the position of a
dip-switch or by pressing and holding a specified
keyboard number.
8.1 Dip-Switch Access Features
A five-position
dip-switch is located
behind the locked
control panel on the
CPU board. The dip-
switch is read by the
software each time
the main menu is
entered. Changing the
settings while at the
main menu will not
effect a change until the
main menu is exited
and reentered.
When taking
advantage of the
special feature
program options,
we strongly
recommend
individuals with
an electronics
background to
properly locate and
change dip-switch
position.
8.1.1 ENGLISH TO SPANISH
Dip-Switch #1: OFF = English
ON = Spanish
A position change to
ON allows the operator to
convert all viewing screens from English to Spanish.
With a conversion to Spanish, viewing screens for
User Set-Up which includes the Password Entry
screen and all subsequent screens within the
configuration change program remain in English. In
addition, all data sent to the printer will only
appear in English.
8.1.2 ON-LINE PRINTING
Dip-Switch #4: OFF = Normal Operation
ON = On-line Printing
A position change to ON enables the chiller to
output a printed report during a hold or chill mode
rather than waiting for the cycle to complete. An
on-line printed report is nearly identical to a report
printed from the Main Menu screen at the end of a
cycle, however, the "end time" and "hold duration"
are excluded from the report.
On-Line Printed Example
The letter "A" following the printed sample time
signifies the chiller was in the Auto-Chill mode, just
as "H" would signify Hold or "T" Timed-Chill.
Unlike standard reports with a 300 maximum
sample limit, on-line printing can contain an
unlimited amount of samples. Printing will
continue until it is terminated by the operator. An
on-line printed report also indicates the amount of
cooling power used at each sample time point.
Enabling the on-line printing option will result
in a minor delay between the time a operator selects
a screen function and the actual onset of the
function. This delay occurs because the chiller is
engaged in sending data to the printer and should
be considered a normal operating condition.
If On-Line Printing is enabled without a printer
connected to the chiller, the chiller will function as
if a printer was attached. The data sent to the
printer will terminate at the printer connection
point and will subsequently be lost since the chiller
is unable to detect a printer.
OPERATION
=-=-=-=QUICKCHILLER REPORT=-=-=-=
DESCRIPTION: AUTO-CHILL
START TIME: Mar 02 11:04:50 AM
TEMPERATURE UNITS: FAHRENHEIT
TIME BETWEEN READS: 02 MIN
TIME M UPR MID LOW AIR CL1 CL2 POWR
10:27 AM A 80 81 88 80 50 49 HI *
10:29 AM A 78 87 85 71 48 47 HI *
10:31 AM A 75 74 83 67 47 46 HI *
SWITCH
NUMBER
FUNCTION OFF ON
1 Language ENGLISH SPANISH
2 Reserved ——
3 Reserved ——
4 On-Line Print NO YES
5 Reserved ——
1 2 3 4 5
DIP-SWITCH
BUZZER
CPU BOARD
( PARTIAL VIEW)
DIP-SWITCH LOCATION

ALTO-SHAAM quickchiller
™
OPERATION AND PROCEDURE GUIDE
Pg. 15
8.1.3 REMAINING DIP-SWITCH POSITIONS
Dip-Switch #2 Dip-Switch #3 Dip-Switch #5
Dip-switch 2 and 3 have no affect on the normal
operation of the chiller and should remain in the
OFF
position.
Dip-switch 5 has a major affect on
chiller function and must always
remain in the
OFF position.
8.2 Keyboard Accessed Features
Keyboard Accessed Features are used for both
diagnostics and trouble shooting. These features are
gained by pressing and holding a specified keyboard
number. Once accessed, these features can be cancelled
by pressing "D" on the keyboard.
8.2.1 SOFTWARE VERSION: "1" BUTTON
Pressing and holding "1" on the keyboard will access
the Software Version screen. This screen indicates the
software version originally configured into the chiller
along with the current time and date. Time and date are
updated continually while the screen is displayed.
SOFTWARE VERSION SCREEN
8.2.2 RTD TEMPERATURE DISPLAY: "2" BUTTON
This screen indicates the current temperatures of the 6
RTD probes along with the current temperature inside the
CPU enclosure. The RTD Temperature Display screen is
updated at a rate of approximately 40 times per minute.
RTD TEMPERATURE DISPLAY SCREEN
8.2.3 TEST PRINTER PORT: "3" BUTTON:
A short, 3-line message is sent to the printer:
Alto-Shaam Inc
Quickchiller
Jan 05, 1995 10:09AM
If the message is not received by the printer, it is a
strong indication of a printer malfunction or erroneous
printer settings.
8.2.4 DUMP CONFIGURATION: "4" BUTTON
This button sends the entire configuration of the
chiller to the printer. Values shown within brackets [ ]
are defaults and values following equal signs = are
current settings.
Example: Dump Configuration
OPERATION
QUICKCHILLER QC-50
SOFTWARE VER. X1.00a
Vers: 03/10/95 09:09
3/15/95 09:41:01AM
UP: 72.0 COL1 23.4
MID: 72.0 COL2 22.4
LOW: 73.4 CPU: 72.7
AIR: 74.4 (F) EXIT=D
Quickchiller Configuration
Printed: 02/25/00 08:41AM
Software ----------------------------
Quickchiller, Model QC-50
03/07/00 08:36AM
VERSION 1.00 by: Allan Inda
8051 SYSTEM LIBRARY SOFTWARE
Printer - - - - - - - - - - - - - - - - - - - - - - - - - - - - - - - - - - -
Printer Interface = Serial
Baud Rate = 4800
Stop Bits = 1 bit
Printing Delay = 40 [ 40]
Sample Period, min = 0 [ 5]
Print Grid Spacing = 10 [ 10]
Print Grids = YES
Printer Columns = [ 40]
Buzzers/Timeouts - - - - - - - - - - - - - - - - - - - - - - - - - - -
Probe Mute Time, sec = 30 [ 30]
Chill Done Time, sec = 60 [ 60]
Are-U-Sure Time, sec = 20 [ 20]
DefrstDone Time, sec = 60 [ 60]
Probe Mute Buzzer = 0 [ 0]
Chill Done Buzzer = 1 [ 1]
Are-U-Sure Buzzer = 2 [ 2]
Defrost Done Buzzer = 3 [ 3]
Holding - - - - - - - - - - - - - - - - - - - - - - - - - - - - - - - - - -
Hold Set-point, C = 3 [ 3]
Hold Offset, 0.1C = 0 [ 0]
Hold Low Offset, 0.1C = 10 [ 10]
Hold Med Offset, 0.1C = 10 [ 10]
HoldHigh Offset, 0.1C = 10 [ 10]
Chilling - - - - - - - - - - - - - - - - - - - - - - - - - - - - - - - - - -
Probe 1 Set-point, C = 4 [ 4]
Probe 2 Set-point, C = 4 [ 4]
Probe 3 Set-point, C = 4 [ 4]
Chill Set-point, C = -6 [ -6]
Chill Offset, 0.1C = 0 [ 0]
ChillLow Offset, 0.1C = 8 [ 8]
ChillMed Offset, 0.1C = 8 [ 8]
Defrosting - - - - - - - - - - - - - - - - - - - - - - - - - - - - - - - -
Automatic Defrost = YES
AutoDefrst Per, 5min = 72 [ 72]
DefrstWarnTime, 10min = 60 [ 60]
Coil1 Defrost End, C = 16 [ 16]
Coil2 Defrost End, C = 16 [ 16]
Defrost Time, min = 20 [ 20]
Misc - - - - - - - - - - - - - - - - - - - - - - - - - - - - - - - - - - - -
Chiller Model = QC-50
Compressor Mode = CPU CNTR
Number Compressors = TWO
Power Throttle = YES
Temp Cycling = YES
Power Down Minutes = 1 [ 1]
Temperature Units = Farhen
Fan Cut-In Temp, C = 4 [ 4]
Fan Cut-Out Temp, C = 13 [ 13]
Time Format = HH:MM:SS
KeyBoard Buzzer = OFF

ALTO-SHAAM quickchiller
™
OPERATION AND PROCEDURE GUIDE
Pg. 16
9.0 PRINTER HARDWARE NOTES
SERIAL PRINTER: The printer MUST have an internal
buffer of at least 1K bytes. Since the
printer must be able to maintain the
same pace as the control, and there is
no printer handshaking, printers
with smaller buffers simply cannot
keep up.
The printer must also conform to RS-
232 standards and must be able to
print using only the TX and GND
lines (i.e., without hardware
handshaking or software hand-
shaking (XON/XOFF). Nearly all
serial printers can print without
handshaking. The printer should be
connected to the control with a
NULL serial cable.
RECOMMENDED:
Alto-Shaam PN# 14218
Star Micronics PN# DP-8340 FM
PARALLEL
PRINTER: Any EPSON, IBM PRO-PRINTER
or compatible is acceptable. The
internal buffer should be at least
1K byte. Most of the newer
printers have at least this amount
or more. A standard printer cable
is required. It is not necessary to
use a printer with 24 pins or special
graphic capabilities.
RECOMMENDED:
Alto-Shaam PN# 14709
SET-UP AND CABLING INSTRUCTIONS:
1. Confirm the gray ribbon cable, originating from the
relay board, is connected to the J7 I/O connector.
2. Confirm the 3-wire cable assembly originating from
the sliding door connection part is connected to the
J29 terminal.
3. With Star Micronics printer model DP8340 power
OFF, confirm only the #2 dip switch (left side of
printer) is down.
4. Confirm the Quickchiller CPU board dip switch
positions are as follows: #4 IS DOWN; #5 IS UP.
5. Confirm the Quickchiller CPU board WP/OFF shunt
is to WP side.
SET-UP & CABLING INSTRUCTIONS:
1. Confirm the gray ribbon cable, originating from the
relay board, is connected to the J8 printer connector.
2. Confirm the 3-wire cable assembly originating from
the sliding door connection part is connected to the
J29 terminal.
3. Confirm the Quickchiller CPU board dip switch
positions are as follows: #4 IS DOWN; #5 IS UP.
5. Confirm the Quickchiller CPU board WP/OFF shunt
is to WP side.
OPERATION

ALTO-SHAAM quickchiller
™
OPERATION AND PROCEDURE GUIDE
Pg. 17
UNDERSTANDING
QUICKCHILLER OPERATION MODES
• AUTOMATIC CHILL
This mode provides chill processing activation and
termination through use of a food probe inserted
into the center of the food.
The cycle is automatically terminated when the
center of the food reaches chill set point temperature.
• HOLD
This mode provides a storage air temperature of
38°F (3°C) to hold foods safely upon completion of
chill processing or to keep the cabinet in a chilled
state between processing cycles.
• TIMED CHILL
This mode provides chill processing cycle activation
and termination based on a timed cycle selected by
the operator.
Upon completion of the timed cycle, the cabinet
automatically reverts to the hold mode, storing
foods safely at 38°F (3°C).
INITIAL QUICKCHILLER OPERATION
PRECHILLING THE CABINET
The Quickchiller should be prechilled prior to
placing food into the cabinet. In models equipped
with a roll-in cart (trolley), always maintain an empty
food cart inside the chiller when prechilling. This
eliminates air loss through the bottom of the chiller
cabinet door.
ALLOW 40 MINUTES PRECHILL TIME.
NOTE: During the initial cooling of the
Quickchiller, an evaporator fan delay
system will prevent the chilling fans
from engaging until the evaporator coil
temperature is below 30°F (-1°C).
Conversely, when the system is turned
OFF, the evaporator fan(s) will continue
to operate until the evaporator coil
temperature is above 60°F (15°C).
UNDERSTANDING
THE CHILL PROCESSING CYCLE
The Alto-Shaam Quickchiller uses high velocity
air circulation to remove heat from prepared
foods, rapidly reducing temperatures through the
Danger Zone. Air circulation is directed from
right and left in each Quickchiller model. Side-to-
side air circulation insures even and complete
cooling of all pans loaded in the unit.
When placed in the cold air of the chiller, high
velocity air sweeping across the pans removes
insulating layers of warm moist air that surrounds
hot products. Removing these insulating layers of
warm, moist air increases the rate of heat transfer
from the food which results in rapid product cooling.
Because the basic performance of the
Quickchiller relies on high velocity air movement
across the containers of food, it is important to load
the food by placing pans directly in the pan slides,
using the slides to support the edges of 12" x 20"
steam table pans (GN 1/1). For 18" x 26" sheet pans;
12" x 10" steam table pans (GN 1/2); loaf pans;
entree plates; and other small containers, use a wire
rack or shelf for pan support.
CAUTION
NEVER STACK PANS DIRECTLY ON TOP
OF EACH OTHER. THIS WILL BLOCK
AIR FLOW AND INCREASE CHILL
PROCESSING TIME.
To maintain sanitation control when loading
the Quickchiller, foods should be above
140°F (60°C) and should be tightly covered.
CAUTION
ADEQUATE SPACING MUST BE
ALLOWED BETWEEN PANS FOR
PROPER AIR CIRCULATION FOR
BOTH THE CHILLING FUNCTION
AND SUBSEQUENT STORAGE.
Quickchiller
™
USAGE
Page is loading ...
Page is loading ...
Page is loading ...
Page is loading ...
Page is loading ...
Page is loading ...
Page is loading ...
Page is loading ...
Page is loading ...
Page is loading ...
Page is loading ...
Page is loading ...
Page is loading ...
Page is loading ...
Page is loading ...
-
 1
1
-
 2
2
-
 3
3
-
 4
4
-
 5
5
-
 6
6
-
 7
7
-
 8
8
-
 9
9
-
 10
10
-
 11
11
-
 12
12
-
 13
13
-
 14
14
-
 15
15
-
 16
16
-
 17
17
-
 18
18
-
 19
19
-
 20
20
-
 21
21
-
 22
22
-
 23
23
-
 24
24
-
 25
25
-
 26
26
-
 27
27
-
 28
28
-
 29
29
-
 30
30
-
 31
31
-
 32
32
-
 33
33
-
 34
34
-
 35
35
Alto-Shaam Quickchiller QC-20 Operating Procedure Manual
- Type
- Operating Procedure Manual
- This manual is also suitable for
Ask a question and I''ll find the answer in the document
Finding information in a document is now easier with AI
Related papers
-
 Alto-Shaam Quickchiller QC-100 Operating instructions
-
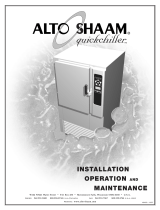 Alto-Shaam Quickchiller QC-50 Installation, Operation and Maintenance Manual
-
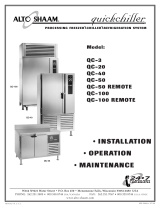 Alto-Shaam QC-50 REMOTE User manual
-
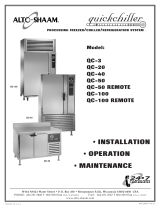 Alto-Shaam Quickchiller QC-50 User manual
-
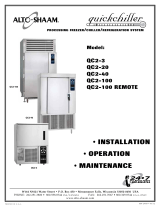 Alto-Shaam QC2-3 User manual
-
 Alto-Shaam QC2-3 User manual
-
 Alto-Shaam Quickchiller QC2-40 User manual
-
 Alto-Shaam Quickchiller QC2-40 User manual
-
 Alto-Shaam Quickchiller QC-50 Operating instructions
-
 Alto-Shaam Quickchiller QC-50 Quick start guide
Other documents
-
AVF EM60S User manual
-
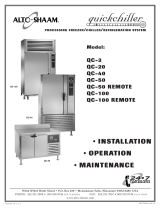 Alto Shaam QC-50 REMOTE Operating instructions
-
Foster QC 11 Operating instructions
-
Hobart HQC45 User manual
-
Hobart ML-124069 User manual
-
Diamond 18G300500000 Installation, Usage And Maintenance Manual
-
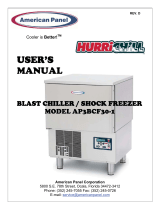 American Panel HurriChill AP3BCF30-1 User manual
-
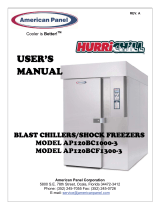 American Panel Freezer AP120BC1000-3 User manual
-
Foster FXBC10 User manual
-
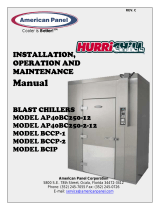 American Panel AP40BC250-2-12 User manual


