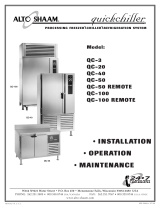
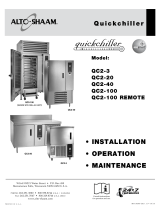
Page is loading ...

®
MAINTENANCE
OPERATION
AND
INSTALLATION
#8405 • 10/07
W164 N9221 Water Street • P.O. Box 450 • Menomonee Falls, Wisconsin 53052-0450 • U.S.A.
PHONE: 262.251.3800 800.558.8744 U.S.A./CANADA FAX: 262.251.7067 800.329.8744 U.S.A. ONLY
WEBSITE
: www.alto-shaam.com

#8405 — QUICKCHILLER INSTALLATION, OPERATION, AND MAINTENANCE
Pg. 1.
®
D E L I V E RY
This Alto-Shaam appliance has been
thoroughly tested and inspected to insure only the
highest quality unit is provided. Upon receipt,
check for any possible shipping damage and
report it at once to the delivering carrier. See
Transportation Damage and Claims section
located in this manual.
This appliance, complete with unattached
items and accessories, may have been delivered in
one or more packages. Check to ensure that all
standard items and options have been received
with each model as ordered.
Save all the information and instructions
packed with the appliance. Complete and return
the warranty card to the factory as soon as
possible to assure prompt service in the event of a
warranty parts and labor claim.
This manual must be read and understood by
all people using or installing the equipment
model. Contact the Alto-Shaam service
department if you have any questions concerning
installation, operation, or maintenance.
NOTE: All claims for warranty must include the
full model number and serial number of
the unit.
U N PA C K I N G
1. Carefully remove the
appliance from the
carton or crate.
NOTE: Do not discard the
carton and other
packaging material
until you have
inspected the unit
for hidden damage
and tested it for
proper operation.
2. Read all instructions in this manual carefully
before initiating the installation of this appliance.
DO NOT DISCARD THIS MANUAL.
This manual is considered to be part of the
appliance and is to be provided to the owner
or manager of the business or to the person
responsible for training operators. Additional
manuals are available from the Alto-Shaam
service department.
3. Remove all protective plastic film, packaging
materials, and accessories from the appliance
before connecting electrical power. Store any
accessories in a convenient place for future use.
®
®

#8405 — QUICKCHILLER INSTALLATION, OPERATION, AND MAINTENANCE
Pg. 2.
®
SAFETY PROCEDURES
A N D P R E C A U T I O N S
Knowledge of proper procedures is essential to the
safe operation of electrically energized equipment.
In accordance with generally accepted product
safety labeling guidelines for potential hazards,
the following signal words and symbols may be
used throughout this manual.
Used to indicate the
presence of a hazard that
will cause severe personal
injury, death, or substantial
property damage if the
warning included with this
symbol is ignored.
Used to indicate the
presence of a hazard that
can cause personal injury,
possible death, or major
property damage if the
warning included with this
symbol is ignored.
Used to indicate the
presence of a hazard that
can or will cause minor or
moderate personal injury
or property damage if the
warning included with this
symbol is ignored.
Used to indicate the
presence of a hazard that
can or will cause minor
personal injury, property
damage, or a potential
unsafe practice if the
warning included with this
symbol is ignored.
Used to notify personnel of
installation, operation, or
maintenance information that is
important but not hazard related.
1
. This appliance is intended to cook, hold or
p
rocess foods for the purpose of human
consumption. No other use for this
appliance is authorized or recommended.
2. This appliance is intended for use in
commercial establishments where all
operators are familiar with the purpose,
limitations, and associated hazards of this
appliance. Operating instructions and
warnings must be read and understood by
all operators and users.
3. Any troubleshooting guides, component
views, and parts lists included in this manual
are for general reference only and are intended
for use by qualified technical personnel.
4. This manual should be considered a
permanent part of this appliance. This
manual and all supplied instructions,
diagrams, schematics, parts lists, notices, and
labels must remain with the appliance if the
item is sold or moved to another location.
NOTE:

#8405 — QUICKCHILLER INSTALLATION, OPERATION, AND MAINTENANCE
Pg. 3.
I N S TA L L AT I O N
P
rior to moving the Quickchiller to the installation
site, check the dimensions of doors, passageways,
and ceiling heights in the areas through which the
cabinet must be moved. Also check the turning
radius if the cabinet must be moved around an
e
xisting structure. The use of a fork lift or pallet
lift truck is required for moving and leveling most
Quickchiller models.
NOTE: In certain instances, it may be
necessary to remove doors and door
hardware to negotiate tight spaces.
SITE SELECTION
P
osition the Quickchiller to allow sufficient air
ventilation through the condensing unit(s). The
rear of unit should be no closer than 6" (152mm)
to any wall or structure.
Avoid installing the chiller
immediately adjacent to fryers,
charbroilers, or any other equipment
producing grease laden air; heat
producing equipment such as ovens
and ranges; and steam discharging
equipment such as steamer ovens and
kettles. Do not locate the Quickchiller
in direct sunlight.
Allow sufficient front clearance
for serviceability and for easy
maneuvering of food trolleys in
and out of the cabinet.
MODEL EXTERIOR D I M E N S I O N S : H x W X D NET WEIGHT*
QC-3 34" x 28" x 29-3/4" 350 lb
(864mm x 711mm x 756mm) (159 kg)
QC-20 42-1/2" x 52-1/2" x 38" 442 lb
(1079mm x 1334mm x 965mm) (200kg)
QC-40 70-1/4" x 38-1/2" x 39-7/8" 676 lb
(1784mm x 978mm x 1013mm) (307 kg)
QC-50 84-1/2" x 51" x 40-1/2" 1,120 lb
(2146mm x 1295mm x 1029mm) (508 kg)
QC-100 95" x 51" x 40-1/2" 1,152 lb
(2413mm x 1295mm x 1029mm) (523 kg)
*SELF-CONTAINED UNITS
®
C L E A R A N C E R E Q U I R E M E N T S
BACK: 6" (152mm) TOP: 6" (152mm)
SIDES: 4" (102mm) minimum at both sides.
18" (457mm)
MINIMUM CLEARANCE
FROM HEAT PRODUCING EQUIPMENT
.
ANSI/NSF 7
5-YEAR LIMITED
WARRANTY ON
SELF-CONTAINED
COMPRESSOR
Effective from date of shipment.
(
EXCLUDES LABOR)
TO PREVENT PERSONAL INJURY,
USE CAUTION WHEN MOVING OR
LEVELING THIS APPLIANCE.

#8405 — QUICKCHILLER INSTALLATION, OPERATION, AND MAINTENANCE
Pg. 4.
I N S TA L L AT I O N R E Q U I R E M E N T S
T
he model QC-3 is a counter mounted unit and
must be sealed to the counter with a NSF listed
silicone sealant.
For all other
models, install
the appliance on a
smooth and level floor surface. Use the
adjustable cabinet legs to level the Quickchiller.
Adjust from front-to-back and from side-to-side
with the use of a spirit level to evenly
distribute the cabinet weight and avoid pulling
the cabinet alignment out of square.
After leveling the cabinet of cart equipped
models, check the height relationship of the roll-
in cart to the cabinet. Adjust the Quickchiller
height as needed to accommodate the cart and
to securely close the Quickchiller door(s).
D
O O R S E A L :
Check the door gasket to make certain it is sealing
properly and that the gasket provides an even and
positive seal around the entire door frame.
TO PREVENT PERSONAL INJURY,
USE CAUTION WHEN MOVING OR
LEVELING THIS APPLIANCE.
®

#8405 — QUICKCHILLER INSTALLATION, OPERATION, AND MAINTENANCE
Pg. 5.
A 1/2" I.D. (12,7mm) PVC pipe is furnished with
each QC-50 and QC-100 model. Use PVC glue to
attach the pipe into the drain opening at the rear of
the unit. Insert the PVC pipe into the drain opening
with a 1/4" (6mm) clockwise turn. Connect the PVC
pipe to discharge through an indirect waste pipe into
an open-site drain by means of a 2" (51mm) air gap.
Connection must be within 10' (3m) of the unit.
NOTE: In the U.S.A., this equipment is to be
installed to comply with the Basic Plumbing
Code of the Building Officials and Code
Administrators International, Inc. [BOCA],
and the Food Service Sanitation Manual of
the Food & Drug Administration [FDA].
WAT E R D R A I N A G E
D R A I N A G E :
Q C - 3 Q C - 2 0 Q C - 4 0
EVAPORATOR PANS: NO INSTALLATION REQUIRED
Q C - 5 0 Q C - 1 0 0
ONE (1) FLOOR DRAIN:
1/2" (12,7mm) DIAMETER
DRAIN OPENING
AT REAR
®

#8405 — QUICKCHILLER INSTALLATION, OPERATION, AND MAINTENANCE
Pg. 6.
This appliance must be branch circuit protected
with proper ampacities, in accordance with the
wiring diagram. The Quickchiller must be
properly grounded in accordance with the
National Electrical Code and applicable local
codes. Wire size for the main incoming power to
the unit must match the minimum size listed in
the specifications applicable to the specific
Quickchiller model. For supply connections,
locate the wire size listed in this manual.
Before operating the chiller, check all cable
connections in the electrical connection area
for tightness since connections can loosen
during transport.
N O T E : After electrical connections have been
completed, operate the appliance in
any chilling mode for a period of 15
minutes and recheck the main power
connections at the terminal block to
make certain they remain tight.
®
ELECTRICAL INSTALLATION

#8405 — QUICKCHILLER INSTALLATION, OPERATION, AND MAINTENANCE
Pg. 7.
®
ELECTRICAL INSTALLATION
VOLTAGE PHASE CYCLE/HZ
Q C - 3 Q C - 2 0 Q C - 4 0 Q C - 5 0 Q C - 1 0 0
S E L F - C O N TA I N E D
208-240VAC 1 ph 50/60 Hz
Recommended
circuit amperage:
20 amps
Recommended
circuit amperage:
20 amps
Recommended
circuit amperage:
30 amps
Recommended
circuit amperage:
40 amps
Recommended
circuit amperage:
60 amps
Recommended
wire size:
12/2 w.g.
Recommended
wire size:
12/2 w.g.
Recommended
wire size:
8/2 w.g.
Recommended
wire size:
8/2 w.g.
Recommended
wire size:
6/2 w.g.
N
O C O R D A N D P L U G
VOLTAGE PHASE CYCLE/HZ
Q C - 3 Q C - 2 0 Q C - 4 0 Q C - 5 0 Q C - 1 0 0
S E L F - C O N TA I N E D
208-240VAC 3 ph 50/60 Hz
NOT AVAILABLE NOT AVAILABLE NOT AVAILABLE
Recommended
circuit amperage:
20 amps
Recommended
circuit amperage:
40 amps
Recommended
wire size:
12/3 w.g.
Recommended
wire size:
8/3 w.g.
N O C O R D A N D P L U G
VOLTAGE PHASE CYCLE/HZ
Q C - 3 Q C - 2 0 Q C - 4 0 Q C - 5 0 Q C - 1 0 0
R E M O T E C O M P R E S S O R
208-240VAC 1 ph 50/60 Hz
(Cabinet Only)
NOT AVAILABLE NOT AVAILABLE NOT AVAILABLE
Recommended
circuit amperage:
20 amps
Recommended
circuit amperage:
30 amps
Recommended
wire size:
12/2 w.g.
Recommended
wire size:
10/2 w.g.
N O C O R D A N D P L U G

#8405 — QUICKCHILLER INSTALLATION, OPERATION, AND MAINTENANCE
Pg. 8.
The Alto-Shaam® Quickchiller
™
is a processing refrigeration
system designed to rapidly and uniformly decrease the
temperature of hot foods to either a chilled or frozen state.
This process provides enhanced safety, longer storage life and
b
etter production efficiency.
Rapid reduction in the temperature of hot foods inhibits the
growth of bacteria and provides a safe, five-day chilled food
refrigerated storage period from the time of preparation to the
time of service. Enhanced storage time offers the food service
operation considerable production efficiency. As an example, a
daily menu item can be reduced from daily preparation to a
preparation schedule consisting of two days per week.
The Alto-Shaam Quickchiller can be effectively utilized in
several types of food service programs:
1. TRADITIONAL COOK-SERVE KITCHENS —
Quick chilling can be used to help streamline production in operations where foods are prepared for
immediate service. Preparation of labor intensive entrées can be scheduled for production several
days before service. Chilling foods provides the ability to rethermalize these items at a later date
while maintaining both safety and product quality.
2. MODIFIED COOK-CHILL OPERATIONS—
where a significant portion of food is cooked for immediate service and a smaller portion of more labor
intensive, hot food items are prepared in advance, chilled and reheated when required for service.
3. FULL COOK-CHILL OPERATIONS —
where all hot food production is prepared in advance of service requirements and held in refrigerated
prepared food inventories. Hot food preparation takes place over a five-day production schedule.
®
QUICKCHILLER OPERATING INTRODUCTION
The Quickchiller cooling or freezing process is
accomplished with the utilization of large
compressors and fans that are electronically
controlled through the parameters entered by the
operator on the control panel located at the front
of the cabinet. The Quickchiller provides the
operator with the ability to chill food products to
a set cavity temperature by time or by internal
product temperature using one or more food
probes. When the specified chill time has elapsed
or the probe temperature(s) has been reached the
Quickchiller will convert to a holding mode at a
temperature specified for either refrigeration or
frozen product maintenance. The Quickchiller
control maintains a record of the length operating
time used for each current cycle. After the chill
cycle has ended and the unit is maintaining a
holding temperature mode, the chiller control will
initiate an automatic defrost cycle when required

#8405 — QUICKCHILLER INSTALLATION, OPERATION, AND MAINTENANCE
Pg. 9.
CHILL PROCESSING CYCLES
The Alto-Shaam Quickchiller uses high velocity
cold air circulation to remove heat from prepared
foods for the purpose of rapidly reducing
temperatures through the danger zone and
providing maximum storage life. Cold air is evenly
directed across each pan from the control side of
every Quickchiller model to assure rapid cooling.
The high velocity cold air produced by the
Quickchiller removes insulating layers of warm
moist air that surrounds hot products. The rapid
removal of these insulating layers of heat reduces
food temperatures significantly faster than any
other method of temperature reduction and
provides enhanced food safety.
Because the basic performance of the
Quickchiller relies on high velocity air movement
around each container of food, it is important to
load the food by placing pans directly into the pan
slides. Always use the pan slides to support the
edges of 12" x 20" steam table pans (GN 1/1). Use
a wire shelf for pan support when using 18" x 26"
sheet pans; 12" x 10" steam table pans (GN 1/2);
loaf pans; entree plates; and other small containers.
QUICKCHILLER OPERATION MODES
➤ PROCESSING WITH THE USE OF PROBES
Probe usage provides chill or frozen food
processing activation and termination through
use of a food probe or probes inserted into the
center of the food. The cycle is automatically
terminated when the center of the food reaches
the probe sensing temperature set by the
operator. In units with multiple probes, all
probes much reach the sensing temperature set
by the operator to trigger automatic termination
of the cycle.
➤ PROCESSING BY TIME
The time mode provides processing activation
and termination based on a timed cycle selected
by the operator. Upon expiration of the timed
cycle, the cabinet automatically reverts to the
designated holding cycle temperature.
➤ HOLDING
Following processing completion, a holding
cycle provides a temperature of 38°F (3°C) for
refrigerated storage or a frozen food storage
temperature of -1°F to 10°F (-18°C to -12°C) to
safely hold foods after processing. The holding
cycle will also maintain a holding compartment
temperature between processing cycles.
INITIAL QUICKCHILLER OPERATION
PRECHILLING THE CABINET
The Quickchiller should be prechilled prior to
placing hot foods into the cabinet. In models
equipped with a roll-in cart (trolley), always
maintain an empty food cart inside the chiller
when prechilling to eliminates air loss through the
bottom of the chiller cabinet door. An optional
Prechill Sealing Strip (Item #1004781) may also be
used for this purpose.
®
OPERATIONAL OVERVIEW
To maintain sanitation control, all
foods for quick-chill or quick-
freeze processing must be at a
temperature above 140°F (60°C)
and must be tightly covered.

#8405 — QUICKCHILLER INSTALLATION, OPERATION, AND MAINTENANCE
Pg. 10.
C A U T I O N
NEVER STACK PANS DIRECTLY ON
TOP OF EACH OTHER. STACKED
P
A N S W I L L R E S T R I C T A I R
FLOW AND INCREASE CHILL
PROCESSING TIME.
C A U T I O N
A
DEQUATE SPACIN G MUST BE
ALLOWED BETWEEN PANS FOR
P R O P E R A I R C I R C U L AT I O N
FOR BOTH PROCESSING AND
SUBSEQUENT HOLDING.
➤ Clean the Quickchiller and probes prior to use and
make certain all processing modes are operating
properly before chilling or freezing foods.
➤ To maintain proper operation of the
Quickchiller, always allow the unit to defrost
whenever the “DEFROST OVERDUE”
warning appears in the display.
➤ For optimum performance, allow the
Quickchiller to prechill for a minimum of
30 minutes before loading pans of food.
➤ Never overload the Quickchiller.
➤ It is important to be familiar with and adhere
to all local food codes.
➤ Cook foods properly in preparation for blast
chilling or freezing.
➤ Foods should be portioned into shallow pans to
a depth not to exceed 2-inches (51mm).
➤ Pans must be covered prior to the chilling or
freezing process.
➤ Always follow the recommended shelf life for
chilled food products. Hold chilled foods
under refrigeration for a maximum of 5 days
including the day of production and the day
of consumption.
➤ According to U.S. food code regulations, all
chilled products must be reheated to an
internal temperature of 165°F (74°C) prior
to serving.
A L L O W A 3 0 M I N U T E M I N I M U M P R E C H I L L T I M E .
NOTE: During the initial cooling of the Quickchiller, an evaporator fan delay system will prevent the
chilling fans from engaging until the evaporator coil temperature is below 30°F (-1°C).
®
OPERATIONAL ADVISORY
NOTE:
THE PROCEDURE TO SET THE CORRECT DATE AND TIME IS ADDRESSED IN THE PROGRAM OPTIONS SECTION OF THIS MANUAL.

#8405 — QUICKCHILLER INSTALLATION, OPERATION, AND MAINTENANCE
Pg. 11.
“DOOR OPEN” will appear in the display whenever the unit is in operation and the door is opened.
When the date and time (only) is showing in the display, this message will not appear when the door is
opened. If the Quickchiller door is opened during any running chill or freeze cycle, the fans will
disengage and the compressor will cycle down. When the door is closed, the fans and compressor will
reengage and the chiller will begin operating at the point of interruption.
The Quickchiller will only trigger an automatic defrost cycle during the refrigerated Hold Temp mode.
If the chiller is in any other mode when the 6-hour Fan Timer limit plus one additional hour has elapsed, the
display will indicate a warning message “DEFROST OVERDUE” and the control will produce an audible
signal every 10 seconds until a defrost is conducted.
The audible signal can be silenced by pressing the PROGRAM key.
NOTE: If the Quickchiller door is opened during any running chill or freeze cycle, the fans will disengage
and the compressor will cycle down. When the door is closed, the fans and compressor will
reengage and the chiller will begin operating at the point of interruption.
“POWER WAS OFF” will appear in the display whenever operation is interrupted by a power outage. The
control will produce an audible signal every 10 seconds and the display will indicate the amount of time the
power was off. If consecutive power outages occur before the first outage has been acknowledged, the
control will accumulate the total amount of outage time up to a period of 23 hours. After a period of 24
hours, accumulated time will be shown as greater than 24 hours, i.e., >24.
Press the PROGRAM key START/STOP key, or POWER key to clear the display and stop the audible signal.
®
OPERATIONAL ADVISORY

#8405 — QUICKCHILLER INSTALLATION, OPERATION, AND MAINTENANCE
Pg. 12.
O
N
/O
FF POWER BUTTON
.
START/STOP
…
Button used to initiate
operating modes, set time and
temperatures, and to set specific chiller
program functions.
PROGRAM
…
Button used to modify or
select specific chiller programming functions.
HOLD TEMP … The mode for
refrigerated storage within a temperature
range of -5°F to +40°F (-21°C to +4°C).
Hold Temp offers continuous refrigerated
storage without the utilization of food
probes or a timer.
QUICK FREEZE … The mode for rapid
freezing and frozen food maintenance by
internal product probe temperature or
time within a temperature range of
-10°F to +10°F (-23°C to -12°C). The mode
automatically converts to a frozen food
holding temperature at the end of the
quick freeze cycle.
HARD CHILL … To rapidly decrease the
temperature of foods by internal product
probe temperature or time within a range
of 4°F to 24°F (-16°C to -4°C). Hard Chill
is recommended for more dense food
items. The mode automatically converts
to refrigerated holding temperature at the
end of the chill cycle.
SOFT CHILL … To rapidly decrease the
temperature of foods by internal product
probe temperature or time within a range
of 24°F to 36°F (-4°C to 2°C). Soft Chill is
recommended for less dense food items
that chill quickly. The mode automatically
converts to a refrigerated holding
temperature at the end of the chill cycle.
쐇
햲
햷
햴햳
햶
햵
햸
쐋
쐏
쐄
쐂
쐆
쐃
®
CONTROL PANEL IDENTIFICATION

#8405 — QUICKCHILLER INSTALLATION, OPERATION, AND MAINTENANCE
Pg. 13.
The date and time will appear in the display when the
power key is pressed to the O
FF
position. All operating
modes can be initiated when the power key is pressed
to the ON position and SELECT MODE, PRESETS,
or PROGRAM appears in the display.
To initiate any Quickchiller operating mode, power
must initially start from the O
FF
position or an
operating mode must be halted by pressing the
S TA RT / S T O P key so that S E L E C T M O D E ,
PRESETS, or PROGRAM appears in the display.
H O L D T E M P
Starting from the O
FF
position, press the
power key O
N
. SELECT MODE,
PRESETS, or PROGRAM will appear in
the display. The compressor will become
energized and will begin to operate if
required by the sensors.
Press the HOLD TEMP key. The display
will indicate the last operator set internal
compartment temperature.
To change the displayed temperature,
press the up or down arrow key to
increase or decrease the temperature
display within the refrigeration storage
parameters of the Hold Temp mode.
N
OTE
: T
HE MODIFIED COMPARTMENT TEMPERATURE IS
N
OT STORED OR SAVED UNTIL THE START
BUTTON IS PRESSED TO BEGIN QUICKCHILLER
OPERATION
.
Press the START/STOP key to begin
operation of the Quickchiller in the
Hold Temp mode.
The display will indicate:
1. The length of time the chiller is
operating in the Hold Temp mode.
2. The temperature set by the operator.
3. The air temperature inside the
chiller compartment.
4. The temperature of all food probes.
WHEN IN THE HOLD TEMP MODE:
Press the UP arrow key to display the maximum sensor temperature achieved during the completed
chill cycle. Press the DOWN arrow key to display the minimum sensor temperature achieved during the
completed chill cycle.
NOTE : N O DI S P LAY DATA IS AVAI L AB L E D U R I N G T H E SE N S O R S TAB I L I Z ATI O N P E R I O D C O N S I S T I N G OF T HE
F I R S T TW O M IN U TE S OF T H E I NI T I A L S TA RT I N G CY C L E .
NOTE: With the exception of the QC-3 counter top Quickchiller model, the Alto-Shaam name on the control
panel will illuminate whenever the power key is pressed to the O
N
position.
®
OPERATION

#8405 — QUICKCHILLER INSTALLATION, OPERATION, AND MAINTENANCE
Pg. 14.
Starting from the O FF position,
press the power key
ON .
The Alto-Shaam name will illuminate and
SELECT MODE, PRESETS, or PROGRAM
will appear in the display. The compressor
will become energized and will begin to
operate if required by the sensors.
Press the QUICK FREEZE key.
The display will indicate the last operator set
internal compartment temperature.
To change the displayed temperature, press the up or
down arrow key to increase or decrease the
temperature displayed within the parameters of the
Quick Freeze mode.
Press the START/STOP key.
The Display will require the operator to select
between quick freezing by PROBE or by
TIME.
Select the desired Quick Freeze method by
pressing the right or left arrow keys.
After the selection has been made, press the
START/STOP key.
NOTE: MODIFIED COMPARTMENT TEMPERATURE IS NOT
STORED OR SAVED UNTIL THE START BUTTON IS
PRESSED TO BEGIN QUICKCHILLER OPERATION
.
1.
2.
3.
4.
QUICK FREEZE
®
OPERATION

#8405 — QUICKCHILLER INSTALLATION, OPERATION, AND MAINTENANCE
Pg. 15.
TIME
If time was selected …
The display will indicate the last period of time set by the operator. To change the displayed time, press the right or
l
eft arrow keys to select between hours or minutes and the up or down arrow key to increase or decrease the time.
Press the START/STOP key.
The Display will indicate the last set holding temperature.
To change the displayed temperature press the up or down arrow key to increase or decrease the temperature
display to any point within Quickchiller parameters for holding frozen product.
After selections have been made, press the START/STOP key. The Quickchiller will begin operating in the
Quick Freeze “time” mode.
When chilling by time, the display will indicate a count-down of the time, the air temperature, and the temperature of
each food probe. After time has expired, the chiller will automatically convert to the set holding mode.
PROBE
If probe was selected …
The display will indicate the last temperature set by the operator for each probe. To change the displayed probe
temperature(s), press the right or left arrow keys to select each probe and the up or down arrow key to
increase or decrease probe temperature.
Press the START/STOP key.
The Display will indicate the last set holding temperature.
To change the displayed temperature press the up or down arrow key to increase or decrease the temperature
display to any point within Quickchiller parameters for holding frozen product.
After selections have been made, press the START/STOP key.
The Quickchiller will begin operating in the Quick Freeze “probe” mode. When chilling by probe, the display will
indicate the length of time the product has been in the Quick Freeze mode, the interior compartment set temperature,
and the air temperature. The display will also indicate the temperature of each probe along with “
ACT.” to advise the
operator that the individual probe is active. As each probe reaches the set point value, the display will indicate
“
DONE.” When all probes reach the individual set point value, the chiller will automatically convert to the holding
mode for frozen product.
WHEN IN THE HOLD TEMP MODE AFTER FREEZING BY PROBE:
Press the RIGHT or LEFTarrow key to display the length of time it took for each probe to achieve set temperature.
THES E DATA AR E RE TAINED UNTIL A NE W PR OBE CYC LE IS COMP LETE D.
QUICK FREEZE
®
OPERATION

#8405 — QUICKCHILLER INSTALLATION, OPERATION, AND MAINTENANCE
Pg. 16.
Starting from the O FF position,
press the power key
O
N
.
The Alto-Shaam name will illuminate and
SELECT MODE, PRESETS, or PROGRAM
will appear in the display. The compressor
will become energized and will begin to
operate if required by the sensors.
Press the HARD CHILL key.
The display will indicate the last operator set
internal compartment temperature.
To change the displayed temperature, press the up
or down arrow key to increase or decrease the
temperature displayed within the parameters of the
Hard Chill mode.
Press the START/STOP key.
The Display will require the operator to select
between chilling by PROBE or by TIME.
S
elect the desired Hard Chill method by
pressing the right or left arrow keys.
After the selection has been made, press the
START/STOP key.
NOTE: MODIFIED COMPARTMENT TEMPERATURE IS NOT
STORED OR SAVED UNTIL THE START BUTTON IS
PRESSED TO BEGIN QUICKCHILLER OPERATION
.
1.
3.
4.
HARD CHILL
2.
®
OPERATION

#8405 — QUICKCHILLER INSTALLATION, OPERATION, AND MAINTENANCE
Pg. 17.
TIME
If time was selected …
The display will indicate the last period of time set by the operator. To change the displayed time, press the right or
left arrow keys to select between hours or minutes and the up or down arrow key to increase or decrease the time.
Press the START/STOP key.
T
he Display will indicate the last set holding temperature.
To change the displayed temperature press the up or down arrow key to increase or decrease the temperature
display to any point within Quickchiller parameters for chilling product.
After selections have been made, press the START/STOP key. The Quickchiller will begin operating in the
Hard Chill “time” mode.
When chilling by time, the display will indicate a count-down of the time, the air temperature, and the temperature of
each food probe. After time has expired, the chiller will automatically convert to the set holding mode.
PROBE
If probe was selected …
The display will indicate the last temperature set by the operator for each probe. To change the displayed probe
temperature(s), press the right or left arrow keys to select each probe and the up or down arrow key to
increase or decrease probe temperature.
Press the START/STOP key.
The Display will indicate the last set holding temperature.
To change the displayed temperature press the up or down arrow key to increase or decrease the temperature
display to any point within Quickchiller parameters for chilling product.
After selections have been made, press the START/STOP key.
The Quickchiller will begin operating in the Hard Chill “probe” mode. When chilling by probe, the display will
indicate the length of time the product has been in the Hard Chill mode, the interior compartment set temperature,
and the air temperature. The display will also indicate the temperature of each probe along with “
ACT.” to advise the
operator that the individual probe is active. As each probe reaches the set point value, the display will indicate
“
DONE.” When all probes reach the individual set point value, the chiller will automatically convert to the holding
mode for chilled product.
WHEN IN THE HOLD TEMP MODE AFTER HARD CHILLING BY PROBE:
Press the RIGHT or LEFTarrow key to display the length of time it took for each probe to achieve set temperature.
THES E DATA AR E RE TAINED UNTIL A NE W PR OBE CYC LE IS COMP LETE D.
HARD CHILL
®
OPERATION

#8405 — QUICKCHILLER INSTALLATION, OPERATION, AND MAINTENANCE
Pg. 18.
Starting from the O FF position,
press the power key
O
N
.
The Alto-Shaam name will illuminate and
SELECT MODE, PRESETS, or PROGRAM
will appear in the display. The compressor
will become energized and will begin to
operate if required by the sensors.
Press the SOFT CHILL key.
The display will indicate the last operator set
internal compartment temperature.
To change the displayed temperature, press the up
or down arrow key to increase or decrease the
temperature displayed within the parameters of the
Soft Chill mode.
Press the START/STOP key.
The Display will require the operator to select
between chilling by PROBE or by TIME.
S
elect the desired Soft Chill method by
pressing the right or left arrow keys. After
the selection has been made, press the
START/STOP key.
NOTE: MODIFIED COMPARTMENT TEMPERATURE IS NOT
STORED OR SAVED UNTIL THE START BUTTON IS
PRESSED TO BEGIN QUICKCHILLER OPERATION
.
1.
3.
4.
SOFT CHILL
2.
®
OPERATION

#8405 — QUICKCHILLER INSTALLATION, OPERATION, AND MAINTENANCE
Pg. 19.
TIME
If time was selected …
The display will indicate the last period of time set by the operator. To change the displayed time, press the right or
left arrow keys to select between hours or minutes and the up or down arrow key to increase or decrease the time.
Press the START/STOP key.
T
he Display will indicate the last set holding temperature.
To change the displayed temperature press the up or down arrow key to increase or decrease the temperature
display to any point within Quickchiller parameters for chilling product.
After selections have been made, press the START/STOP key. The Quickchiller will begin operating in the
Soft Chill “time” mode.
When chilling by time, the display will indicate a count-down of the time, the air temperature, and the temperature of
each food probe. After time has expired, the chiller will automatically convert to the set holding mode.
PROBE
If probe was selected …
The display will indicate the last temperature set by the operator for each probe. To change the displayed probe
temperature(s), press the right or left arrow keys to select each probe and the up or down arrow key to
increase or decrease probe temperature.
Press the START/STOP key.
The Display will indicate the last set holding temperature.
To change the displayed temperature press the up or down arrow key to increase or decrease the temperature
display to any point within Quickchiller parameters for chilling product.
After selections have been made, press the START/STOP key.
The Quickchiller will begin operating in the Soft Chill “probe” mode. When chilling by probe, the display will
indicate the length of time the product has been in the Soft Chill mode, the interior compartment set temperature, and
the air temperature. The display will also indicate the temperature of each probe along with “
ACT.” to advise the
operator that the individual probe is active. As each probe reaches the set point value, the display will indicate
“
DONE.” When all probes reach the individual set point value, the chiller will automatically convert to the set holding
mode for chilled product.
WHEN IN THE HOLD TEMP MODE AFTER SOFT CHILLING BY PROBE:
Press the RIGHT or LEFTarrow key to display the length of time it took for each probe to achieve set temperature.
THES E DATA AR E RE TAINED UNTIL A NE W PR OBE CYC LE IS COMP LETE D.
SOFT CHILL
®
OPERATION
/
