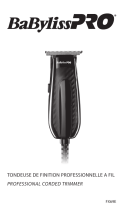
HC5780

Remington HC5780 Owner's manual

  • Hello! I am an AI chatbot trained to assist you with the Remington HC5780 Owner's manual. I’ve already reviewed the document and can help you find the information you need or explain it in simple terms. Just ask your questions, and providing more details will help me assist you more effectively!
LITHIUM POWERED HAIR CLIPPER
HC5780
HC5780 -INT-T22-amended.indd 1 11/19/2012 12:09:34 PM
2
ENGLISH
2
5
6
1
7
4
3
10
8
11
9
HC5780 -INT-T22-amended.indd 2 11/19/2012 12:09:35 PM
3
ENGLISH
Thank you for buying your new Remington® product.
Before use, please read these instructions carefully and keep them safe. Remove all packaging
before use.
A CAUTION
• Use this appliance only for its intended use as described in this manual.
• Do not use the appliance if it is damaged or malfunctions.
C KEY FEATURES
1 On / O Switch
2 Blade set
3 2 attachment guide combs
4 Stubble comb
5 Quick wash release button
6 Hair thinner mechanism
7 Charging indicator light
8 Micro USB port
9 Micro USB cable
10 Charging stand
11 A d a p t o r
•3yearguarantee
C GETTING STARTED
, CHARGING YOUR HAIRCLIPPER
• Beforeusingyourhairclipperforthersttime,chargefor14-16hours.
• Ensuretheproductisswitchedo
• Connectthechargingadaptortotheproductandthentothemains.Thecharging
indicator will light up.
• Iftheproductisnotgoingtobeusedforanextendedperiodtime(2–3months),unplug
it from the mains and store.
• Fullyrechargeyourproductwhenyouwouldliketouseitagain.
• Topreservethelifeofyourbatteries,letthemrunoutevery6monthsthenrechargefor
4.5 hours.
, CHARGINGVIACHARGINGSTAND
• Ensuretheproductisswitchedo.
• Connectthechargingadaptortothechargingstandandthentothemains.
• WhenchargingtheLEDindicatorwillilluminate.
• Allow4.5 hours for a full charge.
HC5780 -INT-T22-amended.indd 3 11/19/2012 12:09:35 PM
4
ENGLISH
, CHARGING VIA STANDARD ELECTRICAL SOCKET
• Ensuretheproductisswitchedo.
• Connectthechargingadaptortotheproductandthentothemains.
• WhenchargingtheLEDindicatorwillilluminate.
• Allow4.5 hours for a complete charge.
, USB
• ConnectyourUSBcabletotheUSBportonyourpowersource.
• ConnecttheUSBcabletoyourappliance.
Quick Charge Time
10
minutes
30
minutes
1
hour
2
hours
Run Time 5 15 30 45
, CORDED USE
•Connectthechargingadaptortotheproductthentothemains.
•Whenthecordisconnectedtothemains,adigitaldisplaywillbedisplayedonthe
appliance.
A CAUTION
Extendedmainsonlyusewillresultinthereductionofthebatterylife.
, WARNING
The appliance can not be operated in corded mode while connected to a PC via the USB port.
, CORDLESS USE
Whentheunitisswitchedonandfullycharged,theproductcanbeusedincordlessmodefor
up to 150 minutes.
F HOW TO USE
, BEFORE STARTING THE CUT
•Inspecttheclippermakingsurethatitisfreefromhairanddirt.
•Seatthepersonsothattheirheadisapproximatelyatyoureyelevel.
•Beforecutting,alwayscombthehairsoitistanglefreeanddry.
HC5780 -INT-T22-amended.indd 4 11/19/2012 12:09:35 PM
5
ENGLISH
Comb Position Short Comb Long Comb
1 3mm 24mm
2 6mm 27mm
3 9mm 30mm
4 12mm 33mm
5 15mm 36mm
6 18mm 39mm
7 21mm 42mm
,
TO ATTACH A COMB
• Holdthecombwithitsteethupward
• Slideitontoandalongtheclipperbladeuntilthefrontofthecombrmlysitsagainstthe
clipper blade.
, TO REMOVE THE COMB
• Holdingtheclipperwiththebladesfacingawayfromyou,rmlypushthecombupward
and away from the blades.
F INSTRUCTIONS FOR HAIR CUTTING
Note:Forevencutting,allowthecombattachment/bladetocutitswaythroughthehair.Donot
forceitthroughquickly.Ifyouarecuttingforthersttime,startwiththemaximumcomb
attachment
STEP 1–Napeoftheneck
• Setthecombto3mmor6mm.
• Holdtheclipperwiththebladeteethpointingupwards.Beginstartingatthecentreof
the head at the base of the neck.
• Slowlylifttheclipper,workingupwardsandoutwardsthroughthehair,trimmingjusta
little at a time
STEP 2–Backofthehead
• Withthecombsetat12mmor18mm,cutthehairatthebackofthehead.
STEP 3–Sideofthehead
• Setthecombto3mmor6mm,trimsideburns.Thenchangethesettingto9mmand
continue to cut the top of the head.
HC5780 -INT-T22-amended.indd 5 11/19/2012 12:09:36 PM
6
STEP 4 –Topofthehead
• Usethelongerlengthcombattachmentandsetitto24mmor27mmthencuthairon
top of the head against the direction in which the hair normally grows.
• Forlongerhairontop,usethelongerlengthcombattachment(24–42mm)toachieve
the desired style.
• Alwaysworkfromthebackofthehead.
STEP 5–Thenishingtouches
• Usetheclipperwithoutanattachmentcombforclosetrimmingaroundthebaseand
sides of the neck.
• Toproduceacleanstraightlineatthesideburns,reversethehairclipper.Placethe
reversed clipper at right angles to the head, tips of the blades lightly touching the skin
and then work downwards.
, SHORT TAPERED STYLES – “FLAT TOPS” & SHORT CUTS
• Startingwiththelongestguidecombattached(24-42mm),cutfromthebackofthe
neck to the crown. Hold the guide comb at against the head and slowly move the
clipper through the hair.
• Usethesameprocedurefromthelowersidetotheuppersideofthehead.Thencutthe
hair against the direction in which it grows and level with the sides.
• Togivea“attop”look,thehairontopoftheheadmustbecutoverthetopofaat
comb.
• Useacloserguidecombtotaperthehairdowntothenecklineasdesired.
F HAIR TEXTURE MECHANISM
•Simplyadjustthehairtexturemechanismbyslidingthebuttonatthetopofthehair
clipper.
• Blending dierent length areas-Selecttheproperlengthguardtoblend.Slideoutthe
hairtexturemechanism(guard)whichallowsyoutoblend/thinoutthearea.
• Textured cut –Slideoutthehairtexturemechanism(guard)togiveanallovertextured
cut.
F DUAL BOOST SYSTEM
• Thereare3settingsfortheDualBoostsystem:O,On,Boost.
• Iftheclipperissettoon,itwillrunatregularpower.
• Iftheclipperissettoboost,itwillprovidemaximumpower.
C CARE FOR YOUR APPLIANCE
Yourclipperisttedwithhighqualityblades.
To ensure long lasting performance of your clipper, clean the blades and unit regularly.
Always keep the attachment guide comb on the trimmer blade.
ENGLISH
HC5780 -INT-T22-amended.indd 6 11/19/2012 12:09:36 PM
7
E After Each Use
• Ensuretheclipperisswitchedoanddisconnectedfromthemains.
• Brushtheaccumulatedhairfromtheblades.Donotsubmergetheclipperinwater.
• Tocleanunit,wipewithdampclothanddryimmediately.
C WASHABLE CLEANING
TheQUICKWASHSYSTEMisdesignedtomaximisetheeciencyofwashablecleaning.
• Clickthebuttonsthatarelocatedonthesidesofthehairclipperhead.Thebladeswill
slide out and the blade set can be easily cleaned under the tap.
• Oncethebladesarecleanedthebladesarelockedintoplacebypushingthebladeset
towards the hair clipper head and will snap into place.
• Donotruntheentireunitunderthetap,onlythebladesetismeanttobesubmergedin
water.
Note:Ensuretheclipperisturnedowhencleaning.
, EVERYSIXMONTHS
•Atregularintervalsthebladesetshouldberemovedandcleaned.
• Removethe2screwsretainingthexedbladewithascrewdriver.Donotremoveblade
set.
• Brushouthairsfrombetweenthebladeswithsoftcleaningbrush.Donotremovethe
lubricatinggreasefromtheblades.Itisnotnecessarytoremovethesmallmovingblade
from the unit.
• Ifthemovingbladehasbeenremovedthiscanbere-ttedbyslottingthecoatedblade
holder over the pin in the centre of the interior product head. The groove on the coated
blade,justbelowtheteeth,restsonametalplateattheoppositesidetothescrewholes.
Thexedbladeisttedwiththeraisedprolepointingoutwardsandxedwiththe2
screws.
, Notethatifthebladesarenotcorrectlyalignedthencuttingeciencywillbeimpaired.
• Placeafewdropsofcutterorsewingmachineoilontotheblades.Wipeoexcessoil.
A CLEANING CAUTIONS
•Onlytheattachmentguidecombsandtrimmerblademayberemovedfromtheproduct
for cleaning.
•Cleaningshouldbedonewithasoftbrush,suchasthebrushsuppliedwiththeproduct.
•Donotuseharshorcorrosivecleanersontheunitsortheirblades.
ENGLISH
HC5780 -INT-T22-amended.indd 7 11/19/2012 12:09:36 PM
8
ENGLISH
F IMPORTANT SAFETY INSTRUCTIONS
Warning – To reduce the risk of burns, electrocution, re, or injury to persons:
• Donotleavetheapplianceunattendedwhilepluggedin.
• Onlysettheappliancedownonaheat-proofsurface.
• Makesurethepowerplugandcorddonotgetwet.
• Donotplugorunplugtheappliancewithwethands.
• Donotusetheapplianceifitisdamagedormalfunctions.
Ifthecableisdamaged,itmustbereplacedbythemanufacturer,itsserviceagent,or
someonesimilarlyqualied,inordertoavoidhazard.
• Donottwistorkinkthecable,anddon’twrapitaroundtheappliance.
• Storetheproductatatemperaturebetween15°Cand35°C.
• Donotuseaccessoriesorattachmentsotherthanthosewesupply.
• Theappliance,includingitscord,mustnotbeused,playedwith,cleanedormaintained
by persons under eight years old and should at all times be kept out of their reach.
Use, cleaning or maintenance of the appliance by children over eight or by anyone with a
lackofknowledge,experienceorwithreducedphysical,sensoryormentalcapabilities
should only be undertaken after receiving appropriate instruction and under the
adequate supervision of a responsible adult to ensure that they do so safely and that the
hazardsinvolvedareunderstoodandavoided.
• Don’tputtheapplianceinliquid,don’tuseitnearwaterinabath-tub,
basinoranyothervessel,anddon’tuseitoutdoors.
H ENVIRONMENTAL PROTECTION
Toavoidenvironmentalandhealthproblemsduetohazardoussubstancesin
electrical and electronic goods, appliances marked with this symbol must not
be disposed of with unsorted municipal waste, but recovered, reused or recycled.
^ BATTERY REMOVAL
• Thebatterymustberemovedfromtheappliancebeforeitisscrapped.
• Theappliancemustbedisconnectedfromthesupplymainswhenremovingthebattery.
• Ensuretheclipperisdischargedofallpoweranddisconnectedfromthemains.
• LiftorprytheUSBportcoverplateonthebottomoftheclipper.
• Liftorprythedecoplateonthelowerportionoftheclipperandunscrew1screwlocated
on the back housing of the clipper.
• Liftorprytheclipperhalvesapart,exposingthebatterychamber.
• LiftorprytheUSBconnectorandliftorprythecoverplateonthebottomofthebattery
chamber.
• Takeoutthebatteryandprintedcircuitboardassemblyfromthebatterychamber.
• Cutthetabsonbothendsofthebatteryandremoveitfromtheprintedcircuitboard
• Thebatteryistobedisposedofsafely.
HC5780 -INT-T22-amended.indd 8 11/19/2012 12:09:36 PM
9
E SERVICE AND GUARANTEE
This product has been checked and is free of defects.
Weguaranteethisproductagainstanydefectsthatareduetofaultymaterialor
workmanship for the guarantee period from the original date of consumer purchase.
Iftheproductshouldbecomedefectivewithintheguaranteeperiod,wewillrepairany
such defect or elect to replace the product or any part of it without charge, provided there
is proof of purchase.
Thisdoesnotmeananextensionoftheguaranteeperiod.
InthecaseofaguaranteesimplycalltheServiceCentreinyourregion.
This guarantee is oered over and above your normal statutory rights.
The guarantee shall apply in all countries in which our product was sold via an authorised
dealer.
This guarantee does not include damage to the product by accident or misuse, abuse,
alteration to the product or use inconsistent with the technical and/or safety instructions
required.
This guarantee shall not apply if the product has been dismantled or repaired by a person
not authorised by us.
IfyoucalltheServiceCentre,pleasehavetheModelNo.tohand,aswewon’tbeableto
help you without it.
It’sontheratingplatewhichcanbefoundontheappliance.
ENGLISH
HC5780 -INT-T22-amended.indd 9 11/19/2012 12:09:36 PM
143
رع
HC5780 -INT-T22-amended.indd 143 11/19/2012 12:09:46 PM
144
رع
HC5780 -INT-T22-amended.indd 144 11/19/2012 12:09:47 PM
146
رع
HC5780 -INT-T22-amended.indd 146 11/19/2012 12:09:47 PM
147
رع
إرفاق مشط,
HC5780 -INT-T22-amended.indd 147 11/19/2012 12:09:47 PM
148
رع
HC5780 -INT-T22-amended.indd 148 11/19/2012 12:09:47 PM
149
رع
HC5780 -INT-T22-amended.indd 149 11/19/2012 12:09:47 PM
150
رع
HC5780 -INT-T22-amended.indd 150 11/19/2012 12:09:48 PM
151
رع
HC5780 -INT-T22-amended.indd 151 11/19/2012 12:09:48 PM
152
رع
HC5780 -INT-T22-amended.indd 152 11/19/2012 12:09:48 PM
153
رع
HC5780 -INT-T22-amended.indd 153 11/19/2012 12:09:48 PM
154
INTERNATIONAL SERVICE CENTRE
1920r. 7a, 02-366 Warszawa
Тел.
HC5780 -INT-T22-amended.indd 154 11/19/2012 12:09:49 PM
/