Page is loading ...

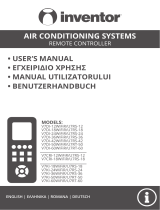
User Manual
KID-06 S
IMPORTANT NOTE:
Thank you very much for purchasing our product. Before using your unit,
please read this manual carefully and keep it for future reference
Wired controller


1
Remote Controller Specications ...................................................... 02
Handling the Remote Controller ......................................................... 03
Buttons and Functions ........................................................................ 04
Remote Screen Indicators .................................................................. 05
How to Use Basic Functions .............................................................. 06
How to Use Advanced Functions ....................................................... 09
CONTENTS

2
Model KID-06 S
Rated Voltage 3.0V (Dry batteries R03/LR03×2)
Signal Receiving Range 8m
Environment -5°C~60°C
Remote Controller Specications
Quick Start Guide
FIT BATTERIES SELECT MODE SELECT TEMPERATURE
PRESS POWER BUTTON POINT REMOTE TOWARD
UNIT
SELECT FAN SPEED
NOT SURE WHAT A FUNCTION DOES?
Refer to the How to Use Basic Functions and How to Use Advanced
Functions sections of this manual for a detailed description of how to use your air
conditioner
SPECIAL NOTE
• Button designs on your unit may differ slightly from the example shown.
• If the indoor unit does not have a particular function, pressing that function's
button on the remote control will have no effect.
• When there are wide differences between "Remote controller Manual" and
"USER'S MANUAL" on function description, the description of "USER'S
MANUAL" shall prevail.

3
Handling the Remote Controller
Inserting and Replacing Batteries
Your air conditioning unit may come with two
batteries (some units). Put the batteries in the
remote control before use.
1. Slide the back cover from the remote
control downward, exposing the battery
compartment.
2. Insert the batteries, paying attention to match
up the (+) and (-) ends of the batteries with
the symbols inside the battery compartment.
3. Slide the battery cover back into place.
BATTERY NOTES
For optimum product performance:
• Do not mix old and new batteries, or
batteries of different types.
• Do not leave batteries in the remote control
if you don't plan on using the device for
more than 2 months.
BATTERY DISPOSAL
Do not dispose of batteries as unsorted municipal
waste. Refer to local laws for proper disposal of
batteries.
TIPS FOR USING REMOTE CONTROL
• The remote control must be used within 8
meters of the unit.
• The unit will beep when remote signal is
received.
• Curtains, other materials and direct sunlight
can interfere with the infrared signal
receiver.
• Remove batteries if the remote will not be
used more then 2 months.
NOTES FOR USING REMOTE CONTROL
The device could comply with the local national
regulations.
• In Canada, it should comply with CAN ICES-
3(B)/NMB-3(B).
• In USA, this device complies with part 15 of
the FCC Rules. Operation is subject to the
following two conditions:
(1) This device may not cause harmful
interference, and
(2) this device must accept any interference
received, including interference that may
cause undesired operation.
This equipment has been tested and found
to comply with the limits for a Class B digital
device, pursuant to part 15 of the FCC Rules.
These limits are designed to provide reasonable
protection against harmful interference in a
residential installation. This equipment generated,
uses and can radiate radio frequency energy
and, if not installed and used in accordance with
the instructions, may cause harmful interference
to radio communications. However, there is no
guarantee that interference will not occur in a
particular installation. If this equipment does
cause harmful interference to radio or television
reception, which can be determined by turning
the equipment off and on, the user is encouraged
to try to correct the interference by one or more of
the following measures:
• Reorient or relocate the receiving antenna.
• Increase the separation between the
equipment and receiver.
• Connect the equipment into an outlet on
a circuit different from that to which the
receiver is connected.
• Consult the dealer or an experienced radio/
TV technician for help.
• Changed or modifications not approved
by the party responsible for compliance
could void user's authority to operate the
equipment.

4
Boutons et fonctions
Avant d'utiliser votre nouveau climatiseur, veuillez vous familiariser avec sa télécommande. Voici une
brève présentation de la télécommande. Pour obtenir des instructions sur comment faire fonctionner
votre climatiseur, nous vous invitons à consulter le point « Comment utiliser les fonctions de base
avancées » de ce manuel.
Model: KID-06 S
BVane
oost
ON/OFF
Turns the unit on or off
TEMP
Increases temperature in 0.5ºC
increments. Max. temperature is
30°C.
NOTE: Press together &
buttons at the same time
for 3 seconds will alternate the
temperature display between
the °C.
SET
Scrolls through operation
functions as follows: Active
clean ( ) → Fresh ( ) →
Sleep ( ) → Follow Me (
) → AP mode ( ) → Active
clean ( )...
The selected symbol will ash
on the display area, press OK
button to conrm.
FAN SPEED
Selects fan speeds in the followinf
order: AU → 20 % → 40 % → 60 %
→ 80 % → 100 %.
Press the TEMP. or button
to increase/decrease the fan speed
in 1% increments.
SWING
Starts and stops the horizontal
louver movement.
BOOST
Active l'unité pour atteindre la
température préréglée le plus vite
possible.
MODE
Scrolls through operation modes as
follows:
AUTO → COOL → DRY → HEAT
→ FAN
button
Enjoy evener comfortable cooling
without a noticeable breeze.
NOTE: This feature is only available
under cool mode.
OK
Used to conrm the selected functions.
TIMER
Set timer to turn unit on or off.
ECO/GEAR
Press this buton to enter the energy
efcient moce in a sequence of
following:
ECO → GEAR (75%) → GEAR
(50%) → Previous setting mode
→ ECO...
TEMP.
Decreases temperature in 0.5ºC.
Min. temperature is 16°C.
Vane
Press to enter the louver setting
mode.
LED
Turns indoor unit's LED display and
air conditioner buzzer on and off,
which create a comfortable and quiet
environment.

5
Remote Screen Indicators
Information are displayed when the remote controller is power up.
Note:
All indicators shown in the figure are for the purpose of clear presentation. But during the actual
operation, only the relative function signs are shown on the display window.
Not applicable for this unit
Not applicable for this unit
Not applicable for this unit
Breezeless display
Not applicable for this unit
Clean feature display (some units)
Fresh feature display (some units)
Sleep mode display
Wireless control feature display
Low battery detection display (if ashes)
Follow me feature display
Transmission Indicator
Lights up when remote sends
signal to indoor unit
ON
TIMER ON display
OFF
TIMER OFF display
Silence feature
display
FAN SPEED display
Display selected fan speed:
MED
Silence
LOW
HIGH
AUTO
This fan speed can not be
adjusted in AUTO or DRY mode.
MODE display
Displays the current mode,
including:
ECO display
Displays when ECO feature is
activated
GEAR display
Displays whent GEAR feature
is activated.
LOCK display
Displays when LOCK feature
is activated.
Temperature/Timer/Fan speed
display
Displays the set temperature by
default, or fan speed or timer
setting when using TIMER ON/
OFF functions.
• Temperature range:
16-30ºC
(20-28ºC/68-82ºF)
(Modele dependent)
• Timer setting range:
0-24 hours
• Fan speed setting range:
AU% -100 %
This display is blank when
operating in FAN mode.
Persienne horizontale
Afchage de l’oscillation
Non applicable dans
cette unité
Afchage du mode
TURBO
Non applicable dans
cette unité
1 %
2 % - 20 %
21 % - 40 %
41 % - 60 %
61 % - 80 %
81 % - 100 %

6
How to Use Basic Functions
Basic operation
ATTENTION! Before operation, please ensure
the unit is plugged in and power is available.
Swing
Boost
Vane
Swing
Boost
Vane
1
3
2
1
3
2
4
COOL Mode
1. Press the MODE button to select COOL
mode.
2. Set your desired temperature using the
TEMP or TEMP button.
3. Press FAN button to select the fan speed in
a range of AU-100%.
4. Press the ON/OFF button to start the unit.
SETTING TEMPERATURE
The operating temperature range for units is 16-
30°C.
You can increase or decrease the set temperature
in 0.5ºC.
AUTO Mode
In AUTO mode, the unit will automatically select
the COOL, FAN, or HEAT operation based on the
set temperature.
1. Press the MODE button to select AUTO.
2. Set your desired temperature using the
TEMP or TEMP button.
3. Press the ON/OFF button to start the unit.
NOTE: FAN SPEED can't be set in AUTO mode.
Swing
Boost
Vane
Swing
Boost
Vane
1
3
2
1
3
2
4

7
1
3
2
Swing
Boost
Vane
Boost
Vane
Vane
4
1
3
2
1
3
2
Boost
FAN Mode
1. Press the MODE button to select FAN
mode.
2. Press FAN button to select the fan speed in
a range of AU-100%.
3. Press the ON/OFF button to start the unit.
NOTE: You can't set temperature in FAN mode.
As a result, your remote control's LCD screen
will not display temperature.
1
3
2
Swing
Boost
Vane
Boost
Vane
Vane
4
1
3
2
1
3
2
Boost
DRY Mode (dehumidifying)
1. Press the MODE button to select DRY.
2. Set your desired temperature using the
TEMP or TEMP button.
3. Press the ON/OFF button to start the unit.
NOTE: FAN SPEED cannot be changed in DRY
mode.
1
3
2
Swing
Boost
Vane
Boost
Vane
Vane
4
1
3
2
1
3
2
Boost
HEAT Mode
1. Press the MODE button to select HEAT
mode.
2. Set your desired temperature using the
TEMP or TEMP button.
3. Press FAN button to select the fan speed in
a range of AU-100%.
4. Press the ON/OFF button to start the unit.
NOTE:
As outdoor temperature drops, the performance
of your unit's HEAT function maybe affected.
In such instances, we recommend using this
air conditioner in conjunction withother heating
appliances.

8
Setting the TIMER
TIMER ON/OFF - Set the amount of time after which the unit will automatically turn on/off.
TIMER ON setting
08
Current
time 1PM
2:00PM 3:00PM 4PM 5PM 6PM
2.5 hours later
5 hours later
3:30PM
ON/OFF
MODE
FAN
SHOR T
CUT
TIMER ON
TIMER OF
F
TEM P
SLEEP
1
x5
xn xn
x10
xn
TIMER
TIMER
TIMER
TIMER
ON/OFF
MODE
FAN
SHORT
CUT
TIMER ON
TIMER OF
F
TEMP
SLEEP
ON/OFF
MODE
FAN
SHORT
CUT
TIMER ON
TIMER OF
F
TEMP
SLEEP
1 sec
ON/OFF
MODE
FAN
SHOR T
CUT
TIMER ON
M
TEM P
SLEEP
1
1 sec
Press TIMER button to initiate
the ON time sequence.
Press Temp. up or down button
for multiple times to set the
desired time to turn on the unit.
Point remote to unit and wait
1 sec, the TIMER ON will be
activated.
TIMER OFF setting
08
Current
time 1PM
2:00PM 3:00PM 4PM 5PM 6PM
2.5 hours later
5 hours later
3:30PM
ON/OFF
MODE
FAN
SHOR T
CUT
TIMER ON
TIMER OF
F
TEM P
SLEEP
1
x5
xn xn
x10
xn
TIMER
TIMER
TIMER
TIMER
ON/OFF
MODE
FAN
SHORT
CUT
TIMER ON
TIMER OF
F
TEMP
SLEEP
ON/OFF
MODE
FAN
SHORT
CUT
TIMER ON
TIMER OF
F
TEMP
SLEEP
1 sec
ON/OFF
MODE
FAN
SHOR T
CUT
TIMER ON
M
TEM P
SLEEP
1
1 sec
Press TIMER button to initiate
the OFF time sequence.
Press Temp. up or down button
for multiple times to set the
desired time to turn off the unit.
Point remote to unit and wait 1 sec,
the TIMER OFF will be activated.
NOTE:
1. When setting the TIMER ON or TIMER OFF, the time will increase by 30 minutes increments
with each press, up to 10 hours. After 10 hours and up to 24, it will increase in 1 hour increments.
(For example, press 5 times to get 2.5h, and press 10 times to get 5h,) The timer will revert to 0.0
after 24.
2. Cancel either function by setting its timer to 0.0h.
TIMER ON & OFF setting (example)
Keep in mind that the time periods you set for both functions refer to hours after the current time.
08
Current
time 1PM
2:00PM 3:00PM 4PM 5PM 6PM
2.5 hours later
5 hours later
3:30PM
ON/OFF
MODE
FAN
SHORT
CUT
TIMER ON
TIMER OF
F
TEMP
SLEEP
1
x5
xn xn
x10
xn
TIMER
TIMER
TIMER
TIMER
ON/OFF
MODE
FAN
SHORT
CUT
TIMER ON
TIMER OF
F
TEMP
SLEEP
ON/OFF
MODE
FAN
SHORT
CUT
TIMER ON
TIMER OF
F
TEMP
SLEEP
1 sec
ON/OFF
MODE
FAN
SHORT
CUT
TIMER ON
M
TEMP
SLEEP
1
1 sec
Timer starts Unit turns
ON
Unit turns
OFF
Example: If current time is 1:00PM to
set the timer as above steps, the unit
will turn on 2.5h later (3:30PM) and
turn off at 6:00PM.

9
How to Use Advanced Functions
Vane function
Press Vane button when the unit is turned on.
Swing
2
-1 -2 -3 -4 -0
Vane
4 Louvers
The system will exit the
louver setting mode if there
is no operations during a
10 seconds period.
Press this button to activate the louver setting feature. Each time you press the Vane button, the
display panel will display the selected louver in an order as ("-0" indicated that four louvers are all
selected):
Swing
2
-1 -2 -3 -4 -0
Vane
4 Louvers
Press Swing button to start/stop the auto swing feature of the selected louvers.
Swing function
Swing
2
-1 -2 -3 -4 -0
Vane
4 Louvers
Press Swing button
The horizontal louver auto swing feature is
energized. Press again to make it stop.
FP function
Press this button 2 times during one second under HEAT Mode and setting temperature of 16ºC.
Swing
2
-1 -2 -3 -4 -0
Vane
4 Louvers
The unit will operate at high fan speed
(while compressor on) with temperature
automatically set to 8ºC
Note: This function is for heat pump air conditioner only.
Press this button 2 times during one second under HEAT Mode and setting temperature of 16ºC to
activate the FP function. Press On/Off, Sleep, Mode, Fan and Temp. button while operating will cancel
this function.

10
ECO/GEAR function
ECO operation:
Under cooling mode, press this button, the remote controller will adjust the temperature automatically
to 24°C, fan speed of Auto to save energy (only when the set temperature is less than 24°C. If the
set temperature is above 24°C, press the ECO button, the fan speed will change to Auto, the set
temperature will remain unchanged.
NOTE:
Pressing this button, or modifying the mode or adjusting the set temperature to less than 24ºC/75ºF
will stop ECO operation.
Under ECO operation, the set temperature should be 24ºC or above, it may result in insufcient
cooling. If you feel uncomfortable, just press the ECO button again to stop it.
GEAR operation:
Press this button to enter the GEAR operation as following:
75% (up to 75% electrical energy consumption)
↓
50% (up to 50% electrical energy consumption)
↓
Previous setting mode.
Under GEAR operation, the display on the remote controller will alternage between electrical energy
consumption and set temperature.
2s
Press this button to enter the energy efcient mode in a sequence of following:
ECO → GEAR(75%) → GEAR(50%) → Previous setting mode → ECO......
Note: This function is only available under COOL mode
Silence function
2s Keep pressing Fan button for more than 2 seconds to active/disable Silence function (some
units).
Due to low frequency operation of compressor, it may result in insufcient cooling and
heating capacity. Press ON/OFF, Mode, Sleep, Boost or Clean button while operating will
cancel silence function.

11
LOCK function
5s
5s
Boost
or
+
SET SET OK
Vane
Press together the two buttons at the same time more than 5
seconds to activate Lock function. All buttons will not response
except pressing these two buttons for two seconds again to disable
locking.
SET function
5s
5s
Boost
or
+
SET SET OK
Vane
• Press the SET button to enter the function setting, then press SET button or TEMP or
TEMP button to select the desired function. The selected symbol will ash on the display area,
press the OK button to conrm.
• To cancel the selected function, just perform the same procedures as above.
• Press the SET button to scroll through operation functions as follows:
Active clean ( ) Fresh* ( ) Sleep ( ) Follow Me( ) AP mode* ( ) Active clean...
[*]: Model dependent

12
Active clean function ( ) (some units):
The Active Celan Technology washes away dust,
mold, and grease that may cause odors when it
adheres to the heat exchanger by automatically
freezing and then rapidly thawing the frost.
When this function is turned on, the indoor unit
display window appears "CL", after 20 to 45
minutes, the unit will turn off automatically and
cancel CLEAN function.
Sleep function ( ):
The SLEEP function is used to decrease energy
use while you sleep (and don't need the same
temperature settings to stay comfortable). This
function can only be activated via remote control.
For the detail, see sleep operation in "USER'S
MANUAL".
Note: The SLEEEP function is not available in
FAN or DRY mode.
FRESH function ( ) (some units):
When the FRESH function is initiated, the ion
generator is energized and will help to purify the
air in the room.
Follow me function ( ):
The FOLLOW ME function enables the remote
control to measure the temperature at its current
location and send this signal to the air conditioner
every 3 minutes interval.
When using AUTO, COOL or HEAT modes,
measuring ambient temperature from the remote
control (instead of from the indoor unit itself)
will enable the air conditioner to optimize the
temperature around you and ensure maximum
comfort.
NOTE:
Press and hold Boost button for seven seconds to
start/stop memory feature of Follow Me function.
• If the memory feature is activated, "On"
displays for 3 seconds on the screen.
• If the memory feature is stopped, "OF"
displays for 3 seconds on the screen.
• While the memory feature is activated, press
the ON/OFF button, shift the mode or power
failure will not cancel the Follow me function.
AP function ( ) (some units):
Choose AP mode to do wireless network
conguration. For some units, it doesn't work by
pressing the SET button. To enter the AP mode,
continuously press the LED button seven times in
10 seconds.

13

/