Page is loading ...

1
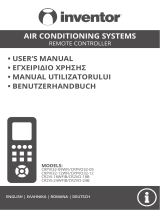
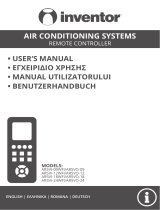
ENGLISH | ΕΛΛΗΝΙΚΑ | ROMANA | DEUTSCH
• USER’S MANUAL
• ΕΓΧΕΙΡΙΔΙΟ ΧΡΗΣΗΣ
• MANUAL UTILIZATORULUI
• BENUTZERHANDBUCH
REMOTE CONTROLLER
AIR CONDITIONING SYSTEMS
MODELS:
ΝUVI-09WF/ ΝUVO-09
ΝUVI-12WF/ ΝUVO-12
ΝUVI-18WF/ ΝUVO-18
ΝUVI-24WF/ ΝUVO-24


3
Table of Contents
Remote Controller Specifications
......................................................02
Handling the Remote Controller ....................................................03
Buttons and Functions ...................................................................04
Remote Screen Indicators ..............................................................08
How to Use Basic Functions ..........................................................09
How to Use Advanced Functions ..................................................11
04
05
06
07
08
10

4
NOT SURE WHAT A FUNCTION DOES?
Refer to the How to Use Basic Functions and How to Use Advanced Functions sections
of this manual for a detailed description of how to use your air conditioner.
SPECIAL NOTE
•Button designs on your unit may differ slightly from the example shown.
If the indoor unit does not have a particular function, pressing that function’s button on
the remote control will have no effect.
When there are wide differentces between “Remote controller Manual” and “USER’S
MANUAL” on function description, the description of “USER’S MANUAL” shall prevail.
•
•
Remote Controller Specifications
Quick Start Guide
8m
3.0V( Dry batteries R03/LR03×2)
-5°C~60°C(23°F~140°F)
FIT BATTERIES
POINT REMOTE TOWARD UNIT
PRESS POWER BUTTON
SELECT MODE SELECT TEMPERATURE
SELECT FAN SPEED
1
6
2
5 4
My ModeFollow Me LED Turbo
Ioniser
Swing
Timer
SelfClean
Mode On/Off Fan
Sleep
AUTO
COOL
DRY
HEAT
FAN
HIGH
MED
LOW
SET TEMPERATURE
3
AUTO
COOL
DRY
HEAT
FAN
RG10A1(D2S)/BGEF

5
NOT SURE WHAT A FUNCTION DOES?
Refer to the How to Use Basic Functions and How to Use Advanced Functions sections
of this manual for a detailed description of how to use your air conditioner.
SPECIAL NOTE
•Button designs on your unit may differ slightly from the example shown.
If the indoor unit does not have a particular function, pressing that function’s button on
the remote control will have no effect.
When there are wide differentces between “Remote controller Manual” and “USER’S
MANUAL” on function description, the description of “USER’S MANUAL” shall prevail.
•
•
Remote Controller Specifications
Quick Start Guide
8m
3.0V( Dry batteries R03/LR03×2)
-5°C~60°C(23°F~140°F)
FIT BATTERIES
POINT REMOTE TOWARD UNIT
PRESS POWER BUTTON
SELECT MODE SELECT TEMPERATURE
SELECT FAN SPEED
1
6
2
5 4
My ModeFollow Me LED Turbo
Ioniser
Swing
Timer
SelfClean
Mode On/Off Fan
Sleep
AUTO
COOL
DRY
HEAT
FAN
HIGH
MED
LOW
SET TEMPERATURE
3
AUTO
COOL
DRY
HEAT
FAN
RG10A1(D2S)/BGEF
TIPS FOR USING REMOTE CONTROL
NOTES FOR USING REMOTE CONTROL
• The remote control must be used within 8
meters of the unit.
The unit will beep when remote signal is
received.
Curtains, other materials and direct sunlight
can interfere with the infrared signal receiver.
Remove batteries if the remote will not be
used more than 2 months.
•
•
•
•
•
Inserting and Replacing Batteries
Your air conditioning unit may come with two
batteries(some units). Put the batteries in the
remote control before use.
1.
Slide the back cover from the remote control
downward, exposing the battery compartment.
Insert the batteries, paying attention to match
up the (+) and (-) ends of the batteries with
the symbols inside the battery compartment.
Slide the battery cover back into place.
2.
3.
BATTERY NOTES
For optimum product performance:
•
Do not mix old and new batteries, or
batteries of different types.
•
Do not leave batteries in the remote control
if you don’t plan on using the device for more
than 2 months.
BATTERY DISPOSAL
Do not dispose of batteries as unsorted
municipal waste. Refer to local laws for proper
disposal of batteries.
The device could comply with the local national
regulations.
In Canada, it should comply with
CAN ICES-3(B)/NMB-3(B).
In USA, this device complies with part 15 of the
FCC Rules. Operation is subject to the following
two conditions:
(1) This device may not cause harmful interference,
and
(2) this device must accept any interference
received, including interference that may
cause undesired operation.
This equipment has been tested and found to
comply with the limits for a Class B digital device,
pursuant to part 15 of the FCC Rules. These limits
are designed to provide reasonable protection
against harmful interference in a residential
installation. This equipment generates, uses and
can radiate radio frequency energy and, if not
installed and used in accordance with the
instructions, may cause harmful interference to
radio communications. However, there is no
guarantee that interference will not occur in a
particular installation. If this equipment does cause
harmful interference to radio or television reception,
which can be determined by turning the equipment
off and on, the user is encouraged to try to correct
the interference by one or more of the following
measures:
Reorient or relocate the receiving antenna.
Increase the separation between the equipment
and receiver.
Connect the equipment into an outlet on a circuit
different from that to which the receiver is
connected.
Consult the dealer or an experienced radio/TV
technician for help.
Changes or modifications not approved by the
party responsible for compliance could void
user’s authority to operate the equipment.
Handling the Remote Controller

6
Before you begin using your new air conditioner, make sure to familiarize yourself with its remote
control. The following is a brief introduction to the remote control itself. For instructions on how to
operate your air conditioner, refer to the How to Use Basic Functions section of this manual.
Buttons and Functions
ON/OFF
SET
Turns the unit on or off. MODE
OK
TIMER
FRESH
CLEAN
LED
Turbo
Scrolls through operation modes
as follows: AUTO
COOL
DRY HEAT FAN
FAN SPEED
SWING
Model:
Increases temperate in
1°C (1°F) increments.
Max. temperature is
30°C (86°F).
NOTE: Press together &
buttons at the same time
for 3 seconds will alternate
the temperature display
between the °C & °F.
TEMP
TEMP
RG10B1(D2S)
Used to confirm the selected
functions
Decreases temperature
O O
in 1 C(1 F) increments.
Min. temperature is
O O
16 C(60 F).
Starts and stops the horizontal
louver movement. Hold down
for 2 seconds to initiate vertical
louver auto swing feature.
Used to start/stop the ionizer
Set timer to turn unit on or off
Scrolls through operation
functions as follows:
The selected symbol will
flash on the display area,
press the OK button to
confirm.
Selects fan speeds in the
following order: AUTO -
LOW - MED - HIGH
NOTE: Holding this button
down for 2 seconds will
activate Silence feature. Enables unit to reach preset
temperature in shortest
possible time
Used to start/stop the Self
Clean or Active Clean function.
(Model dependent, please refer
to the USER’S OPERATION &
INSTALLATION MANUAL).
Turns indoor unit’s LED display
and air conditioner buzzer on and
off (model dependent), which
create a comfortable and quiet
environment.
SLEEP
Saves energy duting
sleeping hours
Fresh( )
Follow Me( )
AP mode( ) Fresh ....
05
Model: RG10A1(D2S)/BGEF
Starts and stops the horizontal
louver movement. Hold down
for 2 seconds to initiate vertical
louver auto swing feature.
ON/OFF
SET
Turns the unit on or off.
MODE
OK
TIMER
FRESH
CLEAN
LED
Turbo
ECO/GEAR
Scrolls through operation modes
as follows: AUTO
COOL
DRY HEAT FAN
FAN SPEED
SWING
Increases temperate in
1°C (1°F) increments.
Max. temperature is
30°C (86°F).
NOTE: Press together &
buttons at the same time
for 3 seconds will alternate
the temperature display
between the °C & °F.
TEMP
TEMP
Used to confirm the selected
functions
Decreases temperature
O O
in 1 C(1 F) increments.
Min. temperature is
O O
16 C(60 F).
Used to starts and stops the
Fresh feature.
Set timer to turn unit on or off
ECO GEAR(75%)
GEAR(50%)
mode ECO ......
Scrolls through operation
functions as follows:
Breeze Away( ) Sleep
( ) Follow Me( )
AP mode( ) Breeze
Away ...
The selected symbol will
flash on the display area,
press OK button to confirm.
Selects fan speeds in the
following order:
AU
20%
60% 40% 80% 100%.
Press the TEMP or button
to increase/decrease the fan
speed in 1% increments.
Enables unit to reach pr
temperature in shortest
possible time
Previous setting
Used to start/stop the Self
Clean or Active Clean function.
(Model dependent, please refer
to the USER’S OPERATION &
INSTALLATION MANUAL).
Turns indoor unit’s LED display
and air conditioner buzzer on and
off (model dependent), which
create a comfortable and quiet
environment.
NOTE: HEAT mode is not
supported by the cooling only
appliance.
Press this button to enter the
energy efficient mode in a
sequence of following:

7
Remote Screen Indicators
Note:
All indicators shown in the figure are for the purpose of clear presentation. But during the actual
operation, only the relative function signs are shown on the display window.
Information are displayed when the remote controller is power up.
Transmission Indicator
MODE display
TIMER ON display
FAN SPEED display
TIMER OFF display
Silence feature
display
Horizontal louver
swing display
Vertical louver auto
swing display
TURBO mode display
Not available for
this unit
Temperature/Timer/Fan speed
display
Breeze Away display - not available
Active clean feature display - not available
Fresh feature display
Sleep mode display
Follow me feature display
Wireless control feature display
Low battery detection display(flashing)
LOW
MED
HIGH
AUTO
Lights up when remote
sends signal to indoor
unit
Displays selected fan speed:
Displays the current
including:
mode,
This fan speed can not be
adjusted in AUTO or DRY
mode.
ECO display
Displays when ECO
feature is activated
GEAR display
Displays when GEAR
feature is activated
LOCK display
Displays when LOCK feature
is activated.
Displays the set temperature
by default, or fan speed or
timer setting when using
TIMER ON/OFF functions.
Temperature range:
oo
oo
16-30 C //60-86 F
Timer setting range:
0-24 hours
Fan speed setting range:
AU -100%
This display is blank when
operating in FAN mode.
(20-28 C/68-82 F)
(Model dependent)
05
Model: RG10A1(D2S)/BGEF
Starts and stops the horizontal
louver movement. Hold down
for 2 seconds to initiate vertical
louver auto swing feature.
ON/OFF
SET
Turns the unit on or off.
MODE
OK
TIMER
FRESH
CLEAN
LED
Turbo
ECO/GEAR
Scrolls through operation modes
as follows: AUTO
COOL
DRY HEAT FAN
FAN SPEED
SWING
Increases temperate in
1°C (1°F) increments.
Max. temperature is
30°C (86°F).
NOTE: Press together &
buttons at the same time
for 3 seconds will alternate
the temperature display
between the °C & °F.
TEMP
TEMP
Used to confirm the selected
functions
Decreases temperature
O O
in 1 C(1 F) increments.
Min. temperature is
O O
16 C(60 F).
Used to starts and stops the
Fresh feature.
Set timer to turn unit on or off
ECO GEAR(75%)
GEAR(50%)
mode ECO ......
Scrolls through operation
functions as follows:
Breeze Away( ) Sleep
( ) Follow Me( )
AP mode( ) Breeze
Away ...
The selected symbol will
flash on the display area,
press OK button to confirm.
Selects fan speeds in the
following order:
AU
20%
60% 40% 80% 100%.
Press the TEMP or button
to increase/decrease the fan
speed in 1% increments.
Enables unit to reach pr
temperature in shortest
possible time
Previous setting
Used to start/stop the Self
Clean or Active Clean function.
(Model dependent, please refer
to the USER’S OPERATION &
INSTALLATION MANUAL).
Turns indoor unit’s LED display
and air conditioner buzzer on and
off (model dependent), which
create a comfortable and quiet
environment.
NOTE: HEAT mode is not
supported by the cooling only
appliance.
Press this button to enter the
energy efficient mode in a
sequence of following:

8
MODE
How to Use Basic Functions
AUTO Mode
COOL or HEAT Mode
DRY Mode
Select AUTO mode Set your desired temperature
NOTE:
1. In AUTO mode,
the unit will automatically select the COOL, FAN, or HEAT function based on
the set temperature.
2. In AUTO mode, fan speed can not be set.
Turn on the air conditioner
Select DRY mode Set your desired temperature Turn on the air conditioner
FAN Mode
Select FAN mode Turn on the air conditioner
Select COOL/HEAT mode Set the temperature Turn on the air
conditioner
Set the fan speed
Set the fan speed
NOTE: In DRY mode, fan speed can not be set since it has already been automatically controlled.
NOTE: In FAN mode, you can’t set the temperature. As a result , no temperature displays in remote screen.
Before operation, please ensure the unit is plugged in and power is available.
ATTENTION
MODE
MODE
MODE

9
MODE
How to Use Basic Functions
AUTO Mode
COOL or HEAT Mode
DRY Mode
Select AUTO mode Set your desired temperature
NOTE:
1. In AUTO mode,
the unit will automatically select the COOL, FAN, or HEAT function based on
the set temperature.
2. In AUTO mode, fan speed can not be set.
Turn on the air conditioner
Select DRY mode Set your desired temperature Turn on the air conditioner
FAN Mode
Select FAN mode Turn on the air conditioner
Select COOL/HEAT mode Set the temperature Turn on the air
conditioner
Set the fan speed
Set the fan speed
NOTE: In DRY mode, fan speed can not be set since it has already been automatically controlled.
NOTE: In FAN mode, you can’t set the temperature. As a result , no temperature displays in remote screen.
Before operation, please ensure the unit is plugged in and power is available.
ATTENTION
MODE
MODE
MODE
Setting the TIMER
TIMER ON setting
TIMER OFF setting
TIMER ON & OFF setting (example)
TIMER ON/OFF - Set the amount of time after which the unit will automatically turn on/off.
Press TIMER button to initiate
the ON time sequence. Press Temp. up or down button for
for multiple times to set the desired
time to turn on the unit.
Press Temp. up or down button for
for multiple times to set the desired
time to turn off the unit.
NOTE:
1. When setting the TIMER ON or TIMER OFF, the time will increase by 30 minutes increments with each
press, up to 10 hours. After 10 hours and up to 24, it will increase in 1 hour increments. (For example,
press 5 times to get 2.5h, and press 10 times to get 5h,) The timer will revert to 0.0 after 24.
2. Cancel either function by setting its timer to 0.0h.
Point remote to unit and wait 1sec,
the TIMER ON will be activated.
Press TIMER button to initiate
the OFF time sequence. Point remote to unit and wait 1sec,
the TIMER OFF will be activated.
Current
time 1PM
2:00PM 3:00PM 4PM 5PM 6PM
Timer starts Unit turns
ON
Unit turns
OFF
2.5 hours later
5 hours later
3:30PM
Example: If current timer is 1:00PM,
to set the timer as above steps, the
unit will turn on 2.5h later (3:30PM)
and turn off at 6:00PM.
ON/OFF
MODE
FAN
SHORT
CUT
TIMER ON
TIMER OF
F
TEMP
SLEEP
1sec
ON/OFF
MODE
FAN
SHORT
CUT
TI
M
E
R
O
N
TIMER OF
F
TEMP
SLEEP
ON/OFF
MODE
FAN
SHORT
CUT
TI
M
E
R
O
N
TIMER OF
F
TEMP
SLEEP
ON/OFF
MODE
FAN
SHORT
CUT
TIMER ON
TIMER OF
F
TEMP
SLEEP
1sec
x5
xn xn
x10
xn
Keep in mind that the time periods you set for both functions refer to hours after the current time.
TIMER
TIMER
TIMER
TIMER

10
11
How to Use Advanced Functions
Swing function
Airflow direction
LED DISPLAY
Press Swing button
The horizontal louver will swing up and down
automatically when pressing Swing button.
Press again to make it stop.
If continue to press the SWING button, five
different airflow directions can be set. The
louver can be move at a certain range each
time you press the button. Press the button
until the direction you prefer is reached.
NOTE: When the unit is off, press and hold MODE and SWING buttons together for one second,
the louver will open for a certain angle, which makes it very convenient for cleaning. Press and hold
MODE and SWING buttons together for one second to reset the louver(Model dependent).
Keep pressing this button more than 2 seconds,
the vertical louver swing function is activated.
(Model dependent)
2s
Keep pressing this button more than 5 seconds,
the indoor unit will display the actual room
temperature. Press more than 5 seconds again
will revert back to display the setting temperature.
Press this button to turn on and turn off
the display on the indoor unit.
5s
Press LED button Press this button more
than 5 seconds(some units)
Swing
LED LED
Swing
Swing
ECO/GEAR function
Under cooling mode, press this button, the remote controller will adjust the temperature
automatically to 24 C/75 F, fan speed of Auto to save energy (only when the set temperature
is less than 24 C/75 F). If the set temperature is above 24 C/75 F, press the ECO button,
the fan speed will change to Auto, the set temperature will remain unchanged.
NOTE:
Pressing the ECO/GEAR button, or modifying the mode or adjusting the set temperature to less
than 24 C/75 F will stop ECO operation.
Under ECO operation, the set tmeperature should be 24 C/75 F or above, it may result in
insufficient cooling. If you feel uncomfortable, just press the ECO button again to stop it.
O
O
O
O
O
O
O
O
O
O
Press this button to enter the energy efficient mode in a sequence of
following:
ECO GEAR(75%) GEAR(50%) Previous setting mode ECO......
Note:This function is only available under COOL mode.
ECO operation:
GEAR operation:
Press the ECO/GEAR button to enter the GEAR operation as following:
75%(up to 75% electrial energy consumption)
50%(up to 50% electrial energy consumption)
Previous setting mode.
Under GEAR operation, the display on the remote controller will alternage between
electical energy consumption and set temperature.

11
11
How to Use Advanced Functions
Swing function
Airflow direction
LED DISPLAY
Press Swing button
The horizontal louver will swing up and down
automatically when pressing Swing button.
Press again to make it stop.
If continue to press the SWING button, five
different airflow directions can be set. The
louver can be move at a certain range each
time you press the button. Press the button
until the direction you prefer is reached.
NOTE: When the unit is off, press and hold MODE and SWING buttons together for one second,
the louver will open for a certain angle, which makes it very convenient for cleaning. Press and hold
MODE and SWING buttons together for one second to reset the louver(Model dependent).
Keep pressing this button more than 2 seconds,
the vertical louver swing function is activated.
(Model dependent)
2s
Keep pressing this button more than 5 seconds,
the indoor unit will display the actual room
temperature. Press more than 5 seconds again
will revert back to display the setting temperature.
Press this button to turn on and turn off
the display on the indoor unit.
5s
Press LED button Press this button more
than 5 seconds(some units)
Swing
LED LED
Swing
Swing
ECO/GEAR function
Under cooling mode, press this button, the remote controller will adjust the temperature
automatically to 24 C/75 F, fan speed of Auto to save energy (only when the set temperature
is less than 24 C/75 F). If the set temperature is above 24 C/75 F, press the ECO button,
the fan speed will change to Auto, the set temperature will remain unchanged.
NOTE:
Pressing the ECO/GEAR button, or modifying the mode or adjusting the set temperature to less
than 24 C/75 F will stop ECO operation.
Under ECO operation, the set tmeperature should be 24 C/75 F or above, it may result in
insufficient cooling. If you feel uncomfortable, just press the ECO button again to stop it.
O
O
O
O
O
O
O
O
O
O
Press this button to enter the energy efficient mode in a sequence of
following:
ECO GEAR(75%) GEAR(50%) Previous setting mode ECO......
Note:This function is only available under COOL mode.
ECO operation:
GEAR operation:
Press the ECO/GEAR button to enter the GEAR operation as following:
75%(up to 75% electrial energy consumption)
50%(up to 50% electrial energy consumption)
Previous setting mode.
Under GEAR operation, the display on the remote controller will alternage between
electical energy consumption and set temperature.

12
FP function
LOCK function
OO
OO
Keep pressing Fan button for more than 2 seconds to activate/disable Silence
function.
Due to low frequency operation of compressor, it may result in insufficient cooling
and heating capacity. Pressing ON/OFF, Mode, Sleep, Turbo or Clean button while
operating will cancel silence function.
Silence function
Clean
5s
5s
Turbo
Press this button 2 times during one second under HEAT Mode and setting temperature of
16 C/60 F or 20 C/68 F.
The unit will operate at high fan speed (while
compressor on) with temperature automatically
set to 8 C/46 F.
2
+Press together Clean button and Turbo button at the
same time more than 5 seconds to activate Lock function.
All buttons will not response except pressing these two
buttons for two seconds again to disable locking.
2s
Pressing On/Off, Sleep, Mode, Fan and Temp. button while operating will cancel this function.

13
FP function
LOCK function
OO
OO
Keep pressing Fan button for more than 2 seconds to activate/disable Silence
function.
Due to low frequency operation of compressor, it may result in insufficient cooling
and heating capacity. Pressing ON/OFF, Mode, Sleep, Turbo or Clean button while
operating will cancel silence function.
Silence function
Clean
5s
5s
Turbo
Press this button 2 times during one second under HEAT Mode and setting temperature of
16 C/60 F or 20 C/68 F.
The unit will operate at high fan speed (while
compressor on) with temperature automatically
set to 8 C/46 F.
2
+Press together Clean button and Turbo button at the
same time more than 5 seconds to activate Lock function.
All buttons will not response except pressing these two
buttons for two seconds again to disable locking.
2s
Pressing On/Off, Sleep, Mode, Fan and Temp. button while operating will cancel this function.
Sleep function ( ) :
SET function
or
SET SET OK
Press the SET button to enter the function setting, then press SET button or TEMP or TEMP
button to select the desired function. The selected symbol will flash on the display area, press the
OK button to confirm.
To cancel the selected function, just perform the same procedures as above.
The SLEEP function is used to decrease
energy use while you sleep (and don t need
the same temperature settings to stay
comfortable). This function can only be
activated via remote control.
Note: The SLEEP function is not available
in FAN or DRY mode.
,
For the detail, see sleep operation in
USER S MANUAL.
,
,, ,,
,,
,,
Follow me function ( ):
The FOLLOW ME function enables the remote
control to measure the temperature at its
current location and send this signal to the
air conditioner every 3 minutes interval.
When using AUTO, COOL or HEAT modes,
measuring ambient temperature from the
remote control(instead of from the indoor
unit itself) will enable the air conditioner to
optimize the temperature around you and
ensure maximum comfort.
If the memory feature is stopped, OF
displays for 3 seconds on the screen.
While the memory feature is activated,
press the ON/OFF button, shift the mode
or power failure will not cancel the Follow
me function.
NOTE: Press and hold Turbo button for
seven seconds to start/stop memory
feature of Follow Me function.
If the memory feature is activated, On
displays for 3 seconds on the screen.
AP function ( ) :
Choose AP mode to do wireless network
configuration. For some units, it doesn’t
work by pressing the SET button. To enter
the AP mode, continuously press the LED
button seven times in 10 seconds.
“ ”
“ ”
Press the SET button to scroll through operation functions as follows:
Breeze Away ( ) Fresh ( ) Sleep( ) Follow Me( ) AP mode( )
[ ]: If your remote controller has Breeze Away button, Fresh button or Sleep button, you can not
use the SET button to select the Breeze Away, Fresh or Sleep feature.
* *
*
FRESH ( ):
When the FRESH function is initiated,
the UV-C lamp and the ion generator are
energized and will help to purify the air in
the room.
Breeze Away function (
):
This feature avoids direct air ow blowing
on the body and makes you feel indulging in
silky coolness.
NOTE: This feature is available under Cool,
Fan and Dry mode only.

14
All the pictures in the manual are for explanatory purposes only. The actual shape of the unit
you purchased may be slightly dierent, but the operations and functions are the same.
The company may not be held responsible for any misprinted information. The design and
the specications of the product for reasons, such as product improvement, are subject to
change without any prior notice.
Please consult with the manufacturer at +30 211 300 3300 or with the Sales agency for
further details. Any future updates to the manual will be uploaded to the service website, and
it is advised to always check for the latest version.
Scan here to download the latest version of this manual.
www.inventorairconditioner.com/media-library


16
Περιεχόμενα
Προδιαγραφές τηλεχειριστηρίου..........................................................17
Χειρισμός του τηλεχειριστηρίου...........................................................18
Πλήκτρα και λειτουργίες.........................................................................19
Ενδείξεις οθόνης LCD του τηλεχειριστηρίου.......................................20
Χρήση των βασικών λειτουργιών..........................................................21
Χρήση των προηγμένων λειτουργιών..................................................23

17
NOT SURE WHAT A FUNCTION DOES?
Refer to the How to Use Basic Functions and How to Use Advanced Functions sections
of this manual for a detailed description of how to use your air conditioner.
SPECIAL NOTE
• Button designs on your unit may differ slightly from the example shown.
If the indoor unit does not have a particular function, pressing that function’s button on
the remote control will have no effect.
When there are wide differentces between “Remote controller Manual” and “USER’S
MANUAL” on function description, the description of “USER’S MANUAL” shall prevail.
•
•
02
Remote Controller Specifications
Quick Start Guide
RG10N2(D2S)
8m
3.0V (Dry batteries R03/LR03×2)
-5°C~60°C(23°F~140°F)
FIT BATTERIES
POINT REMOTE TOWARD UNIT
PRESS POWER BUTTON
SELECT MODE SELECT TEMPERATURE
SELECT FAN SPEED
1
6
2
4
3
AUTO
COOL
DRY
HEAT
FAN
My ModeFollow Me LED Turbo
Ioniser
Swing
Timer
Self Clean
Mode On/Off Fan
Sleep
AUTO
COOL
DRY
HEAT
FAN
HIGH
MED
LOW
SET TEMPERATURE
5
Προδιαγραφές τηλεχειριστηρίου
Μοντέλο RG10A1(D2S)/BGEF
Ονομαστική τάση 3.0V( μπαταρίες R03/LR03×2)
Εμβέλεια λήψης σήματος 8m
Περιβάλλον -5°C~60°C(23°F~140°F)
Οδηγός γρήγορης εκκίνησης
ΤΟΠΟΘΕΤΗΣΤΕ ΤΙΣ
ΜΠΑΤΑΡΙΕΣ
ΕΠΙΛΕΞΤΕ ΛΕΙΤΟΥΡΓΙΑ ΕΠΙΛΕΞΤΕ ΕΠΙΘΥΜΗΤΗ
ΘΕΡΜΟΚΡΑΣΙΑ
ΠΙΕΣΤΕ ΤΟ ΠΛΗΚΤΡΟ
ON/OFF
ΣΤΟΧΕΥΣΤΕ ΤΟ
ΤΗΛΕΧΕΙΡΙΣΤΗΡΙΟ
ΠΡΟΣ ΤΗΝ ΕΣΩΤΕΡΙΚΗ
ΜΟΝΑΔΑ
ΕΠΙΛΕΞΤΕ ΤΑΧΥΤΗΤΑ
ΑΝΕΜΙΣΤΗΡΑ
ΕΠΕΞΗΓΗΣΗ ΛΕΙΤΟΥΡΓΙΩΝ
Ανατρέξτε στις ενότητες «Χρήση των βασικών λειτουργιών» και «Χρήση των
προηγμένων λειτουργιών» του παρόντος εγχειριδίου για αναλυτική περιγραφή
σχετικά με τις λειτουργίες του κλιματιστικού
ΣΗΜΕΙΩΣΗ:
• Η σχεδίαση των πλήκτρων μπορεί να διαφέρει ελαφρώς από την πραγματική
σχεδίαση στο τηλεχειριστήριο που έχετε αγοράσει. Το πραγματικό σχήμα υπερισχύει.
• Όλες οι λειτουργίες που περιγράφονται εκτελούνται από τη μονάδα. Εάν η μονάδα
δεν διαθέτει μια λειτουργία, δεν θα ανταποκρίνεται όταν πατηθεί το σχετικό κουμπί
στο τηλεχειριστήριο.
• Όταν υπάρχουν μεγάλες διαφορές ανάμεσα στην «Εικόνα του τηλεχειριστηρίου» και
στο «ΕΓΧΕΙΡΙΔΙΟ ΧΡΗΣΗΣ» όσον αφορά την περιγραφή της λειτουργίας, θα υπερισχύει
η περιγραφή στο «ΕΓΧΕΙΡΙΔΙΟ ΧΡΗΣΗΣ».
NOT SURE WHAT A FUNCTION DOES?
Refer to the How to Use Basic Functions and How to Use Advanced Functions sections
of this manual for a detailed description of how to use your air conditioner.
SPECIAL NOTE
•Button designs on your unit may differ slightly from the example shown.
If the indoor unit does not have a particular function, pressing that function’s button on
the remote control will have no effect.
When there are wide differentces between “Remote controller Manual” and “USER’S
MANUAL” on function description, the description of “USER’S MANUAL” shall prevail.
•
•
Remote Controller Specifications
Quick Start Guide
8m
3.0V( Dry batteries R03/LR03×2)
-5°C~60°C(23°F~140°F)
FIT BATTERIES
POINT REMOTE TOWARD UNIT
PRESS POWER BUTTON
SELECT MODE SELECT TEMPERATURE
SELECT FAN SPEED
1
6
2
5 4
My ModeFollow Me LED Turbo
Ioniser
Swing
Timer
SelfClean
Mode On/Off Fan
Sleep
AUTO
COOL
DRY
HEAT
FAN
HIGH
MED
LOW
SET TEMPERATURE
3
AUTO
COOL
DRY
HEAT
FAN
RG10A1(D2S)/BGEF

18
TIPS FOR USING REMOTE CONTROL
NOTES FOR USING REMOTE CONTROL
• The remote control must be used within 8
meters of the unit.
The unit will beep when remote signal is
received.
Curtains, other materials and direct sunlight
can interfere with the infrared signal receiver.
Remove batteries if the remote will not be
used more than 2 months.
•
•
•
•
•
Inserting and Replacing Batteries
Your air conditioning unit may come with two
batteries(some units). Put the batteries in the
remote control before use.
1.
Slide the back cover from the remote control
downward, exposing the battery compartment.
Insert the batteries, paying attention to match
up the (+) and (-) ends of the batteries with
the symbols inside the battery compartment.
Slide the battery cover back into place.
2.
3.
BATTERY NOTES
For optimum product performance:
•
Do not mix old and new batteries, or
batteries of different types.
•
Do not leave batteries in the remote control
if you don’t plan on using the device for more
than 2 months.
BATTERY DISPOSAL
Do not dispose of batteries as unsorted
municipal waste. Refer to local laws for proper
disposal of batteries.
The device could comply with the local national
regulations.
In Canada, it should comply with
CAN ICES-3(B)/NMB-3(B).
In USA, this device complies with part 15 of the
FCC Rules. Operation is subject to the following
two conditions:
(1) This device may not cause harmful
interference, and
(2) this device must accept any interference
received, including interference that may
cause undesired operation.
This equipment has been tested and found to
comply with the limits for a Class B digital device,
pursuant to part 15 of the FCC Rules. These limits
are designed to provide reasonable protection
against harmful interference in a residential
installation. This equipment generates, uses and
can radiate radio frequency energy and, if not
installed and used in accordance with the
instructions, may cause harmful interference to
radio communications. However, there is no
guarantee that interference will not occur in a
particular installation. If this equipment does cause
harmful interference to radio or television reception,
which can be determined by turning the equipment
off and on, the user is encouraged to try to correct
the interference by one or more of the following
measures:
Reorient or relocate the receiving antenna.
Increase the separation between the equipment
and receiver.
Connect the equipment into an outlet on a circuit
different from that to which the receiver is
connected.
Consult the dealer or an experienced radio/TV
technician for help.
Changes or modifications not approved by the
party responsible for compliance could void
user’s authority to operate the equipment.
03
Handling the Remote Controller
Χειρισμός του τηλεχειριστηρίου
ΤΟΠΟΘΕΤΗΣΗ ΚΑΙ ΑΝΤΙΚΑΤΑΣΤΑΣΗ
ΤΩΝ ΜΠΑΤΑΡΙΩΝ ΣΗΜΕΙΩΣΕΙΣ ΓΙΑ ΤΗΝ ΧΡΗΣΗ ΤΟΥ
ΤΗΛΕΧΕΙΡΙΣΤΗΡΙΟΥ
ΟΔΗΓΙΕΣ ΧΡΗΣΗ ΑΣΥΡΜΑΤΟΥ
ΧΕΙΡΙΣΤΗΡΙΟΥ
Η συσκευή συμμορφώνεται με τους τοπι-
κούς εθνικούς κανονισμούς
• Για τον Καναδά πρέπει να συμμορφώνε-
ται με τον CAN ICES-3(B)/NMB-3(B).
• Στις ΗΠΑ, συμμορφώνεται με το μέρος 15
των Κανόνων FCC. Η λειτουργία υπόκει-
ται στις ακόλουθες δύο προϋποθέσεις:
(1) Η συσκευή να μην προκαλεί επιβλα-
βείς παρεμβολές και
(2) Η συσκευή πρέπει να δέχεται τυχόν
παρεμβολές που λαμβάνονται, συμπερι-
λαμβανομένων παρεμβολών που μπορεί
να προκαλέσουν ανεπιθύμητη λειτουρ-
γία.
Ο εξοπλισμός έχει δοκιμαστεί και έχει βρε-
θεί ότι συμμορφώνεται με τα όρια για ψη-
φιακές συσκευές Κλάσης Β, σύμφωνα με το
μέρος15 των Κανόνων FCC. Αυτά τα όρια
έχουν σχεδιαστεί για να παρέχουν εύλογη
προστασία από επιβλαβείς παρεμβολές σε
οικιακή εγκατάσταση. Αυτός ο εξοπλισμός
παράγει, χρησιμοποιεί και μπορεί να εκ-
πέμψει ενέργεια ραδιοσυχνοτήτων και, εάν
δεν εγκατασταθεί και χρησιμοποιηθεί σύμ-
φωνα με τις οδηγίες μπορεί να προκαλέσει
επιβλαβείς παρεμβολές στις ραδιοεπικοι-
νωνίες. Ωστόσο, δεν υπάρχει εγγύηση ότι
δεν θα υπάρξουν παρεμβολέςσε μια συγκε-
κριμένη εγκατάσταση. Εάν αυτός ο εξοπλι-
σμός προκαλεί επιβλαβείς παρεμβολές στη
λήψη ραδιοφώνου ή τηλεόρασης η οποία
μπορεί να προσδιοριστεί απενεργοποιώ-
ντας και ενεργοποιώντας τον εξοπλισμό,
προσπαθήστε να διορθώσετε την παρεμβο-
λή με ένα ήπερισσότερα από τα ακόλουθα
μέτρα:
• Αναπροσανατολίστε ή επανατοποθετή-
στε την κεραία λήψης
• Αυξήστε τον διαχωρισμό μεταξύ του εξο-
πλισμού και του δέκτη.
• Συνδέστε τον εξοπλισμό σε πρίζα δια-
φορετικού κυκλώματος από αυτό στο
οποίο είναι συνδεδεμένος ο δέκτης
• Συμβουλευτείτε τον αντιπρόσωπο ή
έναν έμπειρο τεχνικό ραδιοφώνου / τη-
λεόρασης για βοήθεια.
• Αλλαγές ή τροποποιήσεις που δεν έχουν
εγκριθεί από το μέρος που είναι υπεύ-
θυνο για τη συμμόρφωση με τους κα-
νονισμούς μπορούν να ακυρώσουν την
άδεια χειρισμού του εξοπλισμού.
• Το ασύρματο χειριστήριο πρέπει να χρησι-
μοποιείται σε απόσταση έως 8 μέτρων από
το κλιματιστικό Η μονάδα θα κάνει έναν
χαρακτηριστικό ήχο όταν δεχθεί σήμα από
το ασύρματο χειριστήριο. Κουρτίνες, λοιπά
υλικά και απευθείας έκθεση στον ήλιο μπο-
ρούν να δημιουργήσουν παρεμβολέςστον
ασύρματο δέκτη. Αφαιρέστε τις μπαταρίες
αν το χειριστήριο δεν πρόκειται να χρησι-
μοποιηθεί για διάστημα μεγαλύτερο των 2
μηνών.
Η μονάδα κλιματιστικού παρέχεται με δύο
μπαταρίες AAA. Τοποθετήστε τις μπαταρίες στο
τηλεχειριστήριο πριν από τη χρήση:
1. Αφαιρέστε το πίσω κάλυμμα του
τηλεχειριστηρίου.
2. Τοποθετήστε τις μπαταρίες προσέχοντας να
ταιριάζουν τα (+) και (-) των μπαταριών με τα
αντίστοιχα σύμβολα μέσα στην υποδοχή
3. Τοποθετήστε ξανά στη θέση του το πίσω
κάλυμμα.
ΣΗΜΕΙΩΣΕΙΣ ΓΙΑ ΤΗΝ ΜΠΑΤΑΡΙΑ
Για βέλτιστη απόδοση του προϊόντος:
• Μην χρησιμοποιείτε μαζί παλιές και
καινούργιες μπαταρίες ή μπαταρίες
διαφορετικών τύπων.
• Αφαιρέστε τις μπαταρίες αν το
τηλεχειριστήριο δεν πρόκειται να
χρησιμοποιηθεί για περισσότερο από2
μήνες.
ΑΠΟΡΡΙΨΗ ΤΩΝ ΜΠΑΤΑΡΙΩΝ
Μην απορρίπτετε τις μπαταρίες ως
απόβλητα που δεν έχουν περάσει από
διαδικασία διαλογής. Συμβουλευθείτε την
τοπική νομοθεσία για τη σωστή απόρριψη
των μπαταριών.

19
Πλήκτρα και λειτουργίες
Προτού αρχίσετε να χρησιμοποιείτε το νέο σας κλιματιστικό φροντίστε να
εξοικειωθείτε με το τηλεχειριστήριό του.
Ακολουθεί μια σύντομη παρουσίαση του τηλεχειριστηρίου. Για οδηγίες σχετικά
με τον χειρισμό του κλιματιστικού ανατρέξτε στις ενότητες Χρήση των βασικών/
προηγμένων λειτουργιών του παρόντος εγχειριδίου.
MODE (Λειτουργία)
Επιλέγει διαδοχικά τους ακόλουθους
τρόπους λειτουργίας AUTO
(Αυτόματη)
COOL (Ψύξη)
DRY
(Αφύγρανση) → HEAT (Θέρμανση)
FAN (Ανεμιστήρας)
ECO GEAR
Πιέστε για να επιλέξετε τη λειτουργία
εξοικονόμισης με τη παρακάτω σειρά:
ECO
→
GEAR (75%)
→
GEAR (50%)
→
Προηγούμενη λειτουργία ρύθμισης
→
ECO
ΟΚ
Χρησιμοποιείστε το πλήκτρο OK για
να επιβεβαιώσετε την επιλογή σας
TIMER
Ρυθμίζει τον χρονοδιακόπτη για την
ενεργοποίηση και απενεργοποίηση
της μονάδας
ON/OFF
Ενεργοποιεί ή απενεργοποιεί
τη μονάδα
TEMP
Αυξάνει τη θερμοκρασία κατά
1°C (1°F) σε κάθε πάτημα. Η
μέγιστη θερμοκρασία είναι
30°C (86°F)
ΣΗΜΕΙΩΣΗ: Πιέστε
ταυτόχρονα &
για 3 δευτερόλεπτα για
να εναλλάξετε ένδειξη
θερμοκρασίας μεταξύ°C και °F.
FRESH
Ενεργοποιεί/απενεργοποιεί την
λειτουργία ιονιστή
CLEAN
Ενεργοποιεί/απενεργοποιεί την
λειτουργία αυτοκαθαρισμού Self
Clean ή Active Clean (εξαρτάται από
το μοντέλο, ανατρέξτε στο εγχειρίδιο
χρήσης και εγκατάστασης για
λεπτομέρειες.
TEMP
Μειώνει τη θερμοκρασία
κατά1°C (1°F) σε κάθε πάτημα.
Η ελάχιστη θερμοκρασία
είναι 16°C (60°F).
LED
Ενεργοποιεί και απενεργοποιεί
τις ενδείξεις LED της εσωτερικής
μονάδας καθώς και την ηχητική
ειδοποίηση (εξαρτάται από το
μοντέλο), για να δημιουργήσει άνετο
και ήσυχο περιβάλλον.
Turbo
Επιτρέπει στην μονάδα να φτάσει
στην προ-ρυθμισμένη θερμοκρασία
στον συντομότερο δυνατό χρόνο.
FAN SPEED
Επιλέγει τις ταχύτητες του
ανεμιστήρα με την ακόλουθη
σειρά: AUTO - LOW - MED -
HIGH.
ΣΗΜΕΙΩΣΗ: Κρατήστε
πατημένο για τουλάχιστον
2 δευτερόλεπτα για να
ενεργοποιήσετε την αθόρυβη
λειτουργία (Silence).
SWING
Ξεκινά και σταματά την κάθε-
τη μετακίνηση της περσίδας
Πιέστε κρατημένο για 2
δευτερόλεπτα για να ενεργο-
ποιήσετε/απενεργοποιήσετε
την οριζόντια μετακίνηση
της περσίδας.
Model: RG10A1(D2S)/BGEF
SET
Πιέστε για να επιλέξετε
λειτουργία σύμφωνα με την
παρακάτω σειρά:
Breeze Away ( )
→
Sleep ( )
→
Follow Me ( )
→
AP mode
()
→
Breeze Away ...
Το επιλεγμένο εικονίδιο θα
αναβοσβήνει στην οθόνη
του τηλεχειριστηρίου,
πιέστε το πλήκτρο OK για
επιβεβαίωση.

20
Ενδείξεις οθόνης LCD του τηλεχειριστηρίου
Όταν το τηλεχειριστήριο τίθεται σε λειτουργία, εμφανίζονται πληροφορίες στην οθόνη.
Ένδειξη Breeze Away
Ένδειξη Active Clean
Ένδειξη Fresh
Ένδειξη Sleep
Ένδειξη Follow me
Ένδειξη Wireless control
Ένδειξη Χαμηλής Στάθμης μπαταριών
Ένδειξη μετάδοσης
σήματος
Ανάβει όταν το
τηλε-
χειριστήριο
στέλνει
σήμα στην εσωτερική
μονάδα.
TIMER ON
TIMER OFF
Ένδειξη
Ένδειξη
Ένδειξη
Αθόρυβης
λειτουργίας
FAN SPEED display
LOW
MED
HIGH
AUTO
Ένδειξη ταχύτητας ανεμιστήρα
Ένδειξη Swing
(κάθετη κίνηση)
Ένδειξη Swing
(οριζόντια κίνηση)
Ένδειξη λειτουργίας
TURBO
Μη διαθέσιμη
ΜΟDE
Ένδειξη λειτουργίας
Εμφανίζει την τρέχουσα
λειτουργία
05
Remote Screen Indicators
Note:
All indicators shown in the figure are for the purpose of clear presentation. But during the actual
operation, only the relative function signs are shown on the display window.
Note:
Not all the models can display
the fan speed values between
AU-100%.
[ ]
**
*
*
*
*
*
Information are displayed when the remote controller is power up.
Breeze Away display - not available
Transmission Indicator
MODE display
TIMER ON display
FAN SPEED display
TIMER OFF display
Silence feature
display
ECO display
GEAR display
LOCK display
Horizontal louver
swing display
TURBO mode display
Not available for
this unit
Not available for
this unit
Temperature/Timer/Fan speed
display
Active clean feature display
Fresh feature display - not available
Sleep mode display
Follow me feature display
Wireless control feature display
Low battery detection display(flashing)
Displays when LOCK feature
is activated.
Silence
LOW
MED
HIGH
AUTO
Lights up when remote
sends signal to indoor
unit
Displays selected fan speed:
Displays the current
including:
mode,
2%-20%
21%-40%
41%-60%
61%-80%
81%-100%
1%
This fan speed can not be
adjusted in AUTO or DRY
mode.
Displays when ECO
feature is activated
Displays when GEAR
feature is activated
Displays the set temperature
by default, or fan speed or
timer setting when using
TIMER ON/OFF functions.
Temperature range:
oo
oo
16-30 C / /60-86 F
Timer setting range:
0-24 hours
Fan speed setting range:
AU -100%
This display is blank when
operating in FAN mode.
(20-28 C/68-82 F)
(Model dependent)
Η ταχύτητα του ανεμιστήρα δεν
μπορεί να ρυθμιστεί όταν έχουν
επιλεχθεί οι λειτουργίες AUTO
(Αυτόματη) και DRY (Αφύγρανση).
Ένδειξη ECO
Εμφανίζεται όταν η
λειτουργία ECO ενεργο-
ποιηθεί
Ένδειξη GEAR
Εμφανίζεται όταν η λειτουρ-
γία GEAR ενεργοποιηθεί
Ένδειξη LOCK
Εμφανίζεται όταν η
λειτουργία LOCK ενεργο-
ποιηθεί
Ένδειξη Temperature/
Timer/Fan
Απεικονίζει την προεπι-
λεγμένη θερμοκρασία,
την ρύθμιση ταχύτητας
ανεμιστήρα ή τις ρυθμί-
σεις χρονοδιακόπτη όταν
ο τελευταίος έχει ενεργο-
ποιηθεί / απενεργοποιη-
θεί (TIMER ON/ OFF).
• Θερμοκρασιακό εύρος:
16°C-30°C / 60°F-86°F
• Εύρος ρύθμισης χρονο-
διακόπτη:
0-24 ώρες.
• Ταχύτητα ανεμιστήρα:
AU-100%
Η οθόνη αυτή παραμένει
κενή όταν η συσκευή έχει
ρυθμιστεί σε λειτουργία
ανεμιστήρα (FAN).
Σημείωση:
Όλες οι ενδείξεις που φαίνονται στην εικόνα παρέχονται για αποσαφήνιση. Στη διάρκεια της
λειτουργίας εμφανίζονται μόνο τα σύμβολα των σχετικών λειτουργιών στην οθόνη.
MODE
How to Use Basic Functions
AUTO Mode
COOL or HEAT Mode
DRY Mode
Select AUTO mode Set your desired temperature
NOTE:
1. In AUTO mode,
the unit will automatically select the COOL, FAN, or HEAT function based on
the set temperature.
2. In AUTO mode, fan speed can not be set.
Turn on the air conditioner
Select DRY mode Set your desired temperature Turn on the air conditioner
FAN Mode
Select FAN mode Turn on the air conditioner
Select COOL/HEAT mode Set the temperature Turn on the air
conditioner
Set the fan speed
Set the fan speed
NOTE: In DRY mode, fan speed can not be set since it has already been automatically controlled.
NOTE: In FAN mode, you can’t set the temperature. As a result , no temperature displays in remote screen.
Before operation, please ensure the unit is plugged in and power is available.
ATTENTION
MODE
MODE
MODE
MODE
How to Use Basic Functions
AUTO Mode
COOL or HEAT Mode
DRY Mode
Select AUTO mode Set your desired temperature
NOTE:
1. In AUTO mode,
the unit will automatically select the COOL, FAN, or HEAT function based on
the set temperature.
2. In AUTO mode, fan speed can not be set.
Turn on the air conditioner
Select DRY mode Set your desired temperature Turn on the air conditioner
FAN Mode
Select FAN mode Turn on the air conditioner
Select COOL/HEAT mode Set the temperature Turn on the air
conditioner
Set the fan speed
Set the fan speed
NOTE: In DRY mode, fan speed can not be set since it has already been automatically controlled.
NOTE: In FAN mode, you can’t set the temperature. As a result , no temperature displays in remote screen.
Before operation, please ensure the unit is plugged in and power is available.
ATTENTION
MODE
MODE
MODE
/