QUICKGUIDE P-3521 MFP/P-4020 MFP/P-4025w MFP
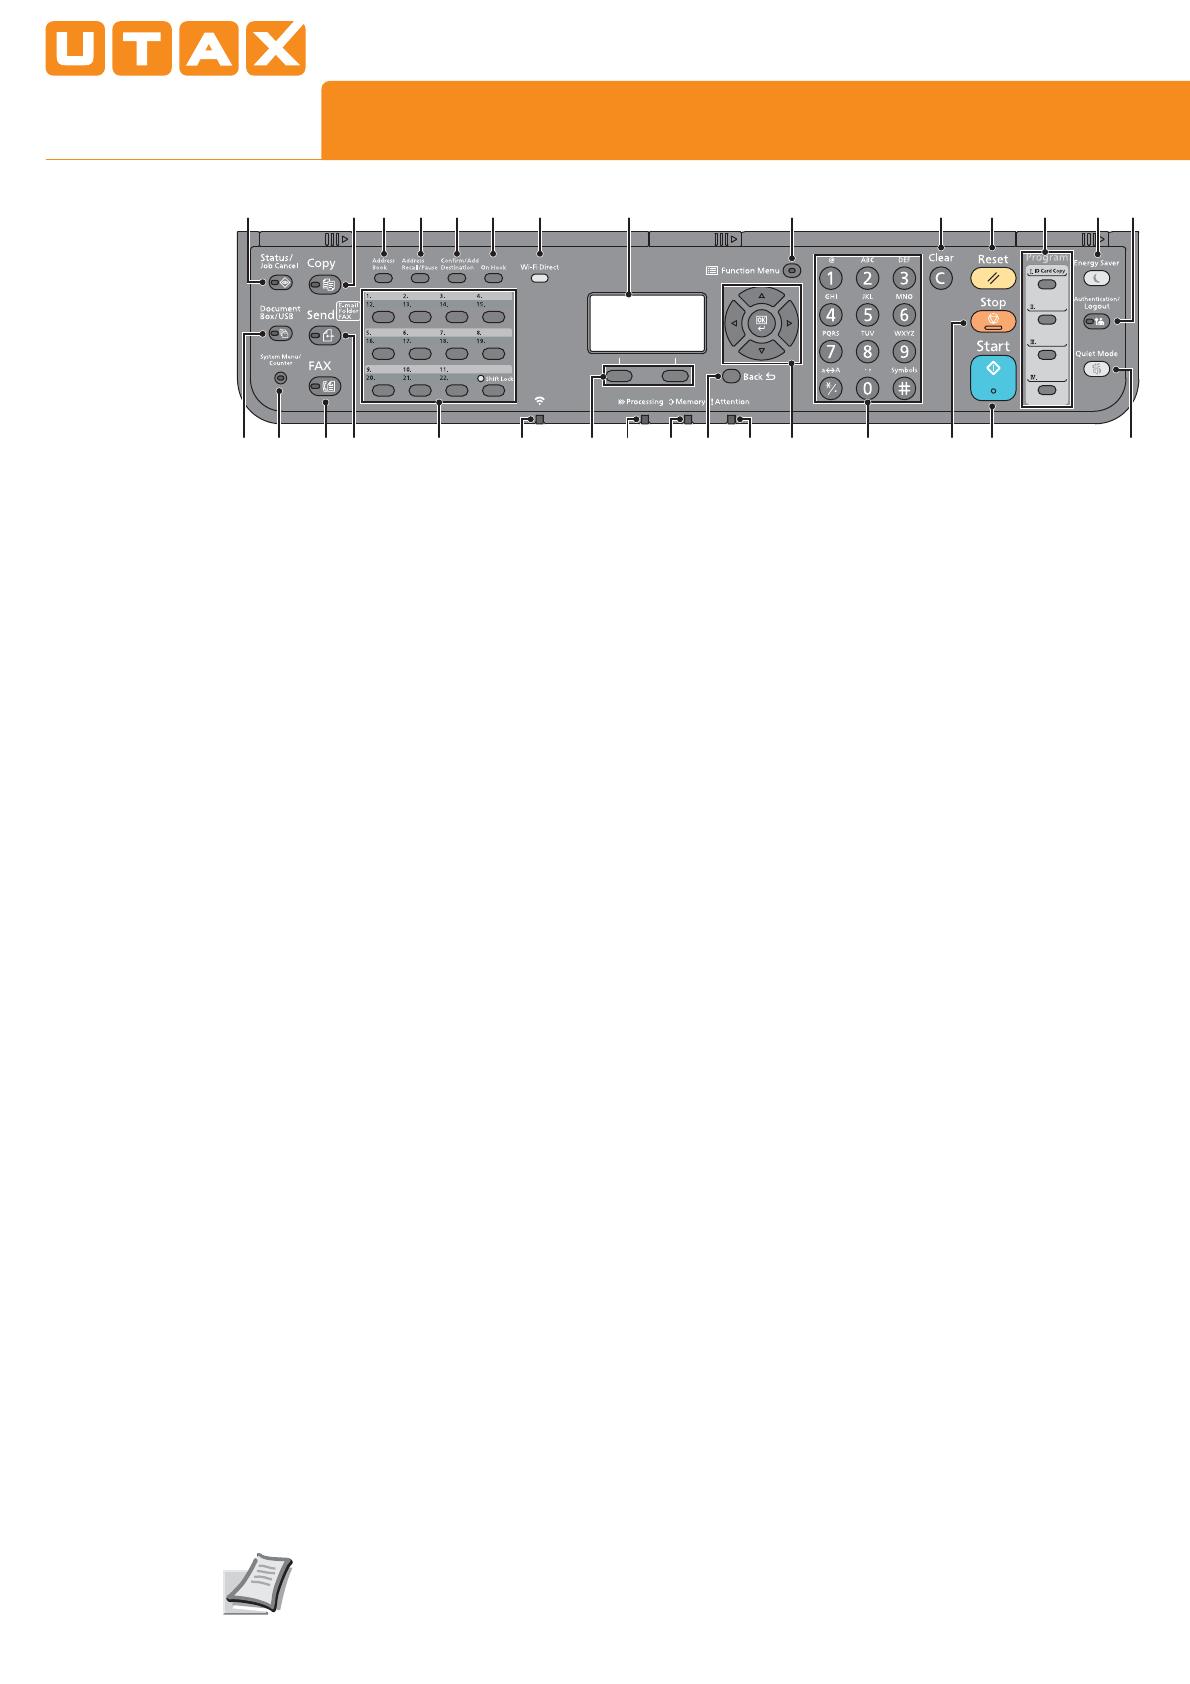
Operation panel
Depending on the model in use not all
functions are available.
For more details refer to the Operation
Guide on the co-packed DVD.
1 [Status/Job Cancel] key: Displays the
Status/Job Cancel screen.
2 [Document Box/USB] key: Displays the
Document Box/USB screen.
3 [System Menu/Counter] key: Displays the
System Menu/Counter screen.
4 [FAX] key: Displays the FAX screen.
5 [Send] key: Displays the screen for
sending. You can change it to display the
Address Book screen.
6 One Touch keys: Recalls the destination
registered for One Touch Keys.
7 [Wi-Fi] indicator: Blinks during Wi-Fi
connection.
8 Select keys: Selects the menu displayed at
the bottom of the message display.
9 [Processing] indicator: Blinks while printing
or sending/receiving.
10 [Memory] indicator: Blinks while the
machine is accessing the machine memory
or fax memory.
11 Message display: Displays the setting
menu, machine status, and error
messages.
12 [Wi-Fi Direct] key: Set Wi-Fi Direct, and
show information necessary for connection
and the connection status.
13 [On Hook] key: Switches between on-hook
and off-hook when manually sending a
FAX.
14
the destination or adds a destination.
15 [Address Recall/Pause] key: Calls the
previous destination. Also used to enter a
pause when entering a FAX number.
16 [Address Book] key: Displays the Address
Book screen.
17 [Copy] key: Displays the Copy screen.
18 [Function Menu] key: Displays the function
menu screen.
19 [Back] key: Returns to the previous
display.
20 [Attention] indicator: Lights or blinks when
an error occurs and a job is stopped.
21 Arrow keys: Increments or decrements
numbers, or selects menu in the message
display. In addition, moves the cursor when
entering the characters.
22 [OK] key: Finalizes a function or menu, and
numbers that have been entered.
23 Numeric keys: Enter numbers and symbols.
24 [Stop] key: Cancels or pauses the job in
progress.
25 [Start] key: Starts copying and scanning
operations and processing for setting
operations.
26 [Quiet Mode] key: Lower speed for quiet
processing.
27 [Authentication/Logout] key: Authenticates
user, and exits the operation for the current
user (i.e. log out).
28 [Energy Saver] key: Puts the machine
into Sleep Mode. Recovers from Sleep if in
Sleep Mode.
29 Program keys: Used to register or recall
programs.
30 [Reset] key: Returns settings to their
default states.
31 [Clear] key: Clears entered numbers and
characters.
1213 11 18 31 30 29 28 2714151617
23 764 5 8 9 10 19 20 21,22 23 24 25 26
1


