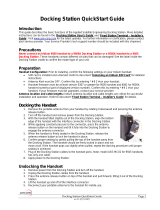
DriveDOCK Extreme
Quick Start Guide
BEAM Communications Pty Ltd
DriveDOCK Extreme Installation set up
www.beamcommunications.com
PART #: USRQSG007102
GREEN
BROWN
BLUE
1
1
2
3
4
2
3
4
5
6
7
8
9
10
11
12
13
14
Latch button
Docking Latch
Feature buttons
Mini USB port
5
Intelligent handset
7
8
9
10
STATUS indicator
Antenna Connector
GPS connector
Horn Alert / Audio
System Mute
11
Alert loop IN/OUT
14
Mic connector
6
Privacy handset
12
DC power
GME
SPK07
13
Speaker connector
* Optional accessory (Alert button)* Optional accessory
* Optional accessory
Driv eDOCK E xtreme
PRESS
Dri veD OCK Ex tre me
1
4
7
*
9
6
3
8
0
#
5
2
ABC
GHI
JKL
MNO
PQRS
TUV
+
[
WXYZ
a
A
DEF
PRESS
Intelligent Handset:
• Mountthehandsetcupinasuitableposition
• ConnecttheIntelligenthandsetRJ45connector
intotheRJ45socketatthebaseoftheDriveDOCK
Extreme
• Intelligenthandsetmodeisactivewheneverthe
handsetisremovedfromthecup
Options
Tracking & Alert
Tracking&alertrequirestheGPSantennaandsetupof
thetrackingand/oralertingmessagesinEagleandinthe
IridiumExtremeHandset.
External Alert Loop Button:
ConnectaNormally-CLOSEDbutton,totheBrownand
Greenwires(itcanbeextendedforlongerruns).
TheloopneedstobeOPEN(pressbutton)for2secondsto
activateAlert(SOS)mode.
Privacy Handset:
• Mountthehandsetcuptothemountingplate.
• Mountthespacerplateandthemountingbracket,by
usingthelongerscrewsprovidedwiththekit.(Re-
installedtheRAMarm-bracketbehindtheseplates).
• ConnectthePrivacyHandset3.5mmplugintothe
socketatthebaseoftheDriveDOCKExtreme
• PrivacyHandsetmodeisactivewheneverthe
handsetisremovedfromthecup.
BEAM Communications Pty Ltd
8 Anzed Court, Mulgrave
Victoria, 3170, AUSTRALIA
Tel: +61 3 8588 4500
Fax: +61 3 9560 9055
Info: info@beamcommunications.com
Support: suppor[email protected]
www.beamcommunications.com

1. At the base of the Iridium Extreme
handset there is an accessory
connector cover. Open the cover
and move it to the back of the
handset, securing it to the two rear
retaining features.
2. Press down the latch button and
then gently rotate it up to open
the latch. Place the Iridium Extreme
handset into the DriveDOCK Extreme.
3. Lift the latch back over the handset
until it Click’s into place.
“CLICK”
1. To remove the handset, first
press the eject button and then
rotate the latch up away from the
handset. The handset can now be
slid up and out of the DriveDOCK.
Refit the accessory connector
cover to maintain the IP rating of
the Iridium Extreme handset.
1. Attach one pivot base to the rear of
the DriveDOCK Extreme using the
M4 screws and washers supplied.
2. Secure the second pivot base to
the location you have selected for
mounting the DriveDOCK Extreme.
(Screws not supplied)
3. Use the interconnecting arm of
the RAM® mount to secure the
DriveDOCK Extreme to the pivot
base and tighten into the desired
location rmly using the wing nut
on the arm.
Inserting and Ejecting Extreme Handset
Inserting:
Removing:
Iridium Antenna Connection
The antenna connections exit from the rear of the
DriveDOCK Extreme cradle, via the antenna loom. There
are two RF connections required, the Satellite TNC
Female Connector and GPS SMA Female connector.
Refer to the antennas installation guide for antenna
mounting and location requirements.
WARNING
DO NOT pull with force on the cables from the rear of
the DriveDOCK. Please install strain relief clamping for
the antenna cables where required.
Correct installation of the antenna system is a vital
part of the DriveDOCK DRIVE system, to ensure reliable
functionality, and drop-free calls.
Mounting Cradle
The DriveDOCK Extreme is supplied with a universal RAM® mount bracket that enables mounting to any at surface
(vertical or horizontal) within a vehicle, or other required location.
DriveDOCK Extreme Front Panel
LOCATION BUTTON MODE ACTION LED/SOUND
Mute press
On/o
In a Call:
Mute the microphone (uplink) on the Hands-free,
optional privacy handset, or optional Intelligent
Handset
LED turns RED Muted
LED turns OFF
Not muted
OR
Up/Down In a Call:
Increase/decrease volume on the audio device in use
Audio will sound louder/quieter with each press.
Out of Call or Incoming Ring:
Increase/decrease volume of incoming ring tone on
the external or internal speaker. (The lowest setting will
silence the Ringer)
A beep will sound indicating the increased/decreased
ring tone volume of the external or internal speaker –
whichever is currently set by the Ring (Bell) button.
Brightness Mode:
Increase/decrease the LED intensity
All Button LEDs will be increased/decreased with each
press.
+
Brightness - dual
button simultaneous
press (2 seconds)
Out of Call:
Enter LED brightness change mode. Then Press UP and/
or DOWN arrows to vary intensity.
Mode will automatically exit after 5 seconds after the
last button press.
Status LED ashes YELLOW 3 times and all Button LED’s
will change WHITE. A single beep will sound when
entering brightness change mode.
A short double beep will sound when exiting change
mode.
Ringer
Single Press
Not in Call:
Cycle through the ring tones and the output device
(internal buzzer and external speaker). The last Ringer
type sounded is then saved.
Ring tone playback and the output device changes.
LED FLASHING (Fast) BLUE when Ring Tone is sounded.
Single Press
(no beep sound)
When Bluetooth is OFF:
Turns ON Bluetooth function
LED changes from OFF to FAST FLASHING in BLUE
when searching Bluetooth device(s). LED turns solid
BLUE when connected
If Bluetooth connected but NOT used in Call:
Transfer the audio to the Bluetooth device
LED changes from Solid BLUE to SLOW FLASHING in
BLUE
Bluetooth Device being Used in Call:
Transfer the audio to HF mode, or Privacy/Intelligent
handset if activated
LED changes from Slow Flashing to solid BLUE
Single Press 1.5 sec
(until 1 beep sounds)
Bluetooth function is ON:
Turns OFF Bluetooth function LED turns OFF
Single Press 5 sec
(until 2 beep sounds)
Bluetooth function is ON:
Bluetooth is set to discovery mode for pairing to
Bluetooth devices
LED is FAST FLASHING ORANGE and BLUE, and then
turns solid BLUE when paired and connected.
Single Press 10sec
(until 3 beep sound)
Bluetooth is ON or OFF: Clear all paired Bluetooth
devices and turn o Bluetooth function LED turns OFF
Single Press
(until 1 beep sounds)
In Tracking Mode*:
Send a Quick GPS message to the pre-congured
destination in the Extreme Handset
LED ashes GREEN for 5 seconds.
A beep will sound to indicate that a tracking message
is to be sent#
Single Press 5sec
(until 2 beeps
sound)
Enables / Disables Track button LED Solid GREEN is enabled, LED OFF is disabled
* This action is optional, and only when tracking for your Extreme Handset is congured and activated. Using the Track button only initiates the
command to send a Quick GPS message - check that the Extreme Handset is congured correctly.
# A beep will only sound if audible alerts are enabled in Eagle
-
 1
1
-
 2
2
Beam PTTGNG-C1 Quick start guide
- Type
- Quick start guide
- This manual is also suitable for
Ask a question and I''ll find the answer in the document
Finding information in a document is now easier with AI
Related papers
Other documents
-
WiebeTech Forensic Notebook DriveDock v4 User manual
-
WiebeTech USB DriveDock v5 User manual
-
WiebeTech NBDDV4 User manual
-
 ASE 9505A Quick start guide
-
WiebeTech Field Kit B-6 User manual
-
Eagle Arion ET-AR304-BK User manual
-
Eagle arion ET-AR302-BK User manual
-
Eagle Arion ET-AR506-BK User manual
-
QUIKCELL Drive Dock Universal 3-in-1 Car Mount User guide
-
 TDCom IRITRACK Quick Start Quide


