Page is loading ...

0046-M570-O1 Rev A IBFL500 ASSEMBLY INSTRUCTIONS
1
IB Series
Model IBFL500
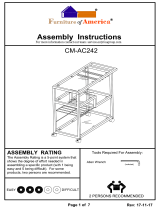
Assembly Instructions
203 E. Daugherty, Webb City, MO 64870 USA
0046-M570-O1 Rev A
Ph: 417-673-4631 Fax: 417-673-2153
Printed in USA
02/13
www.detectocom

0046-M570-O1 Rev A IBFL500 ASSEMBLY INSTRUCTIONS
2

0046-M570-O1 Rev A IBFL500 ASSEMBLY INSTRUCTIONS
1
INTRODUCTION
Thank you for purchasing our DETECTO™ IB Series Model IBFL500 in-bed scale. It has been
manufactured with quality and reliability and has been assembled and tested before leaving
our factory to insure accuracy and dependability for years to come.
This manual is provided to guide you through the assembly of your scale. Please read it
thoroughly before attempting to assemble your scale and keep it handy for future reference.
COPYRIGHT
All rights reserved. Reproduction or use, without expressed written permission, of editorial or
pictorial content, in any manner, is prohibited. No patent liability is assumed with respect to
the use of the information contained herein.
DISCLAIMER
While every precaution has been taken in the preparation of this manual, the Seller assumes
no responsibility for errors or omissions. Neither is any liability assumed for damages resulting
from use of the information contained herein. All instructions and diagrams have been
checked for accuracy and ease of application; however, success and safety in working with
tools depend to a great extent upon the individual accuracy, skill and caution. For this reason
the Seller is not able to guarantee the result of any procedure contained herein. Nor can they
assume responsibility for any damage to property or injury to persons occasioned from the
procedures. Persons engaging the procedures do so entirely at their own risk.
DANGER! NOT A PATIENT TRANSPORT DEVICE!
This scale is NOT intended for use in transporting patients! It is to be
used ONLY for weighing a patient. Failure to observe this warning may
result in serious injury to the patient and/or the scale operator.
PRECAUTIONS
Before beginning assembly of this scale, read this manual and
pay special attention to all "NOTIFICATION" symbols:
IMPORTANT:

0046-M570-O1 Rev A IBFL500 ASSEMBLY INSTRUCTIONS
2
ASSEMBLY INSTRUCTIONS
The IB Series Model IBFL500 in-bed scale is shipped disassembled in two (2) separate
cartons. Carefully inspect all cartons for damage that may have taken place during shipment.
It is the responsibility of the purchaser to file all claims with the shipping company for damages
or loss incurred during transit.
Packing Checklist
NOTE: All nuts, bolts or screws are already in position on the scale and “finger tight”. No
hardware is package separately. Contents of cartons should include:
Item Description
Part Number
Qty
Carton 1
Base Assembly
0046-D533-1A
1
Column Weldment
0046-D547-0A
1
Carton 1 – Inner Upper Section
Boom Assembly
0046-C279-0A
1
Hydraulic Cylinder
6540-1119
1
Indicator / Handle Assembly
0046-B549-1A
1
Stretcher Cup
0046-B005-08
1
Anti-Swing Bar
0046-B518-08
2
0.5 ml Capsule, Loctite®
6560-1046
1
Indicator
Model 750
1
Carton 1 – Inner Lower Section
Stretcher Hoop
0046-D261-08
2
Carton 2
Stretcher Support Bars
0046-C248-08
2
Stretcher
0046-C247-08
1
The capsule of Loctite® is in a plastic bag taped to the Boom Assembly.
Tools Required
The following tools are required to assemble the IB Series Model IBFL500 in-bed scale:
1/2" drive ratchet wrench
1/2” drive 15/16” and 3/4” standard socket
15/16”, 1/2" and 7/16" wrench (open end, box end, or combination)
5/16” and 3/16” Allen wrench
Small Flat Blade Screwdriver

0046-M570-O1 Rev A IBFL500 ASSEMBLY INSTRUCTIONS
3
Unpacking
IMPORTANT: UNPACKING AND ASSEMBLY OF THIS PRODUCT REQUIRES
TWO PEOPLE. PLEASE READ THROUGH THE INSTRUCTIONS CAREFULLY
BEFORE STARTING TO ASSEMBLE THE SCALE.
Remove the shipping straps and packing material to unpack the IB Series Model IBFL500
in-bed scale. Check the parts against the PACKING CHECKLIST. If any are damaged or
missing, please contact our Parts Department at 1-800-641-2045 or by email at
NOTE: Leave the shipping straps and packing material on the Boom
Assembly until instructed to remove it in Step 7.
Carton 1 – Inner Upper Section
Carton 1
Carton 2
Carton 1 – Inner Lower Section

0046-M570-O1 Rev A IBFL500 ASSEMBLY INSTRUCTIONS
4
Step 1 – Prepare the Base Assembly
1. With the help of an assistant, remove the
Column Assembly from Carton 1.
Remove Column Assembly
2. Next, remove the plastic bag and packing
from the Base Assembly in Carton 1.
Remove Plastic Bag and Packing
3. Again, with the help of an assistant, remove
the Base Assembly from the Carton 1.
Remove Base Assembly
4. Set the brakes on the rear wheels.
Set Brakes on Rear Wheels
Push
Down
Brake

0046-M570-O1 Rev A IBFL500 ASSEMBLY INSTRUCTIONS
5
Step 2 – Install Column Assembly
1. Remove
the 5/8-11 elastic stop nut and 5/8-11 x 3 1/2” hex head bolt in the top of the
base assembly.
2. Next, then turn the base over (upside down) and remove
the 5/8-11 elastic stop nut and
5/8-11 x 3 1/2” hex head bolt in the bottom of the base assembly.
Use the 1/2” drive ratchet with the 15/16 socket and 15/16” wrench if needed.
Remove Top Bolt from Base, then turn over to remove Bottom Bolt from Base
3. Place the Column Assembly into the rectangular opening of the base assembly until it
stops. NOTE: The opening in the base assembly is angled back away from the leg
assemblies of the base. The column assembly must be inserted at an angle and then
slid into the opening.
4. Install
the 5/8-11 x 3 1/2” hex head bolt and 5/8-11 elastic stop removed in step 1 in
the top hole of the base assembly.
5. Next, turn the base on its side and install
the 5/8-11 x 3 1/2” hex head bolt and 5/8-11
elastic stop removed in step 2 in the bottom hole of the base assembly.
Use the 1/2” drive ratchet with the 15/16 socket and 15/16” wrench to tighten.
Rectangular opening in Base
Install Top Bolt and Nut
Insert Column at an angle
Turn base on its side and
install Bottom Bolt and Nut

0046-M570-O1 Rev A IBFL500 ASSEMBLY INSTRUCTIONS
6
Step 3 – Install Stretcher Cup
1. Remove the 1/4-20 x 1/2” hex head bolt from the Stretcher Cup mounting bracket. Use
the 7/16 wrench if needed.
2. Place the Stretcher Cup on the mounting bracket, align the center hole in the cup with
the hole in the mounting bracket and secure with the 1/4-20 x 1/2” hex head bolt. Use
the 7/16 wrench to tighten.
Remove mounting bolt Use center mounting hole Stretcher Cup Installed
Step 4 – Install Boom Assembly
1. Remove the 1/2-13 elastic stop nut and 5/8” split lock washer from the 5/8 x 2 1/2”
shoulder bolt in the column assembly and then slide the bolt out of the column assembly.
Use the 1/2” drive ratchet with the 3/4” socket and 5/16” Allen wrench if needed.
2. With the help of an assistant, place the Boom Assembly between the mounting plates of
the column assembly and align the hole in the boom assembly with the holes in the
column assembly mounting plates.
3. Insert the 5/8 x 2 1/2” shoulder bolt removed in step 1 through the hole in the mounting
plate of the column assembly. Next, install the 5/8” split lock washer and 1/2-13
elastic stop nuts removed in step 1 and tighten. Use the 1/2” drive ratchet with the
3/4” socket and 5/16” Allen wrench to tighten.
Remove Bolt from Column
Have an assistant hold the Boom
Assembly while inserting the bolt

0046-M570-O1 Rev A IBFL500 ASSEMBLY INSTRUCTIONS
7
Step 5 – Install Hydraulic Cylinder
1. Lower the boom assembly and remove the 5/16-18 elastic stop nut and 3/8” split lock
washer from the 5/16-18 x 1/2” socket head shoulder bolt in the boom assembly, then
slide the bolt out of the boom assembly. IMPORTANT: Note the location of the bolt in
the cylinder mounting plate; it must be re-installed in the same location. Use the 1/2”
wrench and 3/16” Allen wrench if needed.
2. While the assistant is holding the boom assembly up, place the shaft end of the hydraulic
cylinder (end with the hole) between the cylinder mounting plates in the boom assembly
and then align the hole in the shaft with the holes in the mounting plates.
3. Insert the 5/16-18 x 1/2” socket head shoulder bolt into the hole (where it was removed
in step 1) in the mounting plate, through the cylinder shaft and out the mounting plate.
Next, install the 3/8” split lock washer and 5/16-18 elastic stop nut removed in step 1
and tighten. Use the 1/2” wrench and 3/16” Allen wrench to tighten.
4. Next, align the ball end of the hydraulic cylinder with the ball socket on the column
assembly and insert the ball into the socket. Tighten the cylinder nut to hold in place.
Hand-tighten only.
Note original location of Bolt
Remove Bolt, Washer & Nut
Bolt installed in
correct location
Align ball end with ball socket
Hand-tighten only!

0046-M570-O1 Rev A IBFL500 ASSEMBLY INSTRUCTIONS
8
Step 6 – Install Push Handle
1. Remove the (4) 1/4-20 x 1/2” hex head bolts
(two on each side) from the column assembly.
Use the 7/16” wrench if needed.
Remove Push Handle Bolts
2. Place the Push Handle on the column
assembly (the opposite direction of the legs)
and align the top hole in the handle mounting
bracket with the top hole in the column
assembly. Insert a 1/4-20 x 1/2” hex head bolt
through the hole and finger tighten.
3. Align the bottom hole in the handle bracket
with the bottom hole in the column assembly
and insert a 1/4-20 x 1/2” hex head bolt
through the hole and finger tighten.
4. Repeat steps 2 and 3 for the push handle bolts
on the other side of the column assembly.
5. Completely tighten all bolts to secure the push
handle to the column assembly. Use the 7/16”
wrench to tighten.
Tighten all Push Handle Bolts
Install top Bolt and finger tighten.
Next, install bottom Bolt and finger
tighten. Repeat for other side.

0046-M570-O1 Rev A IBFL500 ASSEMBLY INSTRUCTIONS
9
Step 7 – Install Stretcher Support Hoops
1. Remove the shipping straps and packing on the boom assembly and load cell tube.
2. Remove the outer (2) 1/4-20 x 1/2” socket head screws on the end of load cell tube.
Next, loosen the single inner 1/4-20 x 1/2” socket head screw enough to rotate the hoop
retainer plate to one side. Use the 3/16”Allen wrench if needed.
3. Align the hole in the stretcher support hoop with the hoop support hook on the load cell
tube and place on the support hook.
Remove Packing & Straps
Packing & Straps Removed
Remove outer 2 Screws
Loosen inner Screw
Rotate Hoop Retainer Plate
Align hole in Stretcher Hoop
with Support Hook
Stretcher Hoop Installed

0046-M570-O1 Rev A IBFL500 ASSEMBLY INSTRUCTIONS
10
Step 7 – Install Stretcher Support Hoops, Cont.
4. Rotate hoop retainer plate until two outer holes align with the holes in the load cell tube.
5. Remove Loctite® from plastic bag and follow instructions on bag to prepare Loctite®.
6. Apply a small amount of Loctite® to the threads of the (2) 1/4-20 x 1/2” socket head
screws removed in step 2.
7. While slightly lifting the hoop, insert the screws through the holes in the hoop retainer
plate and finger tighten.
8. Completely tighten all three screws to secure the hoop retainer plate to the load cell tube
weldment. Use the 3/16”Allen wrench to securely tighten.
9. Repeat steps 2 through 8 to install the stretcher support hoop on the other end of the
load cell tube.
Apply a small amount of
Loctite® to screw threads
Lift hoop slightly to ease
screw installation
Completely tighten all three
retainer plate screws

0046-M570-O1 Rev A IBFL500 ASSEMBLY INSTRUCTIONS
11
Step 8 – Install the Model 750 indicator
1. Remove the indicator from its box and unpack it. Obtain and install six “AA” batteries in
the indicator.
2. Route the coiled load cell cable from the boom assembly around the boom and down
through the indicator mounting bracket between the bracket supports.
3. Turn the indicator face down (display away from you). Locate the 9-pin load cell
connector on the bottom rear panel of the indicator. Align the long edge of the load cell
cable connector with the long edge of the indicator connector. Place the load cell cable
connector on the indicator connector and secure using the load cell cable retaining
screws. Use the small flat blade screwdriver to securely tighten.
4. Place the screw heads on the back of the indicator into the large end of the slotted
holes in the bracket. Pull down to secure the indicator. The spring plunger will lock
the indicator to the bracket.
NOTE: For more detailed information on installing the batteries, mounting
the indicator on the scale bracket and connecting the load cell cable, refer
to the 750 Owner’s Manual, 8555-M483-O1.
Install load cell cable and
secure with cable
connector retaining screws
Align screw heads with large end
of slotted holes and pull down to
secure indicator
Route cable around boom...
and down through bracket

0046-M570-O1 Rev A IBFL500 ASSEMBLY INSTRUCTIONS
12
Step 9 – Install the Stretcher
1. Remove the pre-assembled Stretcher and Support Bars from Carton 2 and then unroll
the stretcher.
2. NOTE: The stretcher support bars may have moved in the stretcher during shipment.
Make sure the holes in the stretcher support bars are aligned with the opening in the
stretcher and towards the edge of the stretcher. In addition, check that the Velcro® tabs
on the end of the stretcher are closed to seal the stretcher support bars in.
3. The stretcher attaches to the stretcher support hoops by inserting the hooked ends
through the four holes in the stretcher support bars.
4. For transport and storage, store the stretcher in the Stretcher Cup at the base of the
scale and secure to the column assembly with the Velcro® straps. Secure the stretcher
support hoops to the column using the Anti-Swing Bars, attaching the rear anti-swing
bar to the cylinder with the Velcro® strap.
Remove Stretcher from box
and then unroll the stretcher
Insure support bars holes are
aligned with stretcher openings
Anti-Swing
Bars
Store stretcher in stretcher
cup when not in use
Attach stretcher to hooked ends
of support bars

0046-M570-O1 Rev A IBFL500 ASSEMBLY INSTRUCTIONS
13

0046-M570-O1 Rev A IBFL500 ASSEMBLY INSTRUCTIONS
14
/