Invacare 1085144 User manual

Category
Networking
Type
User manual

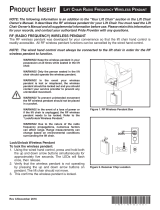
Invacare 1085144, a replacement kit for your Reliant Bath Lift (RBL250), offers enhanced functionality and safety features to improve your bathing experience. It includes a new pendant with an ergonomic design for easy operation, a sturdy cable for reliable power transmission, and an updated current limit device for added protection against electrical hazards. With this kit, you can enjoy a safer and more convenient bathing experience in the comfort of your own home.

Invacare 1085144, a replacement kit for your Reliant Bath Lift (RBL250), offers enhanced functionality and safety features to improve your bathing experience. It includes a new pendant with an ergonomic design for easy operation, a sturdy cable for reliable power transmission, and an updated current limit device for added protection against electrical hazards. With this kit, you can enjoy a safer and more convenient bathing experience in the comfort of your own home.

1
1. Secure the frame to the floor with the suction cups or by
standing on the frame base during removal of the seat.
2. Press the UP button on the pendant to raise the
seat all the way up (DETAIL "A").
3. Grasp the handgrip on the battery pack and pull
upwards to remove it from the motor shroud as
shown in DETAIL "B".
4. Press and hold the spring loaded chair release
button to release the seat (DETAIL "C").
5. While holding the button with one hand, grasp the
seat bottom firmly with your other hand.
6. Slide the seat up until the slide block disengages from
the groove in the frame as shown in FIGURE 1.
7. Grasp the handgrip on the battery pack and push
downwards to install onto the motor shroud.
8. Press the DOWN button on the pendant to lower
the bath lift to the lowest position (DETAIL "A").
9. If necessary, remove the bath lift frame from the
bathtub. Refer to
REMOVING THE FRAME FROM
THE BATHTUB in this instruction sheet.
FIGURE 1 - REMOVING THE SEAT
Frame
Groove
Seat Bottom
Slide
Block
LIFT THE SEAT
é
STEPS 5-6
Down Button
Up
Button
Pendant
DETAIL "A"
STEPS 1 AND 8
PULL UP TO REMOVE
é
PUSH DOWN TO
INSTALL
Battery Pack
ê
DETAIL "B"
STEPS 2 AND 7
Motor
Shroud
Handgrip
Spring Loaded Chair Release Button
Recess
Seat
DETAIL "C"
STEP 4
NOTE: Check all parts for shipping damage. In case of dam-
age, DO NOT use. Contact your Dealer for further instruction.
SAFETY SUMMARY
The following recommendations are made for the
safe replacement of the PENDANT/CABLE/CUR-
RENT LIMIT DEVICE:
GENERAL WARNINGS
DO NOT install or use this equipment without
first reading and understanding this instruc-
tion sheet. If you are unable to understand
the Warnings, Cautions or Instructions in this
Instruction Sheet and in the Owner's Operat-
ing and Maintenance Manual (Part No.
1081003) provided with the Bath Lift, contact
a healthcare professional, dealer or techni-
cal personnel before attempting to install this
kit, otherwise, injury or damage may occur.
This kit MUST be installed by an Invacare
Dealer or technical personnel.
INSTALLATION WARNINGS
After ANY adjustments, repair or service and
BEFORE use, make sure all attaching hard-
ware is tightened securely - otherwise injury
or damage may occur.
Use proper lifting techniques to avoid in-
jury. Keep back straight and bend knees
when lifting components of the bath lift.
REPLACING THE PENDANT/CABLE/
CURRENT LIMIT DEVICE
NOTE: Refer to the INSTALLATION WARNINGS in the
SAFETY SUMMARY of this instruction sheet.
Removing the Seat (FIGURE 1)
WARNING
To prevent pinching injury between seat
back and motor shroud when removing/
installing the seat, DO NOT grasp seat any-
where other than at the recess at the top
(DETAIL "C"), the opening at the bottom of
the seat or the lip at the top of the seat.
To prevent frame from tipping when remov-
ing seat, either suction the frame to the floor
or place one foot on the frame base when
removing/installing the seat.
CAUTION
The bath lift seat MUST be removed from the
top of the lifting cycle, otherwise, damage
to the unit may occur.
DO NOT grasp seat by side flaps, otherwise
damage to the bath lift or the bathtub may
occur.
Reliant Bath Lift (RBL250)
Pendant/Cable/Current Limit Device Replacement Kit
Assembly, Installation and Operating Instructions
Kit No. 1085144
2
FIGURE 2 - REMOVING THE FRAME FROM
THE BATHTUB
TILT FRAME
FORWARDS
Frame
Bathtub
Suction Cup
Loop
Suction
Cup
Self-Locking
Screws
(STEP 2)
Mounting Screw
(STEP 2)
Washer
(STEP 2)
Washers
(STEP 2)
Motor Shroud
(STEP 3)
FIGURE 3 - REMOVING THE MOTOR
SHROUD
CAUTION
The motor shroud is still connected to the
motor by the spade connectors and pen-
dant cable. DO NOT attempt to forcibly
separate the motor shroud from the mo-
tor. Otherwise - damage to the motor
shroud and/or motor may occur.
3. Carefully lift the motor shroud off of the motor.
4. Disconnect the RED and BLACK spade connec-
tor wires from the motor as shown in FIGURE 4.
5. Remove the two (2) mounting screws securing
the mounting bracket to the motor as shown in
FIGURE 4.
NOTE: Save the EXISTING two (2) mounting screws
for reuse when securing the NEW spade connector
wire and pendant cable to the motor.
6. Remove the mounting bracket and release the
spade connector wire and pendant cable as shown
in FIGURE 4.
7. Disconnect the battery connector from the motor
shroud. Refer to
REMOVING THE BATTERY
CONNECTOR in this instruction sheet.
Removing the Motor Shroud (FIGURES 3
AND 4)
WARNING
ALWAYS lower the bath lift frame to the
lowest position BEFORE performing this
procedure. Otherwise, the bath lift frame
may tip during installation resulting in in-
jury and/or damage.
WARNING
ALWAYS remove the bath lift from the bath-
tub BEFORE performing this procedure.
Otherwise - injury or damage may occur.
1. Remove the bath lift frame from the bathtub, if not
already done. Refer to
REMOVING THE FRAME
FROM THE BATHTUB in this instruction sheet.
2. Remove the mounting screw, two (2) self-locking
screws and three (3) washers securing the motor
shroud to the bath lift frame. Refer to FIGURE 3.
Removing the Frame from the Bathtub
(FIGURE 2)
WARNING
ALWAYS lower the bath lift frame to the
lowest position BEFORE performing this
procedure. Otherwise, the bath lift frame
may tip during installation resulting in in-
jury and/or damage.
CAUTION
ALL water MUST be drained from the bath-
tub BEFORE removal of the bath lift frame
to prevent damage to the bath lift frame
or suction cups.
ALWAYS release the suction cups from bath-
tub bottom BEFORE removing frame to pre-
vent damage to the frame or bathtub.
1. Remove the seat, if not already done. Refer to
RE-
MOVING THE SEAT in this instruction sheet.
NOTE: Ensure bath lift is in lowest position before pro-
ceeding.
2. Grasp the handgrip on the battery pack and pull
upwards to remove it from the motor shroud.
3. Tilt the frame forward towards the drain or gently
pull up on the suction cup loops to release the suc-
tion cups from the bathtub.
4. Remove the frame from the bathtub.
5. Remove the motor shroud. Refer to
REMOVING
THE MOTOR SHROUD in this instruction sheet.
3
Removing the Battery Connector (FIGURE 5)
1. Remove the two (2) mounting screws and nuts
securing the battery connector to the motor shroud
as shown in FIGURE 5.
2. Carefully pull the battery connector away from the
motor shroud.
3. Loosen, but do not remove the two (2) flat screws
on the battery connector to release the YELLOW
(+) and BLUE (-) wires.
4. Pull the YELLOW (+) and BLUE (-) wires through
the motor shroud.
5. Remove the current limit device. Refer to
REMOV-
ING CURRENT LIMIT DEVICE in this instruction
sheet.
Pendant
Cable
Spade Connector Wires
RED
Spade
Connector
BLACK Spade
Connector
Mounting
Bracket
Mounting Screws
Nut
Connection to
Motor Shroud
FIGURE 4 - REMOVING THE MOTOR SHROUD
- RELEASING THE CABLES
Removing Current Limit Device (FIGURE 6)
1. Remove the two (2) mounting screws and nuts se-
curing the current limit device to the motor shroud.
NOTE: EXISTING mounting screws and nuts will be
used to secure NEW current limit device to motor
shroud.
2. Remove the pendant/cable/current limit device as-
sembly.
3. Install NEW pendant/cable/current limit device as-
sembly. Refer to
INSTALLING NEW CURRENT
LIMIT DEVICE in this instruction sheet.
Mounting
Screws
(Nuts NOT
SHOWN)
Battery
Connector
BLUE (-)
Wire
YELLOW (+) Wire
Flared End
FIGURE 5 - REMOVING THE BATTERY
CONNECTOR
STEPS 1 - 2
BLUE (-)
Wire
Battery
Connector
YELLOW (+) Wire
LOOSEN
Flat Screw
(DO NOT
REMOVE)
Bare
Wire
Insulated
Wire
DETAIL "A"
STEP 3
Motor
Shroud
4
Installing the Battery Connector (FIGURE 7)
CAUTION
The BLUE (-) and YELLOW (+) wires MUST
be installed properly, otherwise, serious
damage to the electrical system of the
bath lift may occur.
1. Position the BLUE (-) wire through the FRONT hole
and the YELLOW (+) wire through the REAR hole
as shown in DETAIL "D" of FIGURE 7.
2. If necessary, loosen, but do not remove the two
(2) flat screws in the battery connector (DETAIL
"E").
3. Visually inspect the battery connector to find the
POSITIVE (+) and NEGATIVE (-) channels. Refer
to DETAIL "E" of FIGURE 7.
4. Insert the bare end of the YELLOW (+) wire into
the POSITIVE (+) channel.
CAUTION
DO NOT tighten the flat screw onto the
insulated portion of the wire. Ensure the
screw secures the bare wire ONLY.
5. Tighten the flat screw to secure the wire to the battery
connector. Refer to DETAIL "F" of FIGURE 7.
6. Repeat STEPS 4 - 5 to install the BLUE (-) wire
into the NEGATIVE (-) channel.
7. Ensure BOTH wires are securely installed in the
battery connector.
NOTE: If installed properly, the wires should not pull
out of the battery connector when gently tugged.
8. Position the battery connector on the motor shroud
with the flared end on the bottom as shown in FIG-
URE 7.
9. Align the mounting holes of the battery connector
with the mounting holes of the motor shroud.
10. Secure the battery connector to motor shroud with the
two (2) mounting screws and nuts. Tighten securely.
11. Install the motor shroud. Refer to
INSTALLING THE
MOTOR SHROUD in this instruction sheet.
Installing NEW Current Limit Device
(FIGURE 6)
1. Position the NEW current limit device on the in-
side of the motor shroud with the blue and yellow
battery connector wires towards the REAR of the
shroud and the pendant cable towards the FRONT
of the shroud as shown in FIGURE 6.
2. Align the mounting holes of the current limit device
and the motor shroud and secure with the two (2)
existing mounting screws and nuts. Tighten se-
curely.
3. Install the battery connector. Refer to
INSTALLING
THE BATTERY CONNECTOR in this instruction
sheet.
Mounting
Screws
BLUE and
YELLOW
Battery
Connector
Wires
Spade
Connector
Wires
Pendant Cable
Current Limit Device
Nuts
Motor
Shroud
FIGURE 6 - REMOVING CURRENT LIMIT
DEVICE
FRONT
REAR
5
1. Connect the spade connector wires to the motor
in the following manner:
A. BLACK spade connector wire to lower spade.
B. RED spade connector wire to upper spade.
CAUTION
DO NOT secure the pendant cable be-
yond the middle of the cable (measur-
ing from the current limit device to the
pendant), otherwise damage to the
cable may result.
.
2. Secure the pendant cable and the spade connec-
tor wire wrap to the motor with the mounting bracket
as shown in FIGURE 8.
3. Align the mounting holes of the mounting bracket and
motor and secure the mounting bracket with the two
(2) EXISTING mounting screws. Tighten securely.
4. Position the motor shroud over the motor, aligning the
mounting holes of the motor shroud and motor.
5. Install the machine screw and washer in the side
mounting hole. Tighten securely.
6. Install the two (2) self-locking screws and two (2)
washers in the front mounting holes. Tighten securely.
7. Grasp the handgrip on the battery pack and push
downwards to install it onto the motor shroud.
WARNING
To prevent frame from tipping when raising
the bath lift without the seat installed, ei-
ther suction the frame to the floor or place
one foot on the frame base.
8. Secure the frame to the floor with the suction cups or by
standing on the frame base.
9. Test the operation of the bath lift by pressing the
UP and DOWN buttons on the pendant to ensure
proper installation of the NEW pendant.
10. Perform one (1) of the following:
PROPER OPERATION - Install the bath lift
frame into the bathtub. Refer to
INSTALLING
BATH LIFT INTO THE BATHTUB in this in-
struction sheet.
IMPROPER OPERATION - If the bath lift does
not respond correctly when the pendant but-
tons are pushed (for example, the lift raises
when the DOWN button is pushed) or if it does
not work at all, repeat STEPS 1-9 making sure
the spade connectors are properly connected.
NOTE: If improper operation exists, contact
Invacare at the number on the back of this in-
struction sheet before using.
FIGURE 7 - INSTALLING THE BATTERY
CONNECTOR
DETAIL "F" - STEP 5
DETAIL "E" STEPS 2-3
TIGHTEN
Flathead Screw (DO
NOT REMOVE)
Bare
End of
Wire
Insulated
Wire
BLUE (-)
Wire
Flared End of Battery Connector
YELLOW
(+) Wire
Flat Screws
STEPS 8-10
Yellow (+) Wire
Blue (-) Wire
FRONT
Hole
REAR Hole
REAR of
Motor
Shroud
FRONT of
Motor
Shroud
DETAIL "D" - STEP 1
Mounting
Screws
(Nuts NOT
SHOWN)
Battery
Connector
BLUE (-)
Wire
YELLOW (+) Wire
Flared End
Battery
Connector
NEGATIVE
(-) Channel
POSITIVE (+)
Channel
Installing the Motor Shroud (FIGURE 8)
CAUTION
The spade connectors MUST be con-
nected to the motor as shown in FIG-
URE 8 - otherwise, the pendant will op-
erate improperly.
6
Installing the Bath Lift into the Bathtub
(FIGURE 9)
WARNING
ALWAYS lower the bath lift frame to the
lowest position BEFORE performing this
procedure. Otherwise, the bath lift frame
may tip during installation and injury or
damage may occur.
The frame MUST be placed into an
EMPTY bathtub.
1. Clean tub and wipe suction cups with a damp cloth.
2. Press the DOWN button on the pendant to lower
the bath lift to the lowest position.
3. Grasp the handgrip on the battery pack and pull
upwards to remove it from the motor shroud as
shown in FIGURE 9.
4. Place the frame into the bathtub.
5. Perform the following steps to position the frame
in the bathtub:
A. Position the rubber pads of the frame just in front of
the curve at the bottom of the back of the bathtub.
B. Install the seat. Refer to
INSTALLING THE
SEAT in this instruction sheet.
C. Position the frame to align the line on the entry/
exit side flap with the inside edge of the bathtub
as shown in DETAIL "G" of FIGURE 9.
WARNING
The frame must be positioned so that
the side flap of the seat on the entry/
exit side of the bathtub is fully sup-
ported by the side of the bathtub. The
inside edge of the bathtub MUST be
aligned with the line on this side flap.
D. Ensure the rubber pads and suction cups are
positioned flat on the bottom of the bathtub.
NOTE: Pull up on suction cup loops to release suc-
tion cups from bathtub bottom.
6. Press firmly down onto the two (2) front suction cups
to attach the frame securely to the bottom of the bath.
FIGURE 8 - INSTALLING THE MOTOR SHROUD
Mounting
Bracket
Spade Connector Wire Wrap
Pendant
Cable
Mounting Screw
STEPS 2-3
Pendant
Secure Here
DO NOT Secure Here
Current
Limit
Device
STEP 2
BLACK Spade
Connector Wire
(STEP 1)
RED Spade
Connector
Wire
(STEP 1)
Nut
Mounting
Bracket
Mounting
Screws
Pendant
Secure Pendant
Cable and Spade
Connector Wire
Wrap Together
(STEP 2)
To Current Limit
Device
STEPS 1 - 3
Mounting
Holes
Upper
Spade
STEPS 4-6
Motor Shroud
Self-locking
Screws
Washer
Machine
Screw
Washer
Motor
Lower Spade
7
Installing the Seat (FIGURE 10)
WARNING
To prevent pinching injury between seat
back and motor shroud when removing/
installing the seat, DO NOT grasp seat any-
where other than at the recess at the top,
the opening at the bottom of the seat or
the lip at the top of the seat.
To prevent frame from tipping when re-
moving seat, either suction the frame to
the floor or place one foot on the frame
base when removing/installing the seat.
CAUTION
The bath lift seat MUST be installed from
the uppermost lifting position, otherwise,
damage to the unit may occur.
DO NOT grasp seat by side flaps to avoid
damage to the bath lift or the bathtub.
1. Secure the frame to the floor with the suction cups or by
standing on the frame base.
2. Grasp the handgrip on the battery pack and push
downwards to install it onto the motor shroud.
FIGURE 9 - INSTALLING THE BATH LIFT INTO THE BATHTUB
3. Press the UP button on the pendant to raise the
bath lift to the uppermost position.
4. Grasp the handgrip on the battery pack and pull
upwards to remove it from the motor shroud.
5. Lower the seat onto the frame, ensuring that the slide
block on the back of the chair slides down the two (2)
grooves on the frame as shown in FIGURE 10.
NOTE: The seat MUST be lowered onto the frame
until the spring loaded chair release button locks in
place and an audible "click" is heard.
Down
Up
Pendant
Frame
FIGURE 10 - INSTALLING THE SEAT
LOWER
SEAT
Slide
Block
Groove
Seat
Spring Loaded Chair
Release Button
Recess
Seat
Entry/Exit
Side Flap
Position of Line
on Side Flap
Seat
Inside Edge
of Bathtub
PROPER POSITIONING OF
ENTRY/EXIT SIDE FLAP
Side Flap
Hinge
FRONT VIEW - STEPS 5C-5D
Side Flaps
Seat
Frame
Suction Cups
and Pads Flat
on Bottom of
bathtub
Bathtub
SIDE VIEW - STEPS 5A & 6
PRESS DOWN ON
SUCTION CUP
Back of
the
Bathtub
Frame
Suction
Cup
Rubber Pad
Front of the
Bathtub
(fixture end)
Suction
Cup
Loop
é
Battery Pack
Motor
Shroud
DETAIL "G"
STEP 5C
STEP 1 STEP 2
PULL UP
TO
REMOVE
LIMITED WARRANTY
PLEASE NOTE: THE WARRANTY BELOW HAS BEEN DRAFTED TO COMPLY WITH FEDERAL LAW
APPLICABLE TO PRODUCTS MANUFACTURED AFTER JULY 4, 1975.
This warranty is extended only to the original purchaser/user of our products.
This warranty gives you specific legal rights and you may also have other legal rights
which vary from state to state.
Invacare warrants its product to be free from defects in materials and workmanship for
one (1) year for the original purchaser. If within such warranty period any such product
shall be proven to be defective, such product shall be repaired or replaced, at Invacare's
option. This warranty does not include any labor or shipping charges incurred in re-
placement part installation or repair of any such product. Invacare's sole obligation
and your exclusive remedy under this warranty shall be limited to such repair and/or
replacement.
For warranty service, please contact the dealer from whom you purchased your In-
vacare product. In the event you do not receive satisfactory warranty service, please
write directly to Invacare at the address on the bottom of the page. Provide dealer's
name, address, model number, date of purchase, indicate nature of the defect and, if
the product is serialized, indicate the serial number.
Invacare Corporation will issue a return authorization. The defective unit or parts must
be returned for warranty inspection using the serial number, when applicable, as iden-
tification within thirty (30) days of return authorization date. DO NOT return products to
our factory without our prior consent. C.O.D. shipments will be refused; please prepay
shipping charges.
LIMITATIONS AND EXCLUSIONS: THE WARRANTY SHALL NOT APPLY TO PROBLEMS ARISING
FROM NORMAL WEAR OR FAILURE TO ADHERE TO THE ENCLOSED INSTRUCTIONS. IN ADDI-
TION, THE FOREGOING WARRANTY SHALL NOT APPLY TO SERIAL NUMBERED PRODUCTS IF
THE SERIAL NUMBER HAS BEEN REMOVED OR DEFACED; PRODUCTS SUBJECTED TO NEGLI-
GENCE, ACCIDENT, IMPROPER OPERATION, MAINTENANCE OR STORAGE; OR PRODUCTS
MODIFIED WITHOUT INVACARE'S EXPRESS WRITTEN CONSENT INCLUDING, BUT NOT LIM-
ITED TO: MODIFICATION THROUGH THE USE OF UNAUTHORIZED PARTS OR ATTACHMENTS:
PRODUCTS DAMAGED BY REASON OF REPAIRS MADE TO ANY COMPONENT WITHOUT THE
SPECIFIC CONSENT OF INVACARE; PRODUCTS DAMAGED BY CIRCUMSTANCES BEYOND
INVACARE'S CONTROL; PRODUCTS REPAIRED BY ANYONE OTHER THAN AN AUTHORIZED
INVACARE DEALER, SUCH EVALUATION SHALL BE SOLELY DETERMINED BY INVACARE.
THE FOREGOING WARRANTY IS EXCLUSIVE AND IN LIEU OF ALL OTHER EXPRESS WARRAN-
TIES, IF ANY, INCLUDING THE IMPLIED WARRANTIES OF MERCHANTABILITY AND FITNESS FOR
A PARTICULAR PURPOSE.
IT SHALL NOT EXTEND BEYOND THE DURATION OF THE EXPRESSED WARRANTY PROVIDED
HEREIN AND THE REMEDY FOR VIOLATIONS OF ANY IMPLIED WARRANTY SHALL BE LIMITED
TO REPAIR OR REPLACEMENT OF THE DEFECTIVE PRODUCT PURSUANT TO THE TERMS CON-
TAINED HEREIN. INVACARE SHALL NOT BE LIABLE FOR ANY CONSEQUENTIAL OR INCIDEN-
TAL DAMAGES WHATSOEVER.
THIS WARRANTY SHALL BE EXTENDED TO COMPLY WITH STATE/PROVINCIAL LAWS AND RE-
QUIREMENTS.
Invacare Corporation www.invacare.com
USA
One Invacare Way Invacare is a registered trademark of Invacare Corporation.
Elyria, Ohio USA ©
1999 Invacare Corporation
44036-2125
800-333-6900 Form No. 98-321 Part No. 1085312 Rev A (1)-1/00
  • Page 1 1
  • Page 2 2
  • Page 3 3
  • Page 4 4
  • Page 5 5
  • Page 6 6
  • Page 7 7
  • Page 8 8

Invacare 1085144 User manual

Category
Networking
Type
User manual

Invacare 1085144, a replacement kit for your Reliant Bath Lift (RBL250), offers enhanced functionality and safety features to improve your bathing experience. It includes a new pendant with an ergonomic design for easy operation, a sturdy cable for reliable power transmission, and an updated current limit device for added protection against electrical hazards. With this kit, you can enjoy a safer and more convenient bathing experience in the comfort of your own home.

Ask a question and I''ll find the answer in the document

Finding information in a document is now easier with AI