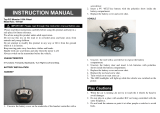
Spin Master Regenerator User manual
- Category
- Toy vehicles
- Type
- User manual

3
2
3
4
2
1
CRASH FORCE™
REGENERATOR SUV™
After
Impact!
BATTERY INSTALLATION
INSTALLING BATTERIES IN THE REGENERATOR™
Crash Force™ Regenerator™ is designed to work with standard RC 6-Volt NiCad batteries and charger,
sold separately. If you do not have a 6-Volt battery and charger, Crash Force™ Regenerator™ can operate with
Five-AA batteries. • Controller is designed to work with a 9-Volt battery, sold separately.
6 VOLT
1 - To install the
6-Volt battery, rotate
the door locks to the
sides of the battery
compartment door
as shown.
2 - Remove the battery
compartment door.
3 - Place the battery
in the battery
compartment, making
sure to follow the
correct + and –
polarity markings.
Then fold the internal
battery adjuster out,
to hold the 6-Volt
battery in tight.
4 - Replace the battery
compartment door and
rotate the door locks
to their “Lock” positions.
AA BATTERIES
1 - To install the AA
batteries, rotate the
door locks to the sides
of the door as shown.
2 - Remove the battery
compartment door
and make sure the
internal battery
adjuster is folded in,
out of the way.
3 - Place the batteries
in the battery tray
according to the + and
– polarity markings.
4 - Place the battery
tray into the battery
compartment.
5 - Replace the battery
compartment door and
rotate the door locks
to their “Lock” positions.
Turn
Vehicle
Over
Lock
Lock
Battery
Compartment
Door
1
Turn
Vehicle
Over
Lock
Lock
Battery
Compartment
Door
Battery
Compartment
Door
Battery
Compartment
Door
Five-AA
Batteries
Battery
Tray
Battery
Compartment
Door
Battery
Compartment
Battery
Compartment
6-V
Battery
Battery
Compartment
3
2
1
9-V
Battery
Phillips Screw
INSTALLING CONTROLLER
9 VOLT BATTERY
1 - Using a Phillips screwdriver, undo the
hold down screw and remove the battery
compartment door.
2 - Place the 9-Volt battery in the battery
compartment, making sure to follow the
correct + and – polarity markings.
3 - Replace the battery compartment door
and refasten the hold down screw.
IMPORTANT! PROBLEMS?
Before taking Crash Force™ Regenerator™ RC
back to the retailer, call our friendly
RC technicians at: 1-800-622-8339
STORAGE: The Crash Force™ Regenerator™
RC should be stored indoors in the box and
foam tray after each use.

2
1
TROUBLE SHOOTING
OPERATING VEHICLE
When driving Regenerator™, the most dramatic crashes are caused by head on collisions at full speed. It can take as
many as 4 hits to fully crumple Regenerator™ or as few as one, if the speed is fast enough. You can drive Regenerator™
in the crashed state, full function. When you press the Regeneration button, the car will return to its original state.
Regenerator™ can reform from a standing or moving position.
GETTING STARTED
1. Turn the “ON-OFF” switch to the
“ON” position.
2. Use Controller to move vehicle
forwards or backwards, right or left.
Be sure to turn the “ON-OFF”
switch to the “OFF” position when
finished playing with the vehicle.
BREAK-AWAY PARTS
Regenerator™ is designed with
break away doors, roof and rear
section. If you crash Regenerator™
you can dislodge these parts. To
replace, simply snap them back in
as shown. Each break-away part has
a cone shaped snap attached that
fits securely into a corresponding
hole on the vehicle.
Turn unit over
to access the
“ON-OFF”
switch
“ON-OFF”
switch
Forward or
Reverse
Right
or Left
Turns
Regenerated!
Controller
Crumpled!
Press
Regenerator™
Button
Collision!
Controller
Regenerator™
Button
Left
Door
Roof
Rear
Section
Right
Door
Add
Left
Door
Add
Right
Door
Snap
Attachment
Snap
Attachment
Snap Attachment
Snap Attachment
Add Rear Section
Add Roof
SAFETY INFORMATION
Always turn Regenerator™ off before attempting
to pick it up. Never touch the vehicle while it is
regenerating or moving. Do not place the Controller
on the ground with the button facing down.
This could cause accidental starts or erroneous
responses.
BATTERIES
Crash Force™ Regenerator comes complete
with one 9-Volt battery for the Controller and one
6-Volt rechargeable battery and charger.
IMPORTANT BATTERY INFORMATION
Battery installation should be performed by an adult. Use only batteries
recommended on this package and the instruction sheet. Be careful to install
batteries with the correct polarity as indicated. • Do not mix new and old
batteries. • Do not mix alkaline, standard, rechargeable or different types of
batteries. • Non-rechargeable batteries are not to be recharged.
• Rechargeable batteries are to be removed from the toy before being
charged. • Rechargeable batteries are only to be charged under adult
supervision. • Only batteries of the same or equivalent type as recommended
are to be used. • Exhausted batteries are to be removed from the toy.
• The supply terminals are not to be short circuited.
PROBLEM
Car will not Start.
Car does not respond to controls.
Car does not drive straight.
Spin Master Ltd.
450 Front Street West, Toronto, ON M5V 1B6 Canada
Phone: 1-800-622-8339 Fax: 416-364-8005
Web: www.spinmaster.com Email: toys@spinmster.com
©2003 Spin Master Ltd. TM Crash Force and
TM Regenerator are trademarks of Spin Master Ltd.
All Rights Reserved.
FCC Requirement. This device complies with part 15 of the FCC rules. Operation is
subject to the following two conditions: (1) this device may not cause harmful
interference; and (2) this device must accept any interference that may cause
undesired operation. Do not attempt to repair or modify this equipment.
WARNING: Changes or modifications not expressly approved by the party responsible
for its compliance could void the users authority to operate the equipment.
Assortment #40155. Item #40155.
SOLUTION
1. Power switch is off. Turn on. 2. Batteries are installed with incorrect polarities. Check the + and - markings to
make sure the batteries are properly aligned. 3. Batteries are drained. Charge batteries and/or install new batteries.
1. Controller battery is drained. Replace the 9V controller battery. 2. Vehicle is out of Range. Bring controller closer
to the vehicle. 3. Interference from surrounding electrical machinery. Bring to a wide open space.
1. Adjust the steering dial underneath the front axle, left or right, until the wheels point straight forward.
TM
-
 1
1
-
 2
2
Spin Master Regenerator User manual
- Category
- Toy vehicles
- Type
- User manual
Ask a question and I''ll find the answer in the document
Finding information in a document is now easier with AI
Related papers
Other documents
-
 Thunder Tumbler 1641331 User manual
-
Vents twinfresh solar SA-60-L Pro User manual
-
Tektronix WFM91D User manual
-
 urmet domus MT124-013 Technical Manual
-
Vents TwinFresh Comfo RB(1)-50(85) User manual
-
Vents TwinFresh Comfo RB(1)-50(85) User manual
-
Vents TwinFresh Comfo User manual
-
VENTS-US TwinFreshExpert User guide
-
Vents TwinFresh Expert RA1-50/Duo RA1-30 User manual
-
Vents TwinFresh Expert RW-30 V.2 User manual


