Page is loading ...

ANGRY AUDIO
PHONE
+1 (615) 763-3033
WEB
answers@angryaudio.com
www.angryaudio.com
ADDRESS
2000 Mallory Lane, Suite 130-42
Franklin TN 37067 USA
USER GUIDE
P/N 991021
Revision 1.1 - 4/30/2019
Guest Gizmo

1 Welcome! Safety First 2
Welcome to the world of Angry Audio,
home of the audio gadgets.
The audio world is filled with complex, high-tech gear. Much of it bristles with
seductive shapes and eye-catching lights and displays, and all of it promises to
make things sound better and open up new creative possibilities.
But in order for those products to shine, you still have to get the basics right and
sweat the details. Good audio isn’t made by one component. It’s made by getting
things right every step of the way, especially the little things.
Accordingly, every audio gadget – including the Guest Gizmo – is designed
to solve common yet critical problems, and are meticulously engineered with
performance and longevity in mind to deliver pristine audio for many years.
Our promise and guarantee.
We know you’ll love your Guest Gizmo, but sometimes things happen that defy
logic and reasoning and you just might be one of the 0.00001% who don’t. That’s
why we give you 30 days to spend some time together, you and your Gizmo, and
if you find you have irreconcilable differences during that time, we’ll buy it back.
Plus, every gadget is warrantied to be free from defects in parts and workmanship
for two full years after you purchase it. If a gadget fails within this time period,
Angry Audio will, at is discretion, repair or replace it so long as you let us know
of the failure within the warranty period and can provide proof of purchase in the
form of a dated sales receipt. You can call us at +1 615-763-3033, or reach us
online at at www.angryaudio.com/contact.
Making a good rst impression.
When you unbox your Guest Gizmo, we really hope it makes a good first
impression and that you take a moment to appreciate the lengths we’ve gone
to in order to create a “built for broadcast” product. All audio gadgets are over-
engineered to provide long-term reliability and guaranteed RFI immunity.
Some of this is apparent - such as the rugged powder-coated steel chassis - but
much of this goodness is invisible, , like the premium components used in the
audio path. Even if you can’t see it, you’ll hear it!
A word or two about safety.
Most of this falls under the category of common sense, but the one person who
endeavors to install their gadget during a thunderstorm waving a five iron in the air
and riding a unicycle (you know who you are) ruins it for everybody, so bear with
us while we appease our legal counsel.
Guest Gizmos aren’t table saws or 1950’s space heaters with frayed cloth
cords and no tip-over switch, but still, they are intended to be used by qualified
personnel only. To avoid electric shock, do not open the unit or attempt to perform
any servicing unless you are qualified to do so.
The Guest Gizmo has an external power supply. Hazardous voltages are present
within the supply and at the input of the Guest Gizmo. Voltage may still be present
on certain components even when the unit is unplugged.
The power supply cord is the primary disconnect device and so the outlet
providing power to the gadget should be easily accessible. In other words, make
sure you can back out of making any bad electrical decisions by yanking the
plug. Do not overload outlets.
Do not expose your Gizmo or its power supply to rain or moisture.
Any electronic device can fail without warning; do not use this product in
applications where a life threatening condition could result due to failure.
Do not take financial advice from that friend who constantly hits you up for money.
Do not believe everything you read in user manuals – we make a lot of this stuff
up to fill space.

3 The Guest Gizmo Explained Wall Mounng 4
Why the Guest Gizmo?
Studio guests – being human (for the most part) – will inevitably feel the need to
make some sort of undesirable noise while on the air. They cough and sniff and
clear their throats, which is almost as annoying to listeners as the over-processed
car dealer and cheap mattress commercials clogging up your stop sets.
Enter the Guest Gizmo, whose bright red “cough”
button empowers your guests to hack up as
many hairballs as they like without telegraphing
their disgusting functions to your audience.
How does it work?
Normally, the cough button on the Guest Gizmo
is illuminated a bright, easy-to-find red. When your
retching guest feels the urge, they simply depress the button which extinguishes
the light and mutes their mic via your mixer’s microphone insert jack. When they’re
once again ready to make words instead of phlegm, they release the button and
their mic unmutes.
Alternately, the Guest Gizmo can be employed as an On/Off/Cough button by
using the logic port. In this mode, when the Gizmo is OFF, both the mic and the
light are off. Pushing the button turns the Gizmo and the light back ON; however,
audio remains muted until the button is released. If the Gizmo is ON, pushing
the button immediately mutes the audio. If the button is released within 500ms of
being pressed, the Gizmo turns OFF. If the button press lasts longer than 500ms,
it will act as a momentary cough/mute button and audio will be restored when the
button is released.
If you have one of those trendy, highly-desirable mic arms with the built-in
LED, the Guest Gizmo can be wired up to illuminate the tally light. If you have a
broadcast console with built-in muting logic, the Guest Gizmo can drive it with its
dry relay contacts.
But wait - there’s more!
Every guest needs headphones, so we’ve incorporated a high-quality stereo
headphone amp and individual volume control into each Guest Gizmo. It has
enough oomph to drive just about any cans, including the high-impedance
models often found in radio stations. Warning: Using headphones at high volume
levels can result in hearing damage or permanent hearing loss. Avoid prolonged
use at high sound pressure levels. If you experience discomfort or ringing in your
ears, immediately reduce the volume or discontinue using the headphones.
Installing your Guest Gizmo.
The Guest Gizmo is designed to be installed directly into your studio furniture
in a location that is easily accessible to your guests. The only tools required are
a power drill and a 2 ¾” hole saw to create the grommet hole; a router is not
required. The Gizmo is then secured with four screws. Spacing and dimensions
are shown below. A handy to-scale template is included for printing on Page 9.
The Guest Gizmo should be placed far
enough away from the guest to prevent
accidental button presses on the top side
(and painful accidental interaction with
the guest’s knees underneath) but close
enough to allow quick access when the
urge to make unsavory noises arises.
Ideally, that’s about 12” - 15” (30 - 38 cm)
from the front edge of mounting surface.
Two anchor holes are provided on the
back of the gizmo to secure the supplied
tie wraps. We recommend bundling the
audio cables to one side and the power
and logic cables to the other.
Using right angled TRS plugs can provide a bit of additional room. The button
on the Guest Gizmo is a 1cm square (0.40”) film cap type, so you can insert a
custom label indicating “COUGH”, “MUTE”, “ON/OFF” (or even “LAUNCH” if
you’re feeling sporty) using any clear printer label media. Removing the cap takes
little force but a good grip. Wide jaw long-nose pliers work well; use caution.
For a different look, try reverse printing so that the word is clear on a black
background, causing the text to glow red when the LED illuminates. Note: If
glowing red words suddenly render sinister messages, disconnect your Gizmo
immediately and contact a priest.
2.50 IN
1.25 IN
1.25 IN
2.50 IN
ø 0.1375 IN
(See Notes 4,5)
ø 2.75 IN
Notes:
1) This template can be used as a guide for locating holes. Your printer must
be set to print this page at 100% actual size. If printer shrinks image to fit
page, the dimensions will be wrong. Measure printed image with a ruler to
make sure the printed dimensions match actual size.
2) Once you’ve decided where you want your Guest Gizmo, tape the
template to your desktop. Remember to leave at least 12 inches between the
user edge of the desk and the Gizmo. Use an awl or center punch at all 5
hole centers. Remove template.
3) Drill a 2.75 inch diameter hole for the center hole. This must go completely
through the table.
4) For hardwood, plywood or MDF desktops, drill a 1/16 Inch pilot hole for
each corner hole. Use the four included flathead woodscrews to secure the
Gizmo. Do not overtighten.
5) For desktops constructed of other materials including stone, hollow
(honeycomb), or glass, the corner holes must be 0.1375 inch diameter
through holes to allow a flathead bolt to pass through the desktop and be
secured to a nut beneath. This hardware is not included.
Recommended distance 12 inches (30cm)
from gizmo to user edge of table.

5 Connecons in Detail Connecons in Detail 6
Front controls and connections.
Rear connections.
Headphone input and output.
The audio inputs for the Guest Gizmo’s headphone amplifier are located on the
back side and are labeled “Left In” and “Right In”. They provide a balanced,
nominal +4dBu level on 1/4” TRS (tip-ring-sleeve) jacks. If a stereo feed is
available, use both the Left and Right inputs. If the source is mono, feeding the
left input only will automatically send the audio to both the left and right channels
of the headphones.
The standard 1/4” (6.35mm) TRS headphone output jack is located on the front
side with a volume control to allow guests to set their own monitoring level. Most
professional headphones that have a 1/8” (3.5mm) “mini” plug come with a screw-
on adapter for 1/4” connections, but keeping a stash of 3.5mm female stereo to
6.35mm stereo male adapters will ensure you’re prepared if a guest arrives with
consumer earbuds to which they are emotionally attached.
Insert Jack.
Using a cable with a ¼” TRS connection at both ends, connect one end to the
mixer insert jack and the other to the insert jack on the Guest Gizmo.
Connecting multiple Gizmos.
You may want to feed multiple Guest Gizmos from a single audio source.
Thankfully, the Guest Gizmo’s input circuit is balanced and bridging, allowing the
connection of multiple Gizmos in parallel with minimal insertion loss by way of a
daisy chain cable as show here.
Using shielded two-conductor audio cable, connect
all sleeve connections together, all tip connections
together, and all ring connections together. One plug
is used to connect the first Gizmo to the audio source.
You’ll need as many additional plugs as you have Gizmos. Stereo audio requires
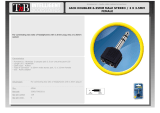
two cables. Another option is to purchase a ready-made splitter such as the
Galaxy Audio Jacks in the Box which takes a balanced input signal and replicates
it on four balanced outputs to feed each balanced Gizmo input. Two splitters are
required for stereo.
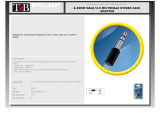
Please note that while your Gizmo’s headphone outputs also use a 1/4” TRS
connection, it will not work to directly feed another Gizmo’s input. If using a
headphone output is your only option, you can make it work by using a 1/4” TRS
stereo female to 2 x 1/4” TRS mono male splitter.
The logic port.
With nothing plugged into the logic port, the Guest Gizmo acts as a traditional
cough button: The mic is muted when the
button is pressed and held, then unmuted
when the button is released.
The logic port can also function as an
On/Off/Cough button (as described on
Page 3) by using the logic port and a
3.5mm TS (tip-sleeve) connector. In this
configuration, the tip provides +12VDC
when the Guest Gizmo is ON and the button is illuminated.
The use of the TS connector also allows the Guest Gizmo to drive a mic arm tally
light by connecting the tally light between the tip and sleeve conductors, paying
attention to polarity so that the tally is lit when the button is lit. If you want to drive
a tally light but prefer the Guest Gizmo to behave as a cough button, use a TRS
(tip-ring-sleeve) connector instead, connect the tally between the tip and sleeve
conductors, and leave the ring contact open.
GUEST
GIZMO
LOGIC
LEFT IN
RIGHT IN
INSERT 16VAC
Guest Gizmo Logic
The 3.5mm logic connector is used to drive a mic arm tally light. It also is used to change the
behaviour of the front panel button. With nothing plugged into the logic port, the Guest Gizmo
front panel button is momentary cough (mute) button.
Using a TS plug will cause the front panel button to work as an ON/OFF toggle. That is, push
and release to turn ON, push again and release to turn OFF. In this mode, when the gizmo is
ON, pushing and holding the button for more than 500ms will mute the audio until the button is
released, at which time the gizmo will return to ON.
The tip provides +12VDC whenever the gizmo is ON. If the button is illuminated, the Tip is at
+12VDC. Connect your mic arm tally light between the Tip and Sleeve conductors paying
attention to polarity and the tally illumination will follow the button illumination.
If you wish to maintain the momentary cough (mute) function, use a TRS plug and leave the
Ring contact open. As above, connect your mic arm tally light between the Tip and Sleeve
conductors.
TIP
RING
RING 2
SLEEVE
RING
TIP
SLEEVE
3.5MM TRRS CONNECTOR
TIP
RING
SLEEVE
3.5MM TRS CONNECTOR
6.3MM TRS CONNECTOR
SLEEVE
TIP
3.5MM TS CONNECTOR

7 Connecons in Detail Typical Installaon 8
Using the Guest Gizmo with broadcast consoles.
The Guest Gizmo presents fully isolated dry contacts to its Insert jack that follow
the status of the front panel button. If you are using a broadcast mixing console
with built-in muting logic, you will use the Insert jack to activate it.
When the button is illuminated, the tip and ring are shorted together. When not
illuminated, the ring and sleeve are shorted together. These contacts will short or
open the logic circuits on your console. As different consoles have different logic
schemes, please check your console manual before wiring it up.
In general, though, an active low connection will need to be pulled to ground
when muted, while an active high connection will be pulled to logic supply when
muted. In this example, we show how to connect the Guest Gizmo to an Axia
radio console using a DB-15 sub to 1/4” TRS connector.
Wiring up the Guest Gizmo to a mixer.
SLEEVE
RING
TIP OPEN WHEN MUTED ON TALLY LAMP
OFF TALLY LAMP
TALK TALLY LAMP
MUTE TALLY LAMP
NOT CONNECTED
NOT CONNECTED
SOURCE COMMON
LOGIC COMMON
LOGIC +5VDC SUPPLY
SOURCE SUPPLY
ON COMMAND
OFF COMMAND
TALK (TO CR) COMMAND
MUTE COMMAND
NOT CONNECTED
RELAY COMMON
CLOSED WHEN MUTED
PIN 01
PIN 02
PIN 03
PIN 04
PIN 05
PIN 06
PIN 07
PIN 08
PIN 09
PIN 10
PIN 11
PIN 12
PIN 13
PIN 14
PIN 15
AXIA GPIO LOGIC PORTGUEST GIZMO INSERT JACK
CONFIGURED FOR GUEST MICROPHONE

9 Installaon Template Block Diagram & Compliance Info 10
One handy-dandy printable template.
2.50 IN
1.25 IN
1.25 IN
2.50 IN
ø 0.1375 IN
(See Notes 4,5)
ø 2.75 IN
This template can be used as a guide for locating holes. Your printer must be
set to print this page at 100% (actual size). If your printer shrinks or enlarges the
image to fit the page, the dimensions will be wrong. Always measure the printed
image with a ruler to verify that the printed dimensions match the actual size.
Once you’ve decided on the location of your Guest Gizmo, tape the template
to your desktop. Remember to leave at least 12 inches between the edge of
the desk nearest the guest and the Gizmo. Use an awl or center punch to mark
center of all 5 holes, then remove the template.
Drill the 2.75” diameter center hole; this hole must go completely through the table
or desk.
For hardwood, plywood, or MDF desktops, drill a 1/16” pilot hole for each corner
hole, then use the four included flathead wood screws to secure the Gizmo to the
surface. Do not over-tighten the screws.
For desktops made of other materials including stone or glass, or made of hollow
(honeycomb) construction, the corner holes should be 0.1375” diameter through-
holes in order to allow a flathead bolt to pass through the desktop and be secured
with a nut beneath. This hardware is not included.
The ow of electrons within the Guest Gizmo.
Compliance in the U.S.
In the U.S., this Gizmo complies with the limits for a Class A computer device
as specified by FCC Rules, Part 15, Subpart J, which are designed to provide
reasonable protection against such interference when this type of equipment is
operated in a commercial environment.
…and in Canada.
In Canada, this Gizmo does not exceed the Class A limits for radio noise
emissions set out in the Radio Interference Regulations of the Canadian
Department of Communications.
...and in Europe.
This Gizmo complies with the requirements of the EEC Council Directives 93/68/
EEC (CE Marking), 73/23/EEC (safety – low voltage directive), and 89/336/EEC
(electromagnetic compatibility). Conformity is declared to standards EN50081-1
and EN50082-1.

11 Specicaons Blank Page 12
Riveting data about your Gizmo.
Part Numbers
Guest Gizmo
North American Version Part No. 991021 (115V)
Pushbutton Switch
Momentary film insert type, LED illuminated
Connections
Left/Right Inputs Balanced female +4dBu nominal ¼” TRS jacks
Insert Balanced female ¼” TRS jack
Headphone Output Balanced female ¼” TRS jack
Logic Port 3.5mm TRS jack
Power 16VAC (115V)
Headphone Amplifier
Nominal Input Level +4dBu
Input Impedance 20kΩ Fully Balanced
Min. Headphone Impedance 32Ω
Maximum Output +18dBu
Output Impedance 10Ω
Frequency Response 20Hz – 20kHz, +/- 0.2dB
THD + N ≤0.008% (20Hz – 20kHz)
Noise ≤-90dBu (20Hz – 20kHz unweighted)
Maximum Power 550mW per channel at 75Ω
Power and Environmental
Power Input (Adapter) 120VAC 60Hz
Power Output (Adapter) 16VAC, 500mA, 8.0W
Operating Temperature 0º to 40º C (32º to 104º F)
Storage Temperature -20º to 45º C (-4º to 113º F)
Relative Humidity 0% to 90% non-condensing
Product Weight & Dimensions
Width x depth x height (Gizmo) 3.125 x 3.125 x 4.25 in., 7.93 x 7.93 x 10.8 cm.
Weight (Gizmo & Adapter) 1.6 pounds, 0.75 kilograms
Well, this is awkward.
It seems we have an even number of pages to work with here, but have only
enough compelling information to fill an odd number. Let’s use this opportunity
to work a fun crossword puzzle and keep our gray matter from going mushy! The
answers are at the bottom of the page. Don’t cheat. We can see you and won’t
think twice about ratting you out.
ACROSS
3. Coughing guests make us ________.
4. The person in the studio most likely to cough.
6. Anyone caught bringing drinks here may get beaten with a rubber hose.
7. It’s first.
DOWN
1. A mixing desk, or something you might do to someone in distress.
2. The wretched noise we’re trying to eliminate with this device.
3. It’s what we’re passionate about.
5. The veggie that’s really a fruit.
8. The very end of a 1/4” connector, or something a pro might give you
ANSWERS
ACROSS DOWN
3. Angry 1. Console
4. Guest 2. Cough
6. Studio 3. Audio
7. Safety 5. Tomato
8. Tip

13 Schemacs Schemacs 14
A peek behind the curtain at the cough-ghting magic.
/