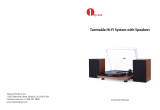
Crosley T200A, a stylish turntable, seamlessly blends vintage charm with modern functionality. Equipped with 33/45 RPM speed options, it accommodates a wide range of vinyl records. Connect it to your stereo system via RCA jacks or directly to powered speakers. Its USB output enables you to convert your cherished vinyl collection into digital files, preserving your musical memories.
Crosley T200A, a stylish turntable, seamlessly blends vintage charm with modern functionality. Equipped with 33/45 RPM speed options, it accommodates a wide range of vinyl records. Connect it to your stereo system via RCA jacks or directly to powered speakers. Its USB output enables you to convert your cherished vinyl collection into digital files, preserving your musical memories.


-
 1
1
-
 2
2
-
 3
3
-
 4
4
-
 5
5
-
 6
6
-
 7
7
-
 8
8
-
 9
9


Crosley T200A, a stylish turntable, seamlessly blends vintage charm with modern functionality. Equipped with 33/45 RPM speed options, it accommodates a wide range of vinyl records. Connect it to your stereo system via RCA jacks or directly to powered speakers. Its USB output enables you to convert your cherished vinyl collection into digital files, preserving your musical memories.
Ask a question and I''ll find the answer in the document
Finding information in a document is now easier with AI
Related papers
-
Crosley T400A User manual
-
Crosley CR6037A User manual
-
Crosley CR6253U User manual
-
-
-
-
-
-
-
Crosley T400D User manual
Other documents
-
ARKROCKET AR108A User manual
-
 Electrohome RR75 User guide
-
Sharper Image Sharp® RP-20 Stereo Turntable Owner's manual
-
 1 BY ONE Wireless Turntable Hi Fi System User manual
-
Memorex MX-T03 User manual
-
Sencor STT 500URA User manual
-
Akai att 05u Owner's manual
-
MUSIC HALL USB-1 User manual
-
 1 BY ONE 1-AD07US01 User manual
-
MUSIC HALL MMF-5.1 User manual


