En los Estados Unidos:
DXV
One Centennial Avenue
Piscataway, New Jersey 08855
Atención: Director de Atención al Cliente
Para los residentes de los EE.UU.,
también puede obtenerse información
sobre la garantía llamando al siguiente
número gratuito: (800) 227-2734
www.DXV.com
En Canadá:
DXV
5900 Avebury Road
Mississauga, Ontario
L5R 3M3
Canada
Número sin cargo: 1-800-387-0369
Local: 905-306-1093
Fax: 1-800-395-1498
www.DXV.ca
In Mexico:
DXV
Via Morelos 330
Col. Santa Clara Coatitla
Ecatepec, Estado de México 55540
Número sin cargo: 01-800-8391200
www.DXV.mx
760237-101 SP (5/17)
6B
8B
7B
9B
Coloque la tapa de la bisagra sobre las bisagras.
Sosteniendo la tuerca, use un destornillador para
ajustar la bisagra.
Coloque la parte
posterior del asiento
hacia la taza y haga
click con las bisagras.
Abra la tapa y asiento. Presione el los dos botones
del interior para liberar el asiento y la tapa. Tire del
asiento y la tapa hacia arriba para sacar las bisagras.
KIT DE PIEZAS DE REPUESTO
Nº DE PIEZA DESCRIPCIÓN
760234-100.XXX
*KIT DE MONTAJE DEL ASIENTO: INCLUYE LA FERRETERÍA
PARA EL MONTAJE SUPERIOR E INFERIOR
*Incluye un juego de amortiguadores y todas las piezas para la instalación del asiento.
- 12 -
INSTALLATION INSTRUCTIONS
Product names listed herein are trademarks of AS America, Inc.
© AS America, Inc. 2017
SAVE FOR FUTURE USE
- 1 -
RECOMMENDED TOOLS AND MATERIALS
Most of the procedures require the use of common tools and materials, which are available from hardware and plumbing
supply stores. It is essential that the tools and materials be on hand before work has begun.
Thank you for selecting DXV. To ensure this product is installed
properly, please read these instructions carefully before you
begin. (Certain installations may require professional help.)
Also be sure your installation conforms to local codes.
760237-101 (5/17)
TOILET SEAT
TOP MOUNT &
BOTTOM MOUNT
TOP MOUNT
Phillips Screwdriver
1A
3A
2A
4A
For ease of installation of black rubber grommets,
insert steel bolt (capture a few threads), and wet the
lower area with some water (soapy water works best).
Insert plugs into seat
holes in bowl.
NOTE: FLANGE MUST REMAIN ABOVE THE SURFACE.
DO NOT ALLOW GROMMET TO FALL THROUGH!
BOTTOM MOUNT
1B - 9B
TOP MOUNT
1A - 10A
NOTE: Pictures may not exactly depict toilet
seat and components.
TOILET
Hinge Cover
Screws
Hinge
Hinge Washer Pad
Rubber Screw
Plug
Bolt
Flange
Bulb
Wet this area with water

- 2 -
760237-101 (5/17)
5A
7A
9A
6A
8A
10A
Place hinge cover over the hinges.
Place seat back on
bowl and click seat
onto hinges.
Place seat with hinges onto bowl.
Align seat with front of bowl.
Open the seat and cover. Push both inside
buttons to release seat and cover. Pull the seat
and cover upwards to take it off the hinges.
Snap hinges with
washer pad into
holes on the bottom
of the seat.
B
Hinge
Hinge
Washer
Pad
Install Hinge Washer
Pad into Hinge.
A
Put screws into seat
hinge and tighten using
a screwdriver.
MONTAJE INFERIOR
760237-101 (5/17)
3B
4B 5B
Con los pernos instalados, enrosque las tuercas
mariposa, las arandelas de hule y los tapones de
hule en los pernos. Ajuste únicamente con los
dedos para que la bisagra pueda girar aún.
Instale la almohadilla de la arandela de la bisagra
en la bisagra.
- 11 -
1B 2B
INODORO
Tapa de la bisagra
Tornillos
Bisagra
Almohadilla de la
arandela de la bisagra
Tuerca
Arandela
Tapón de la taza
Bisagra
Almohadilla de la
arandela de la bisagra
Coloque el asiento (ya con las bisagras) sobre
la taza. Alinee el asiento con el frente de la taza.
Ajuste las bisagras (ya con el empaque) en
los agujeros inferiores del asiento.

- 10 -
760237-101 SP (5/17)
5A
7A
9A
6A
8A
10A
Coloque la tapa de la bisagra sobre las bisagras.
Coloque la parte
posterior del asiento
hacia la taza y haga
click con las bisagras.
Coloque el asiento (ya con las bisagras) sobre la taza.
Alinee el asiento con el frente de la taza.
Abra la tapa y asiento. Presione el los dos botones
del interior para liberar el asiento y la tapa. Tire del
asiento y la tapa hacia arriba para sacar las bisagras.
B
A
Encaje las bisagras con
la almohadilla de la
arandela en la parte
inferior del asiento.
Bisagra
Almohadilla
de la arandela
de la bisagra
Instale la almohadilla
de la arandela de la
bisagra en la bisagra.
Coloque los tornillos
dentro de la bisagra
y apriete usando la
desatornillador.
BOTTOM MOUNT
760237-101 (5/17)
3B
4B 5B
Snap hinges with washer into holes on
the bottom of the seat.
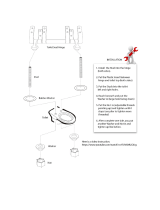
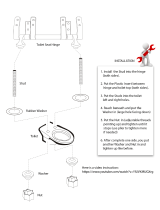
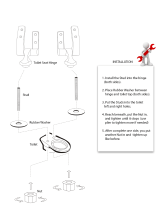
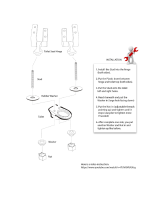
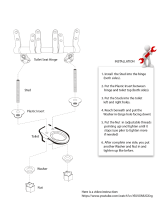
With the bolts installed, thread the winged nuts,
rubber washers and rubber plugs on to the bolts.
Finger tighten only so that hinge can still turn.
Install hinge washer pad into hinge.
- 3 -
1B 2B
TOILET
Hinge Cover
Screws
Hinge
Hinge Washer Pad
Nut
Washer
Bowl Plug
Hinge
Hinge
Washer
Pad
Place seat with hinges onto bowl.
Align seat with front of bowl.

760237-101 (5/17)
6B
8B
7B
9B
Place hinge cover
over the hinges.
While holding the nut, use a
screwdriver to tighten the hinge.
Place seat back on
bowl and click seat
onto hinges.
Open the seat and cover. Push both inside
buttons to release seat and cover. Pull the seat
and cover upwards to take it off the hinges.
In the United States:
DXV by American Standard
One Centennial Avenue
Piscataway, New Jersey 08855
Attention: Director of Customer Care
For residents of the United States, warranty
information may also be obtained by calling
the following toll free number: (800) 227-2734
www.DXV.com
In Canada:
DXV5900 Avebury Road
Mississauga, Ontario
L5R 3M3
Canada
Toll Free: 1-800-387-0369
Local: 905-306-1093
Fax: 1-800-395-1498
www.DXV.ca
In Mexico:
DXVVia Morelos 330
Col. Santa Clara Coatitla
Ecatepec, Estado de México 55540
Toll Free: 01-800-8391200
www.DXV.mx
REPLACEMENT KIT
PART NUMBER DESCRIPTION
760234-100.XXX *SEAT MOUNTING KIT: INCLUDES BOTH TOP & BOTTOM MOUNTING HARDWARE
*Includes a set of seat bumpers and all hardware needed for installation of seats.
- 4 - - 9 -
INSTRUCCIONES DE INSTALACIÓN
Los nombres de los productos que aquí guran son marcas registradas de AS America, Inc.
© AS America, Inc. 2017
GUARDAR PARA USO FUTURO
HERRAMIENTAS Y MATERIALES RECOMENDADOS
La mayoría de los procedimientos requieren el uso de herramientas y materiales comunes que están disponibles en tiendas
de suministros de herrajes y plomería. Antes de comenzar la instalación, es fundamental tener disponibles las herramientas
y los materiales.
760237-101 SP (5/17)
Gracias por elegir DXV. Para asegurarse de
que no haya problemas durante la instalación,
lea atentamente estas instrucciones antes
de comenzar.
Desarmador Estrella
ASIENTO DEL INODORO
MONTAJE SUPERIOR
E INFERIOR
MONTAJE SUPERIOR
1A
3A
2A
4A
Para facilitar la instalación de los tampos de hule
negros, inserte el tornillo de acero (enrosque un poco)
y humedezca el área inferior con un poco de agua
(el agua con jabón funciona mejor).
Inserte los tampos en
los ori cios de la taza.
NOTA: LA BRIDA DEBE PERMANECER SOBRE
LA SUPERFICIE.
¡NO PERMITA QUE EL TAMPO CAIGA!
NOTA: es posible que las imágenes no
defi nan con exactitud el asiento
y los componentes del inodoro.
INODORO
Tapa de la bisagra
Tornillos
Bisagra
Almohadilla de la arandel
a
de la bisagra
Tornillo de hule
Tornillo
Brida
Ampolla
Humedezca esta
área con agua
Tampo
MONTAJE
SUPERIOR
1A - 10A
MONTAJE
INFERIOR
1B - 9B
Page is loading ...
Page is loading ...
/

