Ken A Vision Microprojector 2 User manual
- Type
- User manual

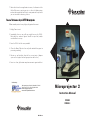
Microprojector 2
Microprojector 2
Instruction Manual
X2000
X2000-1
INS-X2000
7. Note also that as the magnification increases, the diameter of the
field will decrease, requiring you to use either the floating stage,
mechanical stage or both to keep the exact portion of the specimen
you are interested in observing, in focus.
CCaarree aanndd MMaaiinntteennaannccee ooff yyoouurr XX22000000 MMiiccrroopprroojjeeccttoorr::
Follow normal practice for any high quality optical instrument:
1. Unplug Power to unit
2. Immediately clean up any spills you might have on the X2000.
Particularly any corrosive agents should be wiped off, and/or
neutralized as necessary.
3. Store the X2000 with the cover provided.
4. Clean the Zoom Objective Lens only with standard lens paper to
preventing scratching.
5. Do not use any liquids to clean the lens, except water. (dampen
a piece of lens paper if oils or fingerprints are on the lens)
6. Store in a clean, dry location away from corrosive agents and dust.
100 Lauman Lane, Suite A, Hicksville, NY 11801
Tel: (877) 877-7274 | Fax: (516) 801-2046
Email: [email protected]
www.microscopeinternational.com
'LVWULEXWHGE\

You have acquired one of the most unique and innovative changes in
microscopy in the last 50 years - A microscope which is capable of projecting
an XGA (resolution 1024 X 768) image onto a screen, interactive board or
even a wall. Dependent upon the quality of your projector and the distance
the projector is from the screen or wall, you can magnify the image as much
as 300X and enlarge that image to greater than 5000 times original size!
GGeettttiinngg ssttaarrtteedd::
1. Plug X2000 into your power source, using the Ken-A-Vision power
supply provided with the unit.
2. Connect a VGA cable (not provided by Ken-A-Vision) into the VGA
plug at the rear of the X2000, and then plug the VGA connector into
the VGA input of your projector.
3. Turn on X2000 with the switch at the rear of the unit and turn on
your projector, being sure correct button is activated.
4. If possible, be sure that your projector is sharply focused, by
utilizing any text or symbols that can be activated using the menu
button on the projector.
5. What ever the camera of the X2000 sees at that point should be
visible on the screen, and if you have centered correctly it should be
some part of the slide or Petri dish (hereafter referred to as
"specimen") you have placed on the stage.
PPllaacciinngg tthhiinnggss oonn tthhee ssttaaggee::
The X2000 is provided with a floating stage and mechanical stage. A
floating stage allows you to reposition the stage by grasping the side of the
stage using your thumb and fingers, and moving the stage to any position you
wish. Center the slide or object you wish to view with the X2000 by easy to use
mechanical stage installed on the unit.
Place the slide (specimen) in the mechanical stage , by pulling back on
the retractable spring arm, placing the slide against the straight edge at the
right side (as you face the front of the X2000 Microprojector), and then gen-
tly releasing the spring loaded retractable arm so that the specimen is locked
into place.
Now the specimen may be manipulated into place, by either moving the
floating stage, or using the knurled controls of the Mechanical Stage or both.
LLiigghhtt SSoouurrccee::
Light for our X2000 is provided by a variable light source at the top of
the microscope. Turning the orange dial will increase or decrease the amount
of light hitting the stage, as indicated by bar meter.
TThhee ZZoooomm OObbjjeeccttiivvee LLeennss::
The Zoom Objective Lens is located below the stage. On the front side
(as you face the front of the X2000 Microprojector) of the tube of the Zoom
Object Lens, there is an arrow pointer to set each point. On the moveable
part of the Zoom Objective Lens are a series of numbers (3X, 4.5X, 7.5X, 11X,
16X, 20X, 26X, 30X) indicating the approximate magnification achieved
when the Zoom Objective Lens is in that position. Turning the moveable por-
tion of the Zoom Objective Lens counter-clockwise increases the magnifica-
tion from approximately 3X to 30X. In doing so the magnification achieved is
approximately going from 30X to 300X.
BBeesstt PPrraaccttiiccee FFooccuussiinngg -- ZZoooommiinngg::
1. Place the specimen to be observed on the stage, and center as well
as possible with your naked eye.
2. Be sure that the Zoom Objective Lens is set on 3X, with the light
dimmer set to minimum and included filter is screwed in) Note: the
filter is designed to be used between 3X-4.5X only. It MUST BE
REMOVED above 4.5X magnification.
3. Using the Coarse and Fine Adjust knobs and observing the picture
on the screen, bring the specimen into focus, similarly to the way one
focuses a standard microscope. (Be sure that your projector's focus
previously was sharply set for the conditions under which you are
using it).
4. Change the light impinging on the specimen using the orange dial
at the top of the X2000. Please note that often objects are better
viewed in less light then at maximum incident light, so experiment
with the light at 4X to see if there is an optimum light point.
5. Now slowly turn the Zoom Objective Lens counter-clockwise,
increasing the magnification as you do this. You may have to read
just the focus of the X2000 Microprojector using the fine and coarse
adjust knobs.
6. As you increase magnification, you may also have to increase the
intensity of the light, as just like regular microscopes, as the
magnification poser of an objective lens increase, the amount of light
necessary must also increase.
-
 1
1
-
 2
2


Ken A Vision Microprojector 2 User manual
- Type
- User manual
Ask a question and I''ll find the answer in the document
Finding information in a document is now easier with AI
Related papers
-
Ken A Vision PrepScope T-1252 Catalog
-
Ken A Vision FlexCam 910-171-120 Product Catalog
-
Ken A Vision PupilCAM 1401KRN Catalog
-
Ken A Vision Network Video Flex 7700 Catalog
-
-
Ken A Vision X1000 User manual
-
-
-
-
Other documents
-
Carson MM-840 User guide
-
-
Toshiba TLP-XC3000 User manual
-
Panasonic HCX1500E Operating instructions
-
Panasonic HC-X Series User HC-X1500 Operating instructions
-
Panasonic HC-X1500 Operating instructions
-
-
Toshiba TLP-X2000 User manual
-
-
Hitachi TM3000 User manual