Sirius Satellite Radio XS027 User manual

Type
User manual

This manual is also suitable for

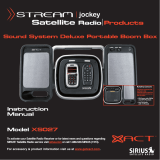
Sirius Satellite Radio Xact XS027 combines AM/FM radio and CD player with a satellite radio receiver, offering various entertainment options in one portable device. Enjoy crystal-clear satellite radio reception with the included satellite radio receiver and remote control, or switch to AM/FM radio stations with 10 presets for your favorite channels. Additionally, play your favorite CDs and MP3s with the built-in CD player, featuring playback controls and repeat functions.

Sirius Satellite Radio Xact XS027 combines AM/FM radio and CD player with a satellite radio receiver, offering various entertainment options in one portable device. Enjoy crystal-clear satellite radio reception with the included satellite radio receiver and remote control, or switch to AM/FM radio stations with 10 presets for your favorite channels. Additionally, play your favorite CDs and MP3s with the built-in CD player, featuring playback controls and repeat functions.

Instruction
Manual
Model XS027
To activate your Satellite Radio Receiver or for latest news and questions regarding
SIRIUS®Satellite Radio service visit sirius.com or call 1-888-539-SIRIUS (7474).
For accessory & product information visit us at www.getxact.com.
Sound System Deluxe Portable Boombox
> CD Player with CDRW
and MP3 Playback
> AM/FM Radio
with 10 Presets
Rotating Console:
Satellite radio receiver
and remote control on
one side (sold separately) -
AM/FM radio and CD
player on the flip side!
KEEPONLISTENING
This equipment has been tested and found to comply with the limits for a Class B digital device, pursuant to
Part 15 of the FCC Rules. These limits are designed to provide reasonable protection against harmful
interference in a residential installation. This equipment generates, uses, and can radiate radio frequency
energy and, if not installed and used in accordance with the instructions, may cause harmful interference to
radio communications. However, there is no guarantee that interference will not occur in a particular
installation. If this equipment does cause harmful interference to radio or television reception, which can be
determined by turning the equipment off and on, the user is encouraged to try to correct the interference by
one or more of the following measures:
Reorient or relocate the receiving antenna.
Increase the separation between the equipment and receiver.
Connect the equipment into an outlet on a circuit different from that to which the receiver
is connected.
Consult the dealer or an experienced radio/TV technician for help.
Changes or modifications not expressly approved by the Manufacturer for compliance could void the user’s
authority to operate the equipment.
COPYRIGHT / TRADEMARKS
No part of this publication may be reproduced, stored in a retrieval system, or transmitted in any form or by
any means, whether electronic, mechanical, photocopying, recording or otherwise without the prior writing of
the publisher.
is a registered trademark of SIRIUS®Satellite Radio. To activate your Satellite Radio Receiver or for latest
news and questions regarding SIRIUS®Satellite Radio service visit sirius.com or call
1-888-539-SIRIUS (7474).
SAFETY PRECAUTIONS
Cautions and Warnings
Follow these warnings and safety considerations, serious accidents and/or personal injury can be avoided:
1. Within the home, do not install the Sound System Deluxe Portable Boombox in a position that obstructs
viewing of any home entertainment component, such as television or stereo system indicators and displays.
2. Do not install or use the Sound System Deluxe Portable Boombox in locations exposed to direct sunlight,
or in areas subject to extreme temperatures; do not operate the unit in moist areas, in rain, or in areas
adjacent to water such as pools, hot tubs, etc.
3. When outdoors, position the Sound System Deluxe Portable Boombox and antenna where there are no
obvious satellite signal obstructions such as high terrain, trees, overhangs, etc.
4. When installed indoors, unplug the AC Power Adapter from the wall outlet when the Sound System Deluxe
Portable Boombox is not to be used for an extended period of time. If batteries are installed, set the Power
On/Off- VOL control to the Off position to prevent unintentional battery discharge, or remove the batteries.
5. To avoid possible damage to the Sound System Deluxe Portable Boombox caused by battery leakage, it is
recommended that the batteries be removed when the Boombox is not being used for an extended period
of time.
6. Do not install or place the Sound System Deluxe Portable Boombox on an inclined or unstable surface.
7. By adhering to these warnings and safety considerations, serious accidents and/or personal injury can be
avoided.
SAFETY PRECAUTIONS
CAUTION: TO REDUCE THE RISK OF ELECTRIC SHOCK, DO NOT REMOVE COVER (OR BACK). NO USER-
SERVICEABLE PARTS INSIDE. REFER SERVICING TO QUALIFIED SERVICE PERSONNEL.
Dangerous Voltage
The lightning flash with arrowhead symbol, within an equilateral triangle is intended to alert the user to the
presence of uninsulated dangerous voltage within the product's enclosure that may be of sufficient magnitude
to constitute a risk of electric shock to persons.
Attention
The exclamation point within an equilateral triangle is intended to alert the user to the presence of important
operating and maintenance (servicing) instructions in the literature accompanying the appliance.
Danger
This product utilizes a Class 1 laser to read COMPACT discs. This laser Compact Disc Player is equipped
with safety switches to avoid exposure when the CD door is open and the safety interlocks are defeated.
Invisible hazardous laser radiation when open and interlock failed or defeated. Avoid direct exposure to beam.
Please do not attempt to defeat or bypass the safety switches.
FCC Warning
This equipment may generate or use radio frequency energy. Changes or modifications to this equipment may
cause harmful interference unless the modifications are expressly approved in the instruction manual. The
user could lose the authority to operate this equipment if an unauthorized change or modification is made.
Surge Protectors
It is recommended to use a surge protector for AC connection. Lightning and power surges ARE NOT covered
under warranty for this product.
RISK OF ELECTRIC SHOCK DO NOT OPEN
CAUTION
SAFETY PRECAUTIONS
Information
This equipment has been tested and found to comply with the limits for a Class B digital device, pursuant to
Part 15 of the FCC Rules. These limits are designed to provide reasonable protection against harmful
interference in a residential installation. This equipment generates, uses, and can radiate radio frequency
energy and, if not installed and used in accordance with the instructions, may cause harmful interference to
radio communications. However, there is no guarantee that interference will not occur in a particular
installation. If this equipment does cause harmful interference to radio or television reception, which can be
determined by turning the equipment off and on, the user is encouraged to try to correct the interference by
one or more of the following measures:
Re-orient or relocate the receiving antenna.
Increase the separation between the equipment and receiver.
Connect the equipment into an outlet on a circuit different from that to which the receive is connected.
Consult the dealer or an experienced radio/TV technician for help.
Do not open the CD compartment while the CD is rotating.
Always keep the CD compartment closed when not in use.
Keep all foreign objects out of the CD compartment.
Place the unit on a stable surface.
Avoid installing the unit in locations described below:
Places exposed to direct sunlight or close to heat radiating appliances such as electric heaters.
On top of other stereo equipment that radiates too much heat.
Placed lacking ventilation or dusty places.
Places subject to constant vibration.
Humid or moist places.
Dear Customer
Selecting fine audio equipment such as the unit you have just purchased is only the start of your musical
enjoyment. Now it's time to consider how you can maximize the fun and excitement your equipment offers.
This manufacturer and the Electronic Industries Association's Consumer Electronics Group want you to get the
most out of your equipment by playing it at a safe level. One that lets the sound come through loud and clear
without annoying blaring or distortion and, most importantly, without affecting your sensitive hearing. Sound
can be deceiving. Over time your hearing "comfort level" adapts to higher volumes of sounds and "normal"
can actually be loud and harmful to your hearing. Guard against this by setting your equipment at a safe level
BEFORE your hearing adapts.
To establish a safe level:
Start your volume control at a low setting.
Slowly increase the sound until you can hear it comfortably and clearly, and without distortion.
Once you have established a comfortable sound level:
Set the dial and leave it there.
Taking a minute to do this now will help to prevent hearing damage or loss in the future. After all, we want you
listening for a lifetime.
We Want You Listening For A Lifetime.
Used wisely, your new sound equipment will provide a lifetime of fun and enjoyment. Since hearing damage
from loud noise is often undetectable until it is too late ,this manufacturer and the Electronic Industries
Association's Consumer Electronics Group recommend you avoid prolonged exposure to excessive noise.
This list of sound levels is included for your protection.
Decibel
Level Example
30 Quiet library, soft whispers
40 Living room, refrigerator, bedroom away from
traffic
50 Light traffic, normal conversation, quiet office
60 Air conditioner at 20 feet, sewing machine
70 Vacuum cleaner, hair dryer, noisy restaurant
80 Average city traffic, garbage disposals, alarm
clock at two feet
THE FOLLOWING NOISES CAN BE DANGEROUS
UNDER CONSTANT EXPOSURE:
90 Subway, motorcycle, truck traffic, lawn mower
100 Garbage truck, chain saw, pneumatic drill
120 Rock band concert in front of speakers,
thunderclap
140 Gunshot blast, jet engine
180 Rocket launching pad
A
S
S
O
C
I
A
T
I
O
N
EST. 1924
E
L
E
C
T
R
O
N
I
C
I
N
D
U
S
T
R
I
E
S
EIA
We
LISTEN ING
For A Lifetime
Want Yo u
Information courtesy of the Deafness Research Foundation.
81
TABLE OF CONTENTS
Introduction Page 2
Product Overview Page 2
Package Contents Page 2
Components Guide Page 3
Boombox Setup Page 5
Installing the Satellite Antenna Page 6
Installing the Power Cable Page 6
Installing the Batteries (Optional) Page 7
Antenna Aiming Page 8
SIRIUS®Satellite Map Page 8
AM/FM Radio Operation Page 9
To Listen to the Radio Page 9
Antennas Page 9
Auto Scan Page 9
To set and Receive a Station into Memory Page 9
CD Operation Page 10
To Insert and Play a CD Page 10
CD Playback Notes Page 10
To Pause a CD Page 11
To Begin Playback from a Specific Track Page 11
Forward/Reverse Skip Track Page 11
High-Speed Music Search Page 12
Repeat Playback of One Track Page 12
Repeat Playback of All Tracks Page 12
Repeat Playback of a Folder (MP3 with folders only) Page 13
Intro Playback (will play the first 10 seconds of each track) Page 13
To Randomly Play Back a CD Page 13
To Program the Memory (Up to 24 Tracks) Page 13
Notes of Program Playback Page 14
MP3 FAQ's - Frequently Asked Questions Page 14
Single Session Page 15
Multi Session Page 15
Specifications Page 16
Problem Solving Page 17
Care and Maintenance Page 19
Warranty Page 21
1
INTRODUCTION
Product Overview
Thank you for purchasing this product! Your new Xact Sound System Deluxe Portable Boombox is specifically
designed for the XTR1 Xact Stream | jockey SIRIUS®Radio Receiver.
Package Contents
Carefully unpack your kit box and ensure that you have the following items.
Xact Sound System Deluxe Portable Boombox
12v DC Power Adapter
Antenna
User’s Guide
In the event that any item is missing or if you find any mismatch or damage, promptly contact your dealer.
Your Xact Sound System Deluxe Portable Boombox must be used in conjunction with The XTR1 Xact Stream
| jockey SIRIUS® Radio Receiver. Please see these other available accessories below.
Xact Vehicle Kit: Model Number XS021
Xact Home Kit: Model Number XS022
Xact Universal Kit: Model Number XS01UK
Xact Sound Pad Portable Boom Box: Model Number XS024
Xact Sound System Portable Boom Box: Model Number XS025
Xact Power Pod Portable Battery Pack: Model Number XS028
The easiest way to activate your Satellite Radio Receiver is to log on to sirius.com.
You may also call 1-888-539-SIRIUS (7474).
2
2
COMPONENTS GUIDE
3
1. POWER ON/OFF
VOLUME CONTROL
2. SAT/AUDIO
SLIDE SWITCH
3. HEADPHONE JACK
Sound System Deluxe Portable Boombox
The Xact Sound System Deluxe Portable Boombox provides Control buttons for CD Player, AM/FM digital
tuner. Power On/Off-Volume control and a Slide switch to toggle between Satellite Radio and other audio
signal. A power-on LED is also located on the front panel.
1. Power On/Off Switch-VOL Control:Applies power to the Boombox when rotated clockwise (CW)
from the Off position. When in On position, increases or decreases the volume of the audio output
signal from the Boombox. To increase the volume level, rotate the control CW. To decrease the
volume level, rotate the control counterclockwise (CCW).
2. SAT/Audio Selector: Slide between Satellite Radio and an audio signal( CD, AM/FM, AUX).
3. Headphones Jack: Accepts a stereo headphone jack to provide private listening capability for the
Boombox.
4. DC Power jack: Plug in the DC Power Adapter output (included) into the DC 12V jack. The batteries
are automatically bypassed.
5. AUX Input Jack: Accepts an audio input signal from an external audio device. When using AUX audio
input, the Receiver will be automatically shut off to preserve battery power. Adjust the volume level of
the external audio device to obtain an audio output from the Boombox. The volume control on the
external audio device should be set to mid-range.
6. AUX Output Jack: Connect audio jack (not included) if you want to listen the Satellite radio signal,
CD audio signal or AM/FM radio signal by your other audio system. Adjust volume level on your audio
system.
7. Satellite Antenna Jack: Connect satellite antenna terminal. (included).
RIGHT SPEAKER (REAR)
4. DC POWER JACK
5. AUX INPUTJACK
6. AUX OUTPUTJACK
LEFT SPEAKER (REAR)
7. SAT ANT JACK
3
COMPONENTS GUIDE
4
Sound System Deluxe Portable Boombox
8. Function button: Push to select a function from
CD/TUNER/AUX.
9. Album/Band button: Tuner mode: Push to select
AM or FM band. CD mode: CD audio: No function.
MP3 CD: Album (Directory) select.
10. Mode button: Tuner mode: Push to select FM
Mono/Stereo, CD mode: Push to select repeat1/
repeat all/intro/random. MP3 CD: push to select
repeat1/repeat Album/repeat/all/intro/random.
11. Program/Memory button: Tuner mode: Preset
memory. CD mode: Program track.
12. Skip-/Tuning down: Tuner mode: Tuning
downward. CD mode: Skip track downward.
13. Skip+/Tuning up: Tuner mode: Tuning upward.
CD mode: Skip track upward.
14. Stop/Preset down: Tuner mode: Preset downward.
CD mode: Stop play. Cancel program.
15. Play/Pause/Preset up: Tuner mode: Preset upward.
CD mode: Start and Pause playback memory.
CD mode: Program track.
16. LCD Display.
17. Push open button: Push open and close the CD
door.
18. Release button: For Satellite receiver.
19. Release button: For remote control.
20. Connector: For remote control.
12. SKIP- / TUNNING DOWN
11. PROGRAM / MEMORY
BUTTON
10. MODE BUTTON
9. ALBAM / BAND BUTTON
8. FUNCTION BUTTON
13. SKIP+ / TUNNING UP
14. STOP / PRESET DOWN
15. PLAY / PAUSE PRESET UP
16. PUSH OPEN
17. LCD DISPAY
18. RELEASE BUTTON FOR
SATELLITE RECEIVER 19. RELEASE BUTTON FOR
REMOTE CONTROL
20. CONNECTOR FOR
SATELLITE RECEIVER
5
BOOM BOX SETUP
To set up your Xact Sound System Deluxe Portable Boombox.
Place the Stream | Jockey Satellite Receiver in the cradle as shown so that the guides are lined up with the
Boombox cradle. Then rotate the receiver forward to engage the connectors. The receiver will lock in place.
Turn on the power by rotating the VOL control clockwise from the off position.
ROTATE RECEIVER AND
CONNECTOR INTO BOOMBOX
3.
2.
LATCH BOOMBOX LOCKS
RECEIVER IN PLACE
1. PUSH RECEIVER ONTO
CONNECTOR
56
Installing the Satellite Antenna
Install the Antenna into the Antenna Jack as shown.
Installing the Power Cable
Install the adapter into the Power Jack as shown.
SAT ANT JACK
7
Installing Batteries (optional)
Your Boombox can also be used with 8 D-Cell batteries as shown:
1. Push the battery cover latches down and flip up the battery compartment covers to the open position.
2. Insert the 8 D-Cell batteries follow the battery polarity as shown; then close the cover.
Note: The batteries are bypassed automatically whenever the supplied DC Adapter is plugged into the
power jack on the back of the Boombox.
8
Antenna Aiming
Note: This adjustment setting is required only when you use your device at home. This way, you can
assure optimum reception when mounting your
SIRIUS®
antenna.
Upon entering this option, two 10-segment horizontal bar graphs are displayed with a (-) sign to the left and a
(+) sign to the right. One is label “SAT” (satellite signal) and the other “TER” (terrestrial signal strength). The
current setting is indicated on the bar graphs. Move the antenna in a location according to the SIRIUS®
Satellite Map placement indicated below which provides the strongest signal indication.
SIRIUS®Satellite Map
Due to the paths of SIRIUS®satellites over the US, the best location for the antenna in your home depends
on where you live. Use the map below as a general placement guideline.
Area 1 : Place the antenna at an EAST -
facing window.
Area 2 : Place the antenna OUTSIDE,
away from any overhead obstructions.
Area 3 : Place the antenna at a NORTH
WEST - or WEST - facing window.
Menu Options
FM Transmitter
Channel Add/Skip
Lock Options
Antenna Aiming
Audio Level
Antenna Aiming
TER
SAT -
-
+
+
Area 4 : Place the antenna at a WEST -
or NORTH - facing window.
Area 5 : Place the antenna at a NORTH -
facing window.
Area 6 : Place the antenna at a NORTH -
or EAST - facing window.
AM/FM RADIO OPERATION
To Listen To The Radio
1. Push the FUNCTION button to the RADIO Position. Press the ALBUM / BAND button to Select a band
(AM or FM). If listening to FM, Press the MODE button to select Stereo or Mono.
2. Press and release the Skip/TUNING DN (12) or UP (13) button to tune a station. Press and hold the
Skip/TUNING DN (12) or UP (13) button for rapid search tuning.
3. Adjust the VOLUME control. If FM STEREO reception is weak/noisy, press the MODE/ button (10) to
Mono, in this case the reception will be monaural.
4. To turn the radio off, rotate POWER ON/OFF volume control counter clockwise.
Antennas
AM - This unit has a built-in ferrite bar antenna, which provides adequate reception in most areas. If reception
is weak, turn the unit to improve reception.
FM - This unit has a built-in antenna, which provides adequate reception in most areas. If reception is weak,
turn the unit to improve reception.
Auto Scan
Press and hold the Skip/TUNING or UP button for approximately 1 second and the unit will automatically
search for the next available station.
To Set and Receive a Station into Memory
1. Tune a desired station as described in the previous
section. Press the PROG. button; the preset number
will blink.
2. Within ten seconds, select the desired preset using
the PRESET UP (14) or DOWN (15) button to set the
memory. Press the PROG (11) button to confirm.
3. To receive a preset station, simply press the PRESET
UP (14) or DOWN (15) button to select the desired
preset.
9
10 12 13
11 14 15
CD OPERATION
To Insert and Play a CD
This CD player is designed to play all kinds of Audio Discs and MP3 CD ROMS, such as CD recordables and
rewritables. Do not try to play CDI, CDV, DVD or computer CD's in this unit.
1. Press the PLAY/PAUSE/POWER ON button (15) to turn the unit on. Open the CD compartment lid by
pushing the CD Door OPEN. Gently press a disc, label side up, onto the spindle until it locks in place.
Close the CD compartment lid.
2. Push the FUNCTION button to select the CD position. Press the PLAY/PAUSE to begin playback; the
current track and elapsed playing time (CD information and folder will also appear, if using MP3) will
appear in the display.
3. Adjust the VOLUME control (1)..
4. When the disc has finished playing, it will stop automatically. Press the STOP button to stop the disc before
it is finished.
CD Playback Notes:
See page 14 for more information on MP3's..
When recording ("burning") CD's, make sure the session is "finalized" or simply record "burn" only one
session. You can find more information in your recorder's manual.
This unit is capable of playing standard CD's or 3" singles;
no adapter is required.
If a disc is inserted incorrectly, dirty, damaged or not
present at all, "No Disc" will appear in the display.
Playback will stop when you open the CD compartment,
but it is not recommended to open the compartment
before the STOP button is pressed.
When recording ("burning") CD's, make sure the session
is "finalized" or simply record "burn" only one
session. You can find more information in your recorder's
manual.
It may take 10 to 30 seconds for the player to read an
MP3 CD and begin playback, depending on the number
of tracks burned on the CD.
If a disc is inserted incorrectly, dirty, damaged or not
present at all, "No Disc" will appear in the display.
10
12 13 15
CD OPERATION
To Pause a CD
1. During CD playback, if you wish to pause the disc momentarily, press the PLAY/PAUSE button. Playback
stops but the disc continues to spin and the elapsed time will blink in the display.
2. Press the PLAY/PAUSE button again to release pause and resume playback. The sound returns and the
elapsed time in the display stops flashing.
To Begin Playback from a Specific Track
1. After you insert the disc into the CD player and total number of tracks appear on the display, you may
press either the Skip/TUNING DN (12) or UP (13) button to select a specific track for playback.
2. When the desired track number (and file number if using MP3) appears in the display, press the
PLAY/PAUSE button. Playback will begin with the track (or file) you selected.
Forward/Reverse Skip Track
1. During playback, press and release the Skip/TUNING UP button once to advance the player to the
beginning of the next track. Press the Skip/TUNING UP button repeatedly to advance the player to higher
number tracks.
2. During playback, press and release the Skip/TUNING UP button once to move the player back to the
beginning of the currently playing track. Press the Skip/TUNING DN button repeatedly to move the player
back to lower numbered tracks.
11
12 13 15
CD OPERATION
High-Speed Music Search
During playback, press and hold either the Skip/TUNING DN (12) or UP (13) button to move the player
forward or backward within a track to locate a specific musical passage. The player will move forward or
backward at high speed as long as the buttons are depressed. When you release the Skip/TUNING DN (12)
or UP (13) button, normal playback will resume.
Repeat Playback of One Track
1. To repeat a single track, while in the Stop mode, press the MODE button once will appear in the display.
Press the Skip/TUNING DN (12) or UP (13) button to select the specific track that you wish to repeat.
2. When the desired track number appears in the display, press the PLAY/PAUSE button to begin playback.
The specific track you selected will be repeated continuously. To cancel Repeat playback, press the MODE
button repeatedly until the mode indictor disappears.
Repeat Playback of All Tracks
1. To repeat all the tracks on the CD, press the MODE button twice; "ALL" will appear in the display.
2. Press the PLAY/PAUSE button to begin playback. All tracks on the disc will be repeated continuously. To
cancel Repeat playback, press the MODE button repeatedly until the mode indicator disappears.
12
12 13
CD OPERATION
Repeat Playback of a Folder (MP3 with folders only)
1. To repeat all files in a directory (MP3 CD only), press the MODE button three times; "ALBUM" will appear
in the display. Press the Skip/TUNING DN or UP button to select the specific directory that you wish to
repeat.
2. Press the PLAY/PAUSE button to begin playback. All files in the selected directory will be repeated
continuously. To cancel Repeat playback, press the MODE button repeatedly until the mode indicator
disappears. See page 14 for more info on MP3 format.
Intro Playback (Will play the first 10 seconds of each track)
1. While in the Stop mode, press the MODE button 3 times (4 times if an MP3 CD with multiple directories is
inserted); "INTRO" will appear in the display.
2. Press the PLAY/PAUSE ON button to begin Intro playback. The first 10 seconds of all tracks on the disc
will be played in sequence. To cancel Intro playback, press the MODE button repeatedly until the mode
indicator disappears.
To Randomly Play Back a CD
1. While in the Stop mode, press the MODE button 4 times (5 times if an MP3 CD with multiple directories is
inserted); "RANDOM" will appear in the display.
2. Press the PLAY/PAUSE button to begin playback. The unit will play all the tracks in random order. When all
the tracks have been played, the unit will stop. To cancel Random playback, press the MODE button
repeatedly until the mode indicator disappears.
To Program the Memory (Up to 24 Tracks)
Programming is the ability to pre-select the order in which a series of tracks will be played.
1. While in the Stop mode, press the PROG. button. The track number will blink and "P-01" will appear in the
display.
2. Select a track to be programmed using the Skip/TUNING DN or UP button. If using a MP3 disc, see note
below.
3. Press the PROG. button to memorize the track. Repeat steps 2 and 3 to program additional tracks up to a
maximum of 24 tracks.
4. Press the PLAY/PAUSE button to begin program playback.
NOTES:
While in the Stop mode and "P" is in the display, press the "STOP" button to clear the memory.
MP3: If an MP3 CD is inserted, you will first select the directory number in step 1, press the PROG.
button and then enter the file/track number.
13
  • Page 1 1
  • Page 2 2
  • Page 3 3
  • Page 4 4
  • Page 5 5
  • Page 6 6
  • Page 7 7
  • Page 8 8
  • Page 9 9
  • Page 10 10
  • Page 11 11
  • Page 12 12
  • Page 13 13
  • Page 14 14
  • Page 15 15
  • Page 16 16
  • Page 17 17
  • Page 18 18
  • Page 19 19
  • Page 20 20
  • Page 21 21
  • Page 22 22
  • Page 23 23
  • Page 24 24
  • Page 25 25
  • Page 26 26
  • Page 27 27
  • Page 28 28
  • Page 29 29
  • Page 30 30
  • Page 31 31
  • Page 32 32

Sirius Satellite Radio XS027 User manual

Type
User manual
This manual is also suitable for

Sirius Satellite Radio Xact XS027 combines AM/FM radio and CD player with a satellite radio receiver, offering various entertainment options in one portable device. Enjoy crystal-clear satellite radio reception with the included satellite radio receiver and remote control, or switch to AM/FM radio stations with 10 presets for your favorite channels. Additionally, play your favorite CDs and MP3s with the built-in CD player, featuring playback controls and repeat functions.

Ask a question and I''ll find the answer in the document

Finding information in a document is now easier with AI