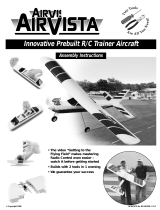
Page is loading ...

WELCOME TO RADIO CONTROLLED FLIGHT!
Your Sky Buddy is ready for Fun at a moments notice. Clean, Quiet electric power and Lightweight Durable design makes this
model aircraft a good choice for beginners and experts alike. Don’t discard the box! It’s great for storing your Sky Buddy. Put
your Sky Buddy in the trunk of your car and you’ll be ready to fly wherever you go. The R/C hobby becomes more and more
enjoyable as your experience grows. If you take your time and follow these instructions, your chances for success are very good
and you’ll be well on your way to becoming a competent R/C pilot. We hope you enjoy flying your Sky Buddy!
IFYOU DON’TREAD MANUALS, WEINSIST YOU ATLEAST READ THIS:
• You have everything you need inside the box except for batteries - Install 8 “AA” alkaline batteries in the transmitter.
• Make your first flight on a day when there is no wind, totally calm, and in a field with more room than you think you will need.
• Do Not overcharge the flight pack battery, always use a stopwatch or wristwatch and don’t charge for much longer than about
3 minutes and you’ll be OK. Never leave the batteries unattended when they are charging, you should monitor the temperature
at all times. Make sure your battery is drained before re-charging. The charged battery should be warm but not too hot.
• Remember that when your Sky Buddy is flying towards you, your controls will seem “reversed” - it takes a while to learn to fly
towards yourself, you’ll find that the airplane will turn the opposite way you thought you were going. It will help you a lot if you
imagine that you are sitting in the model’s cockpit.
• Full Throttle (Left Stick) will make the Sky Buddy climb. The Right Stick is for “steering” left and right.
• This micro airplane weighs less than 2 ounces, but you should still take care to choose an appropriate flying site away from
cars, people etc. Protect Yourself And Others by being safety conscious when flying your model airplane.
• If you are going “Solo” right here and right now without reading the rest of these “destructions”, at least ensure that you are in
a big grassy field on a day with no wind. Flying in a grassy field, the Sky Buddy can survive most crashes without any damage.
• Read all safety warnings in this manual before flying, please turn the page and continue to read the manual!
1 Copyright 2003 Plantraco Ltd. Version 1.0
4
FLY I N G TIPS
If you have never flown an R/C aircraft, it is a good idea to get help from an experienced R/C pilot, but if you can’t find one to help you learn,
the following will help you:
• Always make short duration control movements for steering. By making small control movements, you reduce the risk of “oversteering” the
airplane in a turn. There is always a little bit of time lag between your control stick movements and the change of motion in the Sky Buddy, so
try to make small changes rather than big changes to the flight path of the plane. Keep your eye on the plane and observe what it is doing
and plan ahead.
• If you get confused while flying the Sky Buddy, your best bet is to release the Right stick, and decide whether to apply full throttle or no
throttle with your Left stick. Keep the airplane at a safe altitude, and concentrate on which way you need to turn, and then try a short duration
control movement to see if you got it right.
• A typical flight could be as long as 6 minutes, but it is probably a good idea to have a good place to land at all times. When your flight pack
battery gets depleted, you will notice that the Sky Buddy won’t climb as well, this is usually a good time to make a landingbefore the 6 minute
maximum flight time, and recharge the flight pack.
• Always take off and land into the wind. This will help slow the Sky Buddy down and make it easier to land.
• When the Sky Buddy is coming toward you, moving the Right stick causes the plane to turn left, but it appears to turn to your right. You have
to reverse the way you control the right stick. Imagine yourself in the pilot’s seat and keep on practicing, you’ll get it.
ADJUSTMENTS TO YOUR SKY BUDDY
REPAIRS
• The Sky Buddy Airplane is constructed of light weight foam and should withstand most of the abuse of learning to fly. But if the airplane sus-
tains some damage, here are some helpful hints to get you back up in the air:
• Damaged Propeller: To remove the old propeller slide the supplied prop removal tool between the motor and the propeller, brace the motor
pod area with one hand while gently prying the prying the prop with the other. To install a new prop, hold the motor pod area with one hand
and gently press on the new prop with the other hand. Be careful not press the prop on so far that it binds with the motor.
• If the Foam Wing becomes damaged, it can be repaired by aligning the broken area and applying a piece of cellophane tape across the
break.
• If the motor pods become loose in a crash, you can re-attach them with white glue. You should be cautious of using other glues as it is possi-
ble that it could melt the foam. If you are unsure, you can try applying some glue to the foam packaging of the airplane. You should not use
Superglue or other Cyanoacrylate adhesives as they will melt the foam.
WARRANTY INFORMATION
Plantraco guarantees this kit to be free of defects in both material and workmanship at the date of purchase. This warranty does not cover
any component parts damaged by use or modification. In no case shall Plantraco’s liability exceed the original cost of the purchased kit.
Further, Plantraco reserves the right to change or modify this warranty without notice. No liability shall be assumed nor accepted for any dam-
age resulting from the use by the user of the final user-assembled kit. By the act of using the product, the user accepts all resulting liability.
Clean Quiet Electric Flight
All Up Weight is < 2 oz!
Requires 8 “AA” Batteries
COMPLETE MINIATURE RADIO CONTROLLED AIRPLANE SET
VISIT US ON THE WEB AT:
WWW.PLANTRACO.COM
WWW.SKYBUDDY.COM
Ready to Fly Right Now!

SAFETY WARNINGS
• IIMMPPOORRTTAANNTT!!Never leave the flight pack battery unattended while charging! Always monitor battery temperature while charging.
• The Sky Buddy in not intended for those under 12-years of age unless a supervising adult is in attendance.
• Never fly near power lines, at night, in traffic, above basketball games, in the shower, or during hailstorms, or while sleeping.
• Be aware and keep away from the spinning propellers, don’t tangle your hair or clothes in the prop, keep spectators behind you.
• Before flying your Sky Buddy you should do a range test to insure that the transmitter batteries are still strong. Ask a friend to
hold your airplane 25 feet away, with the transmitter antenna still collapsed test the motor controls.
• Always extend the antenna fully when flying; Flying with a partially extended antenna could cause poor radio range.
• Never cut the radio antenna on the airplane, and note that the model should not be modified in any way for your first flights.
• Always remove the flight pack battery from the airplane after use
BOX CONTENTS
• Sky Buddy Transmitter and Sky Buddy Transmitter antenna
• Sky Buddy Airplane
• 2 Spare propellers
• Red Telltale indicator ribbon (attach to the transmitter antenna)
• Plastic Stand (Yellow Plastic 2 pcs)
• NiMH Flight Pack Battery
• Propeller Puller Tool (looks like a black disc with a slot cut out of it - the slot is used to pull the prop from the motor shaft)
• Instructions (you are reading these now)
CHARGE THE FLIGHT PACK BATTERY
Plug the flight pack battery into the back of the transmitter as shown in the picture below. It is very important to closely monitor
the battery temperature when charging; the battery temperature is an indication of the charge status. Only charge the flight pack
battery until it becomes warm, not too hot. Use a wristwatch and time how long the battery has been charging. A full charge
should take about 3 minutes with fresh transmitter batteries, slightly longer (up to 5 min) if the main cells are getting depleted.
•NNeevveerr lleeaavvee tthhee fflliigghhtt ppaacckk bbaatttteerryy uunnaatttteennddeedd wwhheenn iitt iiss cchhaarrggiinngg,, yyoouu sshhoouulldd mmoonniittoorr tthhee tte
emmppeerraattuurree aatt aallll ttiimmeess..
••NNeevveerr ttrryy ttoo rreecchhaarrggee aa fflliigghhtt ppaacckk bbaatttteerryy tthhaatt iiss aallrreeaaddyy cchhaarrggeedd..
To prevent damage to the airplane’s battery, make sure that it is completely dis-
charged before you recharge the cell. After a flight, if there is still some battery
power left, you can run the motors down for a few minutes to make sure it is
discharged. This ensures that you won’t over-charge the cell next time.
Allow the flight pack battery to cool off after you have been flying before
recharging it again.
Take note of the white tab of tape hanging off the side of the flight pack battery.
This little tab of tape is what you are going to use to pull the battery out of the
airplane fuselage when you need to recharge it.
It is good to keep a count of how many charge cycles you have made.
The transmitter batteries, (8 “AA” Alkaline cells), should be good for 10
or more charge cycles depending on their quality. Since we
are depleting the transmitter batteries through charging our
flight pack battery, it is a good habit to do a range check
of the transmitter and aircraft before every flight.
The Sky Buddy flight pack is a 3.6 Volt,
150mAh capacity, 3-cell, Nickel Metal
Hydride, “NiMH” pack. Extra or replace-
ment batteries are available from
your Plantraco dealer where you
purchased your Sky Buddy, or
........from http://www.plantraco.com
PRE-FLIGHT TRAINING AND ORIENTATION
• Switch your Transmitter “ON”, the LED on the Transmitter should glow RED.
• Open the door on the underside of the Sky Buddy’s fuselage, plug the connector
into the matching airplane plug and insert the battery pack inside the airplane
fuselage. Close/re-attach the door.
• Hold the airplane in your hand (or place it on the included plastic stand) and
make sure the propellers are free to spin and safe from touching anything.
• Push the left stick of the transmitter forwards and you should notice that both
propellers spin at full speed. The left stick is used as your throttle for most R/C
setups, so your flying skills with the Sky Buddy will help you with other planes too.
• Move the Right stick left and right and notice the modulation of the motor thrust.
If you move the Right stick to the left direction, you will note that the right side
motor of the airplane is spinning faster than the left side motor of the airplane.
This will cause the airplane to “steer to it’s left” in flight.
• So your Left stick is for throttle and your right stick is for “steering” - it all seems
simple at first, and it is. Just remember that the airplane will always be turning
to “it’s left” or “it’s right”. When you fly the airplane it will help a lot if you can
imagine that you are in the cockpit holding the controls. When the Sky Buddy is
flying towards you, use your imagination to flip yourself around - your body inside
the cockpit of the airplane looking towards the “real” you, standing in the park. If
you can imagine yourself in the plane, you can make a turn by moving your Right
stick, and your Sky Buddy will turn to the direction that you expected - and that’s
a good thing! BUT: if you are a beginner and your plane is coming back
towards you, and you move your stick to make a turn and the plane turns the
wrong way, Yikes! You might have to wait for the plane to safely finish its turn,
albeit in the wrong direction, and concentrate on imagining you are back in the
cockpit to regain control of the airplane’s flight path. During your first flight you
might experience this “control reversal” issue, so definitely prepare for it.
• Consult the diagrams on the side of the Sky Buddy box to review the controls
etc. - A picture is worth a thousand words.
HOW TO FLY
• The Sky Buddy can fly indoor or outdoors, but for your first flight it is probably best to select a good grassy field free of trees, wires, poles or people.
• Make your first flight on a day with no wind. Attach the “Tell-Tale” Ribbon to the tip of the Transmitter antenna to gauge wind.
• Throw your Sky Buddy horizontally (into the wind if there is any wind at all), and with your other hand push the throttle stick forwards for full
throttle. You will see that your Sky Buddy will start to climb skyward. Do Not attempt to turn until your Sky Buddy has climbed to a safe alti-
tude. Small momentary stick movements might be ok just to keep the model flying in a straight line, but if you make a large turn when you
are still low to the ground, you may lose too much altitude in the turn and crash.
• Once the Sky Buddy is high enough, you can make a turn by moving the Right stick to the direction you want to turn, while still holding the
Left stick forwards for full throttle. Once the model is turned in the direction you want, let go of the Right stick and let it spring back to the
middle in order to resume straight flight. Make short duration control stick movements, try not to oversteer.
• Reduce your throttle to decrease altitude and use full throttle to climb.
• When you notice a diminished motor speed and ability to climb, you can start to plan your landing. There is no landing gear, you can just skid to a stop
on the grass or smooth ground.
23
/