Page is loading ...

SRT321
User and Installation Instructions
1
Electronic Room Thermostat &
Temperature Sensor (Tx) - Z-Wave

2

TM
The Secure SRT321 forms part of a Z-Wave Plus
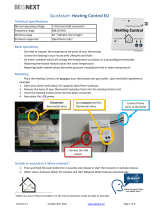
home automation network.
The SRT321 is a wireless electronic battery powered
room thermostat that uses interoperable two-way RF
mesh networking technology to provide optimum
comfort with close control of the energy used to heat the
home without the need for additional wiring or unsightly
cable runs.
This document provides information specific to the Z-
Wave Plus technology implemented on
SRT321, to ensure correct interoperability between
third party devices.
The SRT321 has been developed to control central
heating systems where the demand temperature can
be set locally or remotely by a third party device. The
SRT321 also has the capability to act as a temperature
sensor.
3

The Secure SRT321 thermostat uses the latest control
technology to provide extremely accurate temperature
control which will help to keep your energy usage as low
as possible without affecting your comfort levels. In fact
comfort levels may well be improved as the control
accuracy should ensure that the room does not
‘overheat’ before switching off.
The display will show the
require d t e m p e r at ure
setting and can be adjusted
in increments of 1°C.
To adjust the required
temperature setting turn
the dial anti clockwise to
decrease it and clockwise
to increase it.
USER INSTRUCTIONS
4

When the thermostat is in the ‘call for heat’
condition a flame symbol will appear in the
display.
Pressing the temperature setting dial will allow
the user to check the current actual measured
room temperature which will be displayed for
approx 7 seconds before returning to the set
temperature.
The aerial symbol complete with radio wave
symbols in the display of the SRT321
thermostat indicates that it is communicating
satisfactorily with the rest of the system.
A flashing radio wave indicates a loss of
communication. This may be temporary and can often
be restored by turning the thermostat dial and
increasing or decreasing the temperature to make the
thermostat send a temperature update to a controller. If
this has no effect please see Z-Wave pairing
instructions on page 12. 5

A radio mast symbol with no radio waves
indicates that the SRT321 has not been
signed on to enable it to communicate with
the Z-Wave system. In this case you may
wish to contact the Installer as the indication
is that the product has not been commissioned when
the installation took place. Alternatively see the Z-Wave
pairing instructions on page 12.
Note: This product can be included and operated in any
Z-Wave network with other Z-Wave certified devices
from other manufacturers and/or other applications. All
non-battery operated nodes within the network will act
as repeaters regardless of vendor to increase reliability
of the network.
6

7
Battery Replacement
The SRT321 runs on 2 x type AAA (Alkaline) non
rechargeable batteries and is designed to give a battery
life of approximately two years – under normal usage
conditions.
Battery should
be changed
immediately
Low battery symbol
appears first when
the batteries are
nearing the end of
their life.
When the batteries are
nearing the end of their life
a low battery symbol will
appear in the display and
the batteries should be
changed within a few days.
If the batteries are not changed at this point eventually a
‘LO’ battery message flashes intermittently in the
display and if this happens the batteries should be
changed immediately.
To change the batteries it is necessary to remove the
thermostat from the wall. To do this first undo the two
captive screws at the base of the thermostat and swing
the thermostat up and away from the wall plate.

Please dispose of old batteries
responsibly
Remove the old batteries and replace
them with two new AAA size alkaline
batteries ensuring that they are fitted
correctly as indicated by the terminal
markings in the battery compartments.
8
Once the batteries are fitted, re-fit the thermostat to the
wall plate by engaging with the lugs at the top of the wall
plate and push the thermostat into position. Locate it
over the captive screws at the base of the wall plate and
tighten so that the thermostat is locked into position.
Check the temperature setting is correct and adjust if
necessary.

9
Fitting the SRT321 Room Thermostat
Avoid installing the thermostat against or behind any
large metal surfaces which could interfere with the radio
signals. The SRT321 should be mounted on an internal
wall approximately 1.5 meters from floor level using the
wall plate provided and should be in a position away
from draughts, direct heat and sunlight. Ensure that
there will be enough space to allow easy access to the
two retaining screws located at the base of the wall
plate.

Offer the plate to the wall in the position where the
SRT321 is to be mounted and mark the fixing positions
through the slots in the wall plate. Drill and plug the wall,
then secure the plate into position. The slots in the wall
plate will compensate for any misalignment of the
fixings.
Complete the installation by swinging the room
thermostat into position by engaging with the lugs at the
top of the wall plate before pushing it carefully into its
plug-in terminal block.
Tighten the 2 captive screws on the
underside of the unit.
Now ensure that the system is
responding to the ON/OFF commands
from the Room Thermostat and explain its operation to
the householder before handing over these User
Instructions.
10

11
DIL switch settings – TPI temperature control
software
Thermostats using TPI (Time Proportional Integral)
control algorithms will reduce the temperature swing
that normally occurs when using traditional bellows or
thermally operated thermostats. As a consequence, a
TPI regulating thermostat will maintain the comfort level
far more efficiently than any traditional thermostat.
When used with a condensing boiler, the TPI
thermostat will help to save energy as the control
algorithm allows the boiler to operate in condensing
mode more consistently compared to older types of
thermostat.
ŸDIL switch numbers 7 and 8 should be
set as diagram opposite.
ŸFor Gas boilers set the TPI setting to 6
cycles per hour. (Default setting)
ŸFor Oil boilers set the TPI setting to 3
cycles per hour.
ŸFor Electric heating set the TPI setting
to 12 cycles per hour.
ON
OFF
1 INSTALLER MODE
2 NOT USED
3 NOT USED
4 NOT USED
5 NOT USED
6 NOT USED
TP[
3
TP[
6
TP[
12
SWITCH CONFIGURATION SRT321
7
8
Switch positions for
different TPI settings.

INSTALLATION MENU / INSTRUCTIONS
Set DIL switch 1 to ’ON’ position on the back of the unit,
scroll through the function menu by rotating the dial, to
select the required function press the dial. On selecting
a function the character will start flashing while waiting
for a response from the 3rd party device, a successful
response will display a P after the character and a
failure will be displayed with an F.
If no response has been received from a 3rd party unit
within the time-out period, the SRT321 will report a
failure.
To exit installation mode, change DIL switch 1 to its
‘OFF’ position.
Note: All functionality is not accessible in Installation
mode.
12

13
Mode
Indication Z-Wave Function
I
E
N
L
Li
P
A
D
C
Add Node onto network (See Point 1,4)
Remove Node from network (See Point 1,4)
Transmit Node Information Frame (NIF) (See Point 2)
Learn Mode - use this command for: (See Point 1,5,8)
Add or Remove with another controller (does not support
control group copy) Adding and reception of a primary role
Receive Period Enabled (Listening).
This function will keep the unit awake for 60sec, no Pass or
Fail response will be provided
Protocol Reset (See Point 9) - Press twice to activate, will
restore all parameters back to factory default settings
(Please use this procedure only when the primary controller is
missing or otherwise inoperable)
Associate Control Unit (See Point 3,4,6)
Disassociate Control Unit 3, 6
Controller Shift (See Point 3)
This function allows the installer to manually relinquish the
primary controller role of the SRT321 to become a secondary
or inclusion controller.

1 Once the character starts flashing the installer has
60 sec to activate the 3rd party unit, once the 3rd
party unit has been activated the process must be
completed within 240 sec or SRT321 will timeout.
2 If an outcome is not received within 5sec the
SRT321 will report a failure.
3 On selecting this function the installer has 60s to
initiate a 3rd party unit before the SRT321 times
out and reports a failure
4 Nodes supporting ‘Thermostat Mode Command
Class’ will be associated/dissociated with Group 2
and nodes supporting ‘Binary Switch Command
Class’ will be associated/dissociated with Group 3.
5 All association settings will be lost if learn mode has
been activated with another controller regardless of
a pass or fail result, any associations settings will
have to be re-configured either remotely or manually.
14

6 Nodes can be added/removed from any of the
groups in the ‘Association Command Classes’ by
using these commands.
7 In the instance both ‘Thermostat Mode’ and ‘Binary
Switch’ Command Class are supported, the
SRT321 will default to use the ‘Thermostat Mode
Command Class’.
8 Once the character starts flashing the installer has
20 sec to activate the 3rd party unit and the process
must be completed within 20 sec (2 sec. classic
inclusion, than after 3 retries for NWI inclusion)
9 No time delay between two successive presses.
Network Update Scheme
When the unit is a secondary or inclusion controller with a
SUC/SIS present, the unit will request network updates
once every 23 hours.
15

SUPPORTED DEVICE AND COMMAND CLASSES
16
Z-Wave Plus
Device Classes Implemented Device Classes
Generic Device Class GENERIC_TYPE_THERMOSTAT
Specific Device Class SPECIFIC_TYPE_THERMOSTAT_GENERAL_V2
Basic Device Class Reporting Portable Controller
Command Class Commands Supported
Manufacturer Specific (V2)
Set
Get
Report
Supported Command Classes
Mapping of Basic CC:
Basic Set: 0x00 = ENERGY SAVING MODE (Temperature Set Point = 5˚C)
0xFF = COMFORT MODE (Temperature Set Point = 21°C)
Basic Report: 0x00 = ENERGY SAVING MODE (Temperature Set Point = 5˚C)
0xFF = COMFORT MODE (Temperature Set Point > 5˚C)
Device Specific Get
Device Specific Report
Basic CC (V1)
Get
Report

17
Version (V2) Get
Report
Manufacturer ID = 0x0059
Product Type ID = 0x0001
Product ID = 0x0005 (SRT 321)
Device ID Type 0 and 1 for serial number (Data format Binary, length 4 Bytes)
Version Command Class Get
Version Command Class Report
Provides the version number of the Z-Wave stack, Command Class, Firmware
and Hardware.
Z-Wave Plus Info (V2) Get
Report
Role Type: ROLE_TYPE_CONTROLLER_PORTABLE_REPORTING
Node Type: ZWAVEPLUS_INFO_REPORT_NODE_TYPE_ZWAVEPLUS_NODE
Installer Icon: ICON_TYPE_GENERIC_THERMOSTAT_HVAC
User Icon: ICON_TYPE_GENERIC_THERMOSTAT_HVAC
Association (V2) Set
Get
Report
Remove
Supported Groupings Get
Supported Groupings Report
Specific Group Get
Specific Group Report

18
Association Group Info (V1) Group Name Get
Group Name Report
SRT321 supports 6 association groups, Group 1 (Lifeline) is having only one
node and Group 2 to Group 6 are having maximum 4 nodes.
Group Info get
Group Info Report
Group Command List Get
Group Command List Report
Six association groups are supported.
Group 1:
name - “Lifeline”
Profile MSB - ASSOCIATION_GROUP_INFO_REPORT_PROFILE_GENERAL
Profile LSB -
ASSOCIATION_GROUP_INFO_REPORT_PROFILE_GENERAL_LIFELINE
Supported Command class and command -
COMMAND_CLASS_BATTERY, BATTERY_REPORT
COMMAND_CLASS_THERMOSTAT_SETPOINT,
THERMOSTAT_SETPOINT_REPORT
COMMAND_CLASS_SENSOR_MULTILEVEL,
SENSOR_MULTILEVEL_REPORT
COMMAND_CLASS_THERMOSTAT_OPERATING_STATE,
THERMOSTAT_OPERATING_STATE_REPORT
COMMAND_CLASS_DEVICE_RESET_LOCALLY,
DEVICE_RESET_LOCALLY_NOTIFICATION

19
Group 2:
name - "Thermostat Mode Control"
Profile MSB - ASSOCIATION_GROUP_INFO_REPORT_PROFILE_SENSOR
Profile LSB -
AGI_REPORT_PROFILE_MULTILEVEL_SENSOR_TYPE_TEMPERATURE
Supported Command class and command -
COMMAND_CLASS_THERMOSTAT_MODE, THERMOSTAT_MODE_SET
Group 3:
name - "Switch Control"
Profile MSB - ASSOCIATION_GROUP_INFO_REPORT_PROFILE_SENSOR
Profile LSB -
AGI_REPORT_PROFILE_MULTILEVEL_SENSOR_TYPE_TEMPERATURE
Supported Command class and command -
COMMAND_CLASS_SWITCH_BINARY, SWITCH_BINARY_SET
Group 4:
name - "Battery Info"
Profile MSB - ASSOCIATION_GROUP_INFO_REPORT_PROFILE_GENERAL
Profile LSB -
ASSOCIATION_GROUP_INFO_REPORT_PROFILE_GENERAL_NA
Supported Command class and command -
COMMAND_CLASS_BATTERY, BATTERY_REPORT

20
Group 5:
name - "Thermostat Set point"
Profile MSB - ASSOCIATION_GROUP_INFO_REPORT_PROFILE_GENERAL
Profile LSB -
ASSOCIATION_GROUP_INFO_REPORT_PROFILE_GENERAL_NA
Supported Command class and command -
COMMAND_CLASS_THERMOSTAT_SETPOINT,
THERMOSTAT_SETPOINT_REPORT
Group 6:
name - "Air Temperature"
Profile MSB - ASSOCIATION_GROUP_INFO_REPORT_PROFILE_GENERAL
Profile LSB -
ASSOCIATION_GROUP_INFO_REPORT_PROFILE_GENERAL_NA
Supported Command class and command -
COMMAND_CLASS_SENSOR_MULTILEVEL,
SENSOR_MULTILEVEL_REPORT
Thermostat Mode (V1) Set
Get
Report
Supported Get
Supported Report
Only ‘Heat Mode’ is supported within this command class, which can only
read, it cannot be set.
/