Page is loading ...

GRACE Puck Light Installation Instructions
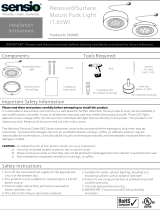
Installing Grace Puck Lighting
The Grace Puck Light is a low-voltage direct-current light fixture that is
intended for indoor use. While the Grace Light does not require a certified
electrician for installation, you may wish to consult with a professional
installer if you are not familiar with basic low voltage wiring. For typical
installations follow these suggested steps:
Surface Wire Install
1) Remove bezel from LED back-plate assembly
2) Confirm fixture, power supply and control locations and run low
voltage wiring
3) If recessing wire, drill holes
4) Connect fixtures to wiring and test system functionality
5) Permanently fasten back-plate assembly to mounting surface using
self-tapping screw (included)
6) Dress wiring as required
7) Secure bezel, color film (if desired) and lens with screws provided
Puck Components
Color films approximate typical
dimmed incandescent light colors.
Place film against lens inside of
puck enclosure.
Power Requirements
Use only Class 2 Power Supplies offered by The Lighting Division as they include
many beneficial features for the long life and designed operation of your Grace
Light fixtures. Connection to other power sources will void your warranty and
may cause fixture damage.
Since each Grace Puck Light consumes a small amount of power, a number of fixtures
may be
powered by a single supply. Fixtures are intended to be daisy chained in order
to minimize wire runs.
Recessed Wire Install
Voltage Drop
As with any low voltage lighting product, reduced light output can occur if installations do not account for the effect of
voltage drop over long runs of fixtures or wire. Since Grace Fixtures are LED, the voltage drop per fixture is far less than
other light sources. Most installations do not need to factor in this concern. Long
runs and large distances from the power
supply (remote location of 50 feet or more) to fixtures do require consideration of wire gauge and component location.
Consult local codes or call factory for further assistance.
Wiring Grace Light
Each end of the Grace Puck Light has wiring terminals; however, connection to only one end is required to power a single
fixture. You may use any wire suitable for low-voltage direct-current, as the terminal will accept 16-24 AWG. Grace
Puck Lights may be wired to any other Grace or Natalie fixture.

TLD Power Supply
* Each Puck Consumes 3.5 Watts
TLD-6WSI Wall Adapter 6 1
TLD-24WSI Wall Adapter 24 7
TLD-30WSO Hard Wired 30 9
TLD-40WSI Laptop 40 11
TLD-60WSO Hard Wired 60 17
TLD-75WSO Hard Wired 75 21
Type Wattage
Maximum Number of
Grace Puck Lights*
We recommend the use of 16-20 AWG for Grace Puck
Fixtures. Note the red mark to one side of the terminal.
This indicates the positive voltage wire position.
Simply strip 1/4 inch of the insulation from your wire;
insert the wire into the opening immediately below the
screw head, and secure by turning the screw clockwise
with a small flathead (eyeglass repair type)
screwdriver. When the screw stops turning, tug lightly
on the wire to check retention. To remove the wire from
the terminal, back out the screw with the screwdriver
by turning in the counterclockwise direction. Secure the ground wire in the same fashion to the other position in the
terminal.
When connecting a second Grace Puck Light Fixture, use the opposite terminal to connect to either terminal strip of the
next fixture. Be sure to keep the same wire on the red indication for both lights. Finally to connect power, simply place
the stripped end of the power supply wire into the end of an open Grace fixture terminal. The positive power wire from
the power supply is either the red wire, or the white lettered/marked of the pair. You may choose to connect the power to
the first fixture and continue wiring with the power remaining on.
Power supplies from The Lighting Division include intelligent features which aid in the electrical installation of your
system. If at any time no lights remain on while installing, check the last connection - it may be reversed or shorted.
If the lights blink on and off, the load has exceeded the capacity of the power supply, or a connection just made is
reversed.
Adding Switch and Dimming
You can control your Grace Puck Lights by:
1) Switching the power on/off to power supply
2) Installing a low-voltage switch (TLD-SW1) between the power
supply and the fixture(s)
3) Installing an under-cabinet dimmer module (TLD-DM-U)
between the power supply and the fixtures
4) Installing an under-cabinet high-low switch (TLD-DM-HL) between
the power supply and the fixture(s)
5) Installing a wireless dimming module (TLD-CWD) with most dimming control systems
6) Installing a wireless dimming module (TLD-WD) and wall control (TLD-WDC-xx) or remote control
(TLD-WHC-xx)
More information on switching and dimming is available from your dealer or our web site.
Note: Dimmer controls for 110VAC incandescent lighting are not compatible with Grace Light fixtures
Wall Adaptor Supply Installation
Revised 11-12
100 Boxart Street, Suite 230
Rochester, NY 14612
585-697-0093
Fax: 585-663-1432
www.thelightingdivision.com
Made in USA
Power Supplies
Certi�ied to
ENERGY STAR
Fixtures Certi�ied
to UL and CSA
Standards
Life In LED Light
/


