Alpine IVE-W560BT Owner's manual

Category
Car video systems
Type
Owner's manual

This manual is also suitable for

3-EN
EN
ENGLISH
Operating Instructions
WARNING
WARNING ......................................................4
CAUTION .......................................................4
NOTICE ..........................................................5
Discs Playable on This Unit ........................6
Getting Started
Accessory List ................................................ 10
Location of Controls ....................................... 10
Touch Operation ............................................. 10
Initial System Start-Up ................................... 11
Setting the Clock ............................................. 11
Preparing a BLUETOOTH Device ................. 11
Radio
Listening to the Radio ..................................... 12
Storing and Receiving Stations ....................... 12
Tuning ......................................................... 12
Presetting Stations Automatically ............... 12
Presetting Stations Manually....................... 12
Using Radio Data System (RDS) ................... 13
Playback
Playing a Disc ................................................. 14
Playing an iPod/USB Device .......................... 14
Playing a BLUETOOTH Device .................... 15
Searching and Playing Tracks ......................... 15
Available Options ........................................... 16
Picture EQ ................................................... 16
Aspect .......................................................... 16
DVD Audio Level ....................................... 16
Useful Function
Using Siri Eyes Free ....................................... 16
Handsfree Calling
Receiving a Call .............................................. 17
Making a Call ................................................. 17
Available Operations During a Call ................ 17
Call Data Management ................................... 17
Phone Option Menu ........................................ 17
Settings
General Settings .............................................. 18
Sound Settings ................................................ 19
Screen Settings ................................................ 20
Visual Settings ................................................ 20
Additional Devices
Auxiliary Audio/Video Equipment ................. 21
Rear View Camera .......................................... 21
Information
Language Code List ........................................ 22
Troubleshooting .............................................. 23
Specications .................................................. 27
Installation and
Connections
Warning ....................................................... 28
Caution ........................................................ 28
Precautions ................................................ 28
Installation ...................................................... 29
Installing the Microphone ............................... 29
Connections .................................................... 30
Contents
4-EN
Operating Instructions
WARNING
WARNING
This symbol means important instructions.
Failure to heed them can result in serious injury
or death.
INSTALL THE PRODUCT CORRECTLY SO THAT THE DRIVER
CANNOT WATCH TV/VIDEO UNLESS THE VEHICLE IS STOPPED
AND THE PARKING BRAKE IS APPLIED.
It is dangerous for the driver to watch TV/Video while driving
a vehicle. Installing this product incorrectly enables the driver
to watch TV/Video while driving. This may cause a distraction,
preventing the driver from looking ahead, thus causing an
accident. The driver or other people could be severely injured.
DO NOT WATCH VIDEO WHILE DRIVING.
Watching the video may distract the driver from looking ahead of
the vehicle and cause an accident.
DO NOT OPERATE ANY FUNCTION THAT TAKES YOUR
ATTENTION AWAY FROM SAFELY DRIVING YOUR VEHICLE.
Any function that requires your prolonged attention should only
be performed after coming to a complete stop. Always stop the
vehicle in a safe location before performing these functions.
Failure to do so may result in an accident.
KEEP THE VOLUME AT A LEVEL WHERE YOU CAN STILL HEAR
OUTSIDE NOISES WHILE DRIVING.
Excessive volume levels that obscure sounds such as emergency
vehicle sirens or road warning signals (train crossings, etc.) can be
dangerous and may result in an accident. LISTENING AT LOUD
VOLUME LEVELS IN A CAR MAY ALSO CAUSE HEARING
DAMAGE.
MINIMIZE DISPLAY VIEWING WHILE DRIVING.
Viewing the display may distract the driver from looking ahead of
the vehicle and cause an accident.
DO NOT DISASSEMBLE OR ALTER.
Doing so may result in an accident, re or electric shock.
USE ONLY IN CARS WITH A 12 VOLT NEGATIVE GROUND.
(Check with your dealer if you are not sure.) Failure to do so may
result in re, etc.
KEEP SMALL OBJECTS SUCH AS SCREWS OUT OF THE REACH
OF CHILDREN.
Swallowing such items may result in serious injury. If
swallowed, consult a doctor immediately.
USE THE CORRECT AMPERE RATING WHEN REPLACING
FUSES.
Failure to do so may result in re or electric shock.
DO NOT BLOCK VENTS OR RADIATOR PANELS.
Doing so may cause heat to build up inside and may result in re.
USE THIS PRODUCT FOR MOBILE 12V APPLICATIONS.
Use for other than its designed application may result in re,
electric shock or other injury.
DO NOT PLACE HANDS, FINGERS OR FOREIGN OBJECTS IN
INSERTION SLOTS OR GAPS.
Doing so may result in personal injury or damage to the product.
CAUTION
This symbol means important instructions.
Failure to heed them can result in injury or
property damage.
STOP USING IMMEDIATELY IF A PROBLEM OCCURS.
Failure
to do so may cause personal injury or damage to the
product. Return it to your authorized Alpine dealer or the nearest
Alpine Service Center for repair.
KEEP FINGERS AWAY WHILE THE MOTORIZED FRONT PANEL
OR MOVING MONITOR IS IN MOTION.
Failure to do so may result in personal injury or damage to the
product.
For safety, be sure to install this unit in the dashboard of the car
as the rear side of the unit becomes hot during use.
For details, see “Installation and Connections” (page 28)
This product is classied as a Class 1 Laser product under
IEC 60825-1:2007.
Laser Diode Properties
Emission Duration: Continuous
Laser Output: Less than 46.8 W
(This output is the value measured at a distance
of 70 mm from the objective lens surface on the
optical pick-up block with 7 mm aperture.)
The nameplate indicating operating voltage, etc., is located on the
bottom of the chassis.
5-EN
EN
NOTICE
Product Cleaning
Use a soft dry cloth for periodic cleaning of the product. For more
severe stains, please dampen the cloth with water only. Anything
else might dissolve the paint or damage the plastic.
Temperature
Check that the temperature inside the vehicle is between +40°C
(+104°F) and 0°C (+32°F) before turning your unit on.
Moisture Condensation
You may notice the disc playback sound wavering due to
condensation. If this happens, remove the disc from the player and
wait about an hour for the moisture to evaporate.
Damaged Disc
Do not attempt to play cracked, warped, or damaged discs. Playing
a faulty disc could severely damage the playback mechanism.
Maintenance
If the unit appears faulty, do not attempt to repair it yourself.
Return it to your Alpine dealer or the nearest Alpine Service
Station for servicing.
Never Attempt the Following
Do not grip or pull out the disc while it is being pulled back into
the player by the automatic reloading mechanism.
Do not attempt to insert a disc into the unit when the unit power
is off.
Inserting Discs
Your player accepts only one disc at a time for playback. Do not
attempt to load more than one disc.
Make sure the label side is facing up when you insert the disc.
“Disc error” will be displayed on your player if you insert a disc
incorrectly. If “Disc error” continues to be displayed even though
the disc has been inserted correctly, push the RESET switch with a
pointed object such as a ballpoint pen.
Playing a disc while driving on a very bumpy road may result in
skips, but this will not scratch the disc or damage the player.
Irregular Shaped Discs
Be sure to use round shaped discs only for this unit and never use
any specially shaped discs.
Use of specially shaped discs may cause damage to the mechanism.
New Discs
To prevent the disc from jamming, “Disc error” is displayed if
discs with irregular surfaces are inserted or if discs are inserted
incorrectly. When a new disc is ejected immediately after initial
loading, use your nger to feel around the inside of the centre
hole and outside edge of the disc. If you feel any small bumps
or irregularities, this could inhibit proper loading of the disc. To
remove the bumps, rub the inside edge of the hole and outside
edge of the disc with a ballpoint pen or other such instrument, then
insert the disc again.
Centre Hole
Centre Hole
Bumps
New Disc
Outside
(Bumps)
Installation Location
Make sure the IVE-W560BT/IVE-W560BT-R is not installed in a
location subject to:
Direct sun and heat
High humidity and water
• Excessive dust
• Excessive vibrations
Correct Handling
Do not drop the disc during handling. Hold the disc so you do
not leave ngerprints on the surface. Do not afx tape, paper, or
gummed labels to the disc. Do not write on the disc.
CORRECT
INCORRECT
CORRECT
Disc Cleaning
Fingerprints, dust, or dirt on the surface of the disc could cause the
DVD player to skip. For routine cleaning, wipe the playing surface
with a clean, soft cloth from the centre of the disc to the outer
edge. If the surface is very dirty, dampen a clean, soft cloth in a
solution of mild neutral detergent before cleaning the disc.
6-EN
Disc Accessories
There are various accessories available on the market for protecting
the disc surface and improving sound quality. However, most of
them will influence the thickness and/or diameter of the disc. Using
such accessories can cause operational problems. We recommend
not using these accessories on discs played in Alpine DVD players.
Transparent Sheet
Disc Stabilizer
Operation of some of the functions of this unit is very complex.
Because of this, it was considered necessary to place these
functions within a special screen. This restricts operation of these
functions to times when the vehicle is parked. This ensures the
focus of the driver’s attention will be on the road and not on the
IVE-W560BT/IVE-W560BT-R. This has been done for the safety
of driver and passengers.
The car must be parked and the parking brake must be engaged for
the procedure described in the Owner’s Manual to be valid. The
warning “Can’t operate while driving”, will be displayed if any
attempts are made to perform these operations while driving.
The IVE-W560BT/IVE-W560BT-R draws minimal current
even when its power switch is turned off. If the switched
power (ignition) lead of the IVE-W560BT/IVE-W560BT-R is
connected directly to the positive (+) terminal of the vehicle’s
battery, the battery may be discharged.
An SPST (Single-Pole, Single-Throw) switch (sold separately)
can be added to prevent this. Then, you can simply turn
the SPST switch off when you leave the vehicle. Turn the
SPST switch back ON before using the IVE-W560BT/
IVE-W560BT-R. If the power (ignition) lead does not include
a SPST switch, it must be disconnected from the battery post
should the vehicle be left unused for an extended period of time.
Discs Playable on This Unit
Playable discs and file types
Discs
DVD* DVD VIDEO
DVD-R/DVD-R DL/DVD-RW
(Video mode)
DVD+R/DVD+R DL/DVD+RW
VCD Video CD (Ver. 1.0/1.1/2.0)
CD Audio CD
CD-ROM/CD-R/CD-RW
* “DVD” may be used in these Operating Instructions as a general
term for DVD VIDEOs, DVD-Rs/DVD-RWs, and DVD+Rs/
DVD+RWs.
File types
For details on compression formats, see page 7.
Audio MP3 file, WMA file
Video Xvid file, MPEG-4 file
Photo jpeg file (.jpg)
Note on playback operations of DVDs and VCDs
Some playback operations of DVDs and VCDs may be intentionally
set by software producers. Since this unit plays DVDs and VCDs
according to the disc contents the software producers designed,
some playback features may not be available. Also, refer to the
instructions supplied with the DVDs or VCDs.
Notes on DATA CDs, DATA DVDs and USB
playback
Some DATA CDs/DATA DVDs (depending on the equipment used
for its recording, or the disc condition) may not play on this unit.
Finalization is required for some discs (page 7).
The unit is compatible with the following standards.
For DATA CDs
ISO 9660 level 1/level 2 format, Joliet/Romeo in the expansion
format
7-EN
EN
For DATA DVDs
UDF Bridge format (combined UDF and ISO 9660)
The maximum number of:
folders (albums): 256 (including root and empty folders).
files (tracks/videos/photos) and folders contained in a disc:
2,000 (if folder/file names contain lots of characters, this
number may fall below 2,000).
displayable characters for a folder/ file name: 32.
Compatible codecs are MP3 (.mp3), WMA (.wma), JPEG (.jpg),
Xvid (.avi), and MPEG-4 (.avi).
DRM (Digital Rights Management) files cannot be played.
Notes on finalizing discs
The following discs are required to be finalized to play on this unit.
DVD-R/DVD-R DL (in video mode)
DVD-RW in video mode
DVD+R/DVD+R DL
CD-R
CD-RW
DVD+RW can be played without finalization. The disc is
automatically finalized.
For details, refer to the manual supplied with the disc.
Playback order of MP3/WMA/Xvid/MPEG-4
files
MP3/WMA/Xvid/
MPEG-4
Folder (album)
MP3/WMA/Xvid/
MPEG-4 le
(track/video)
About WMA files
WMA*1 files meeting the following requirements can be played.
Playback is not guaranteed for all WMA files meeting the
requirements.
Codec
Media File format: ASF file format
File extension: .wma
Bit rate: 48 to 192 kbps
(supports variable bit rate (VBR))*
2
Sampling frequency*
3
: 44.1 kHz
About MP3 files
MP3 files meeting the following requirements can be played.
Playback is not be guaranteed for all MP3 files meeting the
requirements.
Codec
Media File format: MP3 (MPEG-1 Layer3) file format
File extension: .mp3
Bit rate: 48 to 192 kbps
(supports variable bit rate (VBR))*
2
Sampling frequency*
3
: 32, 44.1, 48 kHz
About Xvid files
Xvid files meeting the following requirements can be played.
Playback is not be guaranteed for all Xvid files meeting the
requirements.
Codec
Media File format: Xvid file format
File extension: .avi
Profile: MPEG-4 Advanced Simple Profile
Bit rate: max. 8 Mbps
Frame rate: max. 30 fps (30p/60i)
Resolution: max. 720 × 576*
4
About MPEG-4 files
MPEG-4 files meeting the following requirements can be played.
Playback is not be guaranteed for all MPEG-4 files meeting the
requirements.
Codec
Media File format: AVI file format
File extension: .avi
Video codec: MPEG-4 Simple Profile
Audio codec: MP3
Bit rate: max. 8 Mbps
Frame rate: max. 30 fps (30p/60i)
Resolution: max. 720 × 576*
4
About JPEG files
JPEG*
5
files meeting the following requirements can be played.
Playback is not be guaranteed for all JPEG files meeting the
requirements.
Codec
Media File format: Compatible with DCF 2.0/Exif 2.21 file format
File extension: .jpg
Profile: Baseline Profile
Number of pixels: max. 6,048 × 4,032 pixels
(24,000,000 pixels)
*1 Copyright protected WMA file cannot be played back.
*2 Non-standard bit rates or non-guaranteed bit rates are included
depending on the sampling frequency.
8-EN
*3 Sampling frequency may not correspond to all encoders.
*4 These numbers indicate the maximum resolution of playable
video, and do not indicate the player’s display resolution. The
display resolution is 800 × 480.
*5 Some photo files cannot be played back, depending on their file
formats.
About iPod
You can connect the following iPod models. Update your iPod
devices to the latest software before use.
Compatible iPhone/iPod models.
Compatible Model USB
iPhone 6 Plus
iPhone 6
iPhone 5s
iPhone 5c
iPhone 5
iPhone 4s
iPhone 4
iPhone 3GS
iPod touch (5th generation)
iPod touch (4th generation)
iPod touch (3rd generation)
iPod classic
iPod nano (7th generation)
iPod nano (6th generation)
iPod nano (5th generation)
“Made for iPod” and “Made for iPhone” mean that an electronic
accessory has been designed to connect specifically to an iPod
or iPhone respectively, and has been certified by the developer
to meet Apple performance standards. Apple is not responsible
for the operation of this device or its compliance with safety and
regulatory standards. Please note that the use of this accessory
with iPod or iPhone may affect wireless performance.
About BLUETOOTH
What is BLUETOOTH technology?
BLUETOOTH wireless technology is a short-range wireless
technology that enables wireless data communication between
digital devices, such as a mobile phone and a headset.
BLUETOOTH wireless technology operates within a range of
about 10 m (about 33 feet). Connecting two devices is common,
but some devices can be connected to multiple devices at the
same time.
You do not need to use a cable for connection since
BLUETOOTH technology is wireless, neither is it necessary for
the devices to face one another, as is the case with infrared
technology. For example, you can use a BLUETOOTH device in a
bag or pocket.
BLUETOOTH technology is an international standard supported
and used by millions of companies all over the world.
About BLUETOOTH communication
BLUETOOTH wireless technology operates within a range of
approximately 10 m.
Maximum communication range may vary depending on
obstacles (person, metal, wall, etc.) or the electromagnetic
environment.
The following conditions may affect the sensitivity of
BLUETOOTH communication.
— There is an obstacle such as a person, metal object or wall
between this unit and BLUETOOTH device.
— A device using 2.4 GHz frequency, such as a Wi-Fi device,
cordless telephone, or microwave oven, is in use near this unit.
Because BLUETOOTH devices and Wi-Fi (IEEE802.11b/g/n/ac)
use the same frequency, microwave interference may occur and
result in communication speed deterioration, noise, or invalid
connection if this unit is used near a Wi-Fi device. In such as
case, perform the following.
— Use this unit at least 10 m away from the Wi-Fi device.
— If this unit is used within 10 m of a Wi-Fi device, turn off the
Wi-Fi device.
— Install this unit and the BLUETOOTH device as close to each
other as possible.
Microwave emission from a BLUETOOTH device may affect the
operation of electronic medical devices. Turn off this unit and
other BLUETOOTH devices in the following locations because
they may cause an accident.
— where inflammable gas is present, in a hospital, train, aircraft,
or petrol station
— near automatic doors or a fire alarm
This unit supports security capabilities that comply with the
BLUETOOTH standard to provide a secure connection when
the BLUETOOTH wireless technology is used, but security may
not be adequate depending on the setting. Be careful when
communicating using BLUETOOTH wireless technology.
We do not accept any responsibility for the leaking of information
during BLUETOOTH communication.
9-EN
EN
Connection with all BLUETOOTH devices cannot be guaranteed.
— A device featuring BLUETOOTH function is required
to conform to the BLUETOOTH standard specified by
BLUETOOTH SIG, and be authenticated.
— Even if the connected device conforms to the above
mentioned BLUETOOTH standard, some devices may not
connect or work correctly, depending on the features or
specifications of the device.
— While talking on the phone handsfree, noise may occur,
depending on the device or communication environment.
Depending on the connecting device, it may require some time to
start communication.
Others
The BLUETOOTH device may not function with mobile phones
depending on radio wave conditions and the location where the
equipment is being used.
If you experience discomfort while or after using the BLUETOOTH
device, stop using the BLUETOOTH device immediately. Should
any problem persist, consult your nearest Alpine dealer.
If you have any questions or problems concerning your unit that are
not covered in these Owner’s Manual, consult your nearest Alpine
dealer.
Maintenance
Replacing the lithium battery of the remote
control
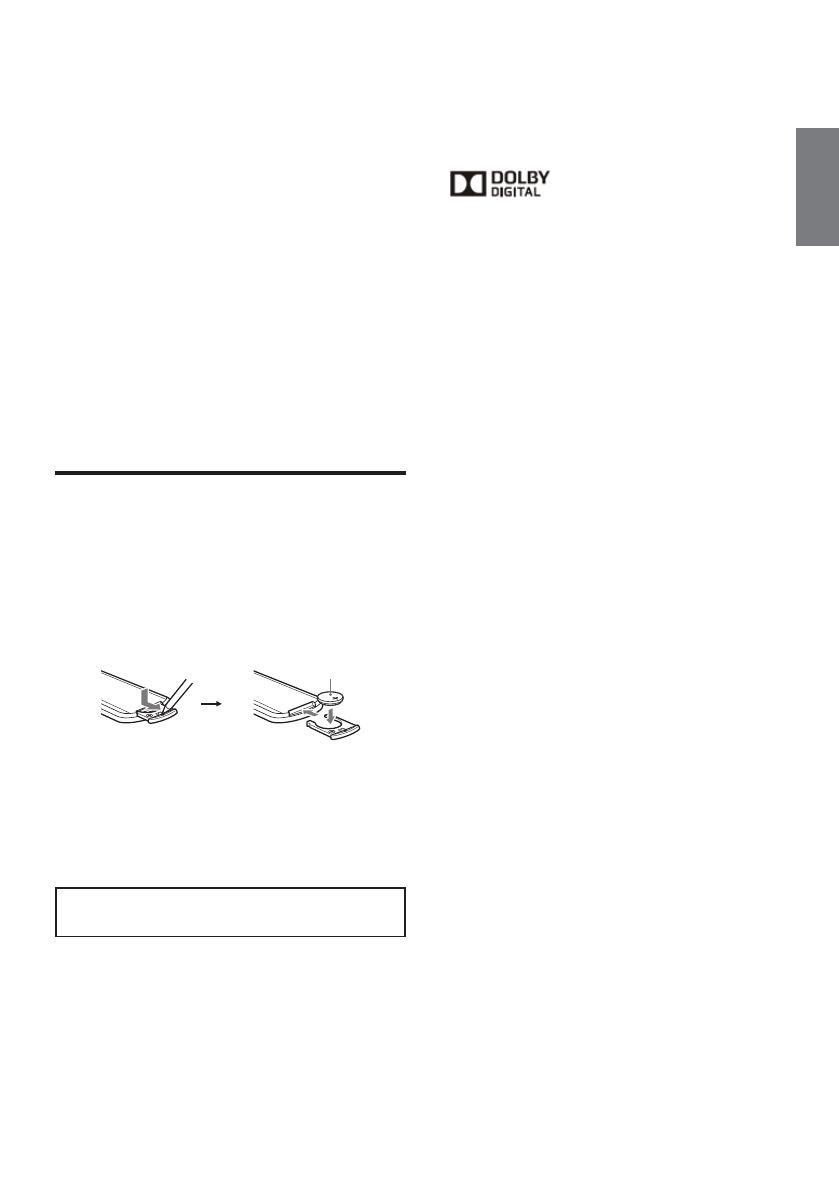
Under normal conditions, the battery will last approximately 1 year.
(The service life may be shorter, depending on the conditions of
use.) When the battery becomes weak, the range of the remote
control becomes shorter. Replace the battery with a new CR2025
lithium battery. Use of any other battery may present a risk of fire or
explosion.
+ side up
Notes on the lithium battery
Do not expose the battery to excessive heat such as direct
sunlight, fire etc.
Keep the lithium battery out of the reach of children. Should the
battery be swallowed, immediately consult a doctor.
Wipe the battery with a dry cloth to assure a good contact.
Be sure to observe the correct polarity when installing the battery.
Do not hold the battery with metallic tweezers, otherwise a short-
circuit may occur.
WARNING
Battery may explode if mistreated.
Do not recharge, disassemble, or dispose of in fire.
Copyright
US and foreign patents licensed from Dolby Laboratories.
MPEG Layer-3 audio coding technology and patents
licensed from Fraunhofer IIS and Thomson.
Manufactured under license from
Dolby Laboratories.
Dolby and the double-D symbol are
trademarks of Dolby Laboratories.
Windows Media is either a registered trademark or
trademark of Microsoft Corporation in the United States and/
or other countries.
This product is protected by certain intellectual property
rights of Microsoft Corporation. Use or distribution of such
technology outside of this product is prohibited without a
license from Microsoft or an authorized Microsoft subsidiary.
DVD VIDEO,” “DVD-R,” “DVD-RW,” “DVD+R,” and
“DVD+RW” are trademarks.
The Bluetooth word mark and logos are registered
trademarks owned by Bluetooth SIG, Inc. and any use of
such marks by Alpine Electronics, Inc. is under license.
Other trademarks and trade names are those of their
respective owners.
iPhone, iPod, iPod classic, iPod nano, iPod touch, and Siri
are trademarkes of Apple Inc., registered in the U.S. and
other countries.
THIS PRODUCT IS LICENSED UNDER THE MPEG-4
VISUAL PATENT PORTFOLIO LICENSE FOR THE
PERSONAL AND NON-COMMERCIAL USE OF A
CONSUMER FOR DECODING VIDEO IN COMPLIANCE
WITH THE MPEG-4 VISUAL STANDARD(“MPEG-4 VIDEO”)
THAT WAS ENCODED BY A CONSUMER ENGAGED IN A
PERSONAL AND NONCOMMERCIAL ACTIVITY AND/OR
WAS OBTAINED FROM A VIDEO PROVIDER LICENSED BY
MPEG LA TO PROVIDE MPEG-4 VIDEO.
NO LICENSE IS GRANTED OR SHALL BE IMPLIED FOR
ANY OTHER USE. ADDITIONAL INFORMATION INCLUDING
THAT RELATING TO PROMOTIONAL, INTERNAL AND
COMMERCIAL USED AND LICENSING MAY BE OBTAINED
FROM MPEG LA, LLC.
SEE HTTP:/ WWW.MPEGLA.COM
All other trademarks are trademarks or their respective
owners.
This product uses data owned by Monotype Imaging Inc.
Such font data shall be used solely in connection with
product.
10-EN
Getting Started
Accessory List
IVE-W560BT/IVE-W560BT-R .......................................................1
Power cable ................................................................................1
Mounting sleeve ...........................................................................1
Bracket key .................................................................................2
Countersunk screw (M5x8) ..........................................................6
Front panel ..................................................................................1
Remote control ............................................................................1
Steering remote cable ..................................................................1
Microphone .................................................................................1
Owner’s Manual .....................................................................1 set
Location of Controls
1
HOME
Open the HOME menu.
When pressed during disc, iPod or USB playback,
playback is paused and there is no sound. To
resume playback, touch.
-DSPL (display)
Press and hold to open the display menu.
The monitor off function is set on the display
menu. When the monitor off function is activated,
the monitor is turned off. Touch anywhere on the
display to turn back on.
-VOICE
Press and hold to activate the voice command
function. To assign the voice command function
to the HOME button, select [Voice] in [HOME Key
Function] (page 19).
2
SOURCE
Turn on the power.
Change the source. Each press displays a
selectable source in a popup on the current
display.
-OFF
Press and hold for 1 second to exit the source.
Press and hold for more than 2 seconds to turn
off the unit. When the unit is turned off, remote
control operation is not available.
-Volume control dial
Rotate to adjust the volume.
3
USB port
Open the cover to connect a USB device.
4
Reset button
5
AUX terminal
6
Receiver for the remote control
7
Disc slot
8
(disc eject)
9
Display/touch panel
P.SCAN
MUTE
10
11
12
13
14
15
16
17
18
19
20
21
22
23
25
RUE-4233
24
Remove the insulation film
before use.
0
MONITOR OFF
a
POSITION
This button is not supported.
b
(return)
Return to the previous display/return to the menu
on a Video CD (VCD).
c
EQ (equalizer) Select an equalizer curve.
d
Number buttons (0 - 9)
e
CLEAR
f
MUTE
Mute the sound. To cancel, press again or press VOL +.
g
(play/pause)
h
/
(previous/next)
i
DVD playback setting buttons
j
P.SCAN (page 12 )
k
///
(cursor)/ENTER
l
MODE
Select the radio band.
m
VOL (volume) +/–
n
Press and hold for 1 second to exit the source.
Press and hold for more than 2 seconds to turn off the unit.
o
Change the source. Each press displays a selectable source
in a popup on the current display.
Touch Operation
You can operate the system by using the touch panel on the screen.
Only to touch the onscreen button lightly with the pad of your nger
to protect the display.
If you touch a button and there is no reaction, remove your nger
from the display once, and try again.
Onscreen buttons that cannot be operated appear dull in colour.
11-EN
EN
Initial System Start-Up
Press the RESET switch when using the unit for the rst time, after
changing the car battery, etc.
1 Turn off the unit power.
2 Press RESET switch with a ballpoint pen or similar
pointed object.
RESET switch
Note
Pressing the reset button will erase the clock setting and some
stored contents.
Setting the Clock
1 Press HOME, then touch [Settings].
2 Touch
,
then touch [Clock Adjust].
The setting display appears.
3 Touch
/
to set the hour and minute.
4 Touch [Set].
The setting is complete.
To activate/deactivate the CT function (page 13), touch [Clock Time].
Preparing a BLUETOOTH Device
You can enjoy music, or perform handsfree calling, by connecting a
suitable BLUETOOTH device (mobile phone, audio device, etc.). For
details on connecting a BLUETOOTH device, refer to the operating
instructions supplied with the device. Before connecting, turn down
the volume of this unit; otherwise, loud sound may result.
Pairing and connecting with a BLUETOOTH
device
When connecting a BLUETOOTH device for the first time, mutual
registration (called “pairing”) is required. Pairing enables this unit and
other devices to recognize each other.
1 Press HOME, then touch [Settings].
2 Touch
,
3 Touch [Bluetooth Connection], then set the signal to
[ON].
The BLUETOOTH signal of this unit is activated and
appears
on the status bar.
4 Touch [Pairing].
The unit enters pairing standby mode.
5 Perform the pairing procedure on the BLUETOOTH
device to detect this unit.
6 Select “IVE-W560” shown in the display of the
BLUETOOTH device.
7 If passkey* input is required on the BLUETOOTH device,
input [0000].
* Passkey may be called “passcode,” “PIN code,” “PIN number,”
“password,” etc., depending on the BLUETOOTH device.
8 Select this unit on the BLUETOOTH device to establish
the BLUETOOTH connection.
or lights up when the connection is made.
Note
While connected to a BLUETOOTH device, this unit cannot be
detected by another device. To enable detection, terminate the
current connection.
Connecting with a paired BLUETOOTH
device
This chapter explains how to connect manually to registered
BLUETOOTH devices.
1 Make sure that the BLUETOOTH signals both on this unit
(page 19) and the BLUETOOTH device are activated.
on the status bar indicates that the BLUETOOTH signal on this
unit is on.
2 Operate the BLUETOOTH device to connect to this unit.
or appears.
When the ignition is turned to on with the BLUETOOTH signal
activated, this unit searches for the last-connected BLUETOOTH
device, and if possible connection is made automatically.
Note
If this unit cannot detect the last-connected BLUETOOTH device,
touch [Reconnect] to search for the last-paired device again.
If the problem is not solved, follow the pairing procedure.
To install the microphone
To capture your voice during handsfree calling, you need to install
the microphone (included).
For details on how to connect the microphone, refer to the supplied
“Installation/Connections” guide.
12-EN
RADIO
Listening to the Radio
To listen to the radio, press HOME then touch [Tuner].
Reception controls/indications
Reception controls (1 to 7)
1
Current band icon
Opens the band list.
2
[PTY] (Programme Types) (FM only)
Opens the PTY list (page 13).
3
P. SCAN
Helps to find a desired station by listening to
preset stations for a few seconds.
4
Opens the tuner option menu.
5
/
Tunes in automatically.
6
/
Tunes in manually.
Touch and hold to continuously skip frequencies.
7
[1] to [6]
Selects a preset station.
Touch and hold to store the currently displayed
frequency in that preset.
Reception indications (
A
)
A
Frequency
Storing and Receiving Stations
Caution
When tuning to stations while driving, use Automatic Tuning
Memory (A.MEMO) to prevent an accident.
Tuning
1 Touch the current band.
The band list appears.
2 Touch the desired band ([FM1], [FM2], [FM3], [AM1], or
[AM2]).
3 Perform tuning.
To tune automatically
Touch
/.
Scanning stops when the unit receives a station.
Repeat this procedure until the desired station is
received.
To tune manually
Touch
/
repeatedly until the desired frequency is
received.
To skip frequencies continuously, touch and hold
/
Presetting Stations Automatically
1 Select the desired band ([FM1], [FM2], [FM3], [AM1], or
[AM2]).
2 Touch
3 Touch [A.MEMO], then [Search].
The unit stores the first six available stations in presets
([1] to [6]).
Presetting Stations Manually
1 While receiving the station that you want to store, press
and hold the desired preset number ([1] to [6]).
Receiving Preset Stations
1 Select the band.
2 Touch the desired preset number ([1] to [6]).
Searching for the desired station from preset
stations (Tuner Preset Scan)
Tuner Preset Scan helps you to find a desired station by listening to
preset stations for a few seconds.
1 While listening to radio, touch P. SCAN.
Tuner Preset Scan starts, and subsequent stations are received
in sequence.
2 Touch P. SCAN again when the desired station is
received.
13-EN
EN
Using Radio Data System (RDS)
Display items
A B
C
A
Band name, RDS*1, TP*2
B
Program service name, frequency, RDS data
C
Preset number
*1 During RDS reception.
*2 During traffic program reception.
RDS services
This unit automatically provides RDS services as follows:
AF (Alternative Frequencies)
Selects and retunes to the station with the strongest signal in a
network. By using this function, you can continuously listen to the
same program during a long-distance drive without having to retune
to the same station manually.
TA (Traffic Announcement)/TP (Traffic Program)
Provides current traffic information/programs. Any information/
program received will interrupt the currently selected source.
PTY (Program Types)
Displays the currently received program type.
Also searches for a designated program type.
CT (Clock Time)
The CT data from the RDS transmission sets the clock.
Setting AF
1 Press HOME, then touch [Tuner].
2 Touch the desired band ([FM1], [FM2] or [FM3]).
3 Touch , then [AF (Alternative Frequencies)] to set
[ON].
Setting TA
1 Press HOME, then touch [Tuner].
2 Touch the desired band ([FM1], [FM2] or [FM3]).
3 Touch , then [TA (Traffic Announcement)] to set [ON].
To store RDS stations with the AF and TA
setting
You can preset RDS stations along with the AF/TA setting. Set
AF/TA, then store the station with BTM or manually. If you preset
manually, you can also preset non-RDS stations.
To receive emergency announcements
With AF or TA on, emergency announcements will automatically
interrupt the currently selected source.
To stay with one regional program (Regional)
When the AF and Regional functions are on, you will not be switched
to another regional station with a stronger frequency. If you leave
this regional program’s reception area, touch
[Regional]
[OFF] during FM reception. This function does not work in the UK
and some other areas.
Selecting programme types (PTY)
1 During FM reception, touch [PTY].
To scroll the list, touch
/.
2 Touch the desired programme type.
The unit searches for a station broadcasting the selected
programme type.
To close the PTY list, touch
.
Type of programs
News (News), Current Affairs (Current Affairs), Information
(Information), Sport (Sports), Education (Education), Drama (Drama),
Cultures (Culture), Science (Science), Varied Speech (Varied),
Pop Music (Pop Music), Rock Music (Rock Music), Easy Listening
(M.O.R. Music), Light Classics M (Light classical), Serious Classics
(Serious classical), Other Music (Other Music), Weather & Metr
(Weather), Finance (Finance), Children’s Progs (Children’s program),
Social Affairs (Social Affairs), Religion (Religion), Phone In (Phone
In), Travel & Touring (Travel), Leisure & Hobby (Leisure), Jazz Music
(Jazz Music), Country Music (Country Music), National Music
(National Music), Oldies Music (Oldies Music), Folk Music (Folk
Music), Documentary (Documentary)
Note
You cannot use this function in countries/regions where no PTY data
is available.
14-EN
PLAYBACK
Playing a Disc
Depending on the disc, some operations may be different or
restricted.
Refer to the operating instructions supplied with the disc.
1 Insert the disc (label side up), then playback starts.
If a DVD menu appears
Touch the desired item in the DVD menu.
You can also use the menu control panel, which can be displayed by
touching the screen anywhere except the DVD menu items. Touch
///
to move the cursor, then touch [ENTER] to confirm.
If the menu control panel does not appear by touching the display,
use the remote control.
Example of playback indications (DVD)
A
B C
A
Current source icon, format
B
Playback status, elapsed playback time
C
Chapter/title number, audio format
Touch the display if the indications are not displayed.
For audio discs, some indications are always displayed during
playback.
Using PBC (playback control) functions
The PBC menu interactively assists with operations while a PBC-
compatible VCD is played.
1 Start playing a PBC-compatible VCD.
The PBC menu appears.
2 Touch
.
.
The menu control panel appears.
3 Touch the number keys to select the desired item, then
touch [ENTER].
4 Follow the instructions in the menu for interactive
operations.
To return to the previous display, touch
.
To deactivate PBC functions, set [Video CD
PBC] to [OFF] (page 20).
Notes
During PBC playback, the track number, playback item, etc., do
not appear on the playback display.
Resume playback is unavailable during playback with PBC.
Configuring audio settings
To change the audio language/format
When playing a DVD Video, the audio language can be changed if
the disc is recorded with multilingual tracks. You can also change
the audio format when playing a disc recorded in multiple audio
formats (e.g., Dolby Digital).
During playback, touch the screen and then
.
Touch
gp
repeatedly until the desired audio language/format
appears.
Example: Dolby Digital 5.1 ch
Audio language
Audio format/channel
numbers
If the same language is displayed two or more times, the disc is
recorded in multiple audio formats.
To change the audio channel
When playing a VCD, you can listen to both left and right channels,
right channel only or left channel only, via both right and left
speakers.
During playback, touch
LR repeatedly until the desired audio
channel appears.
The options are indicated below.
[Stereo] : Standard stereo sound (default)
[Left ] : Left channel sound (monaural)
[Right] : Right channel sound (monaural)
Playing an iPod/USB Device
In these Operating Instructions, “iPod” is used as a general
reference for the iPod functions on the iPod and iPhone, unless
otherwise specified by the text or illustrations.
For details on the compatibility of your iPod, see “About iPod”
(page 8) or visit the support site on the back page.
MSC (Mass Storage Class) and MTP (Media Transfer Protocol)
type USB devices (such as a USB flash drive, digital media player,
Android phone) compliant with the USB standard can be used.
Depending on the digital media player or Android phone, setting the
USB connection mode to MSC or MTP is required.
1 Reduce the volume on this unit.
If the device is turned off, turn it on.
2 Connect the iPod or the USB device to the USB port.
Playback starts automatically.
If an iPod/USB device is already connected, to start playback,
press HOME, then touch [iPod/ USB].
15-EN
EN
To stop playback
Press and hold OFF for 1 second.
To remove the device
Stop playback, then disconnect.
Do not disconnect during playback, as data in the device may be
damaged.
Caution for iPhone
When you connect an iPhone via USB, telephone volume is
controlled by the iPhone itself. In order to avoid sudden loud sound
after a call, do not increase the volume on the unit during a call.
About resume mode
When the iPod currently playing is connected to the dock connector,
the mode of this unit changes to resume mode and playback starts
in the mode set by the iPod.
In resume mode, repeat/shuffle play are not available.
Playing a BLUETOOTH Device
You can play contents on a connected device that supports
BLUETOOTH A2DP (Advanced Audio Distribution Profile).
1 Make BLUETOOTH connection with the audio device
(page 11).
2 Reduce the volume on this unit.
3 Press HOME, then touch [BT Audio].
4 Operate the audio device to start playback.
5 Adjust the volume on this unit.
Playback controls
If the BLUETOOTH device supports AVRCP (Audio Video Remote
Control Profile), you can control playback via this unit in the same
way as disc playback.
To match the volume level of the BLUETOOTH
device to other sources
You can reduce the volume level differences between this unit and
the BLUETOOTH device.
During playback, touch
.
Select a level from –10 to +15.
Searching and Playing Tracks
Using repeat play and shuffle play
1 During playback, touch (repeat) or (shuffle)
repeatedly until the desired option appears.
Repeat or shuffle play starts.
Available play modes differ depending on the selected sound
source.
Note
Repeat play and shuffle play are not available for version 2.0 VCD
with PBC function.
Using direct search play
1 During disc or USB playback, press the number buttons
on the remote control to enter an item (track, chapter,
etc.) number, then press ENTER. Playback starts from
the beginning of the selected point.
Note
During VCD playback, this function is available only when playing a
VCD without PBC functions.
Searching for a file from the list screen
1 During disc or USB playback, touch The list screen
from the currently played item appears.
Furthermore, touch
,
or to list up by the file type (audio/
video/photo).
2 Touch the desired item.
Playback starts.
16-EN
Available Options
Various settings are available in each source by touching .
The available items differ depending on the situation.
Picture EQ
Adjusts the picture to suit the interior brightness of the car. This
setting is available only when the parking brake is applied.
Source: USB (Xvid/MPEG-4/Photo), Disc (DVD/ VCD/Xvid/MPEG-4/
Photo), AUX (Available only when [AUX] is set to [Rear], and [AUX
Input] is set to [Video] or [Auto].)
Option Purpose
Dynamic (
),
Standard,
Theater, Sepia
To select the picture quality.
Aspect
This setting is available only when the parking brake is applied.
Source: USB (Xvid/MPEG-4/Photo), Disc (DVD/ VCD/Xvid/MPEG-4/
Photo), AUX (Available only when [AUX] is set to [Rear], and [AUX
Input] is set to [Video] or [Auto].)
Option Purpose
Normal
To display a picture with 4:3 aspect ratio
(regular picture).
Wide
To display a picture with 4:3 aspect ratio
enlarged to the left and right edges of the
screen, with overflowing parts of the top and
bottom cut off to fill the screen.
Full ()
To display a picture with 16:9 aspect ratio.
Zoom
To display a picture with 4:3 aspect ratio
enlarged to the left and right edges of the
screen.
DVD Audio Level
Source: Disc
Option Purpose
- To adjust the audio output level between -10
and +10 for a DVD recorded in Dolby Digital
format, to balance the volume level between
discs.
USEFUL FUNCTION
Siri Eyes Free allows you to use an iPhone handsfree by simply
speaking into the microphone. This function requires you to connect
an iPhone to the unit with BLUETOOTH Auto Pairing. Availability is
limited iPhone 4s or later. Make sure that your iPhone is running the
latest iOS version. You must complete BLUETOOTH registration and
connection configurations for the iPhone with the unit in advance. For
details, see “Preparing a BLUETOOTH Device” (page 11).
Using Siri Eyes Free
Make sure that [HOME Key Function] is set to [Voice] (page 19).
1 Activate the Siri function on the iPhone.
For details, refer to the operating instructions supplied with the
iPhone.
2 Press and hold HOME.
The voice command display appears.
3 Speak into the microphone after the beep.
The iPhone beeps again and Siri Eyes Free is activated.
To deactivate Siri Eyes Free
Touch [Close].
Notes
The iPhone may not recognize your voice depending on usage
conditions. (For example, if you are in a moving car.)
Siri may not function properly, or the response time may lag in
locations where iPhone signals are difficult to receive.
Depending on the iPhone’s operating condition, Siri may not
function properly, or may quit.
If you play back a track with an iPhone using the BLUETOOTH
audio connection, when the track starts playback via
BLUETOOTH, the Siri function automatically quits and the unit
switches to the BLUETOOTH audio source.
When Siri is activated during audio playback, the unit may switch
to the BLUETOOTH audio source even if you do not specify a
track to play back.
When connecting the iPhone to the USB port, Siri may not
function properly, or may quit.
When connecting the iPhone to the unit, do not activate Siri with
the iPhone. Siri may not function properly, or may quit.
There is no audio sound while Siri Eyes Free is activated.
HANDSFREE CALLING
Before handsfree calling, make sure that and are in the display. If
the indications do not appear, perform the BLUETOOTH connection
procedure (page 11).
17-EN
EN
Receiving a Call
1
Touch when a call is received.
The phone call starts.
Note
The ringtone and talker’s voice are output only from the front speakers.
To adjust the ringtone volume
The level of ringtone volume will be stored into memory, independently
from the regular volume level. Rotate the volume control dial while
receiving a call.
To reject/end a call
Touch
Making a Call
Touch
1 Press HOME, then touch [Phone].
2 Touch one of the icons on the BLUETOOTH phone
1 2 3 4 5
6
(call history) *
1
Select a contact from the call history list.
The unit stores the last 20 calls.
(redial)
Make a call automatically to the last contact you
made.
(phonebook) *
1
Select a contact from the name list/number list in
the phonebook. To search the desired contact by
alphabetical order in the name list, touch.
.
(voice command) *
2
*
3
Say a voice tag stored on the mobile phone.
(phone number input)
Enter the phone number.
Preset number
Touch a preset number ([1] to [6]).
The unit stores up to 6 contacts in the list.
For details on how to store, see “Presetting phone
numbers” (page 17).
*1 The mobile phone needs to support PBAP (Phone Book Access
Profile).
*2 Do not use the voice command function on the mobile phone
while it is connected to this unit.
*3 Voice command may not work depending on the recognition
specification of the mobile phone.
For details, visit the support site on the back page.
3 Touch .
The call is made and the calling display appears until the other
party answers.
Available Operations During a Call
To adjust the talker’s voice volume
The level of the talker’s voice volume will be stored into memory,
independently from the regular volume level. Rotate the volume
control dial during a call.
To transfer the current call to the mobile phone
Touch .
To transfer back to handsfree calling, touch
again.
Available options
During a handsfree call, press
.
[MIC Gain] Adjusts the microphone volume for the other
party: [Low], [Middle], [High].
Call Data Management
Presetting phone numbers
1 Press HOME, then touch [Phone].
The BLUETOOTH phone display appears.
2 Touch
.
.
The phonebook appears.
3 Select the contact to store in the preset dial.
1
In the name list, touch the name of the contact.
To search the desired contact by alphabetical order,
touch
.
, then select alphabet.
2
In the number list, touch the phone number.
The contact confirmation display appears.
4 Touch [Preset], then the desired preset number ([1] to
[6]).
The contact is stored to the selected preset number.
To change the registration of the preset dial
Follow the procedure above and overwrite a registered preset dial.
Phone Option Menu
1
Press HOME, then touch [Phone].
2 Touch .
The phone option menu appears.
[Auto Answer]
Answers an incoming call automatically.
— [OFF]: to not answer automatically.
— [ON]: to answer automatically.
18-EN
SETTINGS
Select [Settings] in the HOME menu when you need to change the
settings of the unit.
” in the table below indicates the default setting.
1 Press HOME, then touch [Settings].
2 Touch one of the setup category icons.
: General Settings (page 18)
: Sound Settings (page 19)
: Screen Settings (page 20)
: Visual Settings (page 20)
3 Touch / to select the desired item.
To return to the previous display, touch
.
To switch from the HOME screen to the playback
screen, touch
.
General Settings
Language
Unit status: Any status
Option Purpose
English (
),
Français, Deutsch
(IVE-560BT)
Italiano, Русский
(IVE-560BT-R)
To select the display language.
Time Format
Unit status: Any status
Option Purpose
12-hour,
24-hour (
)
To change the time format.
Clock Time
Unit status: Any status
Option Purpose
OFF (
), ON
To activate the CT function.
Clock Adjust
Unit status: Any status
Option Purpose
To set the clock.
(Available only when [Clock Time] is set to [OFF].)
Beep
Unit status: Any status
Option Purpose
OFF, ON (
)
To activate the operation sound.
Touch Panel Adjust
Unit status: Any status
Option Purpose
To adjust the touch panel calibration if the
touching position does not correspond with the
proper item.
Dimmer
Unit status: Any status
Option Purpose
OFF To deactivate the dimmer.
Auto (
)
To dim the display automatically when you turn
lights on. (Available only when the illumination
control lead is connected.)
ON To dim the display.
Dimmer Level
Unit status: Any status
Option Purpose
(–5 - +5)
: 0
To select the brightness level when the dimmer
is activated.
Output Colour System
Unit status: No source selected
Option Purpose
NTSC, PAL (
)
To change the colour system according to the
connected monitor. (SECAM is not supported.)
Camera Input
Unit status: Any status
Option Purpose
OFF To deactivate the input.
Normal (
)
To display the picture from the rear view camera.
Reverse To flip the picture from the rear view camera
horizontally.
19-EN
EN
Steering Control
You can operate the unit with buttons on the steering wheel.
For safety, park your car before changing this setting.
Unit status: Any status
Option Purpose
Custom To display the instruction and panel for steering
wheel control.
Preset (
)
To deactivate steering wheel control.
To use rotary commander control.
User Defined
This setting is available only when [Steering Control] is set to [User].
The steering button panel appears.
1
Press and hold the button you want to assign to the steering
wheel. The button on the panel lights up (standby).
2
Press and hold the button on the steering wheel you want to
assign the function to. The button on the panel changes to blue
(registration complete).
3
To register other buttons, repeat steps
1
and
2
.
Unit status: Any status
Option Purpose
To display the instruction and control panel.
Notes
If an error occurs while registering, all the registered information is
cleared. Restart registration from the beginning.
If the setting menu is left and settings are reconfigured, all
registered information are cleared and the registration process
starts from beginning.
This function may not be available on some vehicles.For details on
the compatibility of your vehicle, visit the support site on the back
page.
HOME Key Function (hold 2 sec push)
Unit status: Any status
Option Purpose
Voice, DSPL (
)
To assign the voice command function or the
display menu to the HOME button.
Bluetooth Connection
Unit status: Any status
Option Purpose
ON, OFF (
)
To activate the BLUETOOTH signal.
Bluetooth Device Info
Unit status: Any status
Option Purpose
To display the device connecting to the unit by
touching [Open]. (Available only when [Bluetooth
Connection] is set to [ON].)
Bluetooth Reset
Unit status: Any status
Option Purpose
To initialize all BLUETOOTH-related settings such
as pairing information, call history, preset dial,
history of connected BLUETOOTH devices, etc.
Sound Settings
Rear/Sub Out
Switches the audio output between the rear speakers and subwoofer.
Unit status: Any status
Option Purpose
Rear To output audio signals to the rear speakers
(amplifier).
Subwoofer ( )
To output audio signals to the subwoofer.
Sound Adjust
Selects 3 BAND EQ and adjusts subwoofer level, balance/fader level
or crossover filter.
Unit status: Any status
Option Purpose
3BAND EQ
Flat (
),
Pop,
Rock,
News,
Jazz,
Electronic,
Hip Hop,
Easy list.,
Country,
Classical
Custom
To select the equalizer curve; customize the
equalizer curve.When setting [Custom], selects
the equalizer settings: [Low], [Mid], [High].
Subwoofer:
(MUTE, –10 - +10)
: 0
To adjust the volume level of the subwoofer.
(Available only when [Rear/Sub Out] is set to
[Subwoofer].)
Balance:
(L 15 - 0 - R 15)
: 0
To adjust the sound balance between left and
right speakers.
Fader:
(Front 15 - 0 -
Rear 15)
: 0
To adjust the sound balance between front and
rear speakers.
HPF: 80 Hz,
100 Hz, 120 Hz,
140 Hz, 160 Hz,
OFF (
)
To select the cut-off frequency of the front/rear
speakers.
LPF: OFF (
),
80 Hz, 100 Hz,
120 Hz, 140 Hz,
160 Hz
To select the cut-off frequency of the subwoofer.
(Available only when [Rear/Sub Out] is set to
[Subwoofer].)
20-EN
Screen Settings
Demo
Unit status: Any status
Option Purpose
OFF, ON ( )
To activate the demonstration.
Visual Settings
DVD Menu Language
Unit status: No source selected
Option Purpose
English (
),
Chinese,
German,
French, Italian,
Spanish,
Portuguese,
Dutch, Danish,
Swedish,
Finnish,
Norwegian,
Russian, Other
To select the default language for the disc’s
menu.
DVD Audio Language
Unit status: No source selected
Option Purpose
English (
),
Chinese,
German,
French, Italian,
Spanish,
Portuguese,
Dutch, Danish,
Swedish,
Finnish,
Norwegian,
Russian, Other
To select the default language for the soundtrack.
DVD Subtitle Language
Unit status: No source selected
Option Purpose
English (
),
Chinese,
German,
French, Italian,
Spanish,
Portuguese,
Dutch, Danish,
Swedish,
Finnish,
Norwegian,
Russian, Other
To select the default subtitle language for DVD.
Monitor Type
Selects an aspect ratio suitable for the connected monitor.
(The screen aspect ratio of this unit also changes.)
Depending on the disc, [Letterbox] may be selected automatically
instead of [Pan Scan], and vice versa.
Unit status: No source selected
Option Purpose
16:9 (
)
To display a wide picture. Suitable when
connecting to a wide-screen monitor or a monitor
with a wide mode function.
Letterbox
To display a wide picture with bands on the
upper and lower positions of the screen. Suitable
when connecting to a 4:3 screen monitor.
Pan Scan
To display a wide picture on the entire screen
and automatically cut off the portions that do
not fit.
Video CD PBC
Unit status: No source selected
Option Purpose
OFF, ON (
)
To play a VCD with PBC functions.
21-EN
EN
ADDITIONAL DEVICES
Auxiliary Audio/Video Equipment
You can connect up to an optional device, such as a portable media
player, game console, etc., to the AUX terminal on the unit.
Selecting an auxiliary device
1 Press HOME, then touch [AUX].
The AUX playback display appears.
Adjusting the volume level
Be sure to adjust the volume for the connected
device before playback.
1 Reduce the volume on the unit.
2 Press HOME, then touch [AUX].
The AUX playback display appears.
3 Touch to open the menu, then touch [Input Level].
4 Set your usual listening volume on the unit.
5 Touch –/+ repeatedly to adjust the level. The level is
adjustable in single steps, between –10 and +15.
Setting the type of device
By setting the type (video or audio) of each connected device, the
background screen can be switched accordingly.
1 Press HOME, then touch [AUX].
2 Touch [Front] or [Rear].
[Front] is available only for audio.
3 When selecting [Rear], touch to open the menu, then
touch [AUX Input].
4 Touch [Audio], [Video] or [Auto].
The default setting is [Auto].
To return to the previous display, touch
.
Rear View Camera
By connecting the optional rear view camera to the CAMERA IN
terminal, you can display the picture from the rear view camera.
The picture from the rear view camera appears when:
— the back lamp lights up (or the gear lever is set to the R (reverse)
position).
— you press HOME then touch [Rear Camera].
— you press and hold DSPL then touch [Rear Camera].
22-EN
INFORMATION
Language Code List
Language code list
The language spellings conform to the ISO 639: 1988 (E/F) standard.
Code Language Code Language Code Language Code Language
1027 Afar 1183 Irish 1347 Maori 1507 Samoan
1028 Abkhazian 1186 Scots Gaelic 1349 Macedonian 1508 Shona
1032 Afrikaans 1194 Galician 1350 Malayalam 1509 Somali
1039 Amharic 1196 Guarani 1352 Mongolian 1511 Albanian
1044 Arabic 1203 Gujarati 1353 Moldavian 1512 Serbian
1045 Assamese 1209 Hausa 1356 Marathi 1513 Siswati
1051 Aymara 1217 Hindi 1357 Malay 1514 Sesotho
1052 Azerbaijani 1226 Croatian 1358 Maltese 1515 Sundanese
1053 Bashkir 1229 Hungarian 1363 Burmese 1516 Swedish
1057 Byelorussian 1233 Armenian 1365 Nauru 1517 Swahili
1059 Bulgarian 1235 Interlingua 1369 Nepali 1521 Tamil
1060 Bihari 1239 Interlingue 1376 Dutch 1525 Telugu
1061 Bislama 1245 Inupiak 1379 Norwegian 1527 Tajik
1066 Bengali; 1248 Indonesian 1393 Occitan 1528 Thai
Bangla 1253 Icelandic 1403 (Afan)Oromo 1529 Tigrinya
1067 Tibetan 1254 Italian 1408 Oriya 1531 Turkmen
1070 Breton 1257 Hebrew 1417 Punjabi 1532 Tagalog
1079 Catalan 1261 Japanese 1428 Polish 1534 Setswana
1093 Corsican 1269 Yiddish 1435 Pashto; 1535 Tonga
1097 Czech 1283 Javanese Pushto 1538 Turkish
1103 Welsh 1287 Georgian 1436 Portuguese 1539 Tsonga
1105 Danish 1297 Kazakh 1463 Quechua 1540 Tatar
1109 German 1298 Greenlandic 1481 Rhaeto- 1543 Twi
1130 Bhutani 1299 Cambodian Romance 1557 Ukrainian
1142 Greek 1300 Kannada 1482 Kirundi 1564 Urdu
1144 English 1301 Korean 1483 Romanian 1572 Uzbek
1145 Esperanto 1305 Kashmiri 1489 Russian 1581 Vietnamese
1149 Spanish 1307 Kurdish 1491 Kinyarwanda 1587 Volapük
1150 Estonian 1311 Kirghiz 1495 Sanskrit 1613 Wolof
1151 Basque 1313 Latin 1498 Sindhi 1632 Xhosa
1157 Persian 1326 Lingala 1501 Sangho 1665 Yoruba
1165 Finnish 1327 Laothian 1502 Serbo- 1684 Chinese
1166 Fiji 1332 Lithuanian Croatian 1697 Zulu
1171 Faroese 1334 Latvian; 1503 Singhalese
1174 French Lettish 1505 Slovak
1181 Frisian 1345 Malagasy 1506 Slovenian 1703 Not specified
  • Page 1 1
  • Page 2 2
  • Page 3 3
  • Page 4 4
  • Page 5 5
  • Page 6 6
  • Page 7 7
  • Page 8 8
  • Page 9 9
  • Page 10 10
  • Page 11 11
  • Page 12 12
  • Page 13 13
  • Page 14 14
  • Page 15 15
  • Page 16 16
  • Page 17 17
  • Page 18 18
  • Page 19 19
  • Page 20 20
  • Page 21 21
  • Page 22 22
  • Page 23 23
  • Page 24 24
  • Page 25 25
  • Page 26 26
  • Page 27 27
  • Page 28 28
  • Page 29 29
  • Page 30 30
  • Page 31 31
  • Page 32 32
  • Page 33 33
  • Page 34 34
  • Page 35 35
  • Page 36 36
  • Page 37 37
  • Page 38 38
  • Page 39 39
  • Page 40 40
  • Page 41 41
  • Page 42 42
  • Page 43 43
  • Page 44 44
  • Page 45 45
  • Page 46 46
  • Page 47 47
  • Page 48 48
  • Page 49 49
  • Page 50 50
  • Page 51 51
  • Page 52 52
  • Page 53 53
  • Page 54 54
  • Page 55 55
  • Page 56 56
  • Page 57 57
  • Page 58 58
  • Page 59 59
  • Page 60 60
  • Page 61 61
  • Page 62 62
  • Page 63 63
  • Page 64 64
  • Page 65 65
  • Page 66 66
  • Page 67 67
  • Page 68 68
  • Page 69 69
  • Page 70 70
  • Page 71 71
  • Page 72 72
  • Page 73 73
  • Page 74 74
  • Page 75 75
  • Page 76 76
  • Page 77 77
  • Page 78 78
  • Page 79 79
  • Page 80 80
  • Page 81 81
  • Page 82 82
  • Page 83 83
  • Page 84 84
  • Page 85 85
  • Page 86 86
  • Page 87 87
  • Page 88 88
  • Page 89 89
  • Page 90 90
  • Page 91 91
  • Page 92 92
  • Page 93 93
  • Page 94 94
  • Page 95 95
  • Page 96 96

Alpine IVE-W560BT Owner's manual

Category
Car video systems
Type
Owner's manual
This manual is also suitable for

Ask a question and I''ll find the answer in the document

Finding information in a document is now easier with AI