Page is loading ...

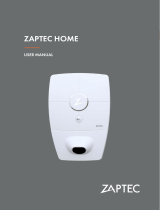
ZAPTEC HOME
USER MANUAL

2

3
EN
Congratulations on your
purchase of ZAPTEC HOME!
A unique Norwegian smart charging station for your
home.
ZAPTEC HOME allows you to charge your vehicle safely,
simply and efciently. The charging station distributes the
available charging current between up to three charging
stations and your home.
Use your charging station together with an RFID tag/
charging card or via our ZAPTEC App to approve users of
the installation. This will provide you with an overview of
your charging history via our cloud-based service ZAPTEC
Portal, available at portal.zaptec.com.
With ZAPTEC HOME, you have bought a charging station
that receives regular software updates from our cloud-
based service to ensure that your charging station is always
up-to-date.
ZAPTEC PREMIUM
Save money and adapt charging based on your home’s
power consumption.
Upgrade to ZAPTEC Premium via the ZAPTEC Portal
to benet fully at home and ensure that you are charging
at the cheapest times.
More information is available at: https://zaptec.com/en/

4
Table of Contents
Safety Instructions 5
ZAPTEC Portal 6
ZAPTEC App 6
Charging Cable Type 6
ZAPTEC HOME 7
Status Indicators 7
How to Start Charging 8
How to Start Charging with Authentication 8
Start charging with an authentication RFID tag/charging card 8
How to Stop Charging 8
Connect RFID Tag/Charging card to user prole 9
Add Users to the Installation 9
How to Monitor the Charging Station (ZAPTEC Portal) 9
Turn Eco Mode on/off 9
Lock Cable to the Charging Station 9
Set Status Indicator Brightness 9
Error Codes 10
Troubleshooting 10
Storage and Maintenance 11
Warranty 11
Support and Repairs 12
Technical Specications 13

5
EN
Safety Instructions
WARNING!
Before using or maintaining this product, it is important to
read the following safety instructions. If you fail to follow and
implement all the specied instructions and procedures, you will
invalidate the warranty and Zaptec Charger AS will not be liable
for any claims or compensation under any circumstances.
!Read these instructions carefully and examine the equipment
to familiarise yourself with the product prior to use.
!This equipment may only be installed, repaired and
main¬tained by qualied personnel (NEK400).
!All applicable local, regional and national regulations must
be followed when installing, repairing and maintaining this
equipment.
!Do not use this product if damaged. See the section Support
and Repairs for further information.
!Do not use an extension cord for the charging cable.
!Do not touch the plugs or insert foreign objects into them.
!Do not insert measuring equipment, cables, cables or other
items into the quick connector or the backplate for testing
the equipment. Please use connector screws or use a female
connector.

6
ZAPTEC Portal
Log in to the cloud-based solution ZAPTEC Portal to nd more smart features of your ZAPTEC
HOME charging station, e.g. see charging consumption, registered users and tags/charging cards.
Log in here: portal.zaptec.com
ZAPTEC App
Included with your charging station is access to the ZAPTEC App. Download the App from App
Store or Google Play and log in.
Charging Cable Type
Your charging cable must have a Type-2 plug on one end in order to connect to the ZAPTEC HOME
charging port, while the other end should be suited to your vehicle specications. Vehicle adapters
are acceptable.
We recommend that the charging cable in use complies with the charging capacity of the vehicle.
This is to ensure that the maximum charging speed can be used.
i

7
EN
ZAPTEC HOME
Status Indicators
The status of the charging station is shown by the status indicator (Z) using the following colours:
Authentication OK (once every 30 seconds means
that the charging station is ofine)
Charging complete
FlashingContinuous
Charging
2 ashes = Authentication failed
The light is off but ashes once every 30 seconds
= the charging station has not been activated in
ZAPTEC Portal. See the Troubleshooting section for
further details.
Error (see the Troubleshooting
section for further details)
Colour
BLUE
RED
YELLOW
GREEN
Connected to a vehicle and
ready to charge
System starting up
Awaiting authentication
Awaiting ZAPTEC Portal
Vehicle added to queue
Status indicator (Z)
RFID zone
Electrical outlet
IEC62196-1/2, Mode 3 Type 2
Protective cover
Open the front cover here
SmartKey
PURPLE Firmware updating
SmartKey Column
WHITE Clear

8
How to Start Charging
1. Check that the status indicator (Z) is illuminated white.
2. Remove the protective cover to gain access to the electrical outlet.
3. Attach the charging connector to the charging station electrical outlet.
4. Attach the charging connector to your vehicle.
5. The status indicator will ash blue once charging has started.
The charging current may vary depending on the capacity of the installation and the number of
active charging stations.
i
How to Start Charging with Authentication
Charging with authentication requires you to have registered a user prole in ZAPTEC Portal and
that this user prole have access granted to the charging station/facility. RFID tags/charging cards
are connected to your user prole.
For set up details, see section connecting a RFID Tag/Charging Card to Your
User Prole. The recommended authentication method is the use of RFID tags/charging cards.
Start charging with an authentication RFID tag/charging card:
1. Follow step 1–4 in How to Start Charging.
5. The status indicator (Z) will now ash yellow to indicate that it is awaiting authentication.
6. Hold the RFID tag/charging card up to the RFID zone, see illustration in the section ZAPTEC
HOME.
7. The status indicator will ash green once authentication is approved.
8. The status indicator will ash blue once charging has started.
If status indicator is ashing red, see the Troubleshooting section for further details.
How to Stop Charging
1. To interrupt the charging process: Stop charging as recommended in your car’s user manual.
2. Disconnect the charging connector from the vehicle.
3. Disconnect the charging connector from the charging station.
4. Place the protective cover over the charging point to limit exposure to dust and rain.

9
EN
Connect RFID Tag/Charging card to user profil
The charging station supports most common RFID tags/charging cards (Mifare Classic). If you
have a visually readable code, this can be added via ZAPTEC Portal or by scanning the RFID tag/
charging card using the charging station as described below.
1. Download the ZAPTEC App from App Store or Google Play.
2. Register as a user and log in to the app.
3. Go to the menu, select user prole and add a new charging card. Then follow the instructions in
the app.
See our YouTube videos for further instructions: zaptec.com/youtube
Add Users to the Installation
The owner of the installation can add users by going to ‘access’. This is where users can be added,
invited or removed. This assumes that authentication (user control) has been activated on the
installation.
How to Monitor the Charging Station (ZAPTEC Portal)
You can log in via ZAPTEC Portal (portal.zaptec.com) to see all your charging stations and all the
charging stations that you are registered to use. The owner of the installation can monitor all use and
see a live overview of the status of the charging station.
Turn Eco Mode On/Off
If you want to temporarily turn eco mode on or off for one charging station (e.g. if you want
charging to start as soon as possible), you can do so via the dashboard in the app. When you have
an active charging station on a charging station where eco mode is available, an on/off button for
eco mode will become available on the dashboard.
In order to change the standard settings for eco mode, you must log in to ZAPTEC Portal.
Lock Cabel to the Charging Station
The charging cable can be locked permanently to the charging station. This feature is activated via
the ZAPTEC App.
1. Log in to the ZAPTEC App (can be downloaded from the App Store or Google Play).
2. Click on the icon for user proles in the top right hand corner of the app home page.
3. Click on ‘Charging Stations’.
4. Select the charging station that you wish the amend the settings for.
5. The setting for locking the cable permanently can be changed under ‘Lock cable to
charging station’.
Set Status Indicator Brightness
1. Log in to the ZAPTEC App
2. Click on the icon for user proles in the top right hand corner of the app home page

10
3. Click on ‘Charging Stations’
4. Select charging station
5. Set status indicator brightness
Error Codes
1. Log in to the ZAPTEC App
2. - Android: Click on the cog in the top right hand corner of the app homepage
- iOS: Click on the ZAPTEC key icon in the top left hand corner of the app home page.
3. Select the charging station that you want to view the error code for.
4. Once the app has connected to the charging station, a red eld will be displayed when the
charger has active error codes. Click on this eld to show the details of the active error codes.
Troubleshooting
Warnings/error messages and related details are also shown via the ZAPTEC Portal/ZAPTEC App.
See section Error Codes.
No light:
• The charging station is not receiving any power from the installation.
White/blue light:
• Check whether the charging cable is correctly attached to the charging station electrical outlet.
• Check whether the vehicle is congured for immediate charging.
Yellow flashing light:
• The charging station is awaiting authentication – no user prole with access has authenticated
with the charging station. Check that the correct RFID tag/charging card is being used with the
charging station.
• Waiting for the cloud – The charging station is waiting for the cloud-based service. Ensure that
the charging cable is connected to the charging station and vehicle, and authenticate the user to
the charging station if the installation/charging station has authentication activated. Charging will
start immediately once the charging station receives the start command from ZAPTEC Portal.
• Vehicle in queue – The charging station is awaiting available charging current from the
installation. Connect the charging cable to the charging station and electric vehicle, and
authenticate the user to the charging station if the installation/charging station has authentication
activated. Charging will start automatically once charging current becomes available.
Red light:
• Disconnect the charging cable. If the status indicator light goes white, reconnect the charging
cable. If charging does not begin and the light goes red again, this indicates a possible fault with
the charging cable or vehicle.

11
EN
Red flashing light:
• Authentication failed – Check that the RFID tag/charging card is connected to your user prole.
• Check that your user prole has been granted access to this installation via ZAPTEC Portal by the
owner.
• If it is ashing red at 30-second intervals, this means it has not been activated via ZAPTEC Portal.
Contact your electrician/installer.
If this does not work, note the serial number of the charging station and contact your distributor/
installer for assistance. The position of the serial number is shown in the illustration.
221.3
112.5
391.7
258.2
Serial number
e.g. ZCS123456
If the charging station has been disconnected from the power network, it will ash yellow and
take 1–2 minutes before the charging station starts up again.
i
Storage and Maintenance
The product should be stored in a dry room with a stable temperature. The protective cover should
always be on if the product is not in use.
The following periodic maintenance is recommended:
• Wipe down the charging station with a damp cloth.
• Check that the charging connector is free of all foreign materials.
• Check that the charging station has no external, physical damage.
In the case of publicly accessible installations, an annual inspection must be carried out by qualied
personnel in accordance with Norwegian legislation and regulations (Ref. NEK400).
Warranty
We guarantee that the unit is free from material defects and complies with all legislation and
regulations relating to consumer protection in the country in which the product is purchased. Further
information about your rights under consumer legislation are set out at www.zaptec.com/en/

12
privacy-policy/
Support and Repairs
If you discover an issue, please read the Troubleshooting section prior to contacting your
distributor/installer. Contact your distributor if you want to purchase accessories for your ZAPTEC
HOME (cable hooks, charging cables, etc.).
Zaptec Charger AS gathers data from the product via the network. You can nd more information
about our privacy guidelines at https://zaptec.com/en/privacy_20611260-11-04-2019/
i

13
EN
ZAPTEC HOME is an alternating current
wall or column-mounted charging station in
accordance with IEC 61851-1, EVSE mode 3.
Dimensions and weight
H: 392 mm W: 258 mm D: 112 mm
Weight: approx. 5 kg (including backplate)
Installation network
TN, IT and TT
Transition box/fuse box
The charging point should be protected against
over-voltage in accordance with NEK-400.
Installation circuit
Max. 32A serial fuse on installation circuit for
charging stations. Max. three ZAPTEC HOME
units connected to a single installation.
Junction box
Cable cross section 2.5–10 mm2
Cable diameter 10–20mm
Installation network, Voltage
230VAC ±10%. 400VAC ±10%
Max. power and charging output
7.36kW* with 32A 1-phase
22kW* with 3-phase 32A (TN network only)
*The output is regulated by the number of
units charging and depends on the internal
temperature of the charging stations.
Charging point
EC 62196-2 Type 2 Female, Silver-lined for
durability
Earth fault protection
Built-in type B RCD Calibration and a self-
test are carried out before the start of every
charging cycle. The earth fault protection can
be reset automatically by disconnecting from
the charging cable.
Soft start
Limits starting power at start of charging.
eMeter
Integrated into charging station with an accura-
cy rate of approx. 1% with regard to power and
voltage. This lets the user monitor charging and
check the actual power consumption.
Theft protection
The front cover can only be opened using a
special tool. The charging cable can be locked
permanently to the charging station.
Phase distribution
Depending on the installation and type of car,
the charging station can switch between being
a 1-phase and 3-phase charging station. If
three charging stations are used, phase usage is
coordinated as optimally as possible.
Avoid skewing the power network – When the
charging station is operating in 1-phase mode,
it can dynamically chose which of the 3 phases
should be used for charging. The charging
station can be programmed to use a certain
phase if necessary.
Load distribution
Together with up to three charging stations and
the power metre from the home (APM), the
available power in the installation is distributed
automatically between the units.
Communication interface and
cloud connection/network
WiFi 2.4 GHz, IEEE 802.11 b/g/n
(channels 1–11)
Identification and configuration via app
and charging pass
Bluetooth Low Energy (BLE 4.1)
RFID/NFC reader
Standards and approvals
CE conformity in accordance with Radio
Equipment Directive 2014/53/EU and ROHS
Directive 2011/65/EU.
Conformity with IEC 61851-1 and IEC 61851-
22
Temperature range
-30 C° to +50C°
Degree of protection
IP54, indoor and outdoor use
IK10 impact protection
UL94 ammability rating
UV resistant
Electrical protection
Protection class II (4kV AC and 6kV impulse,
insulation)
Overvoltage category III (4kV)
Technical Specifications

14

15
EN

Zaptec Charger AS
Richard Johnsensgate 4
4021 Stavanger,
Norway
ZAPTEC Charger
MADE IN NORWAY
© ZAPTEC Charger AS 04-2020. All rights reserved. ZM000560-10738-1
/