Page is loading ...

1
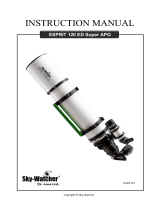
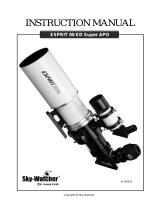
INSTRUCTION MANUAL
ESPRIT 150 ED Super APO
Copyright © Sky-Watcher
SL131119

1
Table of contents
Table of Contents
Introduction........................................................................................................................................ 2
Getting started................................................................................................................................... 3
Parts description .................................................................................................................................. 3
Unpacking the telescope...................................................................................................................... 3
Preparing the telescope for an observation.......................................................................................... 4
Cooling the telescope .......................................................................................................................... 4
Aligning the finderscope .................................................................................................................... 5
Using the telescope for visual observation............................................................................ 6
Inserting the eyepiece.......................................................................................................................... 6
Focusing .............................................................................................................................................. 6
Prime focus imaging with the optional field flattener ...................................................... 7
Installing the field flattener and a DSLR (Digital Single-Lens Reflex) camera.................................. 7
Installing a 48mm filter inside the extender tube ................................................................................. 8
Installing the field flattener and a CCD (Charge-Coupled Device)camera........................................ 8
Focusing .............................................................................................................................................. 9
Framing the picture ............................................................................................................................. 9
Useful tips for all observations ................................................................................................ 13
Removing the finder scope................................................................................................................ 13
Using the indexed scale..................................................................................................................... 13
Prime focus imaging with the optional 0.77x reducer / flattener................................ 10
Installing the reducer flattener and a DSLR camera.......................................................................... 10
Installing the reducer flattener and a CCD (Charge-Coupled Device) camera .................................. 11
Rotating the focuser........................................................................................................................... 13
Specifications.................................................................................................................................. 14
Telescope specifications.................................................................................................................... 14
Threads specifications ....................................................................................................................... 15
Different releases: Case and Accessory box....................................................................... 16

2
Introduction
The spirit of perfection, by Sky-Watcher
The 3" CNC machined 1:11 rotatable dual speed linear power focuser provides a smooth, rock-solid
focusing with zero image shifts. The Esprit ED 150mm refractor comes with a 9 x 50 right angle
finder scope, 2-inch Star diagonal, D-style dovetail, retractable dew cap and padded case.
NEVER USE YOUR TELESCOPE TO LOOK DIRECTLY AT
THE SUN. PERMANENT EYE DAMAGE WILL RESULT.
NEVER USE AN EYEPIECE-TYPE SOLAR FILTER.
NEVER USE YOUR TELESCOPE TO PROJECT SUNLIGHT
ONTO ANOTHER SURFACE; THE INTERNAL HEAT BUILD-
UP WILL DAMAGE THE TELESCOPE OPTICAL ELEMENTS.
USE A PROPER SOLAR FILTER FIRMLY MOUNTED ON THE
FRONT OF THE TELESCOPE FOR VIEWING THE SUN.
WHEN OBSERVING THE SUN, PLACE A DUST CAP OVER
YOUR FINDERSCOPE OR REMOVE IT TO PROTECT YOU
FROM ACCIDENTAL EXPOSURE.
NEVER LET A TELESCOPE POINTING THE SUN
UNATTENDED.
Quick overview:
150 mm apochromatic, 3-element refractor
1050 mm (f/7)
Metallic high-transmission lens coatings
3" CNC machined 1:11 dual-speed focuser
No visual color fringing even on bright objects
Knife-edge Baffled Optical System
2" Diagonal with dielectric coatings
9x50 erect-image 90° finder scope
Tube rings with dovetail D (Losmandy style) bar
Aluminum foam lined case
Optional thread-on full frame field flattener
Optional thread-on full frame 0.77x reducer /
field flattener
-
Designed with the discerning astronomer in mind, Sky-Watcher top-of-the-line Esprit refractors deliver
the kind of imaging performance one would expect from telescopes costing much more. With their
three-element air spaced objective lens design, false color is extremely well corrected, yielding excep-
tional contrast and sharpness.

3
Getting started
Parts description
1. Retractable dew cap
2. Tube rings
3. D (Losmandy) dovetail bar
4. 9x50 erect-image 90° finder
scope
5. 3" 1:11 dual-speed focuser
6. 2" dielectric diagonal
7. 2" eyepiece f= 28mm
Unpacking the telescope
Your telescope is inside the sturdy aluminum padded
case, designed to securely carry the telescope and the
tube rings. The case has two castors on one side to
facilitate transport.
The case contains and protects the telescope and its accessories. Once open you will find:
1. The telescope with dew cap retracted.
2. The 9x50 erect-image finder scope
with tube rings and mount.
3. The 2" (50.8mm) diagonal.
4. The 2-element thread-on field flattener
(used for photography only),
guarantees excellent field flatness
across the entire 44 mm imaging
plane, allowing picturing the sky with
large sensors.
5. Field flattener extender tube for DSLR
camera, used to place the camera
exactly on the corrected focal plane.
6. 2" eyepiece, f= 28mm.
7. Thread-on field flattener adaptor, used
to install the field flattener on the
focuser's drawtube.
Some parts may be optional,
depending on the dealer's
country.
Please check with him if any
doubt.
1224
7
5 6
3

4
Preparing the telescope for an observation
A. Upon delivery, and when not used, the
telescope and its accessories are inside the
aluminum padded case. Unpack the
telescope and assemble it to your mount
using the included D (Losmandy style)
dovetail bar. Please refer to your mount
manual to properly install the telescope.
B. To extend the dew cap unscrew the two
screws on the aluminum ring (1), then
gentle pull the dew cap forward (2). When
in position, tighten the two screws to
ensure the dew cap stays in position (3).
C. The 9x50 erect-image finder scope is a
small fixed magnification scope mounted
on the optical tube. When it is correctly
aligned with the telescope, objects can be
quickly located and brought into the field
of telescope (see also "Aligning the finder
scope" chapter, on next page)
To install the finder scope on the telescope
insert the positive dovetail of the finder
scope support inside the negative dovetail
mounted on the focuser, as shown in
picture.
Cooling the telescope
Telescopes require time to cool down to outside air temperature. This may take longer if there is a big
difference between the temperature of the telescope and the outside air. This minimizes heat wave
distortion inside telescope tube (tube currents). Your telescope would require at least 30 minutes
cooling off to outside conditions. Tip: use this time for planning your session and mount accessories.
1

5
Aligning the finder scope
The 9x50 erect-image finder scope is a small fixed magnification scope mounted on the optical tube.
When it is correctly aligned with the telescope, objects can be quickly located and brought to the
center of the field.
The alignment should be done at first use and over time if the alignment is no more accurate.
Alignment is best done outdoors in day light when it's easier to locate objects
If it is necessary to refocus your finder scope, sight on an object that is
at least 500 meters (or yards) away. Loosen the locking ring by
unscrewing it back towards the bracket. The front lens holder can now
be turned in and out to focus. When focus is reached, lock it in position
with the locking ring
Choose a distant object that is at least 500 meters (or yards) away and
point the main telescope at the object. Adjust the telescope so that the
object is in the center of the view in your eyepiece.
If you are using the star diagonal the image will be left/right
inverted, like images in a mirror.
Having an erected image, the view you have in the finder
scope has the same orientation as the landscape.
Check the finder scope to see if the object, centered in the
main telescope view, is centered on the crosshairs. If not
unscrew the three blocking rings on the rear ring, then adjust
the three small screws to center the finder scope.
Do not over tighten the screws when aligning the finder
scope. When the finder scope is correctly oriented, screw the
three blocking rings in position.

6
Using the telescope for visual observation
Inserting the eyepiece Loosen the two thumbscrews (1)
on the end of the focuser tube.
Insert the 2" diagonal (2) into the
focus tube and re-tighten the
thumbscrews (1) to hold the
diagonal in place.
Loosen the diagonal's screw (3).
For 2" eyepieces (4a), insert it
into the diagonal and secure it by
re-tightening the thumbscrew (3).
For 1.25" eyepieces first insert
the 2" to 1.25" adapter (4b) into
the diagonal and secure by re-
tightening the screw (3). Loosen
the adapter's screw (5) and insert
the 1.25" eyepiece(6) inside the
adapter ring, then secure it by re-
tightening the screw (5).
Focusing
Make sure the locking lever below the focuser (1) is
unlocked (position as shown in picture).
Slowly turn the focus knobs (2) one way or the other,
until the image in the eyepiece is nearly sharp.
To finely focus the image turn the 1:11 knob one way or
the other until the image is perfectly sharp (3).
Lock the screw below the focuser (1) if a heavy load is
attached (pull the lever at 90°).
The image usually has to be finely refocused over time, due
to small variations caused by temperature changes. This
often happens when the telescope has not yet reached
outside temperature.
Refocusing is almost always necessary when you change an
eyepiece.
When looking through a diagonal, the image
is inverted left to right, as an image in a
mirror. This is normal and has no incidence
for astronomical observations.
If you plan to do terrestrial observation often, like bird
watching, optional image-erecting devices such as the
Amici prism or the erected 90° diagonal may be the right
tool.
Your reseller will be glad to advise you about the best
optional part that can be used with your telescope.

7
Prime focus imaging with the optional field flattener
Before installing the field flattener onto the drawtube of the
focuser, the 2" ring adaptor (2) needs to be unscrewed and
removed.
In order to easily unscrew the ring, hold with one hand the ring (1)
at the end of the drawtube and then unscrew the 2" ring adaptor
(2) with the other hand.
.
No "universal" field flattener available on the market will deliver the premium results
achieved with the Sky-Watcher ESPRIT 150 Field flattener.
The Sky-Watcher ESPRIT 150 Field flattener is not compatible with other telescopes,
even refractors with the same aperture and same focal length.
Installing the field flattener and a DSLR (Digital Single-Lens Reflex) camera
1. Screw the drawtube adaptor (1) at
the end of the focus tube.
2.
Screw the field flattener (2) onto
the drawtube adaptor (1).
3.
Screw the extender tube (3) onto
the field flattener (2).
4.
Screw the enlarged 48mm T-Ring
(4) onto the extender tube (3).
The enlarged 48mm T-
Ring may not be included
with your telescope and
should match your DSLR
camera's manufacturer and
model. Please check with
your reseller to get the
correct 48mm Enlarged T-
Ring for your DSLR
camera.
5.
Install your DSLR camera on the
48mm enlarged T-Ring (4).
The Sky-Watcher ESPRIT 150 full frame field flattener has been specifically designed
for your telescope. It guarantees excellent field flatness and ensures full illumination with
extremely minimized color fringing across the entire 44 mm imaging plane.

8
In order to get the premium results the field flattener for
ESPRIT 150 can deliver the distance between the last
lenses to the sensor should be exactly 100mm. This
distance is called the field flattener "back focus".
The rings are designed to provide 98mm of back focus
with any DSLR camera. Modifications to this layout, i.e.
by adding a radial guider, will lead to blurry stars images
in the field edges.
Installing a 48mm filter inside the extender tube
A 48mm (2") filter can be mounted inside the DSLR
extender tube if
needed. By example using a light pollution reducer filter may allow pictures
of the night sky even in suburban areas.
1. Unscrew the closing ring at the rear part of the extender tube.
2.
3.
Installing the field flattener and a CCD (Charge-Coupled Device) camera
Installing an astronomical CCD camera and its accessories (filter wheel, radial guider…) behind the
field flattener is not as straightforward as installing a DSLR camera. All DSLR cameras have the exact
same distance from the border of the T-Ring adapter to the sensor, thus share the same extension rings
to ensure the 98mm back focus distance.
CCD cameras differ from one model to another, even in the same brand name, by the threads used and
the body-to-sensor distance. Accessories also have different possible threads and depths, thus the
combination of a CCD camera and its accessories can have any total length and any coupling thread.
A custom coupling ring is needed in order to assemble the CCD camera and its accessories (called the
"optical train") to the telescope's field flattener. The custom ring should be machined*to have:
1) A female M62x1 thread, to screw and secure the ring to the field flattener exit.
2) A thread compatible with the first component of the optical train.
3) A length to ensure that the distance from the last lenses of the field flattener to the CCD
sensor is exactly 100mm.
As it can be difficult to evaluate the position
of the field flattener lenses inside the frame,
the distance can be more conveniently
measured from the lenses mount edge, as
shown in the picture on the left.
From there to the sensor, the correct distance
should be exactly 98mm.
Most CCD cameras have also the distance
from their body thread to CCD sensor noted
in the manual, thus evaluating the length of
the custom ring you need can be precisely
evaluated.
*Refer to your local dealer about custom ring supply.
8
Insert the filter. Do not overtighten the filter. Put the closing ring
back in place.
This closing ring has a 48x0.75 mm thread inside, able to receive
any 48mm (2") filter.

9
Installing the field flattener and a CCD camera - continued
1.
Screw the drawtube adaptor (1) at the
end of the focus tube.
2.
Screw the field flattener (2) onto the
drawtube adaptor (1).
3.
Screw the custom ring (3) onto the
field flattener (2).
The custom ring needs to be
sturdy enough to secure the
optical train to the field
flattener.
4.
Screw your optical train to the custom
ring (3).
Focusing
Make sure the locking lever below the focuser (1) is
unlocked (position as shown in picture).
Slowly turn the focus knobs (2) one way or the other,
until the image in the eyepiece is nearly sharp.
To finely focus the image turn the 1:11 knob one way or
the other until the image is perfectly sharp (3).
Lock the screw below the focuser (1) if a heavy load is
attached (pull the lever at 90°).
The image usually has to be finely refocused over time, due
to small variations caused by temperature changes. This
often happens when the telescope has not yet reached
outside temperature.
Framing the picture
When the object you want to picture is in the middle of the circular 44mm field, most often its
orientation on the rectangular camera sensor is not what you expected (figure A). You can easily
reframe the picture on the camera sensor by unscrewing the blocking ring (1) at the end of the focuser
drawtube, then turning the adapter ring (2) with all the optical train until the framing suits your needs
(figure B). When done screw the ring (1) to lock position, and you are ready to picture the sky.

10
Prime focus imaging with the optional 0.77x reducer / flattener
Before installing the reducer flattener onto the drawtube of the
focuser, the 2" ring adaptor (2) needs to be unscrewed and
removed.
In order to easily unscrew the ring, hold with one hand the ring (1)
at the end of the drawtube and then unscrew the 2" ring adaptor
(2) with the other hand.
No "universal" reducer flattener available on the market will deliver the premium results
achieved with the Sky-Watcher ESPRIT 150 Reducer flattener.
The Sky -Watcher ESPRIT 150 Reducer flattener is not compatible with other telescopes,
even refractors with the same aperture and same focal length.
Installing the reducer flattener and a DSLR camera
1. Screw the reducer flattener onto
the focuser drawtube.
2.
Screw the extender tube onto
the reducer flattener.
3.
Screw the enlarged 48mm T-Ring
onto the extender tube.
4.
Install your DSLR camera on the
48mm enlarged T-Ring.
The enlarged 48mm T-
Ring may not be included
with your telescope and
should match your DSLR
camera's manufacturer and
model. Please check with
your reseller to get the
correct 48mm Enlarged T-
Ring for your DSLR
camera.
The Sky-Watcher ESPRIT 150 full frame 0.77x reducer / field flattener has been specifi-
cally designed for your telescope. It guarantees excellent field flatness and ensures full
illumination with extremely minimized color fringing across the entire 34 mm imaging
plane.

11
In order to get the premium results the reducer flattener for
ESPRIT 150 can deliver the distance between the last
lenses to the sensor should be exactly 90mm. This
distance is called the reducer flattener "back focus".
The rings are designed to provide 90mm of back focus
with any DSLR camera. Modifications to this layout, i.e.
by adding a radial guider, will lead to blurry stars images
in the field edges.
Installing a 48mm filter inside the extender tube
Installing the reducer flattener and a CCD (Charge-Coupled Device) camera
Installing an astronomical CCD camera and its accessories (filter wheel, radial guider…) behind the
reducer flattener is not as straightforward as installing a DSLR camera. All DSLR cameras have the exact
same distance from the border of the T-Ring adapter to the sensor, thus share the same extension rings
to ensure the 55mm back focus distance.
CCD cameras differ from one model to another, even in the same brand name, by the threads used and
the body-to-sensor distance. Accessories also have different possible threads and depths, thus the
combination of a CCD camera and its accessories can have any total length and any coupling thread.
A custom coupling ring is needed in order to assemble the CCD camera and its accessories (called the
"optical train") to the telescope's field flattener. The custom ring should be machined*to have:
1) A female M78x1 thread, to screw and secure the ring to the reducer flattener exit.
2) A thread compatible with the first component of the optical train.
3) A length to ensure that the distance from the last lenses of the reducer flattener to the CCD
sensor is exactly 90mm .
Most CCD cameras have also the distance
from their body thread to CCD sensor noted
in the manual, thus evaluating the length of
the custom ring you need can be precisely
evaluated.
*Refer to your local dealer about custom ring supply.
90mm
55mm
90mm
55mm
A 48mm (2") filter can be mounted inside the DSLR extender tube if needed.
By example using a light pollution reducer filter may allow pictures of the
night sky even in suburban areas.
As it can be difficult to evaluate the position of
the reducer flattener lenses inside the frame,
the distance can be more conveniently
measured from the lenses mount edge.
The 90mm distance is measured from the edge
marking the start of the M78x1 male thread on
the reducer flattener, to the CCD sensor (see
picture on the left).
1. Unscrew the closing ring at the rear part of the extender tube.
2.
3.
Insert the filter. Do not overtighten the filter. Put the closing ring
back in place.
This closing ring has a 48x0.75 mm thread inside, able to receive
any 48mm (2") filter.

12
Installing the reducer flattener and a CCD camera - continued
1.
Screw the reducer flattener on the end
of the focus tube.
2.
Screw the custom ring onto the field
flattener.
3.
Screw your optical train to the custom
ring.
The custom ring needs to be
sturdy enough to secure the
optical train to the field
flattener.
4.
Screw your optical train to the custom
ring.

13
Useful tips for all observations
Removing the finder scope
During an observation, when the desired target is acquired, it
is possible to remove the finder scope from its support. When
needed the finder scope can be inserted again.
This can be useful when the observer's head is in a position
where the finder scope becomes an obstacle to observation.
Using the indexed scale
The indexed scale on the focuser drawtube gives an accurate
indication on the focus position for various accessories.
Once the position for one accessory is known it is very easy to
approximate the focus position.
Due to the precision needed to reach perfect focus a fine
tuning is advised.
Rotating the focuser
The whole focuser body can be rotated. It is useful when the
focuser knobs aren't in a convenient position.
1. Remove all accessories from the focuser.
2. Fully retract the drawtube inside the focuser body.
3. Unscrew the "boat wheel" like large aluminum ring.
4. Rotate the focuser body.
5. Tight back the "boat wheel" like large aluminum ring.

14
Specifications
Telescope specifications
Optical Design Refractor (air- spaced triplet APO)
Aperture (mm) 150 mm (5.9 in)
Focal Length 1050 mm (41 in)
7
Highest Useful Magnification 354 x
Lowest Useful Magnification 21 x
Limiting Stellar Magnitude 13.4
Resolution (Rayleigh) 0.93 arc seconds
Resolution (Dawes) 0.77 arc seconds
Light Gathering Power 459 x (Compared to Human Eye)
Optical Coatings Fully multi-coated
Optical Tube Length 92 cm (36 in) (Retracted Dew Cap)
Optical Tube Weight 15 kg (32 lbs)
Telescope Visual Backfocus >170mm (6.7 in)
Focuser type Rack and pinion, double speed, diameter 74mm (3 in)
Telescope accessories specifications
Mounting
Focal Ratio
Tube Rings With 3" (D Style) dovetail plate
Finderscope 9x50, erect-image, right-angle
Diagonal 2" dielectric coatings
Field Flattener:
Optical Design 2 lenses
Resulting focal length unchanged 1050mm (F/D=7)
Field of view Full frame (44mm diameter unvignetted)
Backfocus ** 98mm (3.86 in)
Telescope side connection M65x1 (inside)
Camera side connection M62x1 (outside)
Filter compatible 2” filter compatible in DSLR extension adapter
Telescope side adapter M74x1 (in) to M65x1 (out)
Camera side adapter DSLR extension adapter M62x1 (in) to M48x0.75 (out)
0.77x Reducer / Field Flattener:
Optical Design 3 lenses
Resulting focal length 810mm (F/D=5.4)
Field of view Full frame (36mm diameter unvignetted)
Backfocus ** 90mm (3.54 in)
Telescope side connection M86x1 (inside)
Camera side connection M78x1 (outside)
Filter compatible 2” filter compatible in DSLR extension adapter
Camera side adapter DSLR extension adapter M78x1 (in) to M48x0.75 (out)

Rings/
Threads
Focuser
Tube
Field
Flattener
DSLRl
Ext. Tube
Enlarged
T-Ring
In Ø
n/a
M86x1 F.
M78x1 F.
M48x1 F.
In screw depth
n/a
7 mm
9 mm
variable
Out Ø
M86 x1 M
M78x1 M.
M48x0.75 M
Camera
Out screw depth
7 mm
9 mm
6 mm
n/a
15
Threads specifications
Field flattener and DSLR adapter threads specifications
Rings/
Threads
Focuser
Tube
Drawtube
Adatpor
Field
Flattener
DSLRl
Ext. Tube
Enlarged
T-Ring
In Ø
n/a
M74x1 F.
M65x1 F.
M62x1 F.
M48x0.75 F.
In screw depth
n/a
7 mm
7.5 mm
8.5 mm
variable
Out Ø
M74 x1 M
M65x1 M.
M62x1 M.
M48x0.75 M
Camera
Out screw depth
6 mm
6 mm
6 mm
6 mm
n/a
The visual back focus of the telescope is the distance from the end of the focuser tube (with 2’’ adapter
installed) to the focal plane. This means, all accessories needing 170mm back focus or less can be installed.
** The back focus of the field flattener is the distance from the back of the field flattener (flat surface at the exit)
to the focal plane. To obtain flat wide field images, the sensor should be positioned at exactly (+-1mm) this
distance. See also detailed explanations on bottom of page 8.
0.77x reducer / field flattener and DSLR adapter threads specifications

16
Different releases : Case and Accessory box
Some of the first ESPRIT 150 series are delivered with a different case and accessory box.
Your telescope is inside the sturdy aluminum
padded case, designed to securely carry the
telescope and the tube rings.
The accessory box contains the following parts:
1. The 2" (50.8mm) diagonal with dielectric
coating.
2. The 9x50 erect-image finder scope with tube
rings and mount.
3. The 2-element thread-on field flattener, used
for photography only, guarantees excellent
field flatness across the entire 44 mm imaging
plane, allowing picturing the sky with large
sensors.
4. Thread-on field flattener adaptor, used to
install the field flattener on the focuser's
drawtube.
5. Field flattener extender tube for DSLR
camera, used to place the camera exactly on
the corrected focal plane.
6. 2" eyepiece f= 28mm
Some parts may be optional,
depending on the dealer's country.
Please check with him if any doubt.
Sky-Watcher offers this product with the best available quality in accordance with the legislation of the local
market. This can lead to small differences over time and depending on the area of sale in the world. These
differences do not influence the overall quality which is of the high standard guaranteed by Sky-Watcher
worldwide.


We want to ensure that your experience with a Sky-Watcher
product is the best it can be. To make that happen we have a
comprehensive technical and customer support available,
alongside with the list of distributors and dealers worldwide, on
our worldwide internet site:
http://www.skywatcher.com
Sky-Watcher offers this product with the best available quality in
accordance with the legisla�on of the local market, and reserves the
right to modify or discon�nue, without prior no�ce to you, any model
or style telescope.
/