Page is loading ...

42" HIGH PERFORMANCE
LAWNSWEEPER
Model No's. 486.242221, 486.242241
Owner's Manual
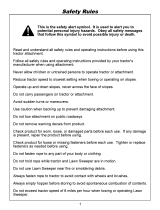
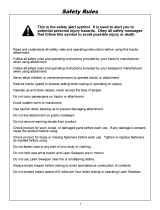
CAUTION:
Before using this product, read this
manual and follow all Safety Rules
and Operating Instructions.
• Safety
• Assembly
• Operation
• Maintenance
• Parts
PRINTEDINU.S.A.
FORMNO.40734Rev(06/11/09)
Sears,RoebuckandCo.,HoffmanEstates,IL60179U.S.A.
www.sears.com/craftsman
®
STOP
DO NOT RETURN TO STORE
For Missing Parts or Assembly
Questions Call 1-866-576-8388

2
Anypowerequipmentcancauseinjuryifoperatedimproperlyoriftheuserdoesnotunderstandhowtooperatetheequipment.
Exercisecautionatalltimes,whenusingpowerequipment.
1. Readthevehicleandsweeperownersmanualsand
knowhowtooperateyourvehicleandsweeperbefore
usingthissweeperattachment.Alwaysinstructother
usersbeforetheyoperatethesweeper.
2. Donotpermitchildrentooperatesweeper.
3. Donotpermitanyonetorideonsweeper.
4. Neverattachthehopperropetoanypartofyourbody
orclothing!Neverholdontotheropewhiletowingthe
sweeper!Attachtheropetothetowingvehicletokeep
it away from wheels and rotating parts.
5. Operate the sweeper at reduced speed on rough
terrain,nearditchesandonhillsidestopreventlossof
control.
6. Vehiclebrakingandstabilitymaybeaffectedwith
theattachmentofthissweeper.Donotllsweeper
tomaximumcapacitywithoutcheckingthecapability
ofthetowingvehicletosafelypullandstopwiththe
sweeper attached. Stay off of steep slopes.
7. Stopandinspectvehicleandsweeperfordamage
afterstrikinganobject.Repairanydamagebefore
continuing operation.
8. Keepsweeperawayfromre.Excessiveheatcan
damagethebrushesandhopperbagandcouldcause
thebaganditscontentstoburn.
9. Beforestoringthesweeper,alwaysemptythehopper
bagtoavoidspontaneouscombustion.
10.Followmaintenanceandlubricationinstructionsas
outlined in the maintenance section of this manual.
Lookforthissymboltopointoutimportantsafetyprecautions.Itmeans—Attention!!
Become alert!! Yoursafetyisinvolved.
MaintenanceSchedule ..................................................13
Storage ..........................................................................13
ServiceandAdjustments ...............................................14
Troubleshooting .............................................................14
RepairPartsIllustration .................................................15
RepairPartsList ............................................................16
PartsOrdering/Service ....................................BackCover
Safety Rules ....................................................................1
Warranty ..........................................................................2
AccessoriesandAttachments .........................................3
CartonContents ..............................................................3
FullSizeHardwareChart ................................................ 4
SweeperAssemblyInstructions ......................................5
HopperAssemblyInstructions .........................................7
Operation .......................................................................12
MODELNUMBER: 486.242221,486.242241
SERIALNUMBER: ____________________
DATEOFPURCHASE: ____________________
WARRANTY
TABLE OF CONTENTS
Themodelandserialnumberswillbefoundonadecal
attached to the lawnsweeper.
Youshouldrecordboththeserialnumberandthedateof
purchaseandkeepinasafeplaceforfuturereference.
SAFETY
CRAFTSMAN FULL WARRANTY
Whenoperatedandmaintainedaccordingtoallsuppliedinstructions,ifthisCraftsmanproductfailsduetoadefectinmaterial
orworkmanshipwithinoneyearfromthedateorpurchase,returnittoanySearsstoreorotherCraftsmanoutletintheUnited
States for free replacement.
Thiswarrantyappliesforonly90daysfromthedateofpurchaseifthisproductiseverusedforcommercialorrentalpurposes.
Thiswarrantydoesnotincludeitemsconsideredtoexpendablepartsthatcanwearoutfromnormalusewithinthewarranty
period.
Thiswarrantygivesyouspeciclegalrights,andyoumayalsohaveotherrightswhichvaryfromstatetostate.
Sears, Roebuck and Co., D817WA, Hoffman Estates, IL 60179
DONOTRETURNTOSTOREforMissingPartsorAssemblyQuestions
Call1-866-576-8388AttachmentHotline

3
CARTON CONTENTS (LoosePartsinCarton)
11.UpperHopperTube(2)
12.LowerHopperTube(2)
13.PivotRod
14.HopperSupportStrap(2)
15.BagFrameStrap
16.BrushAssembly(2)
1. SweeperHousingAssembly
2. BagArmTube(2)
3. HitchTube,L.H.(LeftHand)
4. HitchBracketAssembly
5. HitchBracket,Bent
1
2
3
5
6
7
2
8
9
4
10
11
13
14
10
12
11
12
16
15
ACCESSORIES AND ATTACHMENTS
TheFrontMountDethatcher,Model486.24219attaches
tothelawnsweepertohelploosenandremovedead
grass and thatch from the lawn while sweeping.
These accessories were available when the unit was purchased. They are also available at most Sears retail
outlets and service centers. Most Sears stores can order repair parts for you when you provide the model
numbers of your tractor and sweeper
6. HeightAdjustmentStrap
7. HitchTube,R.H.(RightHand)
8. Rope
9. HopperBag
10.RearHopperTube(2)

4
REF qTY DESCRIPTION
A 2 HexBolt,5/16-18x3"Lg.
B 3 HexBolt,5/16-18x2-1/4"Lg.
C 3 HexBolt,5/16-18x1-3/4"Lg.
D 4 HexBolt,1/4-20x1"
E 1 CarriageBolt,5/16-18x1"Lg.
F 4 CarriageBolt,5/16-18x3/4"Lg.
G 4 CurvedHeadBolt,1/4-20x1"
H 8 NylockNut,1/4"
I 12 NylockNut,5/16"
J 1 Washer,ToothLock5/16"
K 2 FlatWasher,5/16"Standard
L 2 HitchSpacer,3/4"
HARDWARE PACKAGE CONTENTS
A B C ED F
I
S
R
K
T
U
V
W
J
P
L
M
SHOWN FULL SIZE
NOT SHOWN FULL SIZE
O
N
H
G
Q
REF qTY DESCRIPTION
M 1 Spacer Bushing
N 2 ClevisPin,3/8"x1/2"
O 4 ClevisPin,1/4"x1-1/8"
P 2 ClevisPin,1/4"x1-3/4"
Q 2 Palnut,3/8"
R 1 HairpinCotter,1/8"
S 8 HairpinCotter,3/32"
T 4 HopperClamp
U 2 VinylCap
V 1 Grip
W 1 PlasticKnob

5
TOOLS REqUIRED FOR ASSEMBLY
(1)Hammer
(2)1/2"Wrenches
(2)7/16"Wrenches
ASSEMBLY
STEP 2 - IDENTIFY BRUSH ASSEMBLIES
• Eachbrushassemblyhasonebrushretainermarked
witheitherredorblackink.Layoutthebrushassemblies
asshownsothatthebrushretainersmarkedwithink
areinthemiddlewiththeblackoneonyourrightand
theredoneonyourleft.Seegure1.
OVERLAP BRISTLES
BRUSH RETAINER
MARKED RED
BRUSH RETAINER
MARKED BLACK
STEP 3 - ATTACH R.H. BRUSH ASSEMBLY
IMPORTANT:Theoverlapbristlesatthebottomofeach
brush help support the back sideof the brush forbetter
sweeper performance. Be sure the sweeper is turned as
showningure2tocorrectlyassemblethebrushes.
• Attachthebrushassemblywiththeblackbrushretainer
totherightendofthebrushshaftusingtwohexbolts
(D)andnylocknuts(H).Thebrushretainermarkedwith
blackinkmustbeplacedtothemiddle of the sweeper.
Seegure2.
STEP 1 - REMOVE PARTS FROM CARTON
• Toprotectpaintedparts,laythemoncardboardora
mat.
• Removethesweeperhousing,theloosepartsandthe
hardwarepackagefromthecarton.Layouttheparts
andhardwareasshownonpages3and4.
• Placethesheetofcardboardfrominsidethecartononto
yourworksurfacetopreventscratchingthesweeper.
FIGURE 1
FIGURE 2
NYLOCK NUT (H)
BRUSH
RETAINER
MARKED
BLACK
OVERLAP
BRISTLES
HEX BOLT (D)
WELDED BRACE

6
STEP 4 - ATTACH L.H. BRUSH ASSEMBLY
• Attachthebrushassemblywiththeredbrushretainer
totheleftendofthebrushshaftusingtwohexbolts(D)
andnylocknuts(H).Thebrushretainermarkedwithred
inkmustbeplacedtothemiddle of the sweeper. See
gure3.
• Turnawheeltorotatethebrushes.(Thewheelsdrive
thebrushesinonedirectiononly.)Theoverlapbristles
shouldbeonthebacksideofthebrushasitrotates.
FIGURE 3
STEP 5 - ASSEMBLE LEFT HITCH TUBE
• Thehitchtubesarestampedwitha"77L"forthe
lefttubeanda"76R"fortherighttube.Thesweeper
housingismarkedwithan"L"ontheleftwithside
andan"R"ontherightside.Seegures4and5.
• Holdthelefthitchtubeagainsttheleftsideofthe
sweepersothatthe"77L"onthetubefacesaway
fromthesweeper.Attachthehitchtubeusingtwo
hexbolts(C)andnylocknuts(I).Do not tighten yet.
Seegure4.
HEX BOLT (C)
HITCH TUBE (L.H.)
NYLOCK NUT (I)
TUBE
MARKED
“77L”
HOUSING
MARKED “L”
FIGURE 4
FIGURE 5
HEX BOLT (C)
HITCH TUBE (R.H.)
NYLOCK NUT (I)
TUBE
MARKED
“76R”
HOUSING
MARKED “R”
STEP 6 - ASSEMBLE RIGHT HITCH TUBE
• Holdtherighthitchtubeagainsttherightsideofthe
sweepersothatthe"76R"onthetubefacestoward
thesweeper.Attachthehitchtubeusingonehexbolt
(C)andnylocknut(I).Do not tighten yet.Seegure5.
STEP 7 - ASSEMBLE HEIGHT ADJ. STRAP
• Attachtheheightadjustmentstraptothehitchtube
usingahexbolt(B),thespacerbushing(M),aat
washer(K)andanylocknut(I).Seegure6.Do not
tighten yet.
FLAT WASHER (K)
SPACER
BUSHING (M)
HEX BOLT (B)
NYLOCK NUT (I)
HEIGHT ADJ. STRAP
FIGURE 6
HEX BOLT (D)
NYLOCK NUT (H)
BRUSH RETAINER
MARKED RED

7
STEP 9 - FASTEN HITCH TUBES TOGETHER
• Fastenthehitchtubestogetherusingtwohexbolts(A)
andnylocknuts(I).Seegure8.Do not tighten yet.
STEP 10 - ASSEMBLE GRIP
• Assemble the grip (V) onto the end of the height
adjustmenthandleasshowningure8.
FIGURE 10
STEP 12b - ASSEMBLE HITCH BRACKETS
• Ifthetractorhitchis10"ormoreabovetheground,
assemblethehitchbracketsasshowningure10.
Inserttwohexbolts(B)throughthebrackets,with
therearhexboltbetweenthecrossboltsinthehitch
tubes.Securethehexbolts(B)withtwonylocknuts
(I).Do not tighten yet.Seegure10.
• Assemblethetwospacers(L)ontothehitchpinand
securethepinwiththehairpincotter(R).Seegure10.
NYLOCK NUTS (I)
BENT HITCH
BRACKET
HITCH
BRACKET
ASSEMBLY
HEX BOLTS (B)
SPACERS (L)
HAIRPIN
COTTER (R)
FIGURE 9
NYLOCK NUTS (I)
HITCH BRACKET
ASSEMBLY
BENT HITCH
BRACKET
HEX BOLTS (B)
HAIRPIN COTTER (R)
SPACERS (L)
STEP 12a - ASSEMBLE HITCH BRACKETS
• Ifthetractorhitchislessthan10"abovetheground,
assemblethehitchbracketsasshowningure9.
Inserttwohexbolts(B)throughthebrackets,with
therearhexboltbetweenthecrossboltsinthehitch
tubes.Securethehexbolts(B)withtwonylocknuts
(I).Do not tighten yet.Seegure9.
• Assemblethetwospacers(L)ontothehitchpinand
securethepinwiththehairpincotter(R).Seegure9.
STAR WASHER (J)
KNOB (W)
FLAT WASHER (K)
HEIGHT
ADJ.
STRAP
CARRIAGE
BOLT (E)
HEIGHT
ADJ.
HANDLE
STEP 8 - ASSEMBLE KNOB
• Placetheheightadjustmentstraptotheinside of the
heightadjustmenthandle.Placethestarwasher(J)
betweentheheightadjustmentstrapandtheheight
adjustmenthandle.Insertthecarriagebolt(E)through
thestrap,thestarwasherandthehandle.Assemble
theatwasher(K)andtheplasticknob(W)ontothe
endoftheboltandtighten.Seegure7.
STEP 11 - MEASURE TRACTOR HITCH HEIGHT
• Usethemarkalongthesideofthispagetomeasure
theheightofthetractorhitch.Themarkis10"from
thebottomofthepage.Ifthetractorhitchislessthan
10"abovetheground,gotoSTEP 12a. If the tractor
hitchis10"ormoreabovetheground,gotoSTEP 12b.
HEX BOLT (A)
NYLOCK NUT (I)
GRIP (V)
STEP 13 - TIGHTEN BOLTS
• Tightenthefourboltsassembledinsteps5,6and7.
Tightenthetwoboltsassembledinstep9.
Tightenthetwoboltsassembledinstep12aor12b.
FIGURE 7
FIGURE 8
10"

8
ASSEMBLY OF HOPPER BAG
STEP 14 - ASSEMBLE TUBES
• Fittheendsofthetwoupperhoppertubesintothe
endsofarearhoppertube.Aligntheholesintheends
ofthetubesandsecuretheminplaceusingtwocurved
headbolts(G)andnylocknuts(H).Seegure11.
• Fittheendsofthetwolowerhoppertubesintothe
endsofarearhoppertube.Aligntheholesintheends
ofthetubesandsecuretheminplaceusingtwocurved
headbolts(G)andnylocknuts(H).Seegure11.
• Insertaclevispin(O)fromtheoutsideintoeachlower
hoppertubeandsecureitwithahaircotterpin(S).
Seegure11.
NOTE:Eithersideoftherearhoppertubecanfaceup.
FIGURE 11
FIGURE 12
UPPER
HOPPER
TUBE
HOPPER
BAG
BOTTOM
STITCHED SLEEVE
FIGURE 13
LOWER HOPPER TUBE
HOPPER BAG
BOTTOM
UPPER HOPPER
TUBE
CLEVIS PIN (N)
HAIR COTTER
PIN (S)
UPPER
HOPPER
TUBE
NYLOCK
NUT (H)
CURVED HEAD
BOLT (G)
REAR
HOPPER
TUBE
LOWER
HOPPER TUBE
REAR
HOPPER
TUBE
CLEVIS PIN (O)
HAIR COTTER PIN (S)
NYLOCK
NUT (H)
CURVED HEAD
BOLT (G)
STEP 15 - ASSEMBLE TUBES TO BAG
• Unfoldthehopperbag,reversethefoldofthemesh
windscreenandthenlaythebagoutatwiththewind
screen on top.
• Inserttheendsoftheassembledupperhoppertubes
downthroughthestitchedsleevesinthesidesofthe
hopperbagandthenslidethetubesbackunderneath
thewindscreen.Seegure12.
• Placetheassembledlowerhoppertubesintothe
bottomofthehopperbagandthenslidethetubesto
thebackofthebag.Seegure13.
• Attachtheendsofthelowerhoppertubestothe
insideoftheupperhoppertubesusingtwoclevispins
(N)insertedfromtheinside,andtwohaircotterpins
(S).Seegure13.

9
STEP 17 - ASSEMBLE HOPPER CLAMPS
• Assembletwohoppermountclamps(T)overthehole
inthemiddleofeachupperhoppertubeusingtwo
carriagebolts(F)andtwonylocknuts(I).Tightenonly
ngertight.Seegure17.
• Foldthebagapsaroundthelowerhoppertubesand
attachtothebagbottomusingthesnaps.Seegure
16.
FIGURE 16
STEP 16 - ATTACH BAG BOTTOM
• Insertthebagframestrapintothestitchedsleeveat
thefrontedgeofthebagbottom.Seegure14.
FIGURE 15
FIGURE 17
CLEVIS PIN (O)
HAIR COTTER
PIN (S)
BAG FRAME STRAP
SNAP
FLAP
BAG FRAME STRAP
STITCHED
SLEEVE
• Assemblethebagframestraptotheholesinthe
lowerhoppertubesusingtwoclevispins(O)andhair
cotterpins(S).Seegure15.
FIGURE 14
5/16" x 3/4"
CARRIAGE
BOLT (F)
5/16" NYLOCK
NUT (I)
HOPPER
MOUNT
CLAMP (T)
UPPER
HOPPER
TUBE

10
FIGURE 20
STEP 18 - ASSEMBLE PIVOT ROD
• Slidetheendofthepivotrodthroughtheupper
hoppertubeandthehoppermountclampsonone
sideofthehopper.Placeahoppersupportstrap
andthenabagarmtubeontotherod.Slidetherod
throughthestitchedsleeveatthefrontedgeofthe
windscreen,andthenplaceanotherbagarmtube
and a hopper support strap onto the rod. Slide the
rodthroughtheotherupperhoppertubeandhopper
mountclamps.Seegure18.
STEP 20 - ATTACH HOPPER BAG
• Toattachthehopperbagtothesweeper,slidethe
endsofthebagarmtubesintotheendsofthehitch
tubesandsecurewithtwoclevispins(P)andhairpin
cotters(M).Seegure22.
STEP 19 - ATTACH ROPE
• Securetheropetothecenteroftheupperrearhopper
tubeasshowningure21.
FIGURE 22
• Assembleavinylcap(U)ontoeachbagarmtubeas
showningure20.
• Assembletwopalnuts(Q)ontotheendsofthepivot
rodusingahammer.Seegure20.
HINT: Toeaseassemblyofthepalnuts,placethebag
onitssideonasolidsurface.Withthebottomendofthe
pivotrodagainstthesurface,tapapalnutontothetop
end of the rod. Repeat for other end of rod.
FIGURE 18
FIGURE 21
BAG ARM TUBE
HOPPER BAG
PIVOT ROD
MOUNTING CLAMPMOUNTING CLAMP
WIND SCREENWIND SCREEN
HOPPER SUPPORT STRAP
MOUNTING CLAMP MOUNTING CLAMP
HAIR COTTER
PIN (S)
TIGHTEN NUTS
CLEVIS PIN (O)
FIGURE 19
MOUNTING CLAMP MOUNTING CLAMP
PALNUT (Q)
CAP (U)
CLEVIS PIN (P)
BAG ARM TUBE
HAIRPIN
COTTER (S)
• Attachthebottomsofthehoppersupportstrapstothe
clevispins(O)inthelowerhoppertubes,securingthe
strapswiththepreviouslyassembledhaircotterpins
(S).Seegure19.
• Tightenthenutsonthehoppermountclamps.See
gure19.

11
ATTACHING SWEEPER HITCH TO TRACTOR
BLACK LINE IS TRACTOR HITCH
HITCH BRACKET MOUNTED
BELOW HITCH TUBES
BLACK LINE IS TRACTOR HITCH
HITCH BRACKET MOUNTED
ABOVE HITCH TUBES
FIGURE 23
• Placethetractorandsweeperonaatlevelsurface.
• Setthesweeperheightadjustmenthandletoaboutthe
middleofitsadjustmentrange.
• Attachthesweeperhitchtothetractorhitch,arranging
the3/4"spacersinoneofsixpossiblecombinationsas
showninGROUPAandGROUPBdiagramsbelow.
IMPORTANT:Toobtainthebestperformancefromyour
sweeper,arrangethespacerssothatthesweeperbagis
approximatelylevelwiththegroundandapproximately5"
to7"offthegroundasshowningure23.
GROUP "B" - For vehicles with hitches
having 10" to 13" ground clearance.
GROUP "A" - For vehicles with hitches
having 8" to 10" ground clearance.
APPROXIMATELY LEVEL
(5" to 7" FROM SURFACE)
BRUSH HEIGHT ADJUSTED
APPROXIMATELY MID-WAY

12
KNOW YOUR SWEEPER
CAUTION:
Keepsweeperawayfromre.
Excessiveheatcandamagethebrushesand
hopperbagandcouldcausethebagandits
contentstoburn.
CAUTION: Never attach the hopper rope
toanypartofyourbodyorclothing!Never
hold onto the rope while towing the sweeper!
Attach the ropetothetowingvehicletokeep
it away from wheels and rotating parts.
DUMPING OF SWEEPER
• Yoursweepercanbedumpedeasilywithoutgetting
off of the rider or tractor. Simply pull the rope forward
todumpthehopper.Alwaysemptyhopperaftereach
use.
BRUSH HEIGHT ADJUSTMENT
• Toadjustyoursweeperbrushestothebestoperating
height,loosentheadjustmentknobandpushdown
ontheheightadjustmenthandletoraisethebrush,or
pushuponthehandletolowerthebrush.Seegure
19.Bestadjustmentiswhenthebrushsettingis1/2"
downintothegrass.Alwaysmowthegrasstoaneven
heightbeforesweeping.
SWEEPING SPEED
• Tryastartingspeedofapproximately3m.p.h.(third
gearonmosttractors).Dependingontheconditions,
itmaybenecessarytoadjustthesweepingspeedin
ordertoachievebestresults.
OPERATION
HopperBag Collectsgrassclippings,leavesanddebris.
HopperRope Permitsdumpingofhopperbagfromdriver'sseat.
Windscreen Helpspreventcollectedmaterialfrombeingblownoutofhopperbag.
BagArmTubes Connectsthehopperbagtothesweeperhousing.
PivotRod Allowshopperbagtotiltforwardtodumpmaterial.
HeightAdjustmentHandle Adjuststheoperatingheightofthesweeper.
HeightAdjustmentStrap Holdstheheightadjustmenthandleinpositionwhenlocked.
HitchBracket Connectsthesweepertothetowingvehicle.Adjustsforvariousheighttractorhitches.
HOW TO USE YOUR SWEEPER
HOPPER BAG
WINDSCREEN
BAG ARM TUBE
PIVOT ROD
HEIGHT
ADJUSTMENT
HANDLE
HITCH
BRACKETS
HEIGHT
ADJUSTMENT
STRAP
HOPPER
ROPE

13
MAINTENANCE
MAINTENANCESCHEDULE
Fill in dates as you
completeregularservice.
Checkforloosefasteners X
Checkforwornordamagedparts X X
Lubricatebrushshaftbearings X
Lubricatewheelbearings X
CleanSweeper X X
Clean/Lubricatechainandsprockets X
FIGURE 25
• Everytwoyears,removethewheelsandcleanthe
sprockets,chainsandgearsfoundinsidethewheel
housing.Aftercleaning,lubricatewithanevencoatof
lightgrease.Toremovethewheel,popoffthehubcap
usingascrewdriverandremovethelocknutandat
washer.Seegure25.
CLEANING
• Cleansweeperhousingwithasoftbrushorcloth.
• Cleandebrisfromhopperbagwithabrushorbroom.
• Removeanymaterialwhichhaswrappedaround
brushesorendsofbrushshaft.
CUSTOMER RESPONSIBILITIES
• Read and follow the maintenance schedule and the
procedures listed in the maintenance section.
Before each use
Aftereachuse
Twiceayear
Everyseason
Before storage
Everytwoyears
ServiceDates
SCHEDULED MAINTENANCE
• Cleanthesweeperaftereachuse.
• Inspectforwornordamagedparts,suchasbrushes
and wheels.
• Lubricatethebrushshaftbearingtwiceayearwitha
fewdropsoflightweightoil.Seegure24.
HEIGHT ADJUSTMENT SLOT
HEX BOLT
OIL BEARINGS HERE
FLAT WASHER
FIGURE 24
• Cleanthesweeperandhopperbagthoroughlytohelp
preventrustandmildew.
• Tocollapsethehopperbagforstorage,removethetwo
hopper support rods from the rear of the hopper.
• Storeinadryarea.
CAUTION: Before storing the sweeper,
alwaysemptythehopperbagtoavoid
spontaneouscombustion.
STORAGE
COVER
FLAT
WASHER
HEX
LOCK
NUT
HUB CAP
CLEAN
AND
GREASE

14
SPROCKET, CHAIN AND PAWL SERVICE
IMPORTANT: Do notremovebothwheelsatthesame
timetoavoidmixingofparts.(TheR.H.andL.H.ratchet
sprocketsarenotinterchangeable.)Make notes on the
positionofwashersandsnapringsduringdisassembly.
• Removethedustcoverbyremovingthetworivets
whichfastenittothewheelhousing.(Itisnot
necessarytoremovethedustcoverifyouareonly
cleaningandlubricatingthechainandsprockets.)
• Removetheretainingringsandwasherswhichhold
thesprocketsontotheshafts.
• Removethechainandbothsprockets,holdingthemin
positionandslidingthemoffbothoftheshafts.(Look
forthedrivepin,whichmayfalloutofthebrushshaft
whentheratchetsprocketisremoved.)Seegure27.
• Toreassemble,insertthedrivepinthroughthehole
attheendofthebrushshaft.Makesurethepinslides
backandfortheasilyintheshaft.
• Lightlygreasebothshaftsandthechain,andllthe
ratchetsprocketwithgrease.Assemblethechainwith
bothsprocketsbackontotheshafts.
• Lightlygreasetheaxleandthenreassemblethewheel.
Thebrushesshouldrotateonly during forward rotation
ofthewheel.Ifthebrushesaredriven(rotated)byboth
forwardandreverserotationofthewheel,thedrivepin
isjammingintheratchetgear.Disassembleandclean
andlubricatethedrivepinandratchetgear.
BRUSH REPLACEMENT
NOTE: Brushreplacementshouldbedoneonebrushat
a time.
• Removethehopperbagfromthesweeper.
• Loosenthehexboltsandlocknutsontwosingle
brushretainerswhichclamponebrushtothedouble
brushretainers.Do Not loosenorremovethebolts
whichfastenthedoublebrushretainerstothebrush
shaft.Seegure26.
• Slidethebrushoutoftheretainers,notingonwhich
sideofthebrushthebristlesoverlap.Seegure26.
• Installnewbrush,makingsurethebristlesoverlapon
thesamesideofthebrushasbefore.Seegure26.
GEAR SPROCKET
CHAIN
RATCHET
SPROCKET
DRIVE PIN
DUST COVER
FIGURE 27
BRUSH ROTATION
BRUSH ROTATION
OVERLAP
BRISTLES
OVERLAP
BRISTLES
SINGLE
BRUSH
RETAINERS
DOUBLE BRUSH RETAINER
BRUSH
SHAFT
FIGURE 26
• Brushessettoolow.
• Brushesarejammed
• Wheelsarejammed.
Wheelsskidwhensweeping. • Adjust height till brushes are 1/2"
down into grass.
• Stopsweeper.Removeobstruction.
• Removeonewheelatatimetocheck
forobstructionordamage.Referto
ServiceandAdjustmentssection.
SERVICE AND ADJUSTMENTS
TROUBLESHOOTING

15
NOTES

16
PARTS
C
C
D
D
E
E
15
14
16
39
17
18
19
47
56
55
56
20
41
28
30
31
55
25
26
35
38
23
26
24
29
40
14
8
34
4
22
37
21
37
20
64
76
75
28
2
11
12
13
59
33
58
59
68
51
50
69
57
67
65
59
1
9
27
32
6
3
7
5
77
28
70
59
52
75
43
42
44
48
45
72
73
75
75
44
72
70
54
74
46
53
46
53
10
74
17
71
42
44
43
A
61
63
B
A
60
49
62
63
58
66
B
59
REPAIR PARTS LIST FOR MODELS 486.242221, 486.242241
42" HIGH PERFORMANCE LAWNSWEEPER

17
REPAIR PARTS LIST FOR MODELS 486.242221, 486.242241
42" HIGH PERFORMANCE LAWNSWEEPER
REF PART
NO.
qTY DESCRIPTION
1 46776 1 HitchTube,R.H.
2 46777 1 HitchTube,L.H.
3 65885 1 HousingAssembly
4 49102 4 Screw,#12x1/2"HexHead
5 142 1 Pin,Cotter1/8"x3/4"Lg.
6 68202 1 HeightAdjustmentTubeAss'y.
7 43070 1 Washer,3/8"Flat
8 C-9M5732 8 Rivet,Pop
9 43086 4 LockWasher,5/16"
10 43080 4 Bolt,Carriage5/16-18x3/4"
11 62489 2 BrushBushingAss'y.
12 44232 2 Ball Bearing
13 1629-56 2 Retainer,DustCover
14 25847 1 Brush Shaft
15 46780 4 Brush,42"
16 43012 8 Bolt,Hex1/4-20x3/4"Lg.
17 47189 16 Nut,Nylock1/4-20Thread
18 23580 4 Retainer,Brush(Double)
19 23581 8 Retainer,Brush(Single)
20 44008 2 Washer,Flat1-1/8"x.78"x.025"
21 62490 2 Sprocket/Gear
22 23573 2 DustCover
23 47046 2 DowelPin(Drive)
24 43655 2 Ring,Retaining3/4"
25 716-0106 2 Ring,Retaining.594"
26 40001 14 Washer,Shim1-1/8"x.594"x.025"
27 43182 4 Bolt,Hex5/16-18x3/4"Lg.
28 141 6 Washer,Flat1-1/2"x.375"x.062"
29 1540-31 4 Washer,Flat.78"x1.25"x.06"
30 1038 2 Nut,Nylock3/8-24Thread
31 2674-32 2 HubCap
32 1650-1 2 Ring,Retaining(E-type)
33 43932 2 Bolt,Hex3/8-24x3-1/2"Lg.
34 23400 2 Bushing, Spacer
35 43890 1 Sprocket,RatchetR.H.
36 43889 1 Sprocket,RatchetL.H.(notshown)
37 44137 4 Washer,1/2"x1"x.02"
38 44542 2 Chain,Roller
39 43661 4 Bolt,Hex1/4-20x1"Lg.
REF PART
NO.
qTY DESCRIPTION
40 65667 1 Housing,WheelDriveAss'y.L.H.
41 65668 1 Housing,WheelDriveAss'y.R.H.
42 49765 2 Tube,UpperHopperFrame
43 47477 2 Tube,RearHopperFrame
44 48726 2 Tube,LowerHopperFrame
45 24189 1 Strap, Bag Frame
46 25813 2 Strap,HopperSupport
47 43737 1 HopperRope
48 49768 1 HopperBag
49 24979 1 Strap,HeightAdjustment
50 23687 1 Bracket,Hitch
51 24192 1 Bracket,Hitch(Straight)
52 23331 4 HopperMountClamp
53 49766 2 Tube,BagArm
54 46823 1 PivotRod,HopperBag
55 44985 2 Wheel&TireAss'y.(withbearings)
56 45088 4 Wheel Bearing
57 46782 2 Bolt,Hex5/16-18x3"Lg.
58 43224 3 Bolt,Hex5/16-18x2-1/4"Lg.
59 47810 12 Nut,Nylock5/16-18Thread
60 23625 1 Spacer,.38"x.62"x.27"L
61 43720 1 Knob,Wing5/16-18Thread
62 44326 1 Bolt,Carriage5/16-18x1"Lg.
63 43081 2 Washer,Flat5/16"Std.Wrt.
64 43084 3 Bolt,Hex5/16-18x1-3/4"Lg.
65 43943 1 Grip,HeightAdjust
66 44732 1 Washer,ToothLock5/16"
67 49493 1 Pin,Hitch
68 23368 2 Tube,HitchSpacer
69 43343 1 HairpinCotter,1/8"
70 44917 2 Palnut,3/8"
71 43978 4 CurvedHeadBolt,1/4-20x1"
72 48365 4 Pin,Clevis1/4"x1-1/8"
73 48366 2 Pin,Clevis3/8"x1/2"
74 44481 2 Cap,Vinyl
75 43055 8 HairpinCotter,3/32"#3
76 46867 2 Pin,Clevis1/4"x1-1/2"Lg.
77 44230 1 Spring,HitchPin
40734 1 OwnersManual

18

19

® Registered Trademark /
TM
Trademark /
SM
Service Mark of Sears Brands, LLC
® Marca Registrada /
TM
Marca de Fábrica /
SM
Marca de Servicio de Sears Brands, LLC
MC
Marque de commerce /
MD
Marque déposée de Sears Brands, LLC © Sears Brands, LLC
Get it fixed, at your home or ours!
Your Home
For expert troubleshooting and home solutions advice:
www.managemyhome.com
For repair – in your home – of all major brand appliances,
lawn and garden equipment, or heating and cooling systems,
no matter who made it, no matter who sold it!
For the replacement parts, accessories and
owner’s manuals that you need to do-it-yourself.
For Sears professional installation of home appliances
and items like garage door openers and water heaters.
1-800-4-MY-HOME
®
(1-800-469-4663)
Call anytime, day or night (U.S.A. and Canada)
www.sears.com www.sears.ca
Our Home
For repair of carry-in items like vacuums, lawn equipment,
and electronics, call anytime for the location of your nearest
Sears Parts & Repair Service Center
1-800-488-1222 (U.S.A.) 1-800-469-4663 (Canada)
www.sears.com www.sears.ca
To purchase a protection agreement on a product serviced by Sears:
1-800-827-6655 (U.S.A.) 1-800-361-6665 (Canada)
Para pedir servicio de reparación
a domicilio, y para ordenar piezas:
1-888-SU-HOGAR
®
(1-888-784-6427)
Au Canada pour service en français:
1-800-LE-FOYER
MC
(1-800-533-6937)
www.sears.ca
/