Page is loading ...

SJ-MR220
M
D
L
P
Portable MD Recorder
Operating Instructions
SJ-MR220
RQT5997-S
F0401KK0
C
RQT5997-S
i
i
SJ-MR220
‹

RQT5997
ENGLISH
RQT5997
Operating Instructions
Operating Instructions
∫
Recharging time and duration
(When using the supplied battery.)
Charging : Approx. 3.5 hours
Play time
Normal stereo mode : Approx. 25 hours
LP2 stereo mode : Approx. 33 hours
LP4 stereo mode : Approx. 38 hours
Recording time
Normal stereo mode : Approx. 12.5 hours
LP2 stereo mode : Approx. 17 hours
LP4 stereo mode : Approx. 21 hours
≥
Duration may be reduced under some
conditions.
≥
If the unit is to be used for long periods,
such as during recording, use the AC
adaptor to power it.
∫
Follow-on recharging
It is not necessary to completely discharge
Panasonic’s nickel-metal hydride rechargeable
batteries before recharging them.
∫
Rechargeable number of times
About 300.
The battery has reached the end of its useful
life if play time dramatically reduces after
recharging.
∫
Replacement
Nickel-metal hydride rechargeable battery
(HHF-1PSC/1B, HHF-AZ01S/1B).
Dry cell battery (not included)
Use one LR6 alkaline battery. Use long -life
Panasonic alkaline batteries.
1
Put the battery into the battery case.
2
Attach the case to the unit.
Note
Insert the rechargeable battery when
recording on dry cell batteries.
∫
For longer use
Use the two types of batteries at the same time.
The battery indicator and
battery flat alarm
The indicator flashes, when the battery is
almost flat. The battery flat alarm also
sounds three times. Recharge or replace the
battery.
To turn off alarm
Press and hold [T.MARK/EQ] on the remote
control until “BArm OFF” appears. Press and
hold again to turn alarm on. Depending on the
type of music and volume, the alarm may be
difficult to hear.
Using the AC adaptor
Connect the AC adaptor.
Use only the supplied AC adaptor. Use of
other adaptors can damage the unit.
Supplied Accessories
Refer to the illustration on page 3 of the
Japanese text.
≥
Stereo earphones
≥
Wired remote control
≥
Nickel-metal hydride rechargeable battery
≥
External battery case
≥
AC adaptor
≥
Carrying case
The HOLD Function
Refer to the illustration on page 17 of the
Japanese text.
This function stops the unit and remote
control from responding when a button is
pressed.
Guards against the following
≥
The unit is powered on accidentally when not
in use, causing the batteries to run down.
≥
A button is accidentally pressed during
play or recording, interrupting the
operation.
There is a HOLD switch on both the unit
and remote control, each of which works
independent of the other.
∫
The “HOLD” display
This is displayed for a few seconds on the
main unit's and the remote control's display
panels when the following occurs.
≥
The main unit is on hold and a button is
pressed. (When off, display appears only if
[
1
;
CHARA] or [REC
➞
LP MODE] is
operated.)
≥
The remote control's switch is moved to
hold.
Insert an MD
Refer to the illustration on page 18 of the
Japanese text.
1
Slide [OPEN
1
] in the direction of the
arrow to open the lid.
2
Slide the MD between the guides so it
clicks into place.
3
Now close the lid.
After you insert the MD, the unit turns on,
reads the information from it, after a minute,
the unit turns off.
The title of the disc and song is shown. The
title scrolls if it can not be displayed all at
once. “BLANK DISC” is displayed when you
insert a blank MD.
Removing the disc
Slide [OPEN
1
] in the direction of the
arrow and the disc springs out from the unit.
Location of Controls
Refer to the illustrations on pages 12 to
14 of the Japanese text.
∫
Main unit
1
Tone/recording sensitivity/space
button (EQ/REC SENS, SPACE)
2
Display, capital/lower case button
(DISP, CAPS)
3
Menu select, track number select,
character select (
:
!
,
#
9
)
4
Volume and cursor buttons (
M
s r
L
VOL/CURSOR)
5
Play and record mode/character delete
button (MODE, DELETE)
6
To add track marks, to confirm items
selected with
3
(ENTER)
7
Rechargeable battery compartment
cover (
2
OPEN)
8
Display
9
Play/record/pause/power on/character
type button (
1
;
CHARA)
:
Open switch (OPEN
1
)
;
Recording pause/power on/LP
recording switch (REC
➞
,
LP MODE
)
<
Hold switch (HOLD
➞
)
=
Microphone jack (MIC (
PLUG IN POWER
))
>
Optical digital in/line in jack (OPT/LINE
IN)
?
Stop/operation off/edit cancel button
( , OPR OFF)
@
Headphone jack (
Ë
)
A
Entering edit mode, completing edit
,changing track mark mode button
(EDIT, MARK MODE)
B
DC IN jack (DC IN 1.8 V
K
)
C
Connection terminal for battery case
∫
Main unit display
1
Recording indicator
2
Level meter
3
LP recording indicator
4
Synchronized recording indicator
5
Remaining recording/playing time
indicator
6
Sound quality indicators
7
Battery indicator
8
Track number, Text
9
Play mode indicator
:
Disc mark
∫
Wired remote control
1
Display
2
Hold switch (HOLD
1
)
3
Volume control buttons (
i
,
j
)
4
Play/record/stop button (
1
/
∫
)
5
Skip/search(forward) button (
9
)
6
Skip/search(backward) button (
:
)
7
Earphone jack
8
Light/display button (
$
LIGHT/
%
DISP)
9
Play mode button (PLAY MODE)
:
Track mark/tone control button
(T.MARK/EQ )
;
Clip
<
Plug
∫
Remote control display
1
Sound quality indicators
2
Recording indicator
3
Battery indicator
4
Play mode indicator
5
Disc mark
6
Text
7
Track number
∫
Stereo earphones
1
Plug
2
Slider
Slide up to prevent tangling the cord
when the earphones are not in use.
Refer to the illustrations on pages 15 to
17 of the Japanese text.
The rechargeable battery
1
Put the battery into the unit.
The unit cannot recharge batteries other
than the one supplied or recommended
replacements.
2
Connect the AC adaptor.
Recharging begins.
“CHARGE” appears on the display while
recharging.
“CHARGE” disappears when the battery is
fully charged. It takes approximately 3.5
hours to recharge the supplied battery.
3
Disconnect the AC adaptor from the
[DC IN 1.8 V
K
] terminal and the
AC outlet.
Note
≥
The unit can only be recharged while it is off.
≥
The AC adaptor and battery may become
warm during recharging but this is normal.
Power Supply
Note
If the unit is not to be used for a long time
disconnect the AC adaptor from the AC
outlet and turn the unit off to save power. It
is normal for the unit to make some sounds
when you connect the AC adaptor or insert
the battery as it initializes itself.

RQT5997
Basic recording
Refer to the illustrations on pages 24 to
28 of the Japanese text.
Preparation
Preparation
≥
Release HOLD.
≥
Insert a recordable MD.
1
Connect this unit to a unit that has a
digital output terminal.
Connect this unit to a unit that has
stereo LINE OUT terminals.
≥
Connect while the unit is stopped.
≥
Do not connect anything to [MIC (PLUG
IN POWER)] when analog recording.
2
Slide [REC
➞
,
LP MODE] to the right.
The unit comes on and enters the
recording standby mode. If you have
inserted an MD with recordings already
on it, the unit prepares to record from the
first available space.
3
1
Press [
1
;
CHARA] to start
recording.
2
Begin playback of the source.
∫
To pause recording
Press [
1
/
;
, CHARA]. (The number of
tracks increases by one.)
Recording restarts when pressed again.
∫
To stop recording
Press [
∫
, OPR OFF].
(UTOC is recorded.)
≥
The unit powers itself off automatically in
about a minute.
≥
You can turn off the unit by pressing again
[
∫
OPR OFF] on the main unit while
stopped.
∫
High quality recording
You can take advantage of the unit’s High
Density Encoding System (HDES) when
using normal stereo mode for recording,
whichever input mode you choose to use;
digital, analog, or microphone. HDES does
not function when you use MDLP modes.
“HDES” appears on the unit’s display when
you put the unit in the recording standby
mode.
∫
To record at the correct volume
Adjust the recording sensitivity to suit the
equipment you have connected. (See page
81.)
Operating Instructions
Operating Instructions
DIGITAL
ANALOG
RQT5997
ENGLISH
∫
To stop recording
Press [
∫
, OPR OFF].
(UTOC is recorded.)
≥
The unit powers itself off automatically in
about a minute.
≥
You can turn off the unit by pressing again
[
∫
OPR OFF] on the main unit while
stopped.
Note
≥
One track synchronized recording does not
function in the following cases:
≥
When you start CD play from track 2 or
later.
≥
When the first track on a CD is not
numbered 1 (on the second of a set of two
CDs, for example).
≥
You cannot pause recording manually
during synchronized and one track
synchronized recording.
≥
You cannot use synchronized recording
when using a microphone.
Putting track marks
Track marks are put automatically as follows.
When recording from a CD or MD
The track marks are put onto the MD
corresponding to the tracks on the other
disc. (Track marks may not correspond to
track numbers with some discs.)
When recording from other digital
sources
5 seconds of silence is determined as the
division between two tracks and a track
mark is added.
2 seconds of silence is determined as the
division between two tracks and a track
mark is added.
∫
Connecting digital equipment
≥
Use an AC adaptor to power a portable CD
player and turn off its anti-skip function.
≥
This unit has a sampling rate converter that
functions automatically, so you can make
digital recordings from equipment with
different sampling rates, such as satellite
receivers and DAT decks.
Synchronizing recording with
the playback equipment
Synchronized recording
This method starts and stops recording at
the same time as the source being recorded.
One track synchronized recording
The first track on a CD is recorded and then
the unit goes to recording standby mode.
This is a convenient mode if you want to
record the first track off a number of single
CDs.
Preparation
Preparation
≥
Release HOLD.
≥
Insert a recordable MD.
1
Connect this unit to other equipment.
2
Slide [REC
➞
,
LP MODE] to the right.
3
Press [MODE, DELETE] to select the
recording mode.
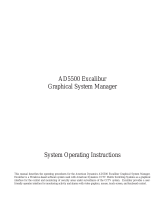
Each time [MODE, DELETE] is pressed
SYNC
>
SYNC 1
>
Normal (No display)
^__________}
SYNC
>
Normal (No display)
^_____}
Note
I
f you have set the recording mode to “SYNC”,
recording begins immediately if the source, for
example the radio, you are recording is already
playing.
4
Begin playback of the source.
Recording begins automatically.
∫
To pause recording
If you have selected
≥
Synchronized recording (SYNC)
This unit automatically pauses if the source
is stopped or if 2 seconds of silence when
analog recording, 5 seconds of silence
when digital recording is detected. (The
number of tracks increases by one.)
≥
One track synchronized recording (SYNC 1)
The unit automatically pauses after the first
track finishes.(The number of tracks
increases by one.)
Recording restarts as follows
≥
Synchronized recording (SYNC)
When sound is input again
≥
One track synchronized recording (SYNC 1)
When you change the CD and play track 1
DIGITAL
ANALOG
DIGITAL
ANALOG
Using the Flatswitch
Refer to the illustrations on page 19 of
the Japanese text.
The flatswitch allows you to efficiently select
track number and enter text.
There are the following four ways of
selecting track number and characters.
1
Press
Skip one track number or character.
2
Swipe
When editing, skip three track numbers
or characters.
3
Press and hold
When editing, skip track numbers and
characters faster.
4
Swipe and hold
When editing, track numbers and
characters are skipped very fast.
When [
#
9
] is pressed or swiped
The track number increases or the
characters change in alphabetical order.
When [
:
!
] is pressed or swiped
The track number decreases or the
characters change in reverse alphabetical
order.
Before recording
Track marks
Like CDs, it is possible to select and play a
track on an MD by selecting its track
number. There are marks at the beginning of
each track, called track marks, that make
this possible. The period between each track
mark is called a track.
(See “Ways of adding track marks” on page
81 for details.)
The two methods of recording
Digital
This method records the digital signals from
CDs and MDs. Compared to analog
recording, this method makes it possible to
make recordings of higher quality. Purchase
an optical fiber cable (RP-CA2110A or RP-
CA2210A, sold separately) to record
digitally.
Analog
Use this method to make analog recordings
of digital material, CDs and MDs, and to
record analog sources such as the radio.
Purchase a line cord (RP-CAPM3G15 or
RP-CAM3G15, sold separately) to make
analog recordings.
Operating Instructions
Operating Instructions
Adjusting recording sensitivity
You can adjust the sensitivity of the unit
when recording with any of the input
methods: digital, analog, or with microphone.
Press [EQ/REC SENS, SPACE] while in
recording standby mode.
The mode changes each time the button is
pressed.
REC SENS H
;
REC SENS L
;
Manual setting
To adjust manually
1
Begin playback of the source.
2
Press [
:
] or [
9
].
Adjust so the meter reaches to between
–12dB and –4dB.
9
: Recording sensitivity increases.
(The level meter also increases in
length.)
:
: Recording sensitivity decreases.
(The level meter also decreases in
length.)
Checking the remaining time on
the MD
This function allows you to check the time
available for recording while in recording
standby mode or in progress.
Press [DISP, CAPS] while in recording
standby mode or during recording.
Press and hold [
$
LIGHT/
%
DISP
] while in
recording standby mode or during
recording.
The display changes each time this is done
to show elapsed recording time and the
remaining recording time.
Main unit
Remote control
RQT5997
RQT5997
Refer to the illustrations on pages 32 and
33 of the Japanese text.
Ways of adding track marks
Apart from auto marking where the unit
automatically adds the track marks during
recording, there are also the manual and
auto time marking methods.
Press [EDIT, MARK MODE] while the unit
is in the recording standby mode to
select the required marking method.
The mode changes each time the button is
pressed.
AUTO
Track marks are added automatically
when the tracks change.
;
MANUAL
Track marks can be added
manually where required.
;
3MIN
Track marks are inserted at
3 minute intervals.
;
5MIN
Track marks are inserted at
5 minute intervals.
;
10MIN
Track marks are inserted at
10 minute intervals.
∫
To add track marks manually
Press [ENTER] when a track mark is
required during recording.
Press [T.MARK/EQ] during recording.
Track marks are added manually even if
MANUAL has not been selected.
Note
“AUTO” cannot be selected when recording
with a microphone.
Other recording functions
Main unit
Remote control
Recording from a microphone
Refer to the illustration on page 29 of the
Japanese text.
Preparation
Preparation
≥
Release HOLD.
≥
Insert a recordable MD.
1
Connect the microphone.
≥
Connect while the unit is stopped.
≥
Do not connect anything to [OPT/LINE IN].
≥
Keep the microphone away from the unit to
avoid recording sounds from it.
2
Slide [REC
➞
,
LP MODE] to the right.
3
1
Press [
1
;
CHARA] to start
recording.
2
Face the microphone towards the
source of the sound.
∫
To pause recording
Press [
1
/
;
, CHARA]. (The number of
tracks increases by one.)
Recording restarts when pressed again.
∫
To stop recording
Press [
∫
, OPR OFF].
(UTOC is recorded.)
≥
The unit powers itself off automatically in
about a minute.
≥
You can turn off the unit by pressing again
[
∫
OPR OFF] on the main unit while
stopped.
∫
Track marks
Add track marks manually or have the unit
add them at selected intervals.
∫
For stereo recording
Purchase a stereo microphone, part number
RP-VC200 or RP-VC300.
Long play recording
Refer to the illustration on page 30 of the
Japanese text.
You can record two or four times the amount
of material as normal stereo recording.
Preparation
Preparation
≥
Release HOLD.
≥
Insert a recordable MD.
1
Connect to the other equipment.
2
Slide [REC
➞
,
LP MODE] to the right.
3
Slide [REC
➞
,
LP MODE] to select the
recording mode.
The mode changes each time you slide the
button.
LP2 : LP2 stereo mode
;
LP4 : LP4 stereo mode
;
No indication : Normal stereo mode
4
1
Press [
1
;
CHARA] to start
recording.
2
Begin playback of the source.
After step 3, you can also select
synchronized recording (digital or analog) or
one track synchronized recording (digital)
with [MODE, DELETE].
∫
The recording times for each
recording mode
The recording times for each mode are as
follows when you use an 80-minute MD.
Normal stereo mode : Max.80 minutes
LP2 stereo mode : Max.160 minutes
LP4 stereo mode : Max.320 minutes
Note
≥
You can record using normal stereo, LP2
stereo, and LP4 stereo on the same disc.
≥
You cannot play material recorded using
LP2 stereo or LP4 stereo on incompatible
equipment.
≥
Use normal stereo recording for the best
quality sound.
≥
The mode reverts to normal stereo
recording when you replace the battery or
unplug the AC adaptor.
Making good recordings
∫
Avoid the batteries running down
while recording
Power the unit with the AC adaptor while
recording. If you intend to use batteries,
ensure they do not run out.
∫
Do not open the lid or shake the
unit while recording
Protect the unit from vibration during
recording.
Be especially careful while “UTOC Writing”
is on the display (“WRITE” on the remote
control). If the unit is moved at this time, the
recording may not be correctly recorded
onto the disc. You can damage the unit or
disc if you try to force open the lid.
ENGLISH

RQT5997
ENGLISH
RQT5997
Operating Instructions
Operating Instructions
Main unit
Remote control
Other useful functions
Refer to the illustration on pages 41 to 43
of the Japanese text.
About the display
∫
To light the display of the remote control
The display lights for about 5 seconds when
an operation is done on the remote control.
It remains lit for up to 20 seconds while a
track or disc title is scrolling on the screen.
∫
Checking the display of the
remote control
Press [
$
LIGHT/
%
DISP
].
The display lights for 5 seconds.
∫
Adjusting the display's contrast
When the unit is powered on:
1
Put the main unit in hold (See page 17
of the Japanese text.) .
2
1
Press and hold [
1
;
CHARA] on
the main unit and ...
2
2
Press [
M
s r
L
,VOL/CURSOR].
2
Press [
r
,
s
].
: darker, : lighter
Change the display
Press [DISP,CAPS] when the unit is
stopped or playing.
The display changes each time this is done
to show the remaining playing time, the
group title, remaining recording time, the
disc title, playing time of all tracks, total
numbers of tracks, elapsed playing time, the
track number and the track title.
Note
The remaining recording time shown
corresponds to the recording mode (normal,
LP2, or LP4) currently selected.
Press and hold [
$
LIGHT/
%
DISP
] when the
unit is stopped or playing.
The display changes each time this is done
to show the track title, the group title, the
disc title, playing time of all tracks, total
numbers of tracks, elapsed playing time and
the track number.
∫
The operation tone of the remote control
A tone sounds when a button on the remote
control is pressed.
The tone can be turned on and off.
To turn on
Press and hold [
1
/
∫
] until “Beep ON”
appears.
To turn off
Press and hold [
1
/
∫
] until “Beep OFF”
appears.
Main unit
Remote control
Repeat and Random play
Press [MODE, DELETE] when the unit is
stopped or playing.
Press [PLAY MODE] when the unit is
stopped or playing.
The mode changes each time the button is
pressed.
1 track repeat (1-
`
)
One track is played over and over.
;
All track repeat (
`
)
All tracks on the disc are repeated.
;
Random (RANDOM)
All tracks are played randomly
once each then the unit
stops automatically.
;
Normal (no indicator is shown)
If you have selected the mode when the unit
was stopped, press [
1
;
, CHARA] (main
unit) or [
1
/
∫
] (remote control).
Sound quality
Press [EQ/ REC SENS, SPACE] when the
unit is stopped or playing.
Press [T.MARK/EQ] when the unit is
stopped or playing.
Every time the button is pressed the mode
changes and an indicator is shown on the
display in the following order.
XBS-1
Increases the power of
the bass sounds.
;
XBS-2
Increases the XBS-1 effect.
;
TRAIN
Reduces sounds that may annoy
others when you are using the
unit in a public place.
;
NORMAL (Cancel)
Main unit
Remote control
Main unit
Remote control
Other playback functions
Refer to the illustrations on pages 37 to
40 of the Japanese text.
Skip
This function skips tracks and play begins
from the beginning of the selected track.
Press during play.
Forward : [
9
]
Backward : [
:
]
Press during play.
Forward : [
9
]
Backward : [
:
]
Search
This function allows you to fast-forward or
rewind through tracks.
Press and hold during play.
Forward : [
9
]
Backward : [
:
]
Press and hold during play.
Forward : [
9
]
Backward : [
:
]
Track/group select
This function allows you to begin listening
from a selected track or group.
1
To listen to the track you like
To listen to the track you like
Press while stopped.
To listen to the group you like
To listen to the group you like
Press and hold while stopped.
Forward : [
9
]
Backward : [
:
]
2
Press [
1
;
CHARA] to start play.
Press [
1
/
∫
] to start play.
Play starts from the selected track or group
and plays through to the final track.
Remote control
Main unit
Main unit
Remote control
Main unit
Remote control
Main unit
Remote control
Playback (Basic play)
Refer to the illustrations on pages 34 to
36 of the Japanese text.
Preparation
Preparation
≥
Release HOLD.
≥
Insert a MD.
1
Connect the remote control and
earphones, then insert the remote
control's plug into the headphone jack
[
Ë
] on the unit.
2
Press [
1
;
CHARA] to start play.
Press [
1
/
∫
] to start play.
The unit stops automatically when all the
tracks on the disc have been played.
3
Adjust the volume.
r
: To increase the volume level
s
: To decrease the volume level
Volume level is 0–25.
∫
To pause play
Press [
1
;
CHARA] during play.
∫
To stop the disc
Press [
∫
OPR OFF].
Press [
1
/
∫
].
≥
The unit powers itself off automatically in
about a minute.
≥
You can turn off the unit by pressing again
[
∫
OPR OFF] on the main unit while
stopped.
∫
Resume function
The unit stores the point at which play was
stopped and if [
1
;
CHARA] on the main
unit or [
1
/
∫
] on the remote control is
pressed again, play begins from that point.
This does not work if the unit is opened or if
the battery is removed. The unit starts play
from the first track in these cases.
∫
Playback for long times
≥
MDLP
≥
You can play tracks recorded with MDLP
mode. “LP-2” or “LP-4” is displayed.
≥
Monaural playback
≥
If a disc was recorded monaurally, the unit
automatically switches to monaural
playback mode.
The unit selects the play mode according to
the recording mode: normal stereo, 2 x play
stereo (LP2), or 4 x play stereo (LP4),
monaural.
Remote control
Main unit
Remote control
Main unit
Main unit

RQT5997
ENGLISH
RQT5997
Operating Instructions
Operating Instructions
TRACK ERASE
Erase one track at a time.
Refer to the illustration on page 48 of the
Japanese text.
1
Press [EDIT, MARK MODE] while
stopped.
2
1
Press [
:
,
9
] to select “TRACK
ERASE?”.
2
Press [ENTER].
Now the display is in the track selection mode.
3
1
Press or swipe [
:
!
,
#
9
] to
select the track to erase.
2
Press [ENTER].
The display asks you to confirm your
selection.
4
Press [EDIT, MARK MODE].
When “UTOC Writing” goes out editing is
complete and the unit stops.
∫
To stop part way through an
editing operation
Press [
∫
OPR OFF] before confirming the
operation in step 4.
COMBINE
(Combining 2 tracks)
Remove a track mark from between two
tracks, effectively making them one track.
Refer to the illustration on page 49 of the
Japanese text.
1
Press [EDIT, MARK MODE] while
playing the latter of the two tracks you
want to combine (or while paused).
2
1
Press [
:
,
9
] to select
“COMBINE?”.
2
Press [ENTER].
The display asks you to confirm your
selection. In the example, the last eight
seconds of track 2 and the first eight
seconds of track 3 play repeatedly.
(16
seconds if the track is monaural or recorded with
LP2, 32 seconds if the track is recorded with LP4)
3
Press [EDIT, MARK MODE].
When “UTOC Writing” goes out editing is
complete and the unit stops.
∫
To stop part way through an
editing operation
Press [
∫
, OPR OFF] before confirming the
operation in step 3.
Note
≥
COMBINE does not work while playing
track 1.
≥
You cannot combine tracks recorded using
different modes (monaural, normal stereo,
LP2, and LP4).
Operation
Operation
GROUP (Grouping tracks)
You can do the following
≥
Group set
Group together successive tracks and give
groups titles
≥
Group title
Change group titles
≥
Group release
Release tracks from a group
Refer to the illustration on pages 50 to 54
of the Japanese text.
1
Press [EDIT, MARK MODE] while
stopped.
2
1
Press [
:
,
9
] to select
“GROUP?”.
2
Press [ENTER] .
Now the display is in the function
selection mode.
3
1
Press to select the function.
The mode changes each time the button
is pressed.
SET?
;
TITLE?
;
RELEASE?
2
Press [ENTER] .
Refer to operation you selected.
≥
GROUP SET
After step 3 above
The display is ready for you to select the first
track in the group.
4
1
Press or swipe [
:
!
,
#
9
] to
select the first track.
2
Press [ENTER].
The display is ready for you to select the
last track in the group.
5
1
Press or swipe [
:
!
,
#
9
] to
select the last track.
2
Press [ENTER].
The number of the new group is
displayed.
After 2 seconds
After 2 seconds
The text editing mode is entered.
6
Enter the title. (See page 86.)
7
Press [EDIT, MARK MODE].
When “UTOC Writing” goes out editing is
complete and the unit stops.
∫
To stop part way through an
editing operation
Press [
∫
, OPR OFF] before confirming the
operation in step 7.
Operation
MOVE (Moving tracks)
Rearrange the order of the tracks.
Refer to the illustration on page 46 of the
Japanese text.
1
Press [EDIT, MARK MODE] while
stopped.
2
1
Press [
:
,
9
] to select “MOVE?”.
2
Press [ENTER].
Now the display is in the mode to select
track to be moved.
3
1
Press or swipe [
:
!
,
#
9
] to
select the track to be moved.
2
Press [ENTER].
Now the display is in the mode to select
the new position.
4
1
Press or swipe [
:
!
,
#
9
]
again to select the new position.
2
Press [ENTER].
The display asks you to confirm your
selection.
5
Press [EDIT, MARK MODE].
When “UTOC Writing” goes out editing is
complete and the unit stops.
To stop part way through an editing
operation
Press [
∫
, OPR OFF] before confirming the
operation in step 5.
ALL ERASE
(Erasing tracks)
Erase all the tracks on the MD.
Refer to the illustration on page 47 of the
Japanese text.
1
Press [EDIT, MARK MODE] while
stopped.
2
1
Press [
:
,
9
] to select “ALL
ERASE?”.
2
Press [ENTER].
The display asks you to confirm your
selection.
3
Press [EDIT, MARK MODE].
When “UTOC Writing” goes out editing is
complete and the unit stops.
(“BLANK DISC” appears on the display.)
∫
To stop part way through an
editing operation
Press [
∫
, OPR OFF] before confirming the
operation in step 3.
Note
ALL ERASE cannot be used while the disc is
playing or paused.
Operation
Editing MDs
DIVIDE
(Dividing a track into two)
This allows you to add track marks, making
it easy to divide a classical piece into its
separate movements, for example.
Refer to the illustration on page 45 of the
Japanese text.
1
Press [EDIT, MARK MODE] during play.
2
1
Press [
:
,
9
] to select
“DIVIDE?”.
2
Press [ENTER] at the point you want
to divide the track.
A 4 second segment (8 seconds if the
track is monaural or recorded with LP2,
16 seconds if the track is recorded with
LP4) of the track is played repeatedly,
beginning at the point selected.
∫
To adjust the point
Press or swipe [
:
!
,
#
9
] to adjust
the point.
Adjustments can be made approximately 8
seconds (16 seconds if the track is monaural
or recorded with LP2, 32 seconds if the track
is recorded with LP4) either side of the
original point. (
-
128 to +127)
3
Press [ENTER].
The display asks you to confirm your
selection.
4
Press [EDIT, MARK MODE].
When “UTOC Writing” goes out editing is
complete and the unit stops.
∫
To stop part way through an
editing operation
Press [
∫
, OPR OFF] before confirming the
operation in step 4.
Note
≥
If you divide a track with a title, the latter
track becomes untitled.
≥
DIVIDE cannot be used while the unit is
stopped.
Operation
Operation
;
;

RQT5997
ENGLISH
RQT5997
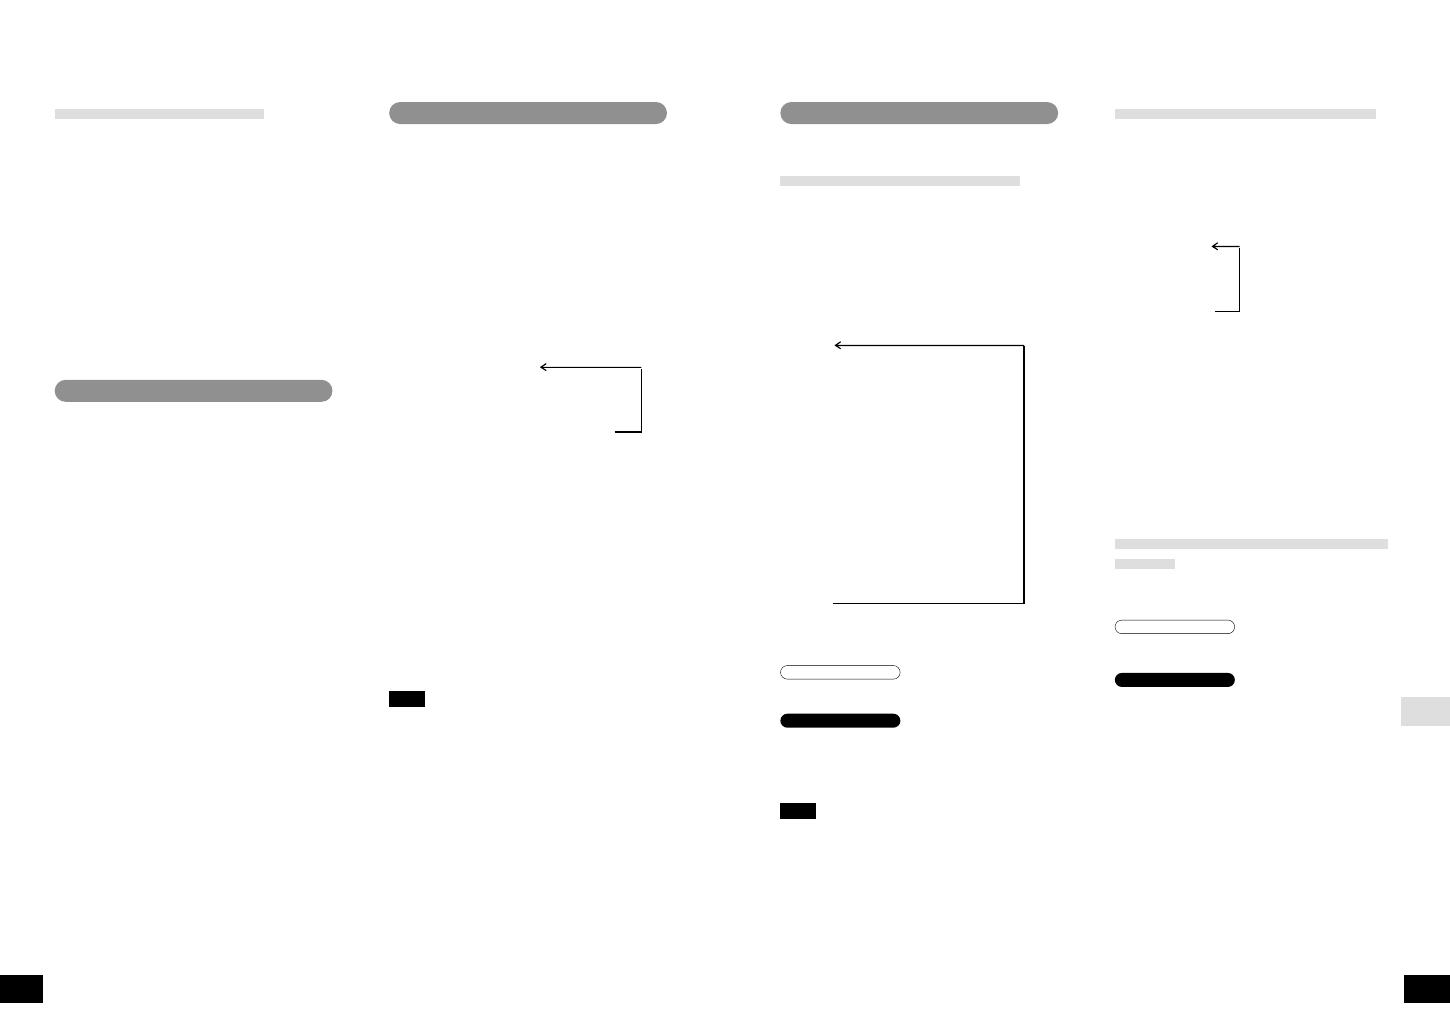
English capitals
)
English lower case
e;
Numerals and symbols
(
Katakana
2
1
Press or swipe [
:
!
,
#
9
] to
move the cursor over the character
you want to enter.
2
Press [ENTER] to enter the
character.
The character you selected is entered.
The cursor moves to the right and shows
where the next character will be entered.
∫
To stop part way through an
editing operation
Press [
∫
, OPR OFF].
The normal display is restored.
∫
To move the cursor
Press [
M
s r
L
VOL/CURSOR].
r
L
: Move to the right
s
M
: Move to the left
∫
Correcting titles
1
Press [
M
s r
L
VOL/CURSOR] to
move the cursor over the character
you want to correct.
2
1
Press or swipe [
:
!
,
#
9
] to
move the cursor over the character
you want to enter.
2
Press [ENTER] to enter the
character.
The new character replaces the old one.
∫
To insert an extra character
1
Press [
M
s r
L
VOL/CURSOR] to
move the cursor over the place you
want the character to go.
2
Press [EQ/REC SENS, SPACE
3
1
Press or swipe [
:
!
,
#
9
] to
select the character to enter.
2
Press [ENTER] to enter the
character.
The character is inserted.
∫
To erase a character
1
Press [
M
s r
L
VOL/CURSOR] to
move the cursor over the character
you want to erase.
2
Press [MODE, DELETE].
The characters after the erased character
move back to take its place.
∫
Changing capitals into lower case
or lower case into capitals
1
Press [
M
s r
L
VOL/CURSOR] to
move the cursor over the character
you want to change.
2
Press [DISP, CAPS].
Copying titles from one MD to
another (TITLE STATION)
Refer to the illustration on pages 61 to 62
of the Japanese text.
The unit temporarily records the titles from
an MD so they can then be copied onto
another MD.
Before proceeding
≥
You cannot copy titles from prerecorded
MDs or blank MDs.
≥
You can copy titles only if both MDs have
the same number of tracks.
≥
If the MD you are copying titles to already
has titles, they are replaced with the new
titles when this procedure is used.
≥
Group information is also copied from the
disc being copied.
1
Insert the MD with the titles.
2
Press [EDIT, MARK MODE] while
stopped.
3
1
Press [
:
,
9
] to select “TITLE
COPY?”.
2
Press [ENTER].
After “TITLE MEMORY” is displayed
“TAKEOUT DISC” is displayed when the
unit has recorded the titles.
4
Eject the MD.
“CHANGE DISC” is displayed when the
lid is opened.
5
Insert the other MD.
After “TOC Reading” is displayed, the
display asks you to confirm the operation.
6
Press [EDIT, MARK MODE].
When “UTOC Writing” goes out editing is
complete and the unit stops.
∫
To stop part way through an
editing operation
Press [
∫
, OPR OFF] before confirming the
operation in step 6.
Titling MDs
Titling discs and tracks
Refer to the illustration on page 55 of the
Japanese text.
Each track and disc can have a title of up to
100 characters in length.
1
Press [EDIT, MARK MODE] while
stopped.
“TITLE?” appears on the display.
2
Press [ENTER].
“DISC TITLE?” appears on the display.
3
When titling a disc
When titling a disc
Press [ENTER] again.
The text editing mode is entered.
When titling a track
When titling a track
1
Press or swipe [
:
!
,
#
9
] to
select the track you want to title.
2
Press [ENTER].
The text editing mode is entered.
4
Enter the title. (See below.)
5
Press [EDIT, MARK MODE].
When “UTOC Writing
”
goes out editing is
complete.
∫
After titling a disc
The display automatically shows the track
titling display. Follow the steps for titling
tracks.
∫
To stop part way through an
editing operation
Press [
∫
, OPR OFF] before confirming the
operation in step 5.
Note
≥
If you start entering a title while a track is
playing, the track repeats until you finish.
≥
The number of characters is limited to 97
when the track is recorded with LP2 or
LP4.
≥
If you begin title editing with a disc that has
titles longer than 100 characters, “TITLE
OVER” is displayed and then the text-
editing mode is entered. The unit erases the
extra characters when you complete editing.
Entering text
Refer to the illustrations on pages 58 to
61 of the Japanese text.
Preparation: Put the unit in the text editing
mode (See above.).
1
Press [
1
;
CHARA to select the
type of characters.
The type changes each time the button is
pressed.
≥
GROUP TITLE
After step 3 on the preceding page
The display is ready for you to select the
group to title.
4
1
Press or swipe [
:
!
,
#
9
] to
select the group you want to title.
2
Press [ENTER].
The text editing mode is entered.
5
Enter the title. (See right.)
6
Press [EDIT, MARK MODE].
When “UTOC Writing” goes out editing is
complete and the unit stops.
∫
To stop part way through an
editing operation
Press [
∫
, OPR OFF] before confirming the
operation in step 6.
≥
GROUP RELEASE
After step 3 in the page before
The display is ready for you to select the
group to release.
4
1
Press or swipe [
:
!
,
#
9
] to
select the group you want to release.
2
Press [ENTER].
The display asks you to confirm your
selection.
5
Press [EDIT, MARK MODE].
When “UTOC Writing” goes out editing is
complete and the unit stops.
∫
To stop part way through an
editing operation
Press [
∫
, OPR OFF] before confirming the
operation in step 5.
Note
≥
After using editing functions (e.g., DIVIDE,
MOVE, and COMBINE) on a disc with
groups, the unit rewrites UTOC to maintain
consistent group information.
≥
If you create groups with this unit and then
perform editing on a unit that is
incompatible with group functions, the
group information may be rendered
unusable.
Operating Instructions
Operating Instructions
/