Page is loading ...

2
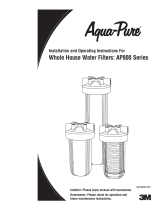
INSTALLATION INSTRUCTIONS ENGLISH
Product Specifications ........................................... Page 3
Tools Required ....................................................... Page 4
Basic Installations Instructions ............................. Page 4
H-1200 Installations Instructions ..................... Pages 6-7
Claims & Notes ...................................................... Page 7
INSTRUCCIONES DE INSTALACIÓN ESPAÑOL
Especificaciones Del Producto ........................... Página 8
Herramientas necesarias ................................... Página 9
Instrucciones básicas de instalación.................. Página 9
H 1200 Instrucciones de instalación ..........Páginas 11-12
Declaraciones y notas ....................................... Página 12
INSTRUCTIONS D’INSTALLATION FRANÇAIS
Caractéristiques Techniques Du Produit ............. Page 14
Outils nécessaires ............................................... Page 15
Instructions d’installation de base ...................... Page 15
Consignes d’utilisation pour l’H 1200 ...........Pages 17-18
Revendication & remarques ................................ Page 18

ENGLISH
EVERPURE H-Series Water Filtration Systems • 3
The Universal Plumbing Code adopted by over 20
states, and other specific state and county codes, prohibit the
use of saddle valves and their use is never recommended. You
must adhere to your state/local plumbing codes. Consult your
licensed plumber if you have related questions.
Do NOT use copper tubing with the John Guest
Fittings provided with your Everpure Filter System. Copper
tubing may appear to fit, but water leaks will develop over time
and use. If copper tubing is required, you must use copper
compression fittings available from any hardware/plumbing
supply.
CALIFORNIA PROPOSITION 65 WARNING
This product contains chemicals known to the
State of California to cause cancer or birth defects or other
reproductive harm.
THE OWNER’S GUIDE IS APPLICABLE FOR THE
FOLLOWING
EVERPURE FILTER MODELS:
Multiple Appliance Connections: You can also connect your
Everpure Filter to the refrigerator for ice and water, an instant
hot water dispenser or chiller, or a plumbed-in coffee brewer.
Simply install connection “tees” (available from any hardware/
plumbing supply) in the water line between the filter and the
faucet adaptor, and run new tubing to each appliance.
NOTE:
DO NOT connect this system to a commercial ice maker.
These appliances require flow and volume beyond the design
limits of your under-sink filter system.
NOTE:
If connecting to a home icemaker and there is no filter
faucet connection under the sink, a flush valve is required.
Thank you for purchasing an Everpure* commercial-grade
water filtration system for your home. With your Everpure
system, you get premium quality water direct from your tap
that’s great-tasting, healthful and convenient for you and
your family.
Product Specifications:
•For Cold Water Use Only
•Temperature Range: 35-100°F (2-38°C)
•Min.-Max. Working Pressure:
10-125 psi (0.7-8.6 bar)
•Service Flow Rate: 0.5 gpm (1.9 Lpm)
Model H-54 Rated Capacity: 750 gal (2,839 L)
†
Model H-300 Rated Capacity: 300 gal (1,136 L)
†
Model H-104 Rated Capacity: 1,000 gal (3,785 L)
†
Model H-300-HSD Rated Capacity: 300 gal (1,136 L)
†
Model H-300-NXT Rated Capacity: 300 gal (1,136 L)
†
Model H-1200 Rated Capacity: 1,000 gal (3,785 L)
†
†
For optimum performance, cartridge replacement is
required once a year, or sooner if flow becomes too
slow for convenience, or if the unit’s rated capacity
is reached.
For purchase of replaceable components please contact your local distributor.
H-1200 customers: Instructions for installing the H-1200
begin on page 6 of this Installation and Operation Guide.

ENGLISH
4 • EVERPURE H-Series Water Filtration Systems
BASIC INSTALLATION INSTRUCTIONS
Tools Needed For Installation
• #2 Phillips Screwdriver • Wrench • Pencil
• Utility Knife • Measuring Tape
1. OPEN CARTON & INSPECT PARTS
Installation Parts
Key Description Part No.
1 QL3 Filter Head
(incl. Qty. 2 ea of
& )
EV925831
2
Filter Cartridge (incl.
)
– Model H-54 EV925268
– Model H-300 EV927072
– Model H-104 EV961211
– Model H-300-HSD EV927075
– Model H-300-NXT EV927441
3 Locking Washers
(2 req.)
EV306204
4 Screws
(2 req.)
EV306196
5 Angle Stop Valve Adaptor EV312120
6 Tubing, 1/4" poly
(per foot)
A0860119
7
Elbow Fitting Pack Restrictor
(incl. Qty. 2 ea of & )
EV308168
8 Plumbers Tape EV312119
9 Faucet Connector EV312135
10 Everpure Filter Timer EV314160
2. VERIFY UNDERSINK MOUNTING LOCATION
Measure 22” from the base of the cabinet, and mark the
mounting location for the top of the filter head. Make sure
there is adequate space above the head to open and close
the built-in shut off valve and to avoid crimping the water
line tubing. Also, make sure your chosen location offers
easy access for future cartridge changes.
1
1
2
3
5
6
7
8
9
10
4
2
22"

ENGLISH
EVERPURE H-Series Water Filtration Systems • 5
DIMENSION Width Height Depth
H-54 5" 15" 5"
H-104 5" 20" 5"
H-300 5" 22" 5"
H-300-HSD 5" 22" 5"
H-300-NXT 5" 22" 5"
NOTE:
The head and cartridge must be mounted in the
vertical position, with the cartridge hanging down.
3. MOUNT FILTER HEAD UNDER SINK
A. Identify Filter Head and the two Elbow Fittings, and
note that the Outlet Fitting has a black band. This
fitting includes a small restrictor insert to ensure
maximum flow at 0.5 gpm (1.9 Lpm) per minute.
B. Apply Plumbers Tape to the threads of each Elbow
Fitting. Wrap tape in direction of the threads to
assure a tight fit and avoid small leaks.
C. Screw Inlet Elbow Fitting into the left side of the
filter head, and hand tighten only.
D. Screw Outlet Elbow Fitting (black band) into the
right side of the filter head in the same manner.
E. Securely mount the filter head on the cabinet wall
using the enclosed mounting screws and washers.
4. ATTACH INLET WATER SUPPLY
F. Locate and close the cold water Angle Stop Valve
under your kitchen sink. Open cold water line of
faucet to release water pressure.
G. Unscrew and disconnect the braided tubing on top of
the Angle Stop Valve.
H. Attach the bottom of Angle Stop Adaptor to the
existing cold water Angle Stop Valve.
I. Attach the braided tubing to the top of the Angle
Stop Adaptor.
J. Close side valve on Angle Stop Adaptor and open
cold water Angle Stop Valve to return water service
to kitchen sink. Check for leaks.
NOTE:
Plumbers Tape should not be required for
these next steps.
K. Measure length of tubing needed to connect Angle
Stop Adaptor to Inlet Elbow Fitting on Filter Head.
Allow adequate tubing to avoid sharp turns.
L. Cut tubing at a 90° angle using a sharp knife.
M. Insert ends of tubing into quick-connect fittings.
Push tube into fitting and gently pull to confirm a
tight fit.
5. ATTACH FILTERED WATER TO SINK FAUCET
N. Install separate faucet for filtered drinking water.
Follow individual manufacturer’s instructions.
O. Attach Faucet Connector Fitting to bottom end of
threads on new faucet assembly. Plumbers Tape
should not be required for this step.
P. Measure length of tubing needed to connect the
Outlet Elbow Fitting on Filter Head to the new
Faucet Connector Fitting. Allow adequate tubing to
avoid sharp turns. Cut and insert each end of the
tubing into the fittings.
3
B
C
D
E
G
H
I
L
M
4
F
P
O
N
5

ENGLISH
6 • EVERPURE H-Series Water Filtration Systems
1
1
2
3
5
6
7
8
9
10
11
12
4
Q
R
S
T
Label
Lug
U
X
6
V W
Y
6. INSTALL AND FLUSH FILTER CARTRIDGE
Q. Lift handle of the built-in shut off Valve on the
Head.
R. Hold Head firmly with one hand.
S. Align cartridge lug with label on filter Head.
T. Insert filter Cartridge – Push upwards.
U. Turn it to the right – About 1⁄4 turn – Until rotation
stops.
V. Open Side Valve of Angle Stop Adaptor and check
for leaks up to Inlet Elbow Fitting.
W. Open Filtered Water Faucet.
X. Lower handle of built-in shut off valve on the Head,
to flush water to the sink.
NOTE:
Flush new filter cartridges for at least
3 minutes (flush H-1200 system for at least 7
minutes) to remove air and any loose carbon. At
first the water may appear cloudy due to trapped
air in the filter and tubing. If water continues to
be cloudy for more than one week, please contact
Everpure Technical Services for assistance.
Y. Activate Filter Timer by pinching bubble until you
feel a change in resistance as the filter timer “pops”.
Within a few seconds, a thin RED line will appear in
the white window showing the Timestrip has been
activated. Peel away backing and adhere to desired
location. When the white window is completely filled
with RED, it is time to replace your product.
H1200 INSTRUCTIONS
Tools Needed For Installation
• #2 Phillips Screwdriver
• Wrench
• Utility Knife
• Measuring Tape
• Pencil
1. OPEN CARTON & INSPECT PARTS
Installation Parts
Key Description Part No.
1 Twin Filter Head N/A
2 H-1200 Filter Cartridges
(Set of 2) (
Includes
10
)
EV928201
3 Locking Washers (2 req.) EV306204
4 Screws (2 req.) EV306196
5 Angle Stop Valve Adaptor EV312120
6 Tubing, 1/4" poly (per foot) A0860119
7
Elbow Fitting Pack Restrictor
(incl. Qty. 2 ea of #3 & #4)
EV308168
8 Plumbers Tape EV312119
9 Faucet Connector EV312135
10 Everpure Filter Timer EV314160
11 Shut Off Valve,
3/8" John Guest x 3/8" FPT
EV309860
12 Coupler, 3/8" FPT
Stainless
EV312350

ENGLISH
EVERPURE H-Series Water Filtration Systems • 7
H-54, H-300, H-104, H-300-HSD & H-1200 Systems
Tested and Certified by NSF International against NSF/
ANSI Standards 42 and 53 of claims specified on the
Performance Data Sheet.
This H-300-NXT System Tested and Certified by NSF
International against NSF/ANSI Standard 42, 53 and
401 of claims specified on the Performance Data
Sheet.
NSF/ANSI Standard 401 have been deemed as
“incidental contaminants/emerging compounds”.
Incidental contaminants are those compounds that have
been detected in drinking water supplies at trace levels.
While occurring at only trace levels, these compounds
can affect the public acceptance/perception of drinking
water quality.
2. VERIFY UNDERSINK MOUNTING LOCATION
Measure 22” from the base of the cabinet, and mark the
mounting location for the top of the filter head. Measure
13” for the width required for the H-1200 System with
dual cartridges. Make sure there is adequate space above
the head to open and close the shut-off valve and to avoid
crimping the water line tubing. Also, make sure your
chosen location offers easy access for future cartridge
changes.
DIMENSION
Width Height Depth
H-1200 13" 22" 5"
NOTE: The head and cartridge must be mounted in the
vertical position, with the cartridge hanging down.
3. MOUNT FILTER HEAD UNDER SINK
A. Identify Dual Filter Head and Shut Off Valve (EV309860).
B. Apply Plumbers Tape to the threads on the inlet (left)
side of the Head. Screw on the new Shut Off Valve
and hand tighten. Repeat for the Stainless Coupler
(EV312350) for the outlet (right) side of the Head.
C. Apply Plumbers Tape to the threads of the Outlet
Elbow Fitting (black band). Screw into the outlet of
the Stainless Coupler. Wrap tape in direction of the
threads to assure a tight fit and avoid small leaks.
D. Securely mount the filter head on the cabinet wall
using the enclosed mounting screws and washers.
4. Go to page 5 and follow Basic Installation Instructions,
Steps 4, 5, and 6, to complete the H-1200 System
installation.
CLAIMS & NOTES
This installation must comply with all applicable state and
local regulations.
Do no use with water that is microbiologically unsafe or
unknown quality without adequate disinfection before or
after the system. Systems certified for cyst reduction may
be used on waters that may contain filterable cysts.
Testing was performed under standard laboratory
conditions, actual performance may vary.
EPA Est. No. 002623-IL-002
3
A
D
Dual Filter Head Shut Off Valve
C
B
2
22"

EV307043 REV AC NV14 © 2014 Pentair Residential Filtration, LLC. All rights reserved.
For Everpure
Product Warranties visit:
Everpure
para las gasantías de los productos visite:
Pour Everpure
garanties produit visitez le site:
www.everpure.com
FILTRATION & PROCESS
5730 NORTH GLEN PARK ROAD, MILWAUKEE, WI 53209
P: 262.238.4400 | WWW.PENTAIRAQUA.COM | CUSTOMER CARE: 800.279.9404 | tech-supportpentair.com
All Pentair trademarks and logos are owned by Pentair, Inc. or its affiliates. All other registered and unregistered trademarks and logos are the property of their
respective owners. Because we are continuously improving our products and services, Pentair reserves the right to change specifications without prior notice.
Pentair is an equal opportunity employer.
FILTRATION & PROCESS
5730 NORTH GLEN PARK ROAD, MILWAUKEE, WI 53209
P: 262.238.4400 | WWW.PENTAIRAQUA.COM | CUSTOMER CARE: 800.279.9404 | tech-supportpentair.com
* For a detailed list of where Pentair trademarks are registered, please visit www.pentairaqua.com. Pentair trademarks and logos are owned by Pentair, Inc. or its
affiliates. Third party registered and unregistered trademarks and logos are the property of their respective owners. Because we are continuously improving our
products and services, Pentair reserves the right to change specifications without prior notice.
Pentair is an equal opportunity employer.
PENTAIR RESIDENTIAL FILTRATION, LLC
5730 N. GLEN PARK RD., MILWAUKEE, WI 53209
262.238.4400, www.pentairaqua.com
CUSTOMER CARE: 800.279.9404
EMAIL: techsupportpentair.com
FILTRATION & PROCESS
5730 NORTH GLEN PARK ROAD, MILWAUKEE, WI 53209
P: 262.238.4400 | F: 262.238.4404
WWW.PENTAIRAQUA.COM
CUSTOMER CARE: 800.279.9404
tech-support@pentair.com
© 2014 Pentair Residential Filtration, LLC
All rights reserved.
/