Page is loading ...

Instruction Manual
DE: Bedienungsanleitung - de.startech.com
FR: Guide de l'utilisateur - fr.startech.com
ES: Guía del usuario - es.startech.com
IT: Guida per l'uso - it.startech.com
NL: Gebruiksaanwijzing - nl.startech.com
PT: Guia do usuário - pt.startech.com
Manual Revision: 06/21/2012
For the most up-to-date information, please visit: www.startech.com
Packaging Contents
• 1xTopPanel
• 3xBottomPanel
• 4xCrossBrace
• 2xSidePanelandframe
• 8xPlasticCornerCaps
• 4xAdjustableFeet
• 4xCasters
• 2xAllenWrench(small,large)
• 1xAssemblyscrewkit(M4,M5,M6,M8)
• 1xBagofM6CabinetScrewsandNuts
• 2xSetsofkeys
Required Tools
• Phillips(crosshead)screwdriver
• Adjustablewrench
RK1236BKF
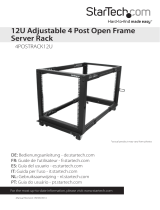
12U 36in Knock-Down Server Rack Cabinet with Casters
Installation
Frame Assembly
1.Connectthetwosideframes(withsidedoors)togetherusingthe
4crossbracesateachcorner.Fastenusingalargesilverhexscrew
(M8)ateachendofthebracewiththelargeAllenWrench.Ensure
thatthe“n”onthecrossbracefacesinwards.Attachthecross
bracestoonesiderst,thenattachthesecondsideframetothe
braces.
NOTE:Makesurethatthetwosideframesarerightsideup.Check
thatthelockandlatchesonthesidedoorsareonthesameendas
wellasthemarkingsontheinnerrackposts.
WARNING:Beforeproceeding,ensurethatALLhexscrewsare
tightlywrench-torquedtopreventaccidentallooseningduringuse.
Corner Joints
Side Panel Lock
Cross Brace
Cross Brace
Large Hex Screw
*installation photos for reference only
WARNING!Topreventbodilyinjury,pleaseensurethattherack
isinstalledinastructurallysoundenvironmentwithaleveloor
andthatallhardwarehasbeenassembledsecurely,andcheckedfor
stabilitybeforeloadingequipment.Wheninstallingequipmentinto
therack,startfromthebottomoftherackrstandmoveupwards,
keepingtheheaviestequipmentatthebottomtoavoidasituation
wheretherackbecomestop-heavy.

2.PlacetheCornerCapsovereachofthe8cornerjointsandfasten
themwithat-headM4screwsandaPhillipsscrewdriver.
3.Onthebottomoftherack,installthefouradjustablecornerfeet
andthefourcasters.Theadjustablefeetscrewintothelarge
openingsineachcornerwiththeirheightdeterminedbythe
largehexnut.Screwinthefeettothedesiredheight,thenuse
anadjustablewrenchtolockthehexnutinplace.Thecastersare
fastenedusingtheM5screwsandPhillipsscrewdriver.
NOTE:Youmaywishtopositionthefeetsotherackdoesnotmove,
untilassemblyiscomplete.
4.Positiontherackright-sideup(sidepanellocksattop)anddropthe
toppanelontothetopoftherack.FastentotheframeusingM6
hexscrewsandthesmallerAllenWrench.
NOTE:Ensurethecornercapsareinstalledbeforeattemptingto
installtheroofpanel,otherwisethecornerswillnotbelevel.
5.Positionthe3oorplatesonthebottomoftherack,makingsure
thetwopieceswiththecablemanagementslotsareattheend.
FastentheoorplateswithM5screwsandPhillipsscrewdriver.
6.Toinstallthefrontandreardoors,rstinstallthedoorbearings
intothebottomofthedoorframes.Installthedoorontothe
bearingandthenpulldownthespringloadeddoorbearingto
installthetopofthedoor.
M4 Screw
M5 Screw
Corner
Feet
M6 Hex Screw
Cable
Management
Slot
Note the notches
in the end plate
corners
Door Bearing

Use of Trademarks, Registered Trademarks, and other Protected Names and Symbols
This manual may make reference to trademarks, registered trademarks, and other protected names and/or symbols of third-party companies not related in any way to
StarTech.com.WheretheyoccurthesereferencesareforillustrativepurposesonlyanddonotrepresentanendorsementofaproductorservicebyStarTech.com,oranendorsementoftheproduct(s)
towhichthismanualappliesbythethird-partycompanyinquestion.Regardlessofanydirectacknowledgementelsewhereinthebodyofthisdocument,StarTech.comherebyacknowledgesthatall
trademarks,registeredtrademarks,servicemarks,andotherprotectednamesand/orsymbolscontainedinthismanualandrelateddocumentsarethepropertyoftheirrespectiveholders.
Technical Support
StarTech.com’slifetimetechnicalsupportisanintegralpartofourcommitmenttoprovideindustry-leadingsolutions.Ifyoueverneedhelpwithyourproduct,visitwww.startech.com/supportandaccess
ourcomprehensiveselectionofonlinetools,documentation,anddownloads.
Forthelatestdrivers/software,pleasevisitwww.startech.com/downloads
Warranty Information
Thisproductisbackedbyalifetimewarranty.
Inaddition,StarTech.comwarrantsitsproductsagainstdefectsinmaterialsandworkmanshipfortheperiodsnoted,followingtheinitialdateofpurchase.Duringthisperiod,theproductsmaybereturned
forrepair,orreplacementwithequivalentproductsatourdiscretion.Thewarrantycoverspartsandlaborcostsonly.StarTech.comdoesnotwarrantitsproductsfromdefectsordamagesarisingfrom
misuse,abuse,alteration,ornormalwearandtear.
Limitation of Liability
InnoeventshalltheliabilityofStarTech.comLtd.andStarTech.comUSALLP(ortheirocers,directors,employeesoragents)foranydamages(whetherdirectorindirect,special,punitive,incidental,
consequential,orotherwise),lossofprots,lossofbusiness,oranypecuniaryloss,arisingoutoforrelatedtotheuseoftheproductexceedtheactualpricepaidfortheproduct.Somestatesdonotallow
theexclusionorlimitationofincidentalorconsequentialdamages.Ifsuchlawsapply,thelimitationsorexclusionscontainedinthisstatementmaynotapplytoyou.
Specications
Description
12U36inKnock-DownServerRack
CabinetwithCasters
Material Steel/Aluminum
Color Black
Maximum Weight
Capacity
800kg
Internal Height 12U
Maximum Mounting
Depth
750.0mm
Mounting Width 19inches
Mounting Hole Type Square
External Dimensions
(HxWxD)
663.0mmx600.0mmx900.0mm
Net Weight 29.3kg
Standards
EIARS-310D,IEC297-2,
DIN41491(Part1)
Certications RoHS,WEEE
WARNING:Beforeattemptingtousethecabinet,ensurethatall
screws(insideandoutsidethecabinet)aretightlytorquedtoprevent
accidentallooseningduringuse.
*actual product may vary from photos
/
