NewAir IM200W User manual
- Category
- Ice cube makers
- Type
- User manual
This manual is also suitable for

Manual v1.0
Because you’re not like everyone else.
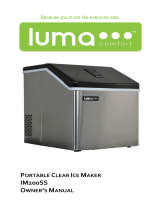
PORTABLE CLEAR ICE MAKER
IM200SS
OWNER’S MANUAL

2
www.LumaComfort.com
BECAUSE YOU’RE NOT LIKE EVERYONE ELSE
And neither are we. Always at the forefront of our industry, our goal is to offer
the best quality product and consumer value on the market. Our team is
constantly pushing the boundaries of innovation and design to create
exceptional products to help you achieve a more comfortable living or work
space.
Our goal is to ensure that every Luma Comfort customer is 100% satisfied with
their product. If you have any questions or concerns regarding your product, or
if you would simply like to share an idea with us, please feel free to contact us.
Contact Us:
For questions regarding your product, please contact us at:
Call:
1-855-963-9247
Email:
support@lumacomfort.com
Online:
www.lumacomfrot.com
Connect with Us:
Facebook.com/lumacomfort
Instagram.com/luma_comfort
YouTube.com/lumacomfort
Twitter.com/lumacomfort

3
CONTENTS
Because You’re Not Like Everyone Else ........................................................... 2
Register Your Product Online .......................................................................... 4
Important Safety Information .......................................................................... 5
Get To Know Your Ice Maker ........................................................................... 6
Product Benefits .......................................................................................... 6
Parts Diagram .............................................................................................. 6
Set Up Instructions .......................................................................................... 7
Operating Instructions ..................................................................................... 7
Control Panel ............................................................................................... 7
Making Ice ................................................................................................... 8
Additional Operating Tips ............................................................................ 9
Maintenance ................................................................................................. 10
Technical Support.......................................................................................... 11
Product Specifications .............................................................................. 11
Troubleshooting ........................................................................................ 11
Warranty ....................................................................................................... 13
SAVE THESE INSTRUCTIONS
Please carefully read this manual before attempting to use this ice maker. For
your own safety, comply with all safety instructions and warnings contained in
this owner’s manual to prevent personal injury or property damage.

4
www.LumaComfort.com
REGISTER YOUR PRODUCT ONLINE
Register Your Luma Comfort Product Online Today!
Take advantage of all the benefits product registration has to offer:
Service and Support
Diagnose troubleshooting and service issues faster and more
accurately
Recall Notifications
Stay up to date for safety, system updates and recall notifications
Special Promotions
Opt-in for NewAir promotions and offers
Registering your product information online is safe & secure and takes less
than 2 minutes to complete:
Alternatively, we recommend you attach a copy of your sales receipt below and
record the following information, located on the manufacturer’s nameplate on
the rear of the unit. You will need this information if it becomes necessary to
contact the manufacturer for service inquiries.
Date of Purchase: ___________________________________________
Serial Number: ____________________________________________
Model Number: ____________________________________________
Register.LumaComfort.com

5
IMPORTANT SAFETY INFORMATION
These instructions are not meant to cover every possible condition
and situation that may occur. Please read all instructions before using
this ice maker. Failure to carefully read all instructions may result in
possible electric shock or fire hazard, and will void the manufacturer’s
warranty.
1. Use this ice maker only as instructed in this owner’s manual. Other uses may cause
electric shock, injury or fire.
2. Close supervision is required if this portable ice maker is used near children or pets.
3. To protect against electric shock, do not immerse this ice maker or its plug and
cord in water.
4. If the ice maker is being transported or will not be in use, disconnect it from the
power supply by tightly gripping the plug and pulling it from the power outlet. Do
not disconnect the power supply by pulling on the portable ice maker’s power
cord.
5. Avoid contact with any of the ice maker’s moving parts.
6. Place the ice maker on a level surface.
7. This ice maker is intended to fit into a matching receptacle. Under no
circumstances should the plug be altered in any way. An improper
connection can result in electric shock.
8. If possible, avoid using extension cords with this ice maker. If an extension cord is
absolutely necessary, do not use more than one extension cord to operate more
than one ice maker.
9. Do not insert objects or allow fingers to enter into the ice maker’s moving parts, as
this may cause electric shock or bodily injury. Do not block or tamper with the ice
maker while it is in operation.
10. Do not run the power cord under mats or carpeting, and do not cover the power
cord with runners. Arrange the power cord away from room traffic and where it
can be tripped over.
11. Do not operate this ice maker in the presence of flammable substances or
explosives.
12. Do not place the ice maker near an open flame or cooking/heating appliances.
13. This product is not intended for use in wet or damp areas.
14. If the ice maker will not be in use, empty the tank of any remaining water.
15. If the ice maker’s plug or power cord is damaged, do not attempt to
repair the components yourself. Please contact Luma Comfort’s
customer service hotline at 1-866-737-6390 or have the unit
examined by an authorized service provider.

6
www.LumaComfort.com
GET TO KNOW YOUR ICE MAKER
PRODUCT BENEFITS
• Plug & play operation
• No plumbing required
• Produces up to 28 lbs. of clear ice daily
• Space-conserving countertop design
• Stylish stainless steel finish
• Push button controls & LED display
• Utilizes commercial technology
• Works in as little as 15 minutes
• Clear ice melts 5x slower than cloudy ice
PARTS DIAGRAM
1. Water reservoir cover
2. Ice maker cover
3. Water separator pipes
4. Evaporator
5. Ice basket
6. Ice scoop
7. Control panel
8. Exhaust
9. Water drainage port

7
SET UP INSTRUCTIONS
1. Remove the ice maker’s exterior and interior packaging, and remove any
tape from the unit. Do not discard the unit’s box. Keep it for future storage
purposes.
2. Check to make sure the ice scoop and other components shown in the list
of main parts are included.
3. Clean the interior with lukewarm water and a soft cloth.
4. Find a location for your ice maker that is positioned away from direct
sunlight and other heat sources such as stoves, furnaces and radiators.
5. Allow the unit’s refrigerant to settle for one hour before plugging in the ice
maker for the first time. Also ensure that the ice maker is positioned so
that the plug is fully accessible.
Important: After unpacking your ice maker, it must rest in an
upright position for at least one hour before you plug it in or the
compressor may be damaged, shortening the life span of the
unit.
OPERATING INSTRUCTIONS
CONTROL PANEL
A. ADD WATER (Tank
Empty) indicator
B. FULL ICE indicator
C. Power Indicator
D. ON/OFF Button

8
www.LumaComfort.com
MAKING ICE
1. Remove the water reservoir cover and pour clean drinking water into the
water reservoir. Keep the water level below the “FULL” water level mark.
Close the water reservoir cover to prevent foreign matter from entering
the reservoir.
Please Note: Do not pour water into the internal water tank located
underneath the ice basket. Doing so will affect the ice maker’s performance.
2. Plug the ice maker into a suitable electrical outlet. Press the ON/OFF
button on the control panel to begin the ice making cycle. The green
power indicator will turn on for 2 seconds and then flash for 3 seconds. It
will then be on continuously.
3. The ice making cycle lasts anywhere from 15 to 30 minutes, depending on
the ambient temperature. The ice making cycle will also take slightly
longer when using the appliance for the first time. The ice making time
may vary significantly if the unit is being used in extremely warm
temperatures, but this will not exceed 50 minutes.
4. To make thicker ice, plug in the unit, press and hold the ON/OFF button
for 5 seconds or longer, and then release it to start the unit. The ice
making cycle will take an additional 3 minutes, but the ice cubes will be
thicker.
5. While the ice maker is on, periodically verify the water level in the
reservoir. If there is not enough water in the reservoir, the ice maker will
automatically stop, and the ADD WATER indicator light will turn on.

9
6. If the ice maker is full of ice, the unit will automatically stop making ice
and the FULL ICE indicator light will turn on.
7. Change the water in the water reservoir every 24 hours. If the unit will not
be in use for an extended period of time, drain all of the water left in the
water reservoir.
8. Periodically check to make sure the water filter is free from dust or
particles. The water filter is located on the bottom of the large water
reservoir and internal water tank.
9. After shipping or moving the unit, allow the refrigerant inside the
compressor to settle for at least 3 minutes before restarting the ice maker.
ADDITIONAL OPERATING TIPS
1. Clean the ice maker’s interior (water reservoir, etc.) with lukewarm water
and a soft cloth.
2. Position your ice maker away from direct sunlight and other heat sources
such as stoves, furnaces and radiators. Place the ice maker on a flat, level
surface and make sure there is at least 6 inches of space in between the
back and sides of the ice maker and the wall.
3. Allow the refrigerant inside the ice maker’s cooling system to settle for
approximately one hour before plugging your ice maker in for the first
time.
4. Make sure the ice maker’s plug is fully accessible.

10
www.LumaComfort.com
MAINTENANCE
Clean your ice maker before use. To properly clean your ice maker, follow
these instructions:
1. Unplug the unit from the power supply.
2. Place a small container or receptacle under the drainage port and clean
the interior with diluted detergent, warm water and a soft cloth. First pour
the warm water with diluted detergent into the internal water reservoir
and then into the space below the clear viewing window.
3. Use this water and detergent solution to clean the rest of the ice maker’s
interior and drain out the water by unplugging the drain cap located on
the bottom of the unit. Dry the interior with a soft cloth.
4. Use warm water and diluted detergent to clean the exterior of the ice
maker. Dry the exterior with a soft cloth.
5. If the ice maker will not be in use for an extended period of time, open the
drain cap and drain out all of the water from the water reservoir.

11
TECHNICAL SUPPORT
Luma Comfort is committed to providing a premier service experience. If you
are experiencing any technical issues with your product related to either setup
or operation, please contact our product support team at 1-866-737-6390 or
support@lumacomfort.com.
PRODUCT SPECIFICATIONS
Model:
IM200SS
Product Dimensions:
11.3” x 14.8” x 14.1”
Product Weight:
25.5 pounds
Voltage:
115V
Wattage:
130W
Ice Making Capacity:
28 pounds daily
Operating Cycle:
15-30 minutes
Ice Type:
Clear ice cubes
Display Type:
LED
Alert Features:
Low water & full ice
Includes:
Ice maker, scoop & manual
Warranty:
1 year manufacturer’s warranty
TROUBLESHOOTING
Problem
Possible Cause(s)
Possible Solution
The “ADD
WATER”
indicator light
is on.
There is not enough water in
the water reservoir.
Turn off the ice maker, fill it
with water and press the
“ON/OFF” button again to
restart the unit.
The “FULL ICE”
indicator is on.
There is too much ice in the
machine.
Remove ice from the ice
basket.
The large
reservoir is full
of water, but
the “ADD
WATER”
indicator is also
on.
a. The water in the tank may
be distilled.
b. The water filter located
on the bottom of the
reservoir is blocked,
preventing water from
entering the lower tank.
a. Use tap or mineral water
in the tank.
b. Clean the water tank.

12
www.LumaComfort.com
Problem
Possible Cause(s)
Possible Solution
Water does not
flow out from
the water
separator
pipes.
The openings in the water
separator pipes may be
blocked.
Use a pin to price each pipe
opening until water can easily
flow through.
There is no
water in the
unit, but the
“ADD WATER”
indicator light
is not on.
The water in the tank may
have impurities.
The wall of the lower tank
located underneath the ice
basked is dirty.
Use normal drinking or tap
water in the unit.
Clean this water tank.
The ice cubes
being produced
are thin and
break easily.
The ambient temperature is
too high.
Turn off the unit first and
press/hold the “ON/OFF”
button for more than 5
seconds to turn on the unit
again. This will lengthen each
ice making cycle and make
thicker ice cubes.
The ice making
cycle is starting
but no ice is
being made.
a. The ambient temperature
or the water temperature
in the inner tank is too
high.
b. The refrigerant is leaking.
c. The pipe in the cooling
system is blocked.
a. Move the ice maker to an
area with an ambient
temperature under 90°F
and pour cooler water
into the tank.
b. Consult a technician.
c. Consult a technician.

13
WARRANTY
Luma Comfort products are warranted to be free from defects in workmanship or materials for one
(1) year from the date of purchase. If the product is found to be defective within this period, Luma
Comfort, at its sole option, will repair or replace any components that fail during normal operation.
The repairs or replacement will be made at no charge to the customer for parts and labor,
assuming that the customer shall be responsible for all transportation costs to and from Luma
Comfort. Luma Comfort retains the right to repair or replace (with a new or newly-refurbished
replacement product) the appliance at its sole discretion. This warranty does NOT apply to the
following:
• Products without a proof of purchase
• Products purchased from a source other than an authorized Luma Comfort dealer
• Cosmetic damage such as scratches or dents
• Damage caused by service performed by anyone who is not an authorized service
provider of Luma Comfort
• Damage in transit
• Damage caused by accident, abuse, misuse, water, flood, fire, improper installation,
maintenance negligence, commercial use for a non-commercial unit, acts of God or any
other acts of nature or external causes
• Damage to a product caused by modifications or alterations without the written
permission of Luma Comfort
• Normal wear and tear of parts that are designed to be replaced, such as filters or
batteries
• Power failure and improper power supply such as low voltage, defective wiring or
inadequate fuses
• Use of force or damage caused by external influences
• Complete or partially dismantled appliances
THE WARRANTIES AND REMEDIES CONTAINED HEREIN ARE EXCLUSIVE AND IN LIEU OF ALL OTHER
WARRANTIES EXPRESS, IMPLIED, OR STATUTORY, INCLUDING ANY LIABILITY ARISING UNDER ANY
WARRANTY OF MERCHANTABILITY OR FITNESS FOR A PARTICULAR PURPOSE, STATUTORY OR
OTHERWISE. THIS WARRANTY GIVES YOU SPECIFIC LEGAL RIGHTS, WHICH MAY VARY FROM STATE
TO STATE.
IN NO EVENT SHALL LUMA COMFORT BE LIABLE FOR ANY INCIDENTAL, SPECIAL, INDIRECT, OR
CONSEQUENTIAL DAMAGES, WHETHER RESULTING FROM THE USE, MISUSE, OR INABILITY TO USE
THIS PRODUCT OR FROM DEFECTS IN THE PRODUCT. SOME STATES DO NOT ALLOW THE
EXCLUSION OF INCIDENTAL OR CONSEQUENTIAL DAMAGES, SO THE ABOVE LIMITATIONS MAY NOT
APPLY TO YOU.
If you believe your product is defective, contact Luma Comfort for warranty service at 1-866-737-
6390 or support@lumacomfort.com. In your correspondence with Luma Comfort, please describe
the problem and request a return material authorization (RMA) number. You will also need to
provide the proof of purchase, return shipping address and a daytime phone number.
After a Luma Comfort representative confirms that your product is defective and is still under
warranty, you will receive an RMA and return shipping instructions. Products sent to our
headquarters without an RMA will be refused.
-
 1
1
-
 2
2
-
 3
3
-
 4
4
-
 5
5
-
 6
6
-
 7
7
-
 8
8
-
 9
9
-
 10
10
-
 11
11
-
 12
12
-
 13
13
NewAir IM200W User manual
- Category
- Ice cube makers
- Type
- User manual
- This manual is also suitable for
Ask a question and I''ll find the answer in the document
Finding information in a document is now easier with AI
Related papers
Other documents
-
 Luma Comfort IM200SS User manual
-
Insignia NS-IMC44S3 User guide
-
cadeninc MRS-LQES-5AAB User manual
-
Hamilton Beach PIM-2-3H User manual
-
NICOR ACW-20-4H-50K User manual
-
Hamilton Beach PIM-2-1H User manual
-
 Tatahance MRS-ES186816NAA Installation guide
-
 Avalon Bay AB-ICE26R Owner's manual
-
Luma Comfort EC220W User guide
-
Luma EC110S Owners Manual/Install Manual


