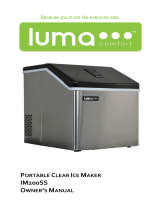
Insignia NS-IMC44S3 User guide

Category
Ice cube makers
Type
User guide
Before using your new product, please read these instructions to prevent any damage.
Antes de usar su producto nuevo, lea este instructivo para prevenir cualquier daño.
USER GUIDE
GUÍA DEL USUARIO
44-lb. Clear Ice Maker
quina de hielo
transparente de 44 lb.
NS-IMC44S3
ENGLISH . . . . . . . . . . . . . 3
ESPAÑOL. . . . . . . . . . . . . 19
www.insigniaproducts.com
2
Contents
ENGLISH
Introduction . . . . . . . . . . . . . . . . . . . . . . . . . . . . . . . . . . . . . . . . . . . . . . . . . . . . . . . . . . . . 3
Important Safety Instructions . . . . . . . . . . . . . . . . . . . . . . . . . . . . . . . . . . . . . . . . . . . . 3
Features . . . . . . . . . . . . . . . . . . . . . . . . . . . . . . . . . . . . . . . . . . . . . . . . . . . . . . . . . . . . . . . .5
Setting up your ice maker . . . . . . . . . . . . . . . . . . . . . . . . . . . . . . . . . . . . . . . . . . . . . . . 7
Using your ice maker . . . . . . . . . . . . . . . . . . . . . . . . . . . . . . . . . . . . . . . . . . . . . . . . . . . . 8
Cleaning and maintaining your ice maker . . . . . . . . . . . . . . . . . . . . . . . . . . . . . . .10
Troubleshooting . . . . . . . . . . . . . . . . . . . . . . . . . . . . . . . . . . . . . . . . . . . . . . . . . . . . . . .13
Specifications . . . . . . . . . . . . . . . . . . . . . . . . . . . . . . . . . . . . . . . . . . . . . . . . . . . . . . . . . .16
ONE-YEAR LIMITED WARRANTY . . . . . . . . . . . . . . . . . . . . . . . . . . . . . . . . . . . . . . . . .17
ESPAÑOL
Introducción . . . . . . . . . . . . . . . . . . . . . . . . . . . . . . . . . . . . . . . . . . . . . . . . . . . . . . . . . . .19
Instrucciones importantes de seguridad . . . . . . . . . . . . . . . . . . . . . . . . . . . . . . . .19
Características. . . . . . . . . . . . . . . . . . . . . . . . . . . . . . . . . . . . . . . . . . . . . . . . . . . . . . . . . .22
Cómo configurar la máquina de hielo . . . . . . . . . . . . . . . . . . . . . . . . . . . . . . . . . . .24
Utilización de su máquina de hacer hielo . . . . . . . . . . . . . . . . . . . . . . . . . . . . . . . .25
Limpieza y mantenimiento de la máquina de hielo . . . . . . . . . . . . . . . . . . . . . .28
Localización y corrección de fallas. . . . . . . . . . . . . . . . . . . . . . . . . . . . . . . . . . . . . . .31
Especificaciones. . . . . . . . . . . . . . . . . . . . . . . . . . . . . . . . . . . . . . . . . . . . . . . . . . . . . . . .33
GARANTÍA LIMITADA DE UN AÑO . . . . . . . . . . . . . . . . . . . . . . . . . . . . . . . . . . . . . . .34
3
44-lb. Clear Ice Maker
www.insigniaproducts.com
ENGLISH
Introduction
Congratulations on your purchase of a high-quality Insignia product. Your
NS-IMC44S3 represents the state of the art in ice maker design and is designed for
reliable and trouble-free performance.
Important Safety Instructions
WARNING
Read these instructions.
Keep these instructions.
•Heed all warnings.
Follow all instructions.
Do not operate your ice maker with a damaged cord.
Your ice maker requires a standard 110-120 Volt, 60Hz electrical outlet with a
three-prong ground.
Connect to a properly polarized outlet only. No other appliance should be
plugged into the same outlet.
Make sure that the plug is fully inserted into the outlet.
Do not run the power cord over carpeting or other heat insulators. Do not
cover the cord. Keep the cord away from traffic areas, and do not submerge in
water.
We do not recommend the use of an extension cord because it may overheat
and become a risk of fire. If you must use an extension cord, use No.14 AWG
minimum size and rated no less than 1875 watts.
Unplug your ice maker before cleaning or making any repairs or servicing.
Exercise caution and use reasonable supervision when your ice maker is used
near children.
Do not use your ice maker outdoors.
Place your ice maker away from direct sunlight and make sure that there is at
least 6 inches (15 cm) of space between the back and sides of your ice maker
and surrounding walls.
Do not use any other liquid besides water to make ice cubes.
CAUTION
RISK OF ELECTRIC SHOCK
DO NOT OPEN
This symbol indicates that dangerous voltage
constituting a risk of electric shock is present
within your ice maker.
This symbol indicates that there are important
operating and maintenance instructions in the
literature accompanying your ice maker.
4www.insigniaproducts.com
Do not clean your ice maker with flammable fluids. The fumes can create a fire
hazard or explosion.
Do not tip over.
If your ice maker is brought in from outside storage in winter, wait a few hours
for it to warm up to room temperature before plugging it in.
To avoid a hazard due to instability of your ice maker, it must be placed on an
even or flat surface.
WARNING
Electric Shock Hazard
Failure to follow these instructions can result in electric shock, fire, or
death.
DANGER: Risk of fire or explosion. Flammable refrigerant used.
Ensure that servicing is done by factory authorized service
personnel to minimize product damage or safety issues.
Consult repair manual or owner's guide before attempting to
service this product. All safety precautions must be followed.
Follow handling instructions carefully.
1WARNING–Do not operate this, or any other appliance with a damaged cord.
Make sure that the plug is fully inserted into the receptacle.
2WARNING–Keep ventilation openings in the appliance enclosure clear of
obstruction.
3WARNING–Do not touch the interior of the ice maker compartment with wet
hands. This could result in frost bite.
4WARNING–Do not use mechanical devices or other means to accelerate the
defrosting process, other than those recommended by the manufacturer.
5WARNING–Do not damage the refrigerant circuit when handling, moving, or
using your ice maker.
6WARNING–Do not use electrical appliances inside the storage compartment
of the cooler, unless they are of the type recommended by the manufacturer.
7Unplug your ice maker before carrying out user maintenance on it.
8Please dispose of your ice maker according to local regulations as the cooler
contains flammable gas and refrigerant.
9This ice maker should be installed in accordance with the safety standard for
Refrigeration Systems, ASHRAE15. Your ice maker shall not be installed in
corridors or hallways of public buildings.
10 This ice maker is intended to be used in household and similar environments,
such as:
Staff kitchen areas in shops, offices, and other working environments
Farm houses and by clients in hotels, motels, and other residential
environments
Bed and breakfasts
Catering and similar non-retail applications
5
44-lb. Clear Ice Maker
www.insigniaproducts.com
Features
Produces up to 44 lbs. (19.9 kg) of ice per day, letting you stock up for your
next get together
Clear ice keeps your beverage cold longer and creates less fizz than white or
bullet ice
Fast-working system produces your first ice in about 14 minutes
2.6 lbs. (1.2 kg) storage capacity gives you plenty of ice for any occasion
Reduces water waste by letting you add water manually
Stainless steel surface is easy to keep clean and looks great in any kitchen
Digital controls make using your ice maker simple and easy
Included scoop makes it easy to pour ice into individual glasses
Auto cleaning mode keeps your ice maker in good working condition
Package contents
44 lb. Clear Ice Maker
•Ice scoop
Ice basket (pre-installed)
User Guide
Product overview
Note: Ice clarity may vary, depending on several factors.
Water reservoir
lid
Vent
Cover
Water separator
piper
Evaporator
Ice basket
Control panel
Ice scoop
Water drain cap
(on bottom)
Water reservoir
6www.insigniaproducts.com
Control panel and display
#ICONBUTTON/DISPLAYDESCRIPTION
1TIMER button Press to set the timer. Press and hold for five seconds to
begin the automatic cleaning cycle or to turn off the
blinking self-clean indicator.
2LCD display screen Lights to show indicators, timer settings and countdown,
and ambient temperature.
3Ambient temperature
and ice maker
countdown
M - indicates timer/ice maker countdown
F or C - indicates ambient temperature in Fahrenheit or
Celsius.
4Ice making symbol When this symbol blinks, your ice maker is emptying the
ice tray. When the symbol rotates, your ice maker is
making ice.
5Self-clean indicator Lights when the automatic self-clean program is
activated.
Blinks when it’s time to run the automatic cleaning
cycle.
6Power on indicator Lights when your ice maker is turned on.
7+/ice maker timer/ice
thickness increase When your ice maker is making ice, press to make thicker
ice. When setting the timer, press to increase the time.
Press and hold for more than five seconds to switch the
temperature display between °F and °C.
8ON/OFF button Press to turn your ice maker on or off.
Press and hold for more than five seconds to stop the ice
making process and have the ice tray eject the ice cubes.
9Time setting indicator M - indicates how many minutes increase or decrease.
H - indicates how long until your ice maker turns on or off.
10 Ice full warning Lights to indicate that the ice basket is full.
11 Low water warning Lights to indicate that your ice maker needs water.
M
H
C
F
C
F
M
H
7
44-lb. Clear Ice Maker
www.insigniaproducts.com
Setting up your ice maker
Before using your ice maker
Remove the exterior and interior packing.
Remove all tape and take out the accessories from the unit. If any parts are
missing, contact customer service.
Clean your ice maker (see Cleaning and maintaining your ice maker on page
10), then run two or three cycles of ice and dispose of them to remove any
plastic odor or residue from the manufacturing and shipping process.
Finding a suitable location
Your ice maker is designed to be free standing only, and should not be
recessed or built-in.
Place your ice maker on a counter top that is strong enough to support it
when it is fully loaded.
Allow six inches (15 cm) of space between the back and sides of your ice
maker and any surrounding walls to allow for proper air ventilation.
Place your ice maker away from direct sunlight and sources of heat, such as a
stove, heater, or radiator. Direct sunlight may affect the acrylic coating and
heat sources may increase electrical consumption. Extremely cold
temperatures may also prevent your ice maker from performing properly.
Providing a proper power supply
This appliance requires a standard 110-120 Volt, 60 Hz electrical outlet with good
grounding means.
12 Error code indicator E - Indicates an ice making problem or a refrigerant leak.
E1 - Indicates that the ambient temperature sensor is bad.
E2 - Indicates that the water temperature sensor is bad.
13 -/ice maker timer/ice
thickness decrease When your ice maker is making ice, press to make thinner
ice. When setting the timer, press to decrease the time.
Press and hold for more than five seconds to switch the
temperature display between °F and °C.
WARNINGS: Before plugging in your ice maker, wait four hours for the refrigerant fluid to
settle.
WARNINGS: Improper use of the grounded plug can result in the risk of electrical
shock. If the power cord is damaged please call our customer service.
#ICONBUTTON/DISPLAYDESCRIPTION
8www.insigniaproducts.com
This unit should be properly grounded for your safety. The power cord of this
appliance is equipped with a grounding plug which mates with standard
grounding wall outlets to minimize the possibility of electric shock.
Using your ice maker
Making ice
1Open the water reservoir lid and fill the reservoir with drinking water. Keep the
water level below the maximum FULL level.
Notes:
Your ice maker should always be plugged into its own individual electrical outlet
which has a voltage rating that matches the rating plate.
Never unplug your ice maker by pulling on the power cord. Always grip the plug
firmly and pull straight out from the outlet.
Do not, under any circumstances, damage the grounding prong of the plug. Any
questions concerning power and/or grounding should be directed toward a certified
electrician.
CAUTIONS:
Fill the reservoir with drinking water only.
Change water in the water reservoir every 24 hours to make sure that it is fresh. If the
unit isn’t to be used for an extended period, drain the water and dry the water
reservoir.
Do not pour water into the internal water tank under the ice basket, as this will
negatively affect the performance of your ice maker.
Tips:
To improve ice clarity:
Try using distilled or purified water in your ice maker
Make sure that you are running the ice maker auto clean cycle frequently
Note: When there is no more water in the top water reservoir, the water tank symbol
lights.
3-prong receptacle
Receptacle box cover3-prong plug
Grounding lead
Grounding adapter Receptacle box cover
Screw
Receptacle
Using a 3-prong plug and outlet Using a grounding adapter
FULL
Water reservoir lid
9
44-lb. Clear Ice Maker
www.insigniaproducts.com
2Close the water reservoir lid.
3Plug in your ice maker. The power indicator on the display begins to blink
and the ambient temperature (in degrees Fahrenheit) is shown.
4Press the (ON/OFF) button to turn on your ice maker. The symbol stops
blinking (stays on), the ice making symbol begins rotating, and the
ambient temperature turns off.
After several minutes, the countdown is shown on the display, indicating the
time (in minutes) until the ice making process is complete.
Water flows from the top water reservoir to the bottom water tank and the
water tank symbol turns on.
5When the ice making symbol blinks, the cycle is over.
6To make additional ice cubes, leave your ice maker on and refill the top water
reservoir. When the water float in the bottom tank detects a full tank, the
water tank symbol turns off and the next ice making cycle begins.
OR
Press the (ON/OFF) button to turn your ice maker off.
Changing the thickness of the ice cubes
Press the + or - buttons prior to the ice making cycle to increase or decrease
the ice making time in one minute increments. More time for thicker ice cubes,
and less time for thinner.
Notes:
The ice making cycle lasts between 13 and 25 minutes, depending on the ambient
temperature.
The first time you make ice, depending on the initial water temperature, ice-making
time will be a little longer. In a very hot room, ice-making time may vary, but will not
exceed 35 minutes.
To stop the ice making process at any time, press and hold the (ON/OFF) button for
more than five seconds to cause the ice tray to eject the ice cubes.
If the low water icon is on, add water then press the (ON/OFF) button to restart
the ice maker.
10 www.insigniaproducts.com
Removing ice
1Your ice maker stops making ice when the ice basket is full. When this
happens, the full indicator appears on the display.
2Open your ice maker lid and remove the ice basket.
3Empty the ice basket and replace it into your ice maker.
4Your ice maker resumes making ice.
Using the timer to turn on your ice maker and start making ice
You can use the timer to turn your ice maker on.
1With your ice maker off, press the (TIMER) button. The display shows “1”
(indicating one hour) and a blinking “H”.
2Press the + button to add additional time to the setting, or the - button to
subtract time from the setting. After five seconds, the time setting stays on
and the timer is set.
The time on the display begins to count down from the time you set and your
ice maker turns on and starts making ice when the time gets to “0”.
Using the timer to turn off your ice maker
You can use the timer to turn off your ice maker.
1With your ice maker on, press the (TIMER) button. The display shows “1”
(indicating one hour) and a blinking “H”.
2Press the + button to add additional time to the setting, or the - button to
subtract time from the setting. After five seconds, the time setting stays on
and the timer is set.
The time on the display begins to count down from the time you set and your
ice maker turns off when the time gets to “0”.
Cleaning and maintaining your ice maker
Clean your ice maker at least every week by running the cleaning cycle. Every
three days is recommended.
If you don’t plan to use your ice maker for an extended period of time, drain the
water from the water reservoir.
Draining the water from your ice maker
1Make sure that your ice maker is plugged in.
2Move your ice maker to the edge of the countertop, then place a large bowl
under it or make sure the edge is above the sink.
Note: If it has been a while since you last made ice, we suggest that you drain the water
from below the ice basket.
Note: Make sure that the water reservoir has water in it.
CAUTION:
To prevent damage to the finish, do not use gasoline, benzine, thinner, or other similar
solvents, or abrasive cleaners to clean the exterior.
Do not use bleach or vinegar to clean the internal components of your ice maker.
11
44-lb. Clear Ice Maker
www.insigniaproducts.com
3Pull the drain plug from the bottom of your ice maker and let the water drain
from the tank.
4Replace the drain plug into the bottom of your ice maker. Your ice maker is
ready to use.
Running the automatic self-cleaning program
Run the automatic self-cleaning program before using your ice maker for the first
time. After that, we suggest running a cleaning cycle at least every week. When
the running time on the compressor reaches 40 hours (approximately every three
to seven days), the automatic self-clean icon blinks to remind you to clean your
ice maker. Run the automatic self-clean program to turn off the blinking icon.
1Fill the water reservoir with about .5 gal. (2 L) of water.
2Plug in your ice maker, but do not press the power (ON/OFF) button.
Drain plug
Drain plug
12 www.insigniaproducts.com
3With your ice maker still powered off, press and hold (for over five seconds) the
(TIMER) button. The (clean) indicator turns on and the time counts
down from 20 minutes. When the self-cleaning cycle is done, the indicator
light turns off.
4Drain the water from the tank (see Draining the water from your ice maker on
page 10.)
Cleaning the parts
1Unplug your ice maker.
2Open your ice maker and remove the ice basket.
3Clean the inside with a damp, warm cloth and lemon water, or use a sponge
brush.
4Use clean water to rinse out the inside of your ice maker, then drain the water
by removing the plug from the water drain on the bottom.
5Dry the inside of your ice maker with a soft cloth.
6Replace the ice basket.
7Clean the outside of your ice maker with a soft cloth using mild, diluted
detergent in warm water.
Deep cleaning your ice maker
After using your ice maker for a long period of time (three months using relatively
soft water or one month using harder water), we also suggest deep cleaning your
ice maker to keep it running efficiently and the ice tasting good. Special attention
should be given to the water separator pipe.
1Turn off and unplug your ice maker, then completely drain the water reservoir
(see Draining the water from your ice maker on page 10).
Note: To stop the self-cleaning cycle at any point, press the (ON/OFF) button.
Notes:
Because the water in the water reservoir is controlled by a valve, you must plug in your
ice maker (but don’t turn it on), then remove the water drain plug on the bottom and
wait for several minutes for the water to drain completely.
If you find that there is an ice cube left in the evaporator that cannot be easily
removed, you can turn on your ice maker to let the unit enter the ice making process,
then press and hold the (ON/OFF) button for more than five seconds to cause the
ice tray to eject the ice cubes.
13
44-lb. Clear Ice Maker
www.insigniaproducts.com
2Gain access to the water separator pipe by lifting the left and right sides of the
pipe from its recess, do not pull the pipe out of the silicone tube on the right.
3Clean each hole in the water separator pipe with a paper clip or toothpick.
4Reattach the left and right sides of the water pipe by inserting it into the
recess from which it was removed. Make sure that the holes are facing down.
5Clean the water tank and water reservoir with lemon water, using a soft cloth.
6Drain the water tank and water reservoir, then rinse with clean water and drain
again (see Draining the water from your ice maker on page 10).
Troubleshooting
CAUTION: Do not try to repair your ice maker yourself. Doing so invalidates the warranty.
Notes:
Make sure that the water tank, water filter, and water separator pipe are not blocked.
Water temperature affects the speed at which ice is made. The lower the temperature,
the faster ice cubes are made.
The cooler the ambient temperature, the faster ice cubes are made.
Always use good quality water (clean and relatively soft) in your ice maker. If you use
hard or dirty water, your ice maker will still work, but the pump may be noisy.
If you turn your ice maker off then turn it back on, the compressor takes three minutes
to restart.
PROBLEM POSSIBLE CAUSE POSSIBLE SOLUTION
The (add
water) indicator
lights
No water in the reservoir. Turn off your ice maker and add water to the
water reservoir, then press the (ON/OFF)
button to turn on your ice maker and begin
making ice.
The (add
water) indicator
lights with water
in the reservoir
The water inlet valve is
not working. Have your ice maker serviced by a qualified
technician.
The ice has a bad
taste or there is
an odor
Various Make a few loads of ice after unpacking and
discard the ice
Clean your ice maker with lemon water
Use filtered water
Water separator pipe
14 www.insigniaproducts.com
The (ice full)
indicator lights
Too much ice in the ice
basket. Remove some ice from the ice basket.
The ice making
cycle is normal,
but no ice is
made
The room temperature or
water temperature may
be too high.
The room temperature should be no higher than
86° F (30° C). The water temperature should be no
higher than 77° F (25° C) and no lower than 50° F
(10° C).
The refrigerant liquid may
have leaked. Contact a qualified service technician for repair.
A pipe in the cooling
system may be blocked. Contact a qualified service technician for repair.
The ice making cycle is
too short. Press the + button to lengthen the ice making
cycle.
The ice cubes
stick together The ice cycle is too long
for the room
temperature.
Stop your ice maker, and restart it when the ice
blocks melt. Press the - button to shorten the ice
making cycle.
My ice maker
makes ice too
slowly
The hot air outlet is
blocked. Check the hot air outlet and remove any
blockage.
The water temperature in
the water reservoir is too
high.
The water temperature should be no higher than
77° F (25° C) and no lower than 50° F (10° C).
The refrigeration system
is malfunctioning. Have your ice maker serviced by a qualified
technician.
There is no water
in the water
separator pipe
The holes in the separator
pipe are blocked. Use a thin wire or paper clip to clean the holes in
the water separator pipe
The ice cubes are
too thick and
can’t drop into
the ice basket
The ice making cycle is
too long. Press the - button to shorten the ice making cycle.
The ice cubes are
too thin
The ambient temperature
is too high. Move your ice maker to a cooler place. The
temperature should be no higher than 86° F
(30° C). The water temperature should be no
higher than 77° F (25° C) and no lower than 50° F
(10° C).
There is a refrigerant
system leak or blockage. Have your ice maker serviced by a qualified
technician.
My ice maker is
leaking water The drain plug is loose or
missing. Replace the drain plug into the drain line.
A pipe joint in your ice
maker may be loose. Have your ice maker serviced by a qualified
technician.
The seal has reached the
end of its service life. Have your ice maker serviced by a qualified
technician.
“E1” appears on
the display
The ambient temperature
sensor is not working. Have your ice maker serviced by a qualified
technician.
“E2” appears on
the display
The water temperature
sensor is not working. Have your ice maker serviced by a qualified
technician.
PROBLEM POSSIBLE CAUSE POSSIBLE SOLUTION
15
44-lb. Clear Ice Maker
www.insigniaproducts.com
My ice maker is
noisy Your ice maker makes
noise during the freezing
cycle and when it is
dumping ice.
This is normal.
My ice maker
will not stop Ice full indicator board is
broken. Have your ice maker serviced by a qualified
technician.
PROBLEM POSSIBLE CAUSE POSSIBLE SOLUTION
16 www.insigniaproducts.com
Specifications
Dimensions (HxWxD) 14.6 x 9.9 x 14.2 in. (37.1 x 25.2 x 36 cm)
Weight 22 lbs. (10 kg)
Power requirements 115V~ 60Hz
Current Ice making - 2.2A
Ice harvest - 2.5A
Noise level <44 dB
Operating temperature 50~100.4° F (10~38° C)
Cube shape and size Square
17
44-lb. Clear Ice Maker
www.insigniaproducts.com
ONE-YEAR LIMITED WARRANTY
Definitions:
The Distributor* of Insignia branded products warrants to you, the original purchaser of this
new Insignia-branded product (“Product”), that the Product shall be free of defects in the
original manufacturer of the material or workmanship for a period of one (1) year from the
date of your purchase of the Product (“Warranty Period”).
For this warranty to apply, your Product must be purchased in the United States or Canada
from a Best Buy branded retail store or online at www.bestbuy.com or www.bestbuy.ca and
is packaged with this warranty statement.
How long does the coverage last?
The Warranty Period lasts for 1 year (365 days) from the date you purchased the Product.
Your purchase date is printed on the receipt you received with the Product.
What does this warranty cover?
During the Warranty Period, if the original manufacture of the material or workmanship of
the Product is determined to be defective by an authorized Insignia repair center or store
personnel, Insignia will (at its sole option): (1) repair the Product with new or rebuilt parts; or
(2) replace the Product at no charge with new or rebuilt comparable products or parts.
Products and parts replaced under this warranty become the property of Insignia and are
not returned to you. If service of Products or parts are required after the Warranty Period
expires, you must pay all labor and parts charges. This warranty lasts as long as you own your
Insignia Product during the Warranty Period. Warranty coverage terminates if you sell or
otherwise transfer the Product.
How to obtain warranty service?
If you purchased the Product at a Best Buy retail store location or from a Best Buy online
website (www.bestbuy.com or www.bestbuy.ca), please take your original receipt and the
Product to any Best Buy store. Make sure that you place the Product in its original packaging
or packaging that provides the same amount of protection as the original packaging.
To obtain warranty service, in the United States and Canada call 1-877-467-4289. Call agents
may diagnose and correct the issue over the phone.
Where is the warranty valid?
This warranty is valid only in the United States and Canada at Best Buy branded retail stores
or websites to the original purchaser of the product in the country where the original
purchase was made.
What does the warranty not cover?
This warranty does not cover:
Food, beverage, and or medicine loss/spoilage.
Customer instruction/education
•Installation
•Set up adjustments
Cosmetic damage
Damage due to weather, lightning, and other acts of God, such as power surges
Accidental damage
•Misuse
•Abuse
•Negligence
Commercial purposes/use, including but not limited to use in a place of business or in
communal areas of a multiple dwelling condominium or apartment complex, or
otherwise used in a place of other than a private home.
Modification of any part of the Product, including the antenna
Display panel damaged by static (non-moving) images applied for lengthy periods
(burn-in).
18 www.insigniaproducts.com
Damage due to incorrect operation or maintenance
Connection to an incorrect voltage or power supply
Attempted repair by any person not authorized by Insignia to service the Product
Products sold “as is” or “with all faults”
Consumables, including but not limited to batteries (i.e. AA, AAA, C etc.)
Products where the factory applied serial number has been altered or removed
Loss or Theft of this product or any part of the product
Display panels containing up to three (3) pixel failures (dots that are dark or incorrectly
illuminated) grouped in an area smaller than one tenth (1/10) of the display size or up to
five (5) pixel failures throughout the display. (Pixel based displays may contain a limited
number of pixels that may not function normally.)
Failures or Damage caused by any contact including but not limited to liquids, gels or
pastes.
REPAIR REPLACEMENT AS PROVIDED UNDER THIS WARRANTY IS YOUR EXCLUSIVE REMEDY
FOR BREACH OF WARRANTY. INSIGNIA SHALL NOT BE LIABLE FOR ANY INCIDENTAL OR
CONSEQUENTIAL DAMAGES FOR THE BREACH OF ANY EXPRESS OR IMPLIED WARRANTY ON
THIS PRODUCT, INCLUDING, BUT NOT LIMITED TO, LOST DATA, LOSS OF USE OF YOUR
PRODUCT, LOST BUSINESS OR LOST PROFITS. INSIGNIA PRODUCTS MAKES NO OTHER
EXPRESS WARRANTIES WITH RESPECT TO THE PRODUCT, ALL EXPRESS AND IMPLIED
WARRANTIES FOR THE PRODUCT, INCLUDING BUT NOT LIMITED TO ANY IMPLIED
WARRANTIES OF AND CONDITIONS OF MERCHANTABILITY AND FITNESS FOR A PARTICULAR
PURPOSE, ARE LIMITED IN DURATION TO THE WARRANTY PERIOD SET FORTH ABOVE AND
NO WARRANTIES, WHETHER EXPRESS OR IMPLIED, WILL APPLY AFTER THE WARRANTY
PERIOD. SOME STATES, PROVINCES AND JURISDICTIONS DO NOT ALLOW LIMITATIONS ON
HOW LONG AN IMPLIED WARRANTY LASTS, SO THE ABOVE LIMITATION MAY NOT APPLY TO
YOU. THIS WARRANTY GIVES YOU SPECIFIC LEGAL RIGHTS, AND YOU MAY ALSO HAVE OTHER
RIGHTS, WHICH VARY FROM STATE TO STATE OR PROVINCE TO PROVINCE.
Contact Insignia:
1-877-467-4289
www.insigniaproducts.com
INSIGNIA is a trademark of Best Buy and its affiliated companies.
*Distributed by Best Buy Purchasing, LLC
7601 Penn Ave South, Richfield, MN 55423 U.S.A
©2022 Best Buy. All rights reserved.
19
Máquina de hielo transparente de 44 lb.
www.insigniaproducts.com
ESPAÑOL
Introducción
Felicitaciones por comprar un producto de alta calidad de Insignia. Su
NS-IMC44S3 representa el más moderno diseño de máquina de hielo y está
diseñado para brindar un rendimiento confiable y sin problemas.
Instrucciones importantes de
seguridad
ADVERTENCIA
Lea estas instrucciones.
Conserve estas instrucciones.
Preste atención a todas las advertencias.
Siga todas las instrucciones.
No utilice su máquina para hacer hielo con un cable dañado.
Su máquina de hielo requiere un tomacorriente eléctrico estándar de 110 a
120 V y 60 Hz con una conexión a tierra de tres patas.
Conecte solamente a un tomacorriente correctamente polarizado. Ningún
otro aparato deberá ser conectado a la misma toma.
Asegúrese de que el enchufe esté correctamente insertado en la toma.
No pase el cable de alimentación sobre una alfombra u otro aislante de calor.
No cubra el cable. Mantenga el cable lejos de áreas de tráfico y no lo sumerja
en agua.
No se recomienda el uso de un cable de extensión, ya que puede
sobrecalentarse y ser un riesgo de incendio. Si debe usar un cable de
extensión, utilice el tamaño N° 14 AWG como mínimo y no menos de 1875
vatios.
Desconecte su máquina de hielo antes de limpiar o hacer cualquier reparación
o servicio.
Tenga precaución y use una supervisión razonable cuando su máquina de
hielo se use cerca de los niños.
CUIDADO
RIESGO DE CHOQUE ELÉCTRICO
NO ABRIR
Este símbolo indica que un voltaje peligroso
que puede constituir un riesgo de choque
eléctrico está presente dentro de su máquina
de hacer hielo.
Este símbolo indica que hay instrucciones
importantes de operación y mantenimiento en
la literatura que acompaña a su máquina de
hacer hielo.
20 www.insigniaproducts.com
No utilice su máquina de hielo al aire libre.
Coloque la máquina de hielo lejos de la luz solar directa y asegúrese de que
haya al menos 15 cm (6 pulg.) de espacio entre la parte posterior y los lados de
la máquina de hielo y las paredes circundantes.
No use ningún otro líquido que no sea el agua para hacer cubos de hielo.
No limpie su máquina de hielo con líquidos inflamables. Los vapores pueden
crear un riesgo de incendio o explosión.
No volcarla.
Si su máquina para hacer hielo se trae del exterior en invierno, espere unas
horas para que se caliente a temperatura ambiente antes de enchufarla.
Para evitar un peligro debido a la inestabilidad de su máquina de hielo, debe
colocarse en una superficie nivelada o plana.
ADVERTENCIA
Peligro de descarga eléctrica
El incumplimiento de estas instrucciones podría resultar en choque
eléctrico, incendio o muerte.
PELIGRO: Riesgo de incendio o explosión. Se utiliza refrigerante
inflamable.
Asegúrese de que el mantenimiento sea realizado por el
personal de servicio autorizado por la fábrica, para minimizar los
daños al producto o los problemas de seguridad.
Consulte el manual de reparaciones o la guía del usuario antes
de intentar reparar este producto. Se deben seguir todas las
precauciones de seguridad.
Siga las instrucciones de manejo cuidadosamente.
1ADVERTENCIA: No utilice este u otro electrodoméstico con un cable dañado.
Asegúrese de que el enchufe esté correctamente insertado en la toma.
2ADVERTENCIA: Mantenga las aberturas de ventilación de la carcasa del
aparato libres de obstrucciones.
3ADVERTENCIA: No toque el interior del compartimiento de la maquina de
hielo con las manos mojadas. Esto podría dar lugar a la congelación.
4ADVERTENCIA: No utilice dispositivos mecánicos u otros medios para
acelerar el proceso de descongelación, que no sean los recomendados por el
fabricante.
5ADVERTENCIA: No dañe la tubería del refrigerante al manipular, mover o al
usar la maquina de hielo.
6ADVERTENCIA: No utilice aparatos eléctricos en el interior del
compartimento del enfriador, a menos que sean del tipo recomendados por el
fabricante.
7Desenchufe su máquina de hacer hielo antes de llevar a cabo el
mantenimiento de usuario en la misma.
8Deseche la maquina de hielo de acuerdo con las normativas locales ya que el
mismo contiene gas inflamable y refrigerante.
9Esta máquina de hielo debe instalarse de acuerdo con la norma de seguridad
para sistemas de refrigeración, ASHRAE15. Su máquina de hielo no se instalará
en los pasillos o corredores de los edificios públicos.
  • Page 1 1
  • Page 2 2
  • Page 3 3
  • Page 4 4
  • Page 5 5
  • Page 6 6
  • Page 7 7
  • Page 8 8
  • Page 9 9
  • Page 10 10
  • Page 11 11
  • Page 12 12
  • Page 13 13
  • Page 14 14
  • Page 15 15
  • Page 16 16
  • Page 17 17
  • Page 18 18
  • Page 19 19
  • Page 20 20
  • Page 21 21
  • Page 22 22
  • Page 23 23
  • Page 24 24
  • Page 25 25
  • Page 26 26
  • Page 27 27
  • Page 28 28
  • Page 29 29
  • Page 30 30
  • Page 31 31
  • Page 32 32
  • Page 33 33
  • Page 34 34
  • Page 35 35
  • Page 36 36

Insignia NS-IMC44S3 User guide

Category
Ice cube makers
Type
User guide

Ask a question and I''ll find the answer in the document

Finding information in a document is now easier with AI

in other languages