The Sleep mode is a simple power saving
feature. If there are no button presses for 10
minutes the display goes to sleep and only a
single decimal point is lit. Pressing any
button causes the meter to exit the sleep
mode and revert to the last displayed
function.
se the
arrow buttons to select or .
(Default OFF) Press the button to save the
selection to memory. Two short beeps will let
you know you have successfully set the
function and the meter will revert to the last
displayed function.
To access the Sleep mode, hold the button
for two seconds. Use the arrow buttons
to scroll until is in the display. Press to
select the Sleep mode. U
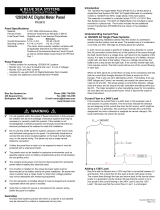
Marine Electrical Products
AC Digital Meters
Single-Function Meters
8237 AC Digital Voltmeter
8238 AC Digital Ammeter
8239 AC Digital Frequency
8247 AC Digital Multimeter with Alarm
Multi-Function Meters
Shock Hazard During
Installation! Read Manual!
WARNING
To minimize shock and fire hazards:
1) Enlist the services of a qualified electrician
if you are not experienced and comfortable
installing AC devices. Be sure they read
this warning page as well.
2) Turn off all AC sources before terminating
either end of wires #1 and #3, which
supply AC power to the meter. This
includes generators, inverters, and utility
power. For marine and RV installations be
sure to unplug shore or park power and
disconnect the inverters DC power supply.
3) Special Warning
Turn off all AC sources before installing the
Current Transformer (CT). Do not
energize until the CT is terminated at
the meter. OPEN CT LEADS CAN
GENERATE LETHAL VOLTAGES!
NEVER OPEN THE CT LEADS DURING
OPERATION. If the meter must be
removed short the CT leads.
Safety!
Electrical shock and fire hazard.
Failure to follow these instructions
May result in injury or death.
Safety!
Specifications
A full discussion of AC monitoring and use
is beyond the scope of these instructions.
The topics mentioned below may be used as
a guide but should not be considered
comprehensive.
AC systems can benefit from the
measurement of four key parameters:
Voltage, Amperage, Frequency, and Power.
Each tell something about the performance
of the system and are more or less required
depending on the application.
Voltage, for example, is very important to
monitor when using a generator. Excessive
voltage can cause equipment damage, and
wide voltage swings may indicate voltage
regulation, or even fuel supply problems.
Current or amperage monitoring can help
avoid overloads when using limited shore
power or RV park power.
Frequency should be monitored when
generators are a part of the system.
Frequency regulation can affect devices such
as clocks, light dimmers, and the efficiency of
devices with transformers. Typically
frequency should not vary more than ± 2 or 3
cycles over the operating range of the
generator.
Power displayed is the apparent power,
Vrms x rms, and can be used to avoid
overloading sources such as an inverter.
Use
1) Physical: The meter must be located in
an environment that is safe for high
voltage electrical connections. Personnel
must not be able to touch the terminals on
the back of the meter. The meter should
be located in a visible position with easy
access for operation of the pushbuttons.
The display has adjustable brightness, but
for best visibility do not place the meter in
full daylight. The location should be dry
and protected. The face is splash proof
and its circuit boards are coated for
corrosion resistance, but it is not intended
for use in wet environments or for
installation outside without additional
protection. All wiring should be in safe
and dry raceways with appropriate strain
relief.
2) Safety: Installation requires high voltage
connections in an electrical panel
environment. These connections must be
made carefully and fused as indicated in
the wiring diagram. Be sure all AC
sources are off, including inverters and
generators. To be sure, disconnect the
battery from the inverter and unplug and
remove any shore or park power cords.
The scope of this document does not
include instruction in basic electrical skills
necessary to install the meter. If you do
not have the
necessary basic skills you
should employ a qualified electrician.
Installation Overview
All models require the same connections
to power the meter. Meters with the voltage
function use these same connections for
voltage sensing. The terminals on the back
of the unit are UL rated for 300 Volts.
Ungrounded line voltage conductors which
feed the meter should be protected by fuses
with the appropriate voltage rating for the
application. If inline fuses are used be sure
there are no exposed parts at line voltage
when the fuses are removed. A fast acting
fuse with a rating of 0.25 to 0.5A helps
protect the meter against transients and the
wiring against shorts.
The wiring from the AC source should be
short and connected as close to the input to
the distribution system as is practical. This
means directly down circuit from the main AC
distribution circuit breaker.
Power and Voltage Sensing
Models that have the ability to measure
AC current are supplied with a Current
Transformer (CT) that is used to sense the
current in the AC circuit to be monitored.
To install the CT, identify the current
carrying conductor that supplies the circuit of
interest, be sure it is de-energized, and
disconnect it from where it is terminated, for
example, at a circuit breaker. Slide the wire
through the center of the doughnut shaped
CT and re-connect. Only pass one conductor
through the CT. In 120 Volt systems you may
pass either the hot or neutral conductor
through the CT. In 240 Volt systems you
must pass one, or the other, of the hot
conductors through the CT. Try to pick the
line with the most load. Do not use the
neutral conductor to monitor current in a
240V three or four wire system, since in a
balanced system the neutral current should
be zero.
NOTE:
The two wires from the CT do not have
polarity indicated. The polarity does not make
a difference for current measurement but for
Power measurement it does. IF THE POWER
NUMBER IS ZERO REVERSE THE CT
SENSE LEADS.
Current Sensing
The 8200 Series meters can be used to
measure the current flow in both legs of a
240 Volt single phase, three or four wire
system, but a switch must be used that is
specifically designed for the purpose.
If primary current is flowing and the CT is
allowed to become open circuited high
voltages are generated that can be lethal to
humans and if connected to the meter may
cause non-warranty damage. This restriction
means that a special switch must be used
that shorts the secondary of the CT, except
when it is connected to the meter. As the
selector switch is turned the terminals of the
CT are shorted together, connected to the
meter, and then the short is removed.
These types of switches are manufactured
by ElectroSwitch (Series 31), Allen Bradley,
and Kraus & Naimer, and are available from
commercial electrical distributors. The PN
8410 switch and panel is available from Blue
Sea Systems for 120/240V applications.
Using Multiple Current Transformers
Upon power up the meter goes through a self
test sequence which lights all the function
LEDs.
All Models: Startup Sequence
Pressing the button causes the display to
dim. There are three levels of brightness.
Models with a single button also have a
fourth sleep mode in which the display is off
with the exception of a single decimal point.
Models with three buttons have an automatic
sleep mode, which is accessed through the
menu as described in the manual.
All Models: Using Button for Dimming
The arrow buttons have two functions.
Normally they change the display between
Volts, Amps, Hertz (frequency), and Watts
(power). When in the MENU mode they are
used to navigate through the functions or
adjust the values.
The center button has three functions.
Normally it is used to dim the display. Holding
the button for 2 seconds will access the
MENU and while in the MENU mode,
pressing it is used to SET or store the
displayed value to memory.
SET
MENU
Press to select a
MENU mode or
to SET a value
to memory
Hold for 2 seconds
to access the
MENU
Press arrow
buttons to display
Volts, Amps, Hertz, or Watts
In MENU use to adjust values.
Three Button Models
Sleep Mode -
Set the meter to display current (Amperes)
using the arrow buttons. The A function
LED will be on. Hold the button for two
seconds to access the MENU. Use the
arrow buttons to scroll until is in the
display. Press to select the High Current
Alarm.
Use the arrow buttons to select or
(Default OFF). Press the button to save the
selection to memory and continue.
A
SET
MENU
Flashing
A
Flashing
SET
MENU
High Current Alarm -
Press the button when the desired set point
is displayed and the new value will be saved
to memory. Two short beeps will let you know
you have successfully set the new value and
the meter will revert to normal operation.*
* The minimum high current alarm setting is
10A. Even if the setting is made less than
10A, the alarm will still respond at 10A.
The present setting will appear in the display
(Default 14.0). If the set point is acceptable,
press the button or wait for 15 seconds and
the meter will revert to normal operation.
Otherwise use the arrow buttons to
select the desired value. For example, press
and hold the right button to scroll up to 28.0
Amperes.
The 8200 Series meters incorporate
microprocessor control and advanced
electronics specifically designed for power
monitoring to provide accurate metering with
a variety of adjustable user features. AC
meters have an internal transformer that
supplies both power and voltage sensing.
This approach simplifies installation.
Models that have the ability to measure
AC current are supplied with a current
transformer (CT). The CT is a toroidal
transformer (doughnut shaped). The AC line
to be measured is passed through the center
of the CT. The CT has a full current rating of
150 Amps and when 150 Amps flows in the
primary it generates a secondary current of
50mA (0.050A ). This current is then
processed inside the meter and scaled to
read amps. For example, if the AC line was
conducting 30A the secondary of the CT
Theory of Operation
would generate 10mA but it would be
displayed as 30.0A. Similarly 1A generates
0.33mA, and 0.1 Amp generates only
0.033mA. This is a very small signal and you
must be sure that all connections are secure
and well made. It is also necessary to use
twisted pair wire to minimize susceptibility to
electrical system noise.
General:
Display Character Size 9/16"
Input Voltage 80-249V AC*
Maximum Power Consumption 1.00W**
Minimum Power Consumption 0.60W**
(Sleep mode PN 8247 only)
Voltage Measurement:
Range 80-249V AC*
Resolution 0.1V AC
Accuracy (% of Reading)
90-249V AC (RMS) ± 2.0%***
70-90V AC (RMS) ± 5.0%***
Current Measurement:
Current Transformer 150A-50mA
Range 1 0.00-9.99A AC(RMS)
(Resolution 0.01A)
Range 2 10.0-150.0A AC(RMS)
(Resolution 0.1A)
Accuracy (% of Reading) ± 3.0%***
Frequency Measurement:
Range 40-90Hz
Resolution 0.1Hz
Accuracy (% of Reading) ± 0.1%***
Calibrated with sine wave input
Power Measurement:
Range 1 (Resolution 10W) 0-9990W
Range 2 (Resolution 0.1kW) 10-45kW
Accuracy (% of Reading) ±5%***
Physical:
Splashproof front
Dimensions Height 2.431" (61.75mm)
Width 2.896" (73.56mm)
Depth 3.400" (86.36mm)
* For 120 & 240 Volt AC single phase systems
** Variable with voltage, display intensity
segments illuminated, and sleep mode
***± 5 LSD (Least Significant Digit)
V
A
W
The Scan mode will automatically scroll the
display between Volts, Amps, Hertz
(Frequency), and Watts (Power) displaying
each for about 3 seconds. If the arrow
buttons are pressed the Scan mode is
temporarily suspended and the buttons may
be used to manually scroll through the
measured parameters. If no button is
pressed for 10 minutes the Scan mode is
resumed.
W
A
V
SET
MENU
Scan Mode -
To access the Scan mode, hold the button
for two seconds. Use the arrow buttons
to scroll until is in the display. Press
to select the Scan mode. Use the
arrow buttons to select or .
(Default OFF) Press the button to save the
selection to memory. Two short beeps will let
you know you have successfully set the
function and the meter will revert to the last
displayed function.
Alarms: The 8247 Multimeter can be set to
generate alarms based on high current, low
voltage, and high voltage.
Set the meter to display voltage using the
arrow buttons. The function LED will
be on. Hold the button for two seconds to
access the MENU. Use the arrow
buttons to scroll until is in the display.
Press to select the Low Voltage Alarm.
V
Use the arrow buttons to select or
(Default OFF). Press the button to save the
selection to memory and continue.
SET
MENU
V
Flashing
SET
MENU
Low Voltage Alarm -
Press the button when the desired set point
is displayed and the new value will be saved
to memory. Two short beeps will let you know
you have successfully set the new value and
the meter will revert to normal operation.
The present setting will appear in the display
(Default 105.0). If the set point is acceptable,
press the button or wait for 15 seconds and
the meter will revert to normal operation.
Otherwise use the arrow buttons to
select the desired value. For example, press
and hold the right button to scroll up to 110
Volts.
V
Flashing
V
Flashing
V
Flashing
Accuracy is valid from 5% of range to 100% of range