Page is loading ...


FATAL1TY... THE FIRST OF HIS KIND
Johnathan “Fatal1ty” Wendel is the most accomplished, professional PC Gamer in history
and is the breakthrough name and face of the sport. As the world’s most famous PC
gamer he spreads interest in PC gaming wherever he goes and, in the process, has
become the sport’s worldwide ambassador. Wendel wants PC gaming to be considered a
true sport and considers himself an “E-Sportsman”. Like any other professional athlete, he
trains for hours a day and analyzes his performances by watching videos of himself in
action-all with the goal of being the best in the world.
Fatal1ty is a naturally gifted athlete who competed in many sports including tennis, golf and
football before devoting his full time efforts to gaming. He still uses physical training to
maintain and hone his natural gifts of quick reflexes and lightning fast hand/eye
coordination. Johnathan Wendel also excelled in school, gaining a 3.4 average in 2 years
of college, from which he withdrew as his gaming career took off. Fatal1ty wants to
communicate the picture of a well-rounded, articulate, 25 year old in order to change the
image of the typical PC gamer as a desensitized geek who only spends time in front of a
computer monitor.
No one has ever come close to the earnings, titles and media coverage of Fatal1ty.
His record of success speaks for itself. He presently reigns as the only 5 time World
Champion, winning each title in a different game, a feat never before accomplished.
Wendel started professional gaming in 1999 by entering the CPL (Cyberathlete
Professional League) tournament in Dallas and won $4,000 for placing third. Emerging as
one of the top players in the United States, he then flew to Sweden where he competed in
a tournament against the top 12 players in the world. By winning 18 straight games and
losing none he took first place, becoming the number one ranked Quake III player in the
world. Two months later he followed that success in Dallas by successfully defending his
title as the world’s best Quake III player and winning the $40,000 grand prize. Since then
Fatal1ty has traveled the globe to compete against the best in the world, winning prizes
and acclaim, including the 2005 CPL World Tour Championship in New York City for a
$150,000 first place finish.
From the time Fatal1ty began to realize success he has preached a doctrine of “giving back
to gaming” and has convinced his business partners to do the same as part of their overall
goal to position gaming in a positive light. As part of this quest he has organized events
that have given away a great deal of money and prizes, including an exhibition held at The
Great Wall of China for a prize of $125,000 to selected challengers who could beat him.
The relationship that has been built between him and his business partners, combined
with the sales of his own branded products, provides the capital and human resources
needed to pull off these types of attention getting promotions.

1
Cautions on Use and Installation
1. By installing this product on a VGA (Video Graphics Array) card, a PCI slot adjacent to the PCIe
(or AGP) slot will become unusable.
2. If this product will be installed on a recently released VGA card, please check for compatibility at
Zalman’s website first.
3. The product cannot be installed on Matrox VGA cards, NVIDIA PCX 5 , NVIDIA Geforce 6600
AGP Series and ATI Radeon 9550/9600 Series.
4. If the VGA card and its components interfere with the installation of this product, stop the installation,
refer to the list of compatible VGA cards at Zalman’s website and install this product with one of
the compatible VGA cards.
5. The use of an exhaust fan positioned on the rear side of the case is recommended for enhancement
of product performance.
Product Features
1.
Pure copper heatsink base and fins maximize cooling performance.
2. Use of two high performance heatpipes maximizes heat transfer.
3. Circular heatsink formed by radially aligned ultra-thin(0.2mm) fins minimizes airflow resistance
and maximizes heat dissipation surface area for excellent cooling performance.
4.
Fast 80mm red LED fan cools not only the VGA chipset and VGA RAM, but all other VGA components.
5. Compact and light-weight design prevents physical stress on the graphic card.
6. Improvement in the installation structure provides excellent compatibility and easy installation.
7.
Fan Mate 2 fan controller for fine adjustment between Quiet Mode and Performance Mode.
Disclaimer
Zalman Tech Co., Ltd. is not responsible for any damages due to external causes, including but not
limited to, improper use, problems with electrical power, accident, neglect, alteration, repair, improper
installation, or improper testing.
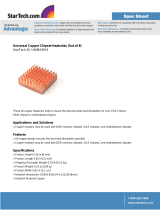
One (1) VGA Cooler
Eight (8) RAM Heatsinks
Four (4) Nipples
Four (4) Fixing Nuts
One (1) PVC Washer Plate
Four (4) Rubber Rings
Four (4) Springs
Thermal Grease
FAN Controller(FAN MATE 2)
Cable for FAN MATE 2
Dual-sided Tape
(to attach FAN MATE 2)
Manual
Components
***
MODEL
SPEC.
96 (L) X 96 (W) X 30 (H)
185
Pure copper
Dimensions (mm)
Weight (g)
Cooling Material
1. VGA Cooler
FC - ZV9
2. Fan
-
Size : 80(L) x 80(W) x 15(H)mm
- Bearing Type : 2-Ball Bearing
- Speed : 1,650rpm
10 % (
5V, Quiet Mode
)
3,600rpm
10 %
(
12V, Performance Mode
)
- Noise level : 20dB
10 % (
5V, Quiet Mode
)
36dB
10 %
(
12V, Performance Mode
)
Specifications

2
Exploded View
VGA Cooler
VGA RAM
RAM Heatsink
Nipple
Rubber Ring
VGA Chipset
PVC Washer
Spring
Fixing Nut

Installation Procedure
Nipple Installation Holes for
Various VGA Cards
The following installation sequence MUST be followed.
( VGA RAM Heatsink Attachment
Thermal Grease Application
Nipple Installation on the
Retention Guide
VGA Cooler Installation
Spring Insertion on the Fixing Nut
Fixing Nut
Assembly on VGA Cooler’s Nipple
VGA Card Installation
Fan Power Cable Connection)
1. VGA RAM Heatsink Attachment
Remove the film from the thermal tapes on the bottom of the
RAM Heatsinks and attach the heatsinks on the VGA RAM.
2. Thermal Grease Application
Clean the contact surface of the VGA Chipset
completely. Apply Thermal Grease on the VGA
Chipset that makes contact with the base of the
VGA Cooler.
3. Nipple Installation on the Retention Guide
Install the short end of the Nipples on the VGA
Cooler's Retention Guide after determining the
appropriate Nipple Installation Holes.
Note 1)
If Thermal Grease or other residue remains on the
RAM, the Thermal Tapes will not stick. Clean the
surface of the RAM with acetone or alcohol before
attaching.
Note 2)
The bonding strength of the Thermal Tapes reaches
90% after 24 hours of curing. Do not exert excessive
force on the RAM Heatsinks during this period.
Note 3)
Thermal Tapes are not reusable because they lose
adhesiveness after their initial attachment. Purchase
new Thermal Tapes if you need to reattach the RAM
Heatsinks.
(Note)
The Nipples MUST be tightened by hand. Using tools
to tighten the Nipples may damage the tips of the Nipples.
Please check the table below to identify the correct
Nipple Installation Holes for specific models of
VGA cards.
VGA RAM
RAM Heatsink
Thermal
Tape
Film
Thermal
Grease
VGA Chipset
Nipple
Retention
Guide
VGA Cooler
Retention Guide
Nipple
Installation
Holes
Nipple Installation Holes
VGA Card
ATI X1600 Series
ATI X1300 Series
ATI Radeon 9 Series
(except 9550/9600)
ATI Radeon X Series
NVIDIA Geforce4 MX Series
NVIDIA Geforce FX 5200
NVIDIA Geforce FX 5500
NVIDIA Geforce FX 5600(FX 5700)
NVIDIA Geforce 6600 Series
(except 6600 AGP Series)
NVIDIA Geforce4 TI 4 Series
NVIDIA Geforce FX 5700(Ultra) Series
NVIDIA Geforce FX 5800 Series
NVIDIA Geforce 6600 Series
(except 6600 AGP Series)
ATI X1600 Series
NVIDIA Geforce 6600 Series
(except 6600 AGP Series)
NVIDIA Geforce FX 5900 Series
NVIDIA Geforce FX 5950 Series
ATI X1900 Series
ATI X1800 Series
NVIDIA Geforce 7900 Series
NVIDIA Geforce 7800 Series
NVIDIA Geforce 6800 Series
***
**
3

4. VGA Cooler Installation
Insert the Rubber Rings into the VGA cooler’s Nipple.
Install the Nipple-attached VGA cooler on the VGA card’s Mounting Holes.
The VGA Chipset MUST be positioned on the center of the VGA Cooler’s base.
Simultaneously hold the VGA Cooler and the VGA card with one hand, then flip the VGA card
so that its rear-side is facing upwards.
(Note)
Make sure that the VGA Chipset and the VGA Cooler’s base do not get disconnected while simultaneously
flipping the VGA Cooler and the VGA card.
5. Spring Insertion on the Fixing Nut
Slowly turn the Spring in counter-clockwise motion so
that the Spring is correctly attached to the Fixing Nut.
Note 1)
The ends of the Springs are of different diameters. Install
the Spring end with the shorter diameter on the Fixing Nut.
Note 2)
Make sure that the Spring is installed perpendicularly and
not leaning to one side.
VGA Cooler
Nipple
Rubber Ring
Nipple
Rubber Ring
Mounting Hole
VGA Chipset
Nipple
VGA Cooler
Spring
Fixing
Nut
4

6. Fixing Nut Installation on the Nipples
Place a PVC Washer over each Nipple.
Slightly screw each of the four Spring-attached-Fixing Nuts onto each Nipple, then tighten
each Fixing Nut one rotation at a time until all are completely tightened.
8. Fan Power Cable Connection (FAN MATE 2 connection)
7. VGA Card Installation
I
nsert the assembled VGA card into the motherboard’s
PCIe (or AGP) slot. Use the
Fixing Bolt to secure the
VGA card onto the
computer case. If the VGA card
has a power connector on
it, remember to plug in the
power cable.
Note 1)
Fully tightening one Fixing Nut at a time may result
in damaging the VGA chipset. Please tighten each
Fixing Nut one rotation at a time until all are
completely tightened.
Note 2)
Make sure that the VGA Cooler’s base and the
VGA Chipset are completely in contact with each
other.
Note 3)
Make sure that the VGA Cooler does not interfere
with the VGA card's capacitors and other components.
PCIe
Slot
Fixing
Bolt
Nipple
Fixing Nut
PVC Washer
VGA Cooler
Installing FAN MATE 2 on the Inside of the System
Installing FAN MATE 2 on the Outside of the System
Connect the appropriate 3-pin connectors on the
cable to the motherboard’s Fan Header and the
FC-ZV9 Fan Connector.
Pull the 6-pin Connector out of the system
through the back and connect it to FAN MATE 2,
which should be installed on the case using the
included Double-Sided Tape ().
When the RPM Control Knob on FAN MATE 2 is turned fully counter-clockwise, the fan operates in
Quiet Mode. Turned fully clockwise, it operates in Normal Mode. You can select the desired fan RPM
by turning the knob.
Performance can be increased by adjusting the RPM control knob of the FAN MATE 2.
Note) FAN MATE 2 has been specifically designed for the fan of this product.
Zalman Tech Co., Ltd. is not responsible for any damage to systems or VGA Chipsets caused by
using it with other types of fans.
RPM Control Knob
Fan Connector
(FC-ZV9)
Motherboard
Double - Sided Tape
FAN MATE 2
6-Pin Connector
5

/