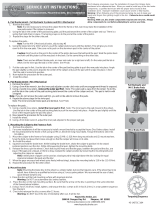
Avid BB5

SRAM Avid BB5, Avid BB7, BB7 Installation And Setup Manual

  • Hello! I am an AI chatbot trained to assist you with the SRAM Avid BB5 Installation And Setup Manual. I’ve already reviewed the document and can help you find the information you need or explain it in simple terms. Just ask your questions, and providing more details will help me assist you more effectively!
Ball Bearing Disc Brake
TM
Installation and Setup Guide
PLEASE READ THE SAFETY AND WARRANTY INFORMATION INSIDE
955-310589-000 Rev. B © SRAM Corporation, 2005
Caliper
Rotor
Brake pad
Caliper
Rotor
2 955-310589-000 Rev. B
BB7 and BB5 Installation & Set-Up Guide English
3SRAM Corporation July 2005
CONGRATULATIONS!
You have selected the best mechanical disc brakes your money can buy! This manual contains important information for
installing, setting up and adjusting your new brakes. To ensure that your Avid brakes perform properly, we recommend that you
have them installed by a qualified bicycle mechanic. We also urge you to follow all of our recommendations to help make your
riding experience safe, enjoyable and trouble free.
First, here is some information to get you started:
TRI-ALIGN CALIPER POSITIONING SYSTEM
Avid disc brakes use a unique alignment system called Caliper Positioning
System (CPS). These stacks of concave and convex washers allow the
caliper to be perfectly aligned with the rotor, regardless of imperfections in
the mounting tabs on the fork or frame, giving you full, square pad contact.
TOOLS NEEDED
2.5 and 5mm hex wrenches
T-25 TORX® wrench
Cable cutters
Adjustable torque wrench: 2.8-10Nm (25-90 in-lb) range
• Safety Glasses
MAKE SURE YOU HAVE THE RIGHT BRACKETS
fronts:
rears:
CPS
Hardware
CPS Bolt
115-373202-500
203 Rear Forged
115-372202-600
185 Rear Forged
115-376202-200
160 Rear Forged
115-376402-600
160 Rear Extruded
115-373602-300
203 Front QR20
115-373502-600
203 Front Boxxer
11.5373.102.800
203 Front Forged
115-372102-900
185 Front Forged
11.5376.102.500
160 Front Forged
11.5376.302.900
160 Front Extruded
11.5372.302.300
185 Front
Post Mount
11.5373.302.200
203 Front
Post Mount
English BB7 and BB5 Installation & Set-Up Guide
4 955-310589-000 Rev. B
Brakes are a safety-critical item on a bicycle. Improper setup or
use of brakes can result in loss of control or an accident, which
could lead to a severe injury.
Avid brakes are a performance product that offer increased
stopping power over brakes that you may be used to. This
greater power requires less effort to lock-up a wheel when
braking. A wheel lock up might cause you to lose control and
possibly cause injury.
It’s your responsibility to learn and understand proper braking
techniques. Consult the owner’s manual for your bicycle and
a professional bike dealer.
Practice your riding and braking techniques on a flat and level
surface prior to aggressive riding.
The effectiveness of braking is dependent on many conditions
over which Avid has no control. These include the speed of the
bicycle, type and condition of the riding surface, braking lever
force, proper installation and maintenance of brakes, brake
lines, hydraulic fluid, levers, brake pads, condition of the bike,
weight of the rider, proper braking techniques, weather, terrain,
and a variety of other factors.
Avid brakes and levers are not intended for use on any
motorized bicycle or vehicle. Such use could result in a
serious personal injury.
ALWAYS RIDE UNDER CONTROL
Remember, it takes longer to stop in wet conditions. To reduce
the possibility of an accident and minimize trail erosion, you
should avoid locking-up your wheels.
FOLLOW THESE INSTRUCTIONS CAREFULLY
If you do not understand the instructions, have the installation
done by a professional bike mechanic.
Only levers designated for side-pull brakes, such as Avid’s
Speed Dial series and FR5 levers, can be used with the
mountain Ball Bearing Disc Brake. For best operation and
performance Avid highly recommends that you use an Avid
Speed Dial lever and premium quality brake cable and
housing. Failure to do so will reduce the performance of
the system.
Avid disc brakes are compatible with 44mm, 6-bolt,
International Standard hubs.
We recommend 32 or 36-spoke wheels with a 3 or 4 cross
spoke lacing pattern. Contact your specific wheel
manufacturer for more specifications.
Do not use radially spoked wheels.
Disc brakes are OIL SENSITIVE! Do not spray any solvents
or lubricants in the vicinity of the rotors or brake pads.
NEVER touch the pad surface or rotor surface with your
fingers. Doing so will significantly degrade braking
performance.
Do not touch the braking surface of any rotor with your bare
hands, because the oils from your fingers will degrade its
performance. Always wear gloves, or handle the rotor by its
spokes.
Disc brakes become very hot during use. Do not touch the
caliper or rotor immediately after use. Make sure the brake
has cooled down before making any adjustments.
SAFETY INFORMATION
WARNING
BB7 and BB5 Installation & Set-Up Guide English
5SRAM Corporation July 2005
INSTALL ROTOR
Mount the rotor to the hub using the supplied T-25 TORX
®
bolts and tighten to the specified
torque. Avid logo MUST face out. Install the wheel into the fork or frame.
WARNING:
IF YOU ARE USING A HUB WITH A REMOVABLE SHIM, YOU MAY NEED LONGER ROTOR MOUNTING
BOLTS
. CONTACT THE HUB MANUFACTURER FOR THE RECOMMENDED BOLTS.
MOUNT FRONT CALIPER
Mount the front caliper to the fork.
2
1
TORQUE TO:
6.2 Nm (55 in-lb)
TORQUE TO:
9-10 Nm (80-90 in-lb)
Remove...
OR
I.S. MOUNT
Loosen the CPS bolts, then bolt the caliper to the mounting
tabs. Tighten the mounting bolts to the specified torque.
Check that the caliper moves freely on the CPS hardware.
POST MOUNT
Remove the mounting bracket but leave the CPS bolts and
washer stacks intact. Bolt the caliper directly to the fork. Snug
the bolts, then back them out 1/8th to 1/4th turn. Check that
the caliper moves freely on the CPS hardware.
...then mount direct
Snug, then back off
1/8th to 1/4th turn
Loosen before
mounting
English BB7 and BB5 Installation & Set-Up Guide
6 955-310589-000 Rev. B
MOUNT REAR CALIPER
Loosen the CPS bolts, then mount the rear caliper to the I.S. tabs on the
rear of the bike. Tighten the mounting bolts to the specified torque.
Check that the caliper moves freely on the CPS hardware.
INSTALL THE CABLE
Pass the brake wire through the anchor bolt on the actuating arm. Cable slack may be removed with a fourth hand tool.
Be careful not to advance the torque arm as you pull the cable. Tighten cable anchor bolt to the specified torque. Use the barrel
adjuster at the brake lever to remove any remaining cable slack (if there is any).
IMPORTANT:
A
FTER THE CABLE IS ANCHORED
, CHECK TO BE SURE THERE IS NO MORE THAN
20MM (3/4 IN) OF EXCESS CABLE BEYOND THE ANCHOR BOLT.
TRIM AS NECESSARY.
4
3
TORQUE TO:
5-7 Nm (40-60 in-lb)
Loosen before
mounting
TORQUE TO:
5-7 Nm
(40-60 in-lb)
After anchoring the cable,
slide the lower boot down
and place one small dot
of light grease inside.
Return the boot to its
proper position.
Make sure the barrel
adjuster is screwed all
the way in before
installing the cable.
BB7 and BB5 Installation & Set-Up Guide English
7SRAM Corporation July 2005
ALIGN THE CALIPER (BB7 ONLY)
A. Turn the inboard (closest to the wheel) knob clockwise until it
pushes the rotor into the position shown. Note that the rotor should
not be centered between the walls of the caliper body.
B. Turn the outboard pad adjustment knob in until it is firmly
squeezing the rotor against the inboard pad – thus immobilizing the
actuating arm. Your caliper is now in perfect position and ready to
be tightened. You’ll back the pads off again in a few moments.
C. Tighten the two CPS bolts that attach the caliper to the mounting bracket.
Tighten one and then the other, repeating until they are at the specified torque.
5
Rotor should be offset
to the outboard side of
the rotor slot. Ideal
ratio is 1/3 to 2/3.
TORQUE TO:
8-10 Nm
(70-90 in-lb)
English BB7 and BB5 Installation & Set-Up Guide
8 955-310589-000 Rev. B
ALIGN THE CALIPER
(BB5 ONLY)
A.
Use your fingers or a Torx® wrench to turn the inboard pad adjustment knob clockwise until
the rotor is centered in the caliper. This positions the pads for the next step in the installation.
B.
Make sure the CPS bolts are loose enough for the caliper to move freely.
C.
Squeeze the brake lever to compress the brake pads firmly on the rotor.
D.
While still holding the brake lever, tighten the CPS bolts.
Once they are tight, you can let go of the lever.
5
Caliper
Rotor
Brake pad
Caliper
Rotor
Turn adjustment knob until the
rotor is centered in the caliper.
Caliper
Rotor
Brake pad
Caliper
Rotor
TORQUE TO:
8-10 Nm
(70-90 in-lb)
(in an alternating fashion)
Caliper
Rotor
Brake pad
Rotor
T-25 TORX
®
Even Spacing
9SRAM Corporation July 2005
BB7 and BB5 Installation & Set-Up Guide English
ADJUST THE PADS (BB7 ONLY)
Turn both pad adjustment knobs counterclockwise until
desired pad/rotor clearance is achieved (approx. 2 or 3
clicks each).
IMPORTANT:
Only use the barrel adjuster at the brake lever to adjust for
cable slack. For lever throw, use the outboard adjustment
knob. For brake pad wear adjustment, use both the inboard
AND outboard knobs.
6
Inboard pad adjustment knob
Outboard pad adjustment knob
ADJUST THE PADS (BB5 ONLY)
Back the adjustment knob off (counterclockwise) until the
rotor spins freely. Now you can dial the pad in or out until
you find the brake action you prefer (make sure, of course,
that there’s no drag on the rotor). If you can’t seem to get
the feel you like, or the rotor is dragging, repeat step 5.
T-25 TORX
®
English BB7 and BB5 Installation & Set-Up Guide
10 955-310589-000 Rev. B
Fine Tuning
BEFORE EACH RIDE
Check cables for signs of wear or fraying.
• Squeeze the brake lever firmly and check for proper brake
function. Adjust for pad wear if necessary.
• Check pads for wear and replace if necessary.
• Ensure rotors are free of foreign substances and oils.
CABLE SLACK ADJUSTMENT
Use the barrel adjuster on the
brake lever to remove any cable
slack from the system. Turn the
adjuster out until there is no free
play in the lever but not so far that
the torque arm on the caliper is
advanced. The torque arm should
return completely when the brake
lever is released. If necessary,
repeat step 6.
Note: New cables will stretch and
require adjustment.
PAD BREAK-IN
It may take anywhere from 20 to 40 complete stops to break
in Avid pads. You may begin to notice an increase in braking
power after the first ride. Brake noise can occur not only
during the break-in period but off and on throughout the life
of the brake pads. Noise is dependent upon factors such as
brake setup, rider weight, riding style, braking style, and
riding conditions (i.e. dust, soil, and contamination of
friction surfaces).
CARE AND CLEANING
Extreme care must be taken when cleaning both the bicycle
and its new disc brakes. Under normal use, it is not
necessary to clean the caliper rotor or pads. If necessary,
use only water and dish detergent to wash the caliper and
rotor – being sure to thoroughly rinse all soap residue from
the rotor. Dry with a clean paper towel.
SPRING TENSION ADJUSTMENT
If necessary, spring tension can be adjusted by turning the
spring tension adjustment screw with a 2.5mm hex wrench.
Turning the screw clockwise increases spring tension,
which equals harder lever pull.
BB7 and BB5 Installation & Set-Up Guide English
11SRAM Corporation July 2005
Inboard pad
adjustment knob
Barrel adjuster
Make sure you tighten
the locknut after you
adjust.
PAD WEAR ADJUSTMENT
(BB7 ONLY)
Over time, you will need to compensate for brake pad wear.
You can do so with two very simple adjustments:
Turn both the inboard and outboard red adjusting knobs
clockwise one or two clicks as needed to restore your brake to
optimum settings. DO NOT use your barrel adjuster to
compensate for pad wear.
A pad wear indicator is at the center of each knob. As the
knob is turned in, the indicator will retract deeper into the
knob giving a visual indication of approximately how much
the pads have worn.
A pad should be replaced when its total thickness (backing
plate & friction material) is less than 3mm. Instructions will be
included with your new pads.
PAD WEAR ADJUSTMENT
(BB5 ONLY)
Over time, you will need to compensate for brake pad wear.
You can do so with two very simple adjustments:
1. Unscrew (counterclockwise) the barrel adjuster on the
caliper.
2. Turn the inboard pad adjustment knob clockwise.
Both of these adjustments move the brake pads closer to
the rotor. You do need to adjust both pads as they wear.
Try different settings until the brake feels just the way
you like.
NOTE: While you can perform a similar adjustment on the
barrel of your brake lever, we suggest that you adjust for
pad wear at the caliper. That way you leave the brake lever
for on-the-fly adjustments.
T-25 TORX
®
Outboard pad
adjustment knob
Pad wear
indicator
English BB7 and BB5 Installation & Set-Up Guide
12 955-310589-000 Rev. B
PAD REPLACEMENT (BB7 ONLY)
A pad should be replaced when its total thickness (backing plate and friction material) is less than 3mm.
1. REMOVE THE OLD PADS
Back both adjuster knobs all the way out (counterclockwise,) then squeeze the pad tabs together and pull both pads straight out
of the caliper.
2. INSTALL THE NEW PADS AND SPRING
Assemble the spring between the new left and right pads. Align the spring to the pad as shown.
Squeeze the brake pad/spring clip assembly together then press firmly into the caliper until it “clicks” into place.
The pad marked "R" goes on the spoke side of the brake.
The spring clip sandwiches
between the pads
Inner
(spoke side)
BB7 and BB5 Installation & Set-Up Guide English
13SRAM Corporation July 2005
PAD REPLACEMENT (BB5 ONLY)
A pad should be replaced when its total thickness (backing plate and friction material) is less than 3mm.
1. REMOVE THE OLD PADS
Back the inner adjustment knob all the way out (counterclockwise). Pull the pad spreader clip from between the pads, then pull
the pads out of the caliper one at a time.
2. INSTALL THE NEW PADS AND SPREADER
Insert the new pads one at a time into the caliper.
V
ERY IMPORTANT: MAKE SURE YOU PLACE THE BLACK PAD ON THE INNER SIDE (TOWARDS THE WHEEL) AND THE BLUE PAD ON THE OUTSIDE
(AWAY FROM THE WHEEL.) ONCE THE PADS ARE IN THE CALIPER YOU CAN SLIDE THE SPREADER CLIP BACK INTO POSITION BETWEEN THE PADS.
Pad spreader clip in place
Black pad “Left”
Blue pad “Right”
Pad spreader
Pads
English BB7 and BB5 Installation & Set-Up Guide
14 955-310589-000 Rev. B
SRAM CORPORATION WARRANTY
EXTENT OF LIMITED WARRANTY
SRAM warrants its products to be free from defects in materials or
workmanship for a period of two years after original purchase. This
warranty only applies to the original owner and is not transferable.
Claims under this warranty must be made through the retailer where the
bicycle or the SRAM component was purchased. Original proof of
purchase is required.
LOCAL LAW
This warranty statement gives the customer specific legal rights. The
customer may also have other rights which vary from state to state
(USA), from province to province (Canada), and from country to
country elsewhere in the world.
To the extent that this warranty statement is inconsistent with the local
law, this warranty shall be deemed modified to be consistent with such
law, under such local law, certain disclaimers and limitations of this
warranty statement may apply to the customer. For example, some
states in the United States of America, as well as some governments
outside of the United States (including provinces in Canada) may:
a.Preclude the disclaimers and limitations of this warranty
statement from limiting the statutory rights of the consumer
(e.g. United Kingdom).
b.Otherwise restrict the ability of a manufacturer to enforce such
disclaimers or limitations.
LIMITATIONS OF LIABILITY
To the extent allowed by local law, except for the obligations specifically
set forth in this warranty statement, In no event shall SRAM or its third-
party suppliers be liable for direct, indirect, special, incidental, or
consequential damages.
LIMITATIONS OF WARRANTY
This warranty does not apply to products that have been incorrectly
installed and/or adjusted according to the respective SRAM technical
installation manual. The SRAM installation manuals can be found online
at www.SRAM.com, www.rockshox.com or www.avidbike.com.
• This warranty does not apply to damage to the product caused by a
crash, impact, abuse of the product, non-compliance with manufacturer’s
specifications of usage or any other circumstances in which the product
has been subjected to forces or loads beyond its design.
• This warranty does not apply when the product has been modified.
• This warranty does not apply when the serial number or production
code has been deliberately altered, defaced or removed.
• This warranty does not apply to normal wear and tear. Wear and tear
parts are subject to damage as a result of normal use, failure to service
according to SRAM recommendations and/or riding or installation in
conditions or applications other than recommended.
WEAR AND TEAR PARTS ARE IDENTIFIED AS:
- Dust seals
- Bushings
- Air sealing o-rings
- Glide rings
- Rubber moving parts
- Foam rings
- Rear shock mounting hardware
and main seals
- Stripped threads/bolts (aluminum,
titanium, magnesium or steel)
- Upper tubes (stanchions)
- Brake sleeves
- Brake pads
- Chains
- Sprockets
- Cassettes
- Shifter and brake cables (inner
and outer)
- Handlebar grips
- Shifter grips
- Jockey wheels
- Disc brake rotors
- Tools
This warranty shall not cover damages caused by the use of parts of
different manufacturers.
• This warranty shall not cover damages caused by the use of parts that
are not compatible, suitable and/or authorized by SRAM for use with
SRAM components.
SRAM Corporation
1333 North Kingsbury, 4th Floor, Chicago, Illinois 60622
1-312-664-8800 • fax 1-312-664-8826
www.avidbike.com
/