Page is loading ...

f*
S.ave This Manual
For Future Reference
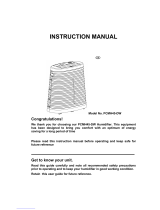
owner's
manual
MODEL NO.
758.144120
758.144240
FOR YOUR
SAFETY:
READ ALL
INSTRUCTIONS
CAREFULLY
Model No. 758.144240
Kenmope'"
QUIETCOMFORT"
EVAPORATIVE
CONSOLE
HUMIDIFIER
, Operating Instructions
, Parts List
Sold by SEARS, ROEBUCK AND COo, Chicago, H 60684 U,S°Ao
J
Part No. SP5377 Pnnted in U.S.A.

FULL ONE YEAR WARRANTY ON HUMIDIFIER
If, within one (1) year from the date of purchase, this humidifier fails due to defect in material or work-
manship, we will repair it free of charge. If, within two (2) years from the date of purchase, the motor
fails due to defect in material or workmanship, we will repair it free of charge. (Applies to Model
758.144140 and 758.144240 only).
This warranty service is available by simply returning the humidifier to the nearest Sears Service Cen-
ter/Department throughout the United States.
This warranty applies only while this product is used in the United States.
This warranty gives you specific legal rights, and you may also have other rights which vary from state
to state.
SEARS, ROEBUCK AND CO., D/817 WA Hoffman Estates,iL 60195
General Safety Instructions
1. To avoid fire or shock hazard, plug the humidifier directly into a 120V A.C. electrical outlet. Use only U.L: listed
extension cords as instructed by the cord manufacturer. -...... .......
2. Keep the cord out of heavy traffic areas. To avoid fire hazard, never put the cord under rugs, near heat registers,
radiators, stoves or heaters.
3. Always unplug the humidifier before moving it, removing the lid or motor support section, before cleaning, or
whenever the humidifier is not in service.
4. When filling, be careful not to pour water in the control or motor area.
5. Keep humidifier clean.
6. To help keep water clean, do not use the humidifier without the lid in place.
7. Do not put foreign objects inside the humidifier.
8. Never use your humidifier while any part is missing or damaged in any manner.
9. To avoid electrical hazard or damage to the humidifier, do not tilt, jolt or tip the humidifier over while the unit is
running.
10. To avoid damage to the humidifier, turn it to OFF when the tank is empty or when the humidifier is not in use.
11. To avoid accidental electrical shock, do not touch the cord or controls with wet hands.
12. Note the warning label (shown below) on the humidifier.
Table of Contents
Warranty ......................................................................... 2
General Safety Instructions ............................................ 2
Know Your Humidifier ..................................................... 3
Humidifier Operation ....................................................... 3
Location Instructions ....................................................... 4
Electrical Hook-Upl ......................................................... 4
Water Fill......................................................................... 4
Operating Controls ......................................................... 5
Using Your Humidifier ..................................................... 5
Cleaning of Humidifier Tank ............................................ 6
Care of Filter ................................................................... 7
Troubleshooting .............................................................. 7
Repair Parts .................................................................... 8
Safety Signal Words
DANGER: means if the safety information_,!s not followed
someone will be seriously injured or killed.
WARNING: means if the safety information is not fol-
lowed someone could be seriously injured or killed.
CAUTION: means if the safety information is not followed
someone might be injured.
WARNING: To avoid injury, fire or shock always
remove plug from electrical outlet before filling,
servicing or cleaning.
To save a service call:
Check the following if your humidifier will not operate
1. Is power cord attached to outlet?
2. Is there electrical power to outlet?
3. ts airflow control in operating position?
4. Is humidity control set high enough?
5. Is water level in tank high enough to activate switch
actuator.
2

Know Your Humidifier
HINGES
SPLASH GUARD
STORED HERE
MOTOR
SUPPORT
ID
CONTROL
AREA
.E
ACTUATOR
WATER LEVEL
INDICATOR
FIGURE 1
MODEL NO. 758.144240
HOUSING-FILTER
FLOAT
Humidifier Operations
Description
Gallon Output
Tank Capacity
Sq. Ft. Coverage
Fan Speeds
Filters
Fill Light
Water Level Indicator
Auto Humidistat
Auto Shut Off
Dry Out
758.144120
12
7
2800
Variable
2
Yes
Yes
Yes
Yes
Manual
758.14424O
14
7
3200
Variable
2
Yes
Yes
Yes
Yes
Manual
Filter Light
Operating Light
Decorative Handles
Electronic Controls
U.L. Listed
AHAM Certified
Volts
Hertz
Amps
Watts
No
No
No
No
Yes
Yes
12O A.C.
60
2.0
140
No
No
Yes
No
,Yes
"Yes
!20 A.C.
60
2.0
155
Your new Sears humidifier is designed to satisfy home
humidity requirements through the principle of evapora-
tion of water into the air.
After water is added to the tank, the filters begin to soak
up the water and become totally saturated in approxi-
mately 30 minutes. Air drawn in from the rear and top of
the humidifier then passes through the filters by means of
a circulation fan. As air passes through the filter, moisture
is absorbed into the air and then released through the top
of humidifier. (See Fig. 2) This moist air is released in the
form of vapor. No water droplets will enter the home. All
evaporation into the air takes place in the humidifier,
which means that the residue left by evaporating water is
not passed into the home, but remains in the filter.
CAUTION: Use only 32-14900 EPA Registered Bac-
teriostat available from SEARS Retail store. Use of
other water treatment products may damage the fil-
ters or may pose health hazards,
Under no circumstances should you use water
treatment products designed for Roto belt or Ultra-
sonic humidifiers.
3

Humidifier Operations (continued)
CAUTION: Keep your humidifier clean. While
humidifiers do not cause colds, some studies sug-
gest that dirty humidifiers can cause cold like
symptoms in some people. To avoid this, we rec-
ommend you clean your humidifier weekly with
Humidifier Cleaner 32-7283 and use Bacteriostat
32-14900. These are available at your local Sears
store.
DRY ROOM AIR
N
HUMIDIFIEOAIR DRYROOMAIR
\to t
WATER
Assembly Instruction
(14 Gallon-Model 758.144240)
Included with this humidifier are two decorative handles
which must be _.t-taelibdto the top of the side panels.
Location Instructions
I WARNING: For your own safety, do not use humidi- Itier if any parts are damaged or missing.
I
1. Place humidifier in area of house where most humidity
is needed, or one which would likely result in moist air
being circulated throughout the house such as near a
cold air return. Moist air (humidity) produced will dis-
perse into the whole house, but area closest to unit will
have the highest humidity.
2. Humidifier should sit at least two inches away from wall
Figure 2
Locate handle and using a screwdriver attach the handle
by inserting the screws through the pre-drilled holes in
the cabinet housing. This is easiest with motor support
removed (see unpacking instructiod_-printed o'n top of
carton).
for proper operation. Air needs to enter through rear
and top louvers in order for humidifier to operate at
peak efficiency.
NOTE: Due to release of cool, moist air from humidifier, it
is best to direct air away from home's thermostat and hot
air registers. It is best to keep humidifier in front of an
inside wall. Hot air registers and cold air from outside
walls can affect the efficiencies of the controls. Unit
should not be placed where warm air from a hot air regis-
ter blows directly on unit.
Electrical Hookup
Locate nearest 120V A.C. wall socket in the location
desired, preferably on inside wall. (See Fig. 3)
WARNING: To avoid fire or shock hazard, humidi- I
tier, should be plugged into a 120V, A.C. outlet. Do
Inot use extension cords.
Lid Retention
Figure 3
1. Locate lid retention clips in styrofoam packing material
on top of motor support section. (See Fig. 4) Dispose
of packing material.
2. Position lid over housing with hinges facing rear of unit.
(See Fig. 5)
3. Position lid retention clip over clip mounting area.
\
Figure 4
4

4.Pushdownonclipuntilfullyseatedagainstlidhinge.
(Seefig.6)
5.Repeatsteps3and4toseatotherclip.
NOTE:Yourlidisnowfastenedtothehousing.Werec-
ommendnottoremovethelidretentionclipsoncethey
havebeensecured.
6•Toremoveyourmotorsupportsectionliftlidandliftout
motorsupportsection,thenslidecordtotherightto
removefromhousing•
Figure 5
Water Fill
Figure 6
WARNING:
1.To avoid shock, always unplug humidifier before
filling, cleaning, or servicing.
2. Do not pour or spill water into control or motor
area. If controls do get wet, have the unit checked
by a qualified service technician before plugging
in.
•Raise the lid.
2. Locate controls on right side of humidifier• (See Fig. 7)
LOUVERS _CONTROL
t!-AREA
GUARD W,TER
FULL LABEL _" __ ' _--:__ ...... '_ _" LEVEL
\, / INDICATOR
Figure 7
3. Locate splash guard, between motor support section
and rear of humidifier tank•
4• Lift splash guard straight up to remove•
5. With the words "Splash Guard" facing you, position
over the left rear louvers• The splash guard will simply
hook on the humidifier tank• (See Fig. 8)
6. Pour water into humidifier from the left side (opposite
the controls)• (See Fig. 9)
NOTE: This is a splash guard to keep water from
splashing out i_ear louvers. Pour water slowly to mini-
mize any water getting outside of unit.
IMPORTANT: Be sure water does not go above FULL
mark or water may run out of the rear louvers.
7. Fill tank with clean water up to FULL indicator label,
located inside the housing on the left rear panel, (See
Fig• 9) by using a bucket•
8. When you are finished filling your humidifier, replace
"Splash Guard" to its storage location. (Located
between the motor support section and_ humidifier
tank.) The "Splash Guard" will hook onto the humidifier
tank.
NOTE: When removing your "Splash Guard" we recom-
mend reaching clown and grabbing the "S" in Splash
Guard and slightly twisting to remove.
t
SPLASH
GUARD \
HUMIDIFIER f
TANK /"
LOUVERS
\
\
SPLASH'
GUARD
Figure 9
Figure 8

Operating Humidifier Controls
Humidity Control:
This control adjusts the amount of humidity depending on
user's needs. The humidifier will turn on and off as
required to maintain level of humidity you select. (See
Fig. 10) Medium setting is recommended but there are
times when a low or high amount of humidity may be pre-
ferred. For constant operation of humidifier. Constant On
allows for the maximum amount of humidity to be evapo-
rated into the air continuously.
IMPORTANT: Water damage may result if condensation
starts to form on windows or walls. Humidity control set-
ting should be lowered until condensation no longer
forms.
Air Flow Control:
The higher the air flow speed, the faster humidified air is
released into_the air. Low speed is the quietest and is
provided for conditions that may not require as high an
evaporation rate. (See Fig. 10)
Fill Light
When unit has a small amount of water left in it, a red fill
light will come on and unit will shut off. (See Fig. 10)
HU_lorr y CONTROL
KenmoPe []
QUIETCOMFORT
AIR FLOW CONTROL
©
MODEl_ 758.144120
Figure 10
HLIM[OfTY CONTROL
f, r_ ji ,,p.
Kenmore rJ_
QUIE] COMFORT
AIR FLOW CONTROL
vc_
m
r,, l
MODEL 758.144240
Using Your Humidifier
1. Be sure unit is plugged in, full of water and your splash
guard is stored behind motor support section.
2. Set Air Flow Control knob to Low or number 1 position.
(See Fig. 10)
3. Set Humidity Control to Medium position. (,See Fig.
11)
NOTE: Humidifier should operate with humidity control
on the recommended Medium setting. If is does not, the
humidity is at a relatively high level. To test the unit under
this condition, turn Humidity Control all the way to Con-
stant On and unit should begin to operate. After unit has
been tested, set Humidity Control to Medium or desired
level.
Allow 24 hours for humidifier to adjust.
If humidity level in home is sufficient, the humidifier will
only operate with Humidity Control set on Constant On.
IMPORTANT: Water damage may result if condensation
starts to form on windows or walls. Humidity Control set-
ting should be lowered until condensation no longer
forms.
4. If humidifier stops running, the humidity level is at the
normal requirements for that setting or it.is adjusting to
the home conditions. Figure 11 shows approximate rel-
ative humidity percentages which correspond to the
various settings of the Humidity Control.
When Outdoor
Temperature is:
_IO°F
O"F
IO°F
20°F & above
Recommended Indoor
Relative Humidity is
20%
25%
30%
50%
30% TO 50%
F Relative
'_- ME_GH
_ LOW CONSTANTO_
Figure 11

Cleaning of Humidifier Tank
WARNING: To avoid toxic injury, fire or damage to
humidifier, use only cleaners specially recom-
mended for humidifiers. Never use flammable,
combustible or poisonous material to clean your
humidifier. To avoid scalds and damage to humidi-
fier, never put hot water in humidifier.
CAUTION: Local water purity varies from area to
area and under certain conditions water impurities
and airborne bacteria may promote the growth of
microorganisms in the reservoir of the humidifier.
To retard bacteria growth that may cause odors
and be harmful to your health, use only Sears
recommended filters. We also recommend using
32-149000 approved bacteriostat. Clean your
humidifier regularly.
Care and Maintenance
To make cleaning easier, the tank should be completely
dried out. Proceed as follows.
a. Loop switch actuato_ Fi_ngaround plastic hook located
directly above the switch actuator.(Fig. 12)
b. Set humidity control to Constant On, air flow to High.
Run till tank is dry. _
NOTE: With the switch actuator ring in place unit will con-
tinue to run until the ring is released. Depending upon
humidity levels, once the tank is empty the average dry
out time is approximately 2 hours.
1.When unit is dry, release switch actuator ring and shut
the unit off.
2. Unplug humidifier, and proceed to clean.
WARNING: If humidifier is not unplugged, fan could
start after motor support is removed.
3. Raise lid to rest on hinges.
4.Lift out the motor support section and wipe off any
mineral deposits with a clean cloth. (Fig. 13)
CAUTION: The switch actuator is a fragile part. Set
the motor support section down carefully to be
sure the switch actuator does not become dam-
aged.
5. Before removing the filters, we recommend moving
the humidifier to an area where floor coverings are not
susceptible to water damage, i.e. kitchen or bath
areas.
6. Slide up the filter holders and remove (either discard
or store for further use) the filters located inside by
gently pushing out from either side. Wash off mineral
deposits on filter holder and wipe with a clean cloth.
7. Remove the floats from the bottom of the humidifier
cabinet. The cabinet should be empty and the water
reservoir is ready for cleaning. (The water reservoir is
the lower areas of the humidifier cabinet that the
floats and filter holders are located during the normal
operation time.)
8. Proceed to "Bi-Weekly Maintenance" or "End of Sea-
son Maintenance.
Figure 12
Figure 13
HOOK
ACTUATOR
RING
SWITCH
MOTOR
• SUPPORT
SECTION
ACTUATOR
ACTUATOR

Care of Humidifier Tank (continued)
Bi-Weekly Maintenance
Removing Scale
1. Partially fill the water reservoir with one 8oz. cup of
undiluted white vinegar. Let solution stay 20 minutes.
2. Clean all interior surfaces with soft brush. Dampen soft
cloth with undiluted white vinegar and wipe out the
water reservoir to remove scale.
3. Rinse thoroughly with clean warm water to remove
scale and cleaning solution before disinfecting the
reservoir.
Disinfecting Reservoir
1. Fill water reservoir and add 5 teaspoons chlorine
bleach (1 teaspoon chlorine bleach in 1 gallon water.)
Let solution stay 20 minutes, swishing every few min-
utes. Wet all surfaces.
Care of Filter
I WARNING: To avoid electric shock, always unplug
humidifier before removing or replacing any parts.
CAUTION: To help retard bacterial growth and
maintain maximum efficiency, the filters should be
replaced at least once a season, or more often
under hard water conditions. Use Sears recom-
mended replacement filter.
Dry out the unit completely before changing filters. (See
Cleaning of Humidifier Tank).
1. Unplug the electrical cord.
2. Before removing the filters, we recommend moving the
humidifier to an area where floor coverings are not
susceptible to water damage, i.e. kitchen or bath
areas.
3. Remove the lid completely from the unit by closing and
lifting up from the hinge holders.
4. With one hand on each side of the motor support sec-
tion, lift straight up and set gently on the floor in an
upright position..
WARNING: Be sure the humidifier is unplugged or I
the fan may come on after the motor support sec-
I
tion is removed from the tank.
2. Empty water reservoir after 20 minutes. Rinse with
water until bleach smell is gone. Dry with clean cloth or
paper towel.
End of Season Maintenance
1. Follow bi-weekly maintenance instructions at end of
humidification season or when humidifier will not be
used for at least one week or more.
2. Remove and throw away filters.
. ,3. Let humidifier dry completely before storing. Do not
store with water inside water reservoir.
4. Store in cool, dry location.
5. Install new filters and clean humidifier before next sea-
son begins.
way to clean filter is to completely submerge filter in
a bucket or sink full of clean cool water and dip
repeatedly.
6. Replace the filter (in holder) in the humidifier tank by
lining up rear slot on filter holder frame with track on
tank. Tilt holder toward rear and lower until front tab
lines up with front slot on the filter holder. (See Figure
14)
7. The filter holder sits on a float located at the bottom of
the tank.
8. Pick up the motor support section and, while standing
over the tank, locate the tabs that the support section
sits on. Be sure the electrical cord is lined up with the
rear opening, and gently slide the motor support sec-
tion down into the tank.
9. Replace the lid and follow the filling and operating
instructions.
FILTER HOLDER
5. The filter is enclosed in a filter holder. Lift out the entire
holder to gain access to the filter.
a. To replace filter, remove used one from plastic
holder by gently pushing from the side, insert a new
filter in the filter housing.
b.To clean filter, lift out filter holder, leaving dirty filter
in the holder. You can either dry out'filter or leave
wet. Place filter and holder under cold tap water on
medium pressure and rinse. Not all of the dissolved _
solids will wash off of filter, but this procedure will
restore filter to a more efficient condition. Another
FILTER
FILTER TRA,
Figure 14
8

Troubleshooting
Model 758.144120 and 758.144240
Trouble
1. Unit will not run,
or will not shut
off.
2. Water runs out of
the rear of unit
3. Unit will not dry
out completely
4. Unit will not cycle
(Turn off) when
out of water
•5.Filter does not
float.
Probable Cause
• Switch Actuator not free to work properly.
• Splash guard not in place or missing.
° Too much water.
• Switch actuator ring is not in place.
° High humidity or low temperature resulting
in slow evaporation.
° Float is hung up, or holders are not on the
filter tracks.
- _--Unitwill continue to run for a time after Fill
light comes on.
° Float may have leak.
• Cardboard packing piece between motor
support and filter holder.
Remedy
• Remove shipping rubber band or unhook ring.
• Hang splash guard on rear of unit, be sure lou-
vers are covered.
° Check Full label in tank. Do not overfill.
• Connect switch actuator ring. See instructio!0s.
(pg 7 Fig. 12)
° Allow unit to continue running until reservoir
becomes dry.
• Check float (pg 9 Fig. 14)
• Remove filter holder, install on filter tracks_ (pg 9
Fig. 14) ....
° Allow unit to continue runningin-diy out cy_le if
dry out is desired.
• Check float for leak, replace if necessary.
• Remove cardboard.
CAUTION: Use Sears 32-14900 EPA Registered Bacteriostat available from Sears Retail. Use of other water
treatment products may damage the filter elements.
Under no circumstances should you use water treatment products designed for Roto belt or Ultrasonic
humidifiers.

Repair Parts
Parts List For Sears Humidifier
Model 758.144120 and 758.144240
1
25
11
H
GUARD 12
J
J
18
13
17
16
10

Repair Parts
Parts List for Sears Humidifier
Model No. 758.144120 and 758.144240
Always order by Part Number--Not by Key Number
i
Key
No.
1
2
3
4
5
6
8
9
10
_il
12
13
14
15
16
17
18
19
20
21
22
23
24
25
26
27
28
29
30
Description
Fan Guard
Screw-Pan Hd. Ty. "AB" 8 x 5/8
Label
Knob
Knob
• Control (Includes Key #4 & 5)
Tie Wire
Switch Actuator
Lid
Lid Retention Clip
Splash Guard
Handle w/screws & washers
Finished Housing
Caster
• Screw-Pan Hd. Ty,"T" 10-32 x 1/2
Filter Float
t Evaporation Filter
Filter Housing
Push Nut 5/16
Model No.
758.144120
817241
29433
819284
817235-1
817235
819212
817878
817380
817452-1
819428
817735
81_HI8
817191-2
13832
STD601005
817195
32-14910
817196
803144-2
758.144240
817241
29433
82O546
817235-1
817235
819212
817878
817380
817186-1
819428
817735
819418
817191-4
13832
STD601005
817195
32-14910
817196
803144-2
Clamp
Fan Blade
Motor
Washer, 13/64 x 3/4 x 1/16
Grommet
Motor Housing
Gasket Air Seal
Airseal Gasket
Spacer
Grommet
Lock Nut 8/32
Owners Manual
816133
V30187
818087
STD551
817966
817197
817237
817964
V27217
STD541408
SP5377
816133
V30187
818087-1
010 STD551010
817966
817197
820016
817237
817964
V27217
STD541408
SP5377
• Any attempt to repair this control assembly or motor may create a hazard unless repair is done by a qualified service
technician. This assembly is factory aligned. Repair service is available at your nearest Sears store.
• Standard Hardware Item - May be purchased locally.
t Stock Item - May be secured through the Plumbing and Heating Department of most Sears Retail Stores.
11

S_FA/RS
owner's
manual
SERVICE
MODEL NO.
758.144120
758.144240
HOW TO ORDER
REPAIR PARTS
Kenmope'"
QUIETCOMFORT"
Conso Humidifier
Service for your humidifier is available by returning itto the.
nearest Sears Service Center/Department threughout the
United States.
The model number will be found on the Humidifier identification
label. Always mention the Model Number when requesting ser-
vice or repair parts.
WHEN ORDERING REPAIR PARTS, ALWAYS GIVE THE FOL-
LOWING INFORMATION:
1. PART NUMBER: (See Repair Parts)
2. PART DESCRIPTION: (See Repair Parts)
3. MODEL NUMBER: 758.144120 and 758.144240
4. NAME OF ITEM: Humidifier
All parts listed may be ordered from any Sears Service Center.
If the parts you need are not stocked locally, your order will be
electronically transmitted to a Sears Repair Parts Distribution
Center for handling.
Part No. SP5377
Sold by SEARS, ROEBUCK AND CO., Chicago, II. 60684 U.S.A.
Form No. SP5377-3
d
Printed in U.S.A. 6/94
/