Philips 7FF2FPA User manual
- Category
- Digital photo frames
- Type
- User manual
This manual is also suitable for
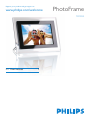
Philips 7FF2FPA lets you view and manage your cherished memories with ease. Enjoy your photos and set up slideshows with the user-friendly interface using the control keys. Connect your digital camera or memory card to view your photos instantly, or connect to your computer to copy, delete, or move photos.
Philips 7FF2FPA lets you view and manage your cherished memories with ease. Enjoy your photos and set up slideshows with the user-friendly interface using the control keys. Connect your digital camera or memory card to view your photos instantly, or connect to your computer to copy, delete, or move photos.


-
 1
1
-
 2
2
-
 3
3
-
 4
4
-
 5
5
-
 6
6
-
 7
7
-
 8
8
-
 9
9
-
 10
10
-
 11
11
-
 12
12
-
 13
13
-
 14
14
-
 15
15
-
 16
16


Philips 7FF2FPA User manual
- Category
- Digital photo frames
- Type
- User manual
- This manual is also suitable for
Philips 7FF2FPA lets you view and manage your cherished memories with ease. Enjoy your photos and set up slideshows with the user-friendly interface using the control keys. Connect your digital camera or memory card to view your photos instantly, or connect to your computer to copy, delete, or move photos.
Ask a question and I''ll find the answer in the document
Finding information in a document is now easier with AI
Related papers
-
Philips 7FF2FPA/93 User manual
-
-
-
-
Philips 10FF2CME/27 User manual
-
Philips 9FF2CME User manual
-
-
Philips 7FF2FPAS/00 User manual
-
Philips 8FF3CME/75 User manual
-
Philips SPF2017 User manual