Page is loading ...

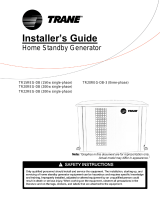
o TR15REG-DB (15Kw single-phase)
o TR20REG-DB (20Kw single-phase)
o TR20REG-DB-3 (20Kw three-phase)
Note: “Graphics in this document are for representation only.
Actual model may differ in appearance.”
June 2017 18-SG02D1-1A-EN
Installer’s Guide
Home Standby Generator

Installation, Maintenance and Repair Manual
For licensed authorized personnel only.
o TR15REG-DB o TR20REG-DB o TR20REG-DB-3
Read all instructions carefully before installation
WARNING: Only qualied technicians and contractors
are to perform installation
NOT INTENDED FOR USE IN CRITICAL LIFE
SUPPORT APPLICATIONS!
Save all instructions!
It is recommended that the Serial Number # be recorded for future warranty, parts and service needs. It can be
located, inside the back-panel on the stamped ID plate or on the outside of original shipping carton. This sys-
tem requires a password to unlock controller for operation and programming. Call 844-367-5660 for password.
Engine ID # __________________________________________
Controller Password ___________________________________
2
18-SG02D1-1A-EN

Table Of Contents
Introduction . . . . . . . . . . . . . . . . . . . . . . . . . . . . . . . . . . . . . . . . . . . . . . . . . . . . 4
Operation & Maintenance . . . . . . . . . . . . . . . . . . . . . . . . . . . . . . . . . . . . . . . . . . . . . . . . . . . . 5
Safety Rules and Common Hazards . . . . . . . . . . . . . . . . . . . . . . . . . . . . . . . . . . . . . . . . . . . . 5
Electrical Hazards . . . . . . . . . . . . . . . . . . . . . . . . . . . . . . . . . . . . . . . . . . . . . . . . . . . . 7
Fire Hazards . . . . . . . . . . . . . . . . . . . . . . . . . . . . . . . . . . . . . . . . . . . . . . . . . . . . 7
Explosion Hazards . . . . . . . . . . . . . . . . . . . . . . . . . . . . . . . . . . . . . . . . . . . . . . . . . . . . 8
Standards Index . . . . . . . . . . . . . . . . . . . . . . . . . . . . . . . . . . . . . . . . . . . . . . . . . . . . 8
Uncrating and Initial Inspection . . . . . . . . . . . . . . . . . . . . . . . . . . . . . . . . . . . . . . . . . . . . . . . . . . . . 9
NEC Requirements . . . . . . . . . . . . . . . . . . . . . . . . . . . . . . . . . . . . . . . . . . . . . . . . . . . . 9
First Step . . . . . . . . . . . . . . . . . . . . . . . . . . . . . . . . . . . . . . . . . . . . . . . . . . . . 10
Location and Site Preparation . . . . . . . . . . . . . . . . . . . . . . . . . . . . . . . . . . . . . . . . . . . . 10
Prestart & Preparation . . . . . . . . . . . . . . . . . . . . . . . . . . . . . . . . . . . . . . . . . . . . . . . . . . . . 12
Lubrication System . . . . . . . . . . . . . . . . . . . . . . . . . . . . . . . . . . . . . . . . . . . . . . . . . . . . 12
Cooling System . . . . . . . . . . . . . . . . . . . . . . . . . . . . . . . . . . . . . . . . . . . . . . . . . . . . 13
Fuel Selection and Conversion from NG to LPG . . . . . . . . . . . . . . . . . . . . . . . . . . . . . . . . . . . . . . . . . . . . 13
Installing and Connecting Gas Lines . . . . . . . . . . . . . . . . . . . . . . . . . . . . . . . . . . . . . . . . . . . . 14
External Power Connections and Wiring Diagram . . . . . . . . . . . . . . . . . . . . . . . . . . . . . . . . . . . . . . . . . . . . 15
Battery Connection . . . . . . . . . . . . . . . . . . . . . . . . . . . . . . . . . . . . . . . . . . . . . . . . . . . . 16
Generator Electrical Connections . . . . . . . . . . . . . . . . . . . . . . . . . . . . . . . . . . . . . . . . . . . . 17
Key Function Operations . . . . . . . . . . . . . . . . . . . . . . . . . . . . . . . . . . . . . . . . . . . . . . . . . . . . 18
Manual Stop / Start . . . . . . . . . . . . . . . . . . . . . . . . . . . . . . . . . . . . . . . . . . . . . . . . . . . . 19
Auto Stop / Start . . . . . . . . . . . . . . . . . . . . . . . . . . . . . . . . . . . . . . . . . . . . . . . . . . . . 19
Parameter Settings . . . . . . . . . . . . . . . . . . . . . . . . . . . . . . . . . . . . . . . . . . . . . . . . . . . . 20
Controller Wiring Diagram . . . . . . . . . . . . . . . . . . . . . . . . . . . . . . . . . . . . . . . . . . . . . . . . . . . . 22
SmartGen Digital Controller Specications . . . . . . . . . . . . . . . . . . . . . . . . . . . . . . . . . . . . . . . . . . . . 23
ATS Installation and Wiring Diagram . . . . . . . . . . . . . . . . . . . . . . . . . . . . . . . . . . . . . . . . . . . . 26
Testing . . . . . . . . . . . . . . . . . . . . . . . . . . . . . . . . . . . . . . . . . . . . . . . . . . . . 29
Circuit Coverage . . . . . . . . . . . . . . . . . . . . . . . . . . . . . . . . . . . . . . . . . . . . . . . . . . . . 30
Electrical Connections . . . . . . . . . . . . . . . . . . . . . . . . . . . . . . . . . . . . . . . . . . . . . . . . . . . . 30
Funcional Testing . . . . . . . . . . . . . . . . . . . . . . . . . . . . . . . . . . . . . . . . . . . . . . . . . . . . 31
Maintenance of Generator . . . . . . . . . . . . . . . . . . . . . . . . . . . . . . . . . . . . . . . . . . . . . . . . . . . . 33
Generator Circuit Diagram . . . . . . . . . . . . . . . . . . . . . . . . . . . . . . . . . . . . . . . . . . . . . . . . . . . . 38
Common Fault Readings and Troubleshooting . . . . . . . . . . . . . . . . . . . . . . . . . . . . . . . . . . . . . . . . . . . . 39
Engine, Primary Parts and Structure . . . . . . . . . . . . . . . . . . . . . . . . . . . . . . . . . . . . . . . . . . . . 45
Generator Alternator and Specications . . . . . . . . . . . . . . . . . . . . . . . . . . . . . . . . . . . . . . . . . . . . 48
Common Formulas . . . . . . . . . . . . . . . . . . . . . . . . . . . . . . . . . . . . . . . . . . . . . . . . . . . . 50
Maintainence Parts . . . . . . . . . . . . . . . . . . . . . . . . . . . . . . . . . . . . . . . . . . . . . . . . . . . . 51
Additional Troubleshooting Procedures . . . . . . . . . . . . . . . . . . . . . . . . . . . . . . . . . . . . . . . . . . . . 52
3
18-SG02D1-1A-EN

INTRODUCTION
Thank you for choosing a Trane standby generator. This manual provides you with extremely important in-
formation about installation, operation and maintenance of the generator system. If you have any questions
about our products, parts, propane products, warranty or service questions, or need professional installation
services, please call 844-367-5660.
Before using this generator, you are advised to read the manual in its entirety and fully understand its con-
tents.
This generator utilizes an automotive 998cc, 4-cylinder liquid cooled, gas engine. The design was selected
because it has been in service for over 20 years with millions of dependable hours and miles in various appli-
cations. This ensures and provides the performance needed for, long term, dependable power output. Through
constant development, this unit has advantages that a number of similar sized products do not offer. Such
as, automotive grade engine, liquid-cooled radiator system, powder coated steel/composite exterior housing,
automotive grade mufer for silent operation, electronic speed control system, 200amp automatic transfer
switch (ATS) included, Sinci - low distortion alternator for all electronic devices, SmartGen - intelligent control
system in four programmable languages and multi-function capability’s, GSM digital monitoring system (op-
tional), Cold weather kit for extreme cold temperature starts (optional). For optional equipment contact our
customer service department at 844-367-5660.
Due to continual improvements and a commitment to offer the latest technology, service and warranty, this
manual may differ slightly from the actual object, contact Trane with any questions:
844-367-5660
4
18-SG02D1-1A-EN

In case of an emergency, the owner operator is responsible for proper and safe use of the electric generator
system. The manufacturer strongly suggest that the owner operator read the Owner’s Manual in its entirety
and understand all operating instructions before using the electrical standby generator. If not properly ad-
hered to, damage can occur to the system causing re, electrical shock and even death. The manufacturer also
strongly recommends instructing other users to properly start/stop and operate the unit in time of need.
Operation and Maintenance
It is the sole responsibility of the owner to periodically service and maintain safe operating conditions. Rou-
tinely inspect the system for all uid levels, uid leaks, loose belts, and unusual noises from normal opera-
tion. If this is observed, contact your installer, local service provider or our Toll Free 844-367-5660 number for
help. To insure your system is always in top condition, contact us for an authorized service center near you for
repairs and extended service agreements. This will give you the peace of mind that your investment will always
be in top condition when an emergency arises.
Standard maintenance service and the replacement of parts are the responsibility of the owner/operator and,
as such, are not considered defects in materials or workmanship within the terms of the warranty. Personal
operating habits and usage contribute to the need for maintenance and service. Proper maintenance and care
of the generator ensures a minimum number of problems and keep operating expenses at a minimum. Talk to
your Installing Dealer about maintenance Plans.
Safety Rules
Save These Instructions – The manufacturer suggests that these rules for safe operation be copied and posted
near the unit’s installation site. Safety should be stressed to all operators and potential operators of this equip-
ment.
Study these SAFETY RULES carefully before installing, operating or servicing this equipment. Become familiar
with this Owner’s Manual and with the unit. The generator can operate safely, efciently and reliably only if it
is properly installed, operated and maintained. Many accidents are caused by failing to follow simple and fun-
damental rules or precautions.
The manufacturer cannot anticipate every possible circumstance that might involve a hazard. The warnings in
this manual, and on tags and decals afxed to the unit are, therefore, not all-inclusive. If using a procedure,
work method or operating technique the manufacturer does not specically recommend, ensure that it is safe
for others. Also make sure the procedure, work method or operating technique utilized does not render the
generator unsafe.
5
18-SG02D1-1A-EN

• Despite the safety design features of this generator, operating this system improperly, and neglecting routine
maintenance can cause possible injury or death. Allow only certied and licensed personnel to install,
operate and maintain this system.
• Potentially lethal voltages are generated by these generators. Make sure all steps are taken to render the
machine safe before attempting to work or service the generator system.
• Parts of the generator are rotating at high speeds and are hot during operation. Exercise care near operating
generators.
• Installation must always comply with applicable local and state codes, standards, laws and regulations.
COMMON HAZARDS
• A running generator gives off carbon monoxide, and odorless, colorless poison gas. Breathing in carbon
monoxide can cause headaches, fatigue, dizziness, nausea, vomiting, confusion, fainting, seizures or death.
• The engine exhaust fumes contain carbon monoxide, which can be DEADLY. This dangerous gas, if inhaled in
sufcient concentrations, can cause unconsciousness or even death. Do NOT alter or add to the exhaust
system or do anything that might render the system unsafe or in noncompliance with applicable codes and
standards.
• Install a battery operated carbon monoxide alarm indoors, according to manufacturer’s instructions and
recommendations.
• Adequate, unobstructed ow of cooling and ventilating air is critical to correct generator operation. Do not
alter the installation or permit even partial blockage of ventilation, as this can seriously affect safe operation
of the generator. The generator MUST be installed and operated outdoors only.
• Keep hands, feet, clothing, etc., away from drive belts, fans, and other moving or hot parts. Never remove
any drive belt or fan guard while the unit is operating.
• When working on this equipment, remain alert at all times. Never work on the equipment when physically or
mentally fatigued.
• Inspect the generator regularly, and contact the nearest Dealer for parts needing repair or replacement.
• Before performing any maintenance on the generator, disconnect battery cables to prevent accidental start
up. Disconnect the cable from the battery post indicated by a NEGATIVE, NEG or (–) rst, then remove the
POSITIVE, POS or (+) cable. When reconnecting the cables, connect the POSITIVE cable rst, the NEGATIVE
cable last.
• Never use the generator or any of its parts as a step. Stepping on the unit can stress and break parts, and
may result in dangerous operating conditions from leaking exhaust gases, fuel leakage, oil leakage, etc.
NEVER STAND ON UNIT!
6
18-SG02D1-1A-EN

ELECTRICAL HAZARDS
• Generators covered by this manual produce dangerous electrical voltages and can cause
fatal electrical shock. Utility power delivers extremely high and dangerous voltages to the
transfer switch as does the standby generator when it is in operation. Avoid contact with bare
wires, terminals, connections, etc., while the unit is running. Ensure all appropriate covers,
guards and barriers are in place, secured and/ or locked before operating the generator. If work
must be done around an operating unit, stand on an insulated, dry surface to reduce shock
hazard. It is required that a wooden pallet and rubber mat placed on top, be used to, avoid
potential and possible shock.
• Do not handle any kind of electrical device while standing in water, while barefoot, or while
hands or feet are wet. DANGEROUS ELECTRICAL SHOCK MAY RESULT.
• The National Electrical Code (NEC) requires the frame and external electrically conductive parts
of the generator to be connected to an approved earth ground. Local electrical codes also may
require proper grounding of the generator electrical system. Refer and adhere to all state and local
electrical codes.
• After installing this home standby electrical system, the generator may crank and start at any
time without warning. When this occurs, load circuits are transferred to the STANDBY
(generator) power source. To prevent possible injury if such a start and transfer occur, always
set the generator’s AUTO/OFF/MANUAL switch to its OFF position before working on
equipment and remove the fuse from the generator control panel.
• In case of accident caused by electric shock, immediately shut down the source of electrical
power by pushing the emergency stop switch located on the outside of unit. Use a non-
conducting implement to push the emergency stop switch if possible. If it is not possible,
attempt to free the victim from the live conductor. AVOID DIRECT CONTACT WITH THE VICTIM.
Use a non-conducting item, such as a dry rope or wooden board, to free the victim from the live
conductor. If the victim is unconscious, apply rst aid and get immediate medical attention.
• Never wear jewelry when working on this equipment. Jewelry can conduct electricity resulting
in electric shock, or may get caught in moving components causing injury.
POSSIBLE FIRE HAZARDS!
• For re safety, the generator must be installed and maintained properly. Installation must always
comply with applicable codes, standards, laws and regulations. Adhere strictly to local, state and
national electrical and building codes. Comply with all regulations the Occupational Safety and
Health Administration (OSHA) has established. Also, ensure that the generator is installed in
accordance with the manufacturer’s instructions and recommendations. Following proper
installation, do not alter an installation that might render the unit in noncompliance with the
aforementioned codes, standards, laws and regulations.
• Keep a re extinguisher near the generator at all times. Extinguishers rated “ABC” by the
National Fire Protection Association are appropriate for use on the standby electrical system.
Keep the extinguisher properly charged and be familiar with its use. Consult the local re
department with any questions pertaining to re extinguishers.
7
18-SG02D1-1A-EN

POSSIBLE EXPLOSION HAZARDS!
• Do not smoke around the generator. Wipe up any fuel or oil spills immediately. Ensure that no
combustible materials are left in the generator compartment, or on or near the generator, as
FIRE or EXPLOSION may result. Keep area surrounding the generator clean and free from
debris.
• Gaseous uids such as natural gas (NG) and liquid propane gas (LPG) are extremely
EXPLOSIVE. Install the fuel supply system according to applicable fuel-gas codes. Before
placing the standby electric system into service, fuel system lines must be properly purged and
leak tested according to applicable code. After installation, inspect the fuel system periodically
for leaks. Make sure there are no gas leaks, use digital gas detector.
STANDARDS INDEX
In the absence of pertinent standards, codes, regulations and laws, the published information listed
below may be used as installation guide for this equipment.
• NFPA No. 37, STATIONARY COMBUSTION ENGINES AND GAS TURBINES, available from the
National Fire Protection Association, 470 Atlantic Avenue, Boston, MA 02210.
• NFPA No. 76A, ESSENTIAL ELECTRICAL SYSTEMS FOR HEALTH CARE FACILITIES, available
same as Item 1.
• NFPA No. 54, NATIONAL FUEL GAS CODE, available same as Item 1.
• NFPA No. 58, AMERICAN NATIONAL STANDARD FOR STORAGE AND HANDLING OF
LIQUEFIED PETROLEUM GAS, available same as Item 1.
• NFPA No. 70, NFPA HANDBOOK OF NATIONAL ELECTRIC CODE, available same as Item 1.
• Article X, NATIONAL BUILDING CODE, available from the American Insurance Association, 85
John Street, New York, N.Y. 10038.
• AGRICULTURAL WIRING HANDBOOK, available from the Food and Energy Council, 909
University Avenue, Columbia, MO 65201.
• ASAE EP-3634, INSTALLATION AND MAINTENANCE OF FARM STANDBY ELECTRICAL
SYSTEMS, available from the American Society of Agricultural Engineers, 2950 Niles Road,
St. Joseph, MI 49085.
• NFPA No. 30, FLAMMABLE AND COMBUSTIBLE LIQUIDS CODE, available same as Item 1.
8
18-SG02D1-1A-EN

Only qualied electricians or contractors should attempt such installations, which must comply strictly with
applicable local and state codes, standards and regulations.
Uncrating and Initial Inspection
After uncrating, carefully inspect the contents for any visible damage. Do not tilt the machine more than 30
degrees. Try to avoid transporting on uneven ground. Violent shaking and vibration during transportation may
affect the unit.
• This standby generator set is ready for installation with a weather protective enclosure that is
intended for outdoor installation use only!
• This ETL listed standby generator set may be packaged with an automatic transfer switch
(ATS).
• This ETL listed, 2-pole switch is rated at 200 AC amperes at 250 volts maximum. The 200 Amp
transfer switch is rated for indoor or outdoor use.
If this generator is used to power electrical load circuits normally powered by a utility power source, it is
required by code to install a transfer switch. The transfer switch must effectively isolate the electrical system
from the utility distribution system when the generator is operating (NEC 700, 701 & 702). Failure to isolate an
electrical system by such means will result in damage to the generator and also may result in injury or death to
utility power workers due to backfeed of electrical energy.
If any loss or damage is noted at time of delivery, have the person(s) making the delivery, note all damage on
the freight bill or afx their signature under the consignor’s memo of loss or damage.
If a loss or damage is noted after delivery, separate the damaged materials and contact the carrier for claim
procedures.
“Concealed damage” is understood to mean damage to the contents of a package that is not in evidence at the
time of delivery, but is discovered later.
To properly open the cover, press down on the center top lip and release the latch with key. If pressure is not
applied from the top, the roof may appear stuck. Always verify that the lock is released before attempting to
lift the roof.
NEC REQUIREMENTS
Local code enforcement may require that AFCIs (Arc Fault Circuit Interrupters) be incorporated into the trans-
fer switch distribution panel. The Transfer Switch provided will accept AFCI’s.
Siemens P/N. Q115AF - 15A or Q120AF - 20A can be obtained from a local electrical wholesaler and will sim-
ply replace any of the single pole circuit breakers supplied in the Transfer Switch distribution panel.
9
18-SG02D1-1A-EN

First Step!
Contact your local building inspector or City Hall to be aware of all federal, state and local codes that could impact
the installation. Secure all required permits before starting the project.
Carefully read and follow all procedures and safety precautions detailed in the installation guide. If any portion
of the installation manual, technical manual or other factory-supplied documents is not completely under-
stood, contact your local authorized dealer for assistance.
It is extremely important to comply with all relevant NEC, NFPA and OSHA standards as well as all federal,
state and local building and electrical codes.
As with any generator, this unit must be installed in accordance with current NFPA 37 and NFPA 70 standards
as well as any other federal, state, and local codes for minimum distances from other structures. As a minimum
distance, use 24 inches from home or building.
GENERATOR LOCATION
AND SITE PREPRATION
1. Place concrete pad as close as possible to both breaker box and fuel
supply. IMPORTANT! Pre-wired control harness located inside
ATS is 9 feet long. Call for longer 20ft, 50ft and 80ft harnesses.
Leave adequate room around the area for service access. You must
CHECK LOCAL CODE for proper distance between generator and
structure! Check local code, and place high enough to keep rising
water from reaching the generator. Select an open space that will provide adequate and unobstructed air-
ow.
Electrical interference with such items as, cell phones, computers, TV’s and other electrical devices and
equipment can occur when standing close or next to running standby system.
10
18-SG02D1-1A-EN

2. Place the unit so air vents won’t become clogged with leaves, grass, snow or debris. Make sure exhaust
fumes will not enter the building through eaves, windows, ventilation fans or other air intakes. Build a
rectangular form out of 2”X6 wooden studs. Dig an area approximately 4 inches deep and about 4 to 6
inches, longer and wider than the footprint of the generator. Place wooden frame in hole leaving
approximately 2” above ground. Place polyurethane lm in the bottom and ll with pea gravel or crushed
stone along with rebar reinforcement. Level and pack gravel or stone evenly. The concrete pad is now ready
to be poured. When pouring concrete, set grade 5 anchor bolts in wet concrete based on the foot print of
generator lining up with holes on the base of the unit. Once complete level and nish concrete pad and
allow to set for 48 hours.
3. Inspect packaging and generator for exterior shipping damage. Remove all packaging material.
4. Make sure the lifting equipment to be used has sufcient capacity to safely handle the weight of the
generator (TR20REG-DB created gross weight 850lbs). Use nylon lifting straps and connect them to the
lifting eyebolts on each corner of the base frame to avoid damage to the enclosure (lifting eyebolts
included) Make sure straps are lifting straight upward and do not pinch lid! Set generator into place and
anchor tightly to concrete pad using grade 5 hardware.
5. When using forklift, you have to ensure that forks are wide enough to lift the unit from the bottom. Fully
insert the fork legs completely through the bottom of the machine. Pay attention to the machine
components avoiding damage from the bottom, lift and set at on concrete pad. Avoid tilting and dropping
generator. Handle with care.
6. Center the generator onto pad so that there is equal distance between the generator on all four sides,
making sure, the generator is level within 1/16” inch.
7. IMPORTANT! Connect an approved ground strap to the grounding lug on the base of frame and to an
approved earth ground or grounding rod as specied by local code and regulations.
DO THIS STEP FIRST BEFORE ANY OTHER
INSTALLATION PROCEDURE IS PERFORMED!
11
18-SG02D1-1A-EN
than 5 feet than 5 feet

Engine Prestart and Preparation
All necessary installation and maintenance must be conducted and performed by authorized licensed person-
nel.
Before starting engine for the rst time, engine oil and radiator coolant must be added. An initial uid inspec-
tion and pre-check is recommended before starting genset for the rst time or when unit has been in opera-
tion for over 20 hours. It can also be used as a quick review of all uids. Check all of the following items before
running system for the rst time.
1. Lubrication System
IMPORTANT NOTE! Unit is not shipped with engine oil or coolant from Factory!!
After installment of generator, ll engine with recommended oil weight based on ambient temperature shown
below and add radiator coolant. Prior to initial startup, replace all service panels and close lid. Start engine
and allow 10 minutes for system to warmup. After this has been performed remove service panels rise lid and
check for any leaks or drips. If found, tighten lose hoses, clamps or plugs. Recheck all uid levels and top off
as necessary.
Engine Oil. The unit is not shipped with oil from factory!!! Only use high-quality Synthetic motor detergent oil
“Classied with SAE viscosity ratings. Fill with the recommended amount of oil as specied.
Overlling or under lling can cause damage to the engine. Use the following recommended or similar
type engine oil.
Temperature
Mobil 1 Synthetic Oil or equivalent recommended
Below 32° F (0° C) SAE 0W-40
32° to 80° F (-1° to 27° C) SAE 10W-40
Above 80° F (27° C) SAE 15W-50
• Place funnel in engine oil inlet.
• First time operation will require 4 liters or (4.25qts) of oil
• Check oil gauge dipstick regularly, oil level should be kept between top and bottom lines, at all
times. It is preferred to be at the top mark but not over.
Fuel Oil Level Mark
Engine Oil
12
18-SG02D1-1A-EN

2. Cooling System
Use only automotive grade antifreeze and distilled water in cooling
system. Do not use tap water, or water that contains salt or alkalis!
Using non-distilled water creates scale in the radiator, causing
corrosion and premature wear.
You must check and maintain all fuel, lubricant and coolant levels. Not doing so will accelerate and
shorten the life of the standby system. Attention must be paid to all uid systems and annually
serviced by an authorized service provider or call 844-367-5660 for assistance.
Converting from Natural Gas (NG) to Liquid Propane Gas (LPG)
Most generators are congured for natural gas operation at the factory. Switching over to LP Vapor
is a simple procedure.
Fuel Conversion
These fuels are ammable and explosive materials. Do not operate
around open ames.
1. When using LPG as fuel:
• Prior to each operation, you should check various components and handle any loose fasteners.
Check if there’s any fuel leakage around pipes and connections by utilizing a digital gas leak
detector (soapy water can be used). Service any leakage immediately!
• When changing fuel supply, close gas valve supply and allow fuel in the fuel line to burn off.
Then turn off main power breaker on standby control panel.
• After fuel supply conversion from LPG to NG replacement, use gas leak detector for any
leakage.
• Periodically check the pressure reducing valve, if the solenoid valve sealing pad is deformed.
You must rst close the manual valve on the fuel supply. Then start the engine. Use up the
gas in the fuel line before you remove the solenoid valve and other parts, if not, this will have a
greater risk of high-pressure or vapor lock and is not safe.
• The Pressure reducer is an important component of the gas supply system. You should pay
particular attention to its operation. If leakage occurs, the unit should be replaced. Periodically
remove the pollution discharge plug on the pressure reducer. Drain off the oil and
condensation. If the obstruction is not drained off, it can seriously affect its performance.
2. When using NG as fuel:
• Before each operation, you should check the integrity of the various components and handle
any loose fasteners immediately! Check if there’s any leakage from the fuel lines, pipes and
connections (soapy water can be used). Take care of leakage ASAP!
• Periodically check the pressure reducer, if the solenoid valve sealing pad is deformed, replace.
• Periodically check to see if any visible signs of wear, aging or leak detection are observed,
repair or replace. Soapy water can be used to detect leaks around connections.
• During maintenance of the gas line, the valve must be closed prior to repair.
• When the engine is operating, especially at high load, it should run 1-3 min in no load state,
to allow the engine to cool. Do not touch hot engine or electrical parts. The engine and
exhaust system components become extremely hot during operation. Make sure unit is
disconnected from main power and main gas lines before converting.
13
18-SG02D1-1A-EN

components become extremely hot during operation. Make sure unit is disconnected from main
power and main gas lines before converting
Two fuel connections on the fuel block allow eld conversion between natural gas (NG) and Liquid Propane
(LPG). The fuel metering valves are factory-set and sealed to provide the best possible hot and cold starting.
Use the following procedure to convert fuel from one type to another.
Natural Gas (NG) and Liquid Propane (LPG) Conversion
• Use a pressure reducing valve to reduce LPG pressure supply.
• Pushing the button as attached pictures show below to the natural
gas or LP vapor per the fuel which you want to use. Push in for
LPG and out for NG.
LPG = button in
Liquid propane (LP Vapor) NG = button out
In engines set up to run on Liquid propane, please check the fuel
supply pressure, lower or higher pressure range will result in
equipment failure. Inlet pressure 1.7kPa to 3.5kPa, and gas line
should be no longer than 16 feet or 5 meters, the inner diameter shall
not be less than (0.63”) or 16mm.
Pressure Relief Valve
Pressure Meter
INSTALLING & CONNECTING GAS LINES
1. Natural gas and LP Vapors are highly explosive
substances; you must follow all safety, codes,
standards and regulations.
Use a certied plumber or licensed contractor familiar with
local codes to make all gas line connections. Always use
AGA-approved gas pipe and a quality pipe sealant or joint
compound. Verify the capacity of the natural gas meter or
the LP tank in regards to providing sufcient fuel for both
the generator and other operating appliances.
2. Most all applications will require an external manual shutoff valve on the fuel line.
3. Only use UL Listed or AGA-approved exible fuel line in accordance with local regulations, when connecting
the gas line to the generator. The section of exible fuel line is to ensure that vibration from the generator
does not create a gas leak at a connection point. Because of this, it’s important the fuel line be installed
with as few connection points and bends as possible.
4. Do not bend exible fuel line to avoid using an elbow. Bending the exible fuel line decreases its ability to
absorb vibrations and defeats the pur p o s e . I t a l s o p revents smooth fuel ow.
5. After checking for leaks, check the gas pressure at the REGULATOR to make sure there’s enough gas
pressure for generator operation. See Owner’s Manual for fuel pressure specications.
If not within these limits, contact your local gas supplier.
6. After checking and testing gas pressure regulator, close the main shutoff valve.
LP Regulator
14
18-SG02D1-1A-EN

EXTERNAL POWER CONNECTIONS & WIRING DIAGRAM
15
18-SG02D1-1A-EN

1. Locate area where electrical conduit will enter structure and drill 1.75” hole. Feed conduit through hole,
sealing both exterior and interior with caulk.
2. Seal the hole with silicone caulk. Don’t forget to caulk the hole inside the house as well.
3. Remove knockout in the back of connection box, feed wires through the back of the box and secure the
conduit with lock nut.
4. Mount connection box over whole in structure. Seal around all sides with weather proof caulk.
5. Connect all wires to the lugs inside connection box. Connect, black to black, red to red, white to white.
Connect ground wire to the ground lug and then connect breaker connections.
6. Close cover and lock connection box.
Initial battery connection and controller activation
1. When battery power is applied to the generator and the power switch is in
the on position, the digital controller will light up. However, the generator
controller still needs to be activated and programed before it will automatically run in the event of a power
outage.
2. Battery Connection - connect positive red lead wire rst (+) and then negative lead black wire (-) to
matching positive (+) and negative (-) terminals on battery. Connect negative (-) lead last!
3. Programing the generator is a one-time process that is guided by the controller screen prompts. Once the
product is activated, the controller screen will not prompt you again, even if you disconnect generator
battery. See SmartGen Owner’s Manual for programing
4. An “Activation Password” is required to unlock the controller for basic programing (date/time/delay/
exercise) and to enter into full feature parameter settings. Please contact (800)-###-#### with your Serial
Number to receive activation password and register your liquid cooled system for warranty.
5. IMPORTANT! The generator will not start and circuit board damage can occur if battery is connected in
reverse.
(Before initial use the maintenance free battery should be tested for voltage, if >12.6V, it can be installed and
used immediately; After rst time use or <12.6V it should be re-charge before use.)
When replacing battery, always use the same size battery and number type: 12V, Lead-acid battery.
CAUTION – Do not dispose of battery or batteries in a re. Batteries are capable of exploding.
CAUTION – Do not open or mutilate the battery. Released electrolytes have been known to be harmful to
skin, eyes and to be toxic.
CAUTION – A battery presents a risk of electrical shock and high short circuit current. The following
precautions are to be observed when working on batteries:
1. Remove watches, rings, or other metal objects.
2. Use tools with insulated handles.
3. Wear rubber gloves, apron, eye protection and boots.
4. Do not lay tools or metal parts on top of batteries.
Make sure the generator set is grounded. Check grounding strap to make sure the generator set ground
terminal is securely grounded to a grounding rod.
16
18-SG02D1-1A-EN

Negative Positive
For rst time use, you should operate according to these steps:
• Installing battery - take off red cap on positive battery terminal.
• Use a multi-meter to check voltage of battery before installing and
starting. If reading is below 12.6V, recharge battery.
• Connect positive terminal lead. Tighten terminal lead nut on battery
and place red rubber cover over terminal.
• Follow the same steps for negative or black battery lead, then place
rubber cover over terminal.
The battery represents a risk of high short circuit
current. When working on the battery, always remove watches, rings or other metal
objects, and only use tools that have insulated handles!
Installing, Servicing or Exchanging the Battery should be performed or supervised by knowledgeable
personnel. Battery connection or exchange requires precautions and protective gear. Always wear face and
eye protection with electrical rubber gloves, boots and battery apron. Keep unauthorized personnel away from
battery.
GENERATOR CONNECTION
If the switch was purchased separately from the generator, a Seal-Tite electrical whip will need to be connect-
ed to the generator. To complete the wiring, run ¾” conduit for the power leads and control wires from the
external connection box to the generator.
1. Feed the wires through the back of the generator and secure the conduit with lock nut.
2. Run power leads through the strain relief hole provided.
3. The circuit breaker and control panel are located under the top lid. Unlock and lift open to
gain access.
4. Remove the screws on the control panel cover to gain access to the connection area.
5. Feed the wires through the back of the generator and secure the conduit with locking nut.
6. Run power leads through the strain relief provided.
7. The circuit breaker is mounted inside next to the generator digital controller.
8. Secure circuit connections
9. Users must connect the GND wire to the grounding lug and tighten.
10. The GND wire should be the same size but not smaller than the load wire.
11. Connect according to the following connector bar from left side to right side.
12. Connect according to the following type due to different Models.
Use insulated and certied wire/cable hose to connect the output hole. And the AC output wires/cable, and
ATS control wires shall be separated by an insulation bushing (min 1.0mm). Tighten all wires before operating
generator set, or it will cause short circuit failure, do not connect generator sets together, damage may occur
if wires are connected in reverse. The AC output wires shall be at least 3AWG, and temperature rating shall not
less than 75°C, and copper wire.
17
18-SG02D1-1A-EN

Operation
Stop/ Reset
Stop running generator in Auto/Manual mode; Lamp test (press
at least 3 seconds); Reset alarm if alarm occurs; During stopping
process, press this button again to stop generator immediately.
Start Start genset in Manual/Test mode.
Manual Mode
Pressing this key will set the module into Manual mode. Press-
ing and (or ) simultaneously can adjust LCD contrast.
Auto Mode Pressing this key will set the module into AUTO mode.
Set/Conrm
Pressing this key will view set menu; In parameter setting inter-
face, pressing this key will shift cursor or conrm setting value.
Up/Increase
Scrolls the screen up; Shift the cursor up or increase the set
value in parameter setting menu.
Down/Decrease
Scrolls the screen down; Shift the cursor down or decrease the
set value in parameter setting menu.
INDICATOR LIGHTS
Alarm
Gens Normal
Indicator
Stop Indicator Close Gens
Stop
Manual Manual Auto Auto Start Set
Indicator Indicator
18
18-SG02D1-1A-EN

AUTO START/STOP OPERATION
Auto mode is selected by pressing the button; a LED beside the button will illuminate to conrm the operation.
Manual Start Sequence:
1. MANUAL START: Manual mode is selected by pressing the button; a LED beside the button will illuminate
to conrm the operation; then press button to start the genset; it will detect crank disconnect condition
and generator accelerates to high-speed running automatically. With high temperature, low oil pressure, over
speed and abnormal voltage during generator operation, controller will protect genset and stop quickly. (please
refer to No.3~8 of Automatic Start Sequence in controller manual for detailed procedures.) The controller will
send Close Gen signal after the genset is running normally.
2. MANUAL STOP: Press to stop the running generator. (please refer to No.2~6 of Automatic Stop Sequence
for detailed procedures).
Automatic Start Sequence:
1. When “Remote Start” is active, “Start Delay” timer is initiated;
2. “Start Delay” countdown will be displayed on LCD;
3. When start delay is over, preheat relay energizes (if congured), “preheat delay XX s”
information will be displayed on LCD;
4. After the above delay, the Fuel Relay is energized, and then one second later, the throttle of the
driving stepper motor will rotate as the pre-set angle and then the Start Relay is engaged. The
engine is cranked for a pre-set time. If the engine fails to re during this cranking attempt then the
fuel relay and start relay are disengaged for the pre-set rest period; “crank rest time” begins and
wait for the next crank attempt.
5. Should this start sequence continue beyond the set number of attempts, the start sequence will be
terminated, the fourth line of LCD display will be highlighted with black and Fail to Start fault will
be displayed.
6. In case of successful crank attempt, the “Safety On” timer is activated and the throttle of the
driving stepper motor will govern the speed, allowing Low Oil Pressure, High Temperature, Under
speed, Charge Alternator Failure and auxiliary inputs (be congured) to stabilise without triggering
the fault. As soon as this delay is over, “start idle” delay is initiated (if congured).
7. During “start idle” delay, under speed, under frequency, under voltage alarms are inhibited. When
this delay is over, “warming up” delay is initiated (if congured).
8. After the “warming up” delay, if generator status is normal, its indicator will be illuminated. If
generator voltage and frequency have reached on-load requirements, then the generator close
relay will be energized; genset will take load; generator power indicator will illuminate and
generator will enter into Normal Running status. If voltage or frequency is abnormal, the controller
will initiate shutdown alarm (alarm information will be displayed on LCD).
Automatic Stop Sequence:
1. When the “Remote Start” signal is removed, the Stop Delay is initiated.
2. Once this “stop delay” has expired, the Generator Breaker will open and the “Cooling Delay” is
then initiated. Moreover, the generator indicator is extinguished.
3. During “Stop Idle” Delay (if congured), idle relay is energized.
4. “ETS Solenoid Hold” delay begins, ETS relay is energized while fuel relay is de-energized.
5. "Fail to Stop Delay" begins, complete stop is detected automatically.
6. When generator is stop completely, generator is placed into its standby mode. Otherwise, fail
19
18-SG02D1-1A-EN

to stop alarm is initiated and the corresponding alarm information is displayed on LCD.
7. Now connect the red and black power leads to the circuit breaker. Since this is a single-phase application, it does
not matter which wire is connected to which lug.
8. Connect the green equipment ground wire to the ground bus bar and torque to 35 inch lbs. The torque values
are: • 10-14 AWG = 35 in/lbs. • 8 AWG = 40 in/lbs. • 4-6 AWG = 45 in/lbs.
9. Connect the white neutral wire to the neutral bus bar and torque to 35 inch lbs. The torque values are:
• 10-14 AWG = 35 in/lbs. • 8 AWG = 40 in/lbs. •4-6 AWG = 45 in/lbs.
10. IMPORTANT NOTE: Connect the control wires to the correct terminals. In order to maintain separation of
circuits, the DC control wires must be separated from the AC control wires. Wrap insulation over the AC wires OR
the DC wires, but not both, from the wire landing area to the outside of the generator. Use cable lock to hold
the insulation in place. An improperly connected control wire can damage the generator control board.
Parameter Settings
Make sure power is on before starting the controller, then press to enter into the parameters setting
menu, see g 1 below:
Fig. 1
Parameters Setting
When entering password interface, input correct password (default: 1234) can set all of the parameter items in
Form 1. If there is need to set more parameters (e.g. Voltage Calibration), please contact the factory.
CAUTION: Please change the controller parameters when generator is in standby mode only
(e. g. Crank disconnect conditions selection, auxiliary input, auxiliary output, various delay),
otherwise, shutdown and other abnormal conditions may happen.
CAUTION: Over voltage set value must be higher than under voltage set value, otherwise
over voltage and under voltage condition may occur simultaneously.
CAUTION: Over speed set value must be higher than under speed set value, otherwise over
speed and under speed condition may occur simultaneously.
CAUTION: Please set the generator frequency value as low as possible when cranking, in
order to make the starter is separated quickly as soon as possible.
1. Set Parameters
2. Information
3. Language
4. Time and Date
20
18-SG02D1-1A-EN
/