Name Status Indication
Note: If you are using a computer that cannot run the mini CD, please refer to Method 1 for configuration.
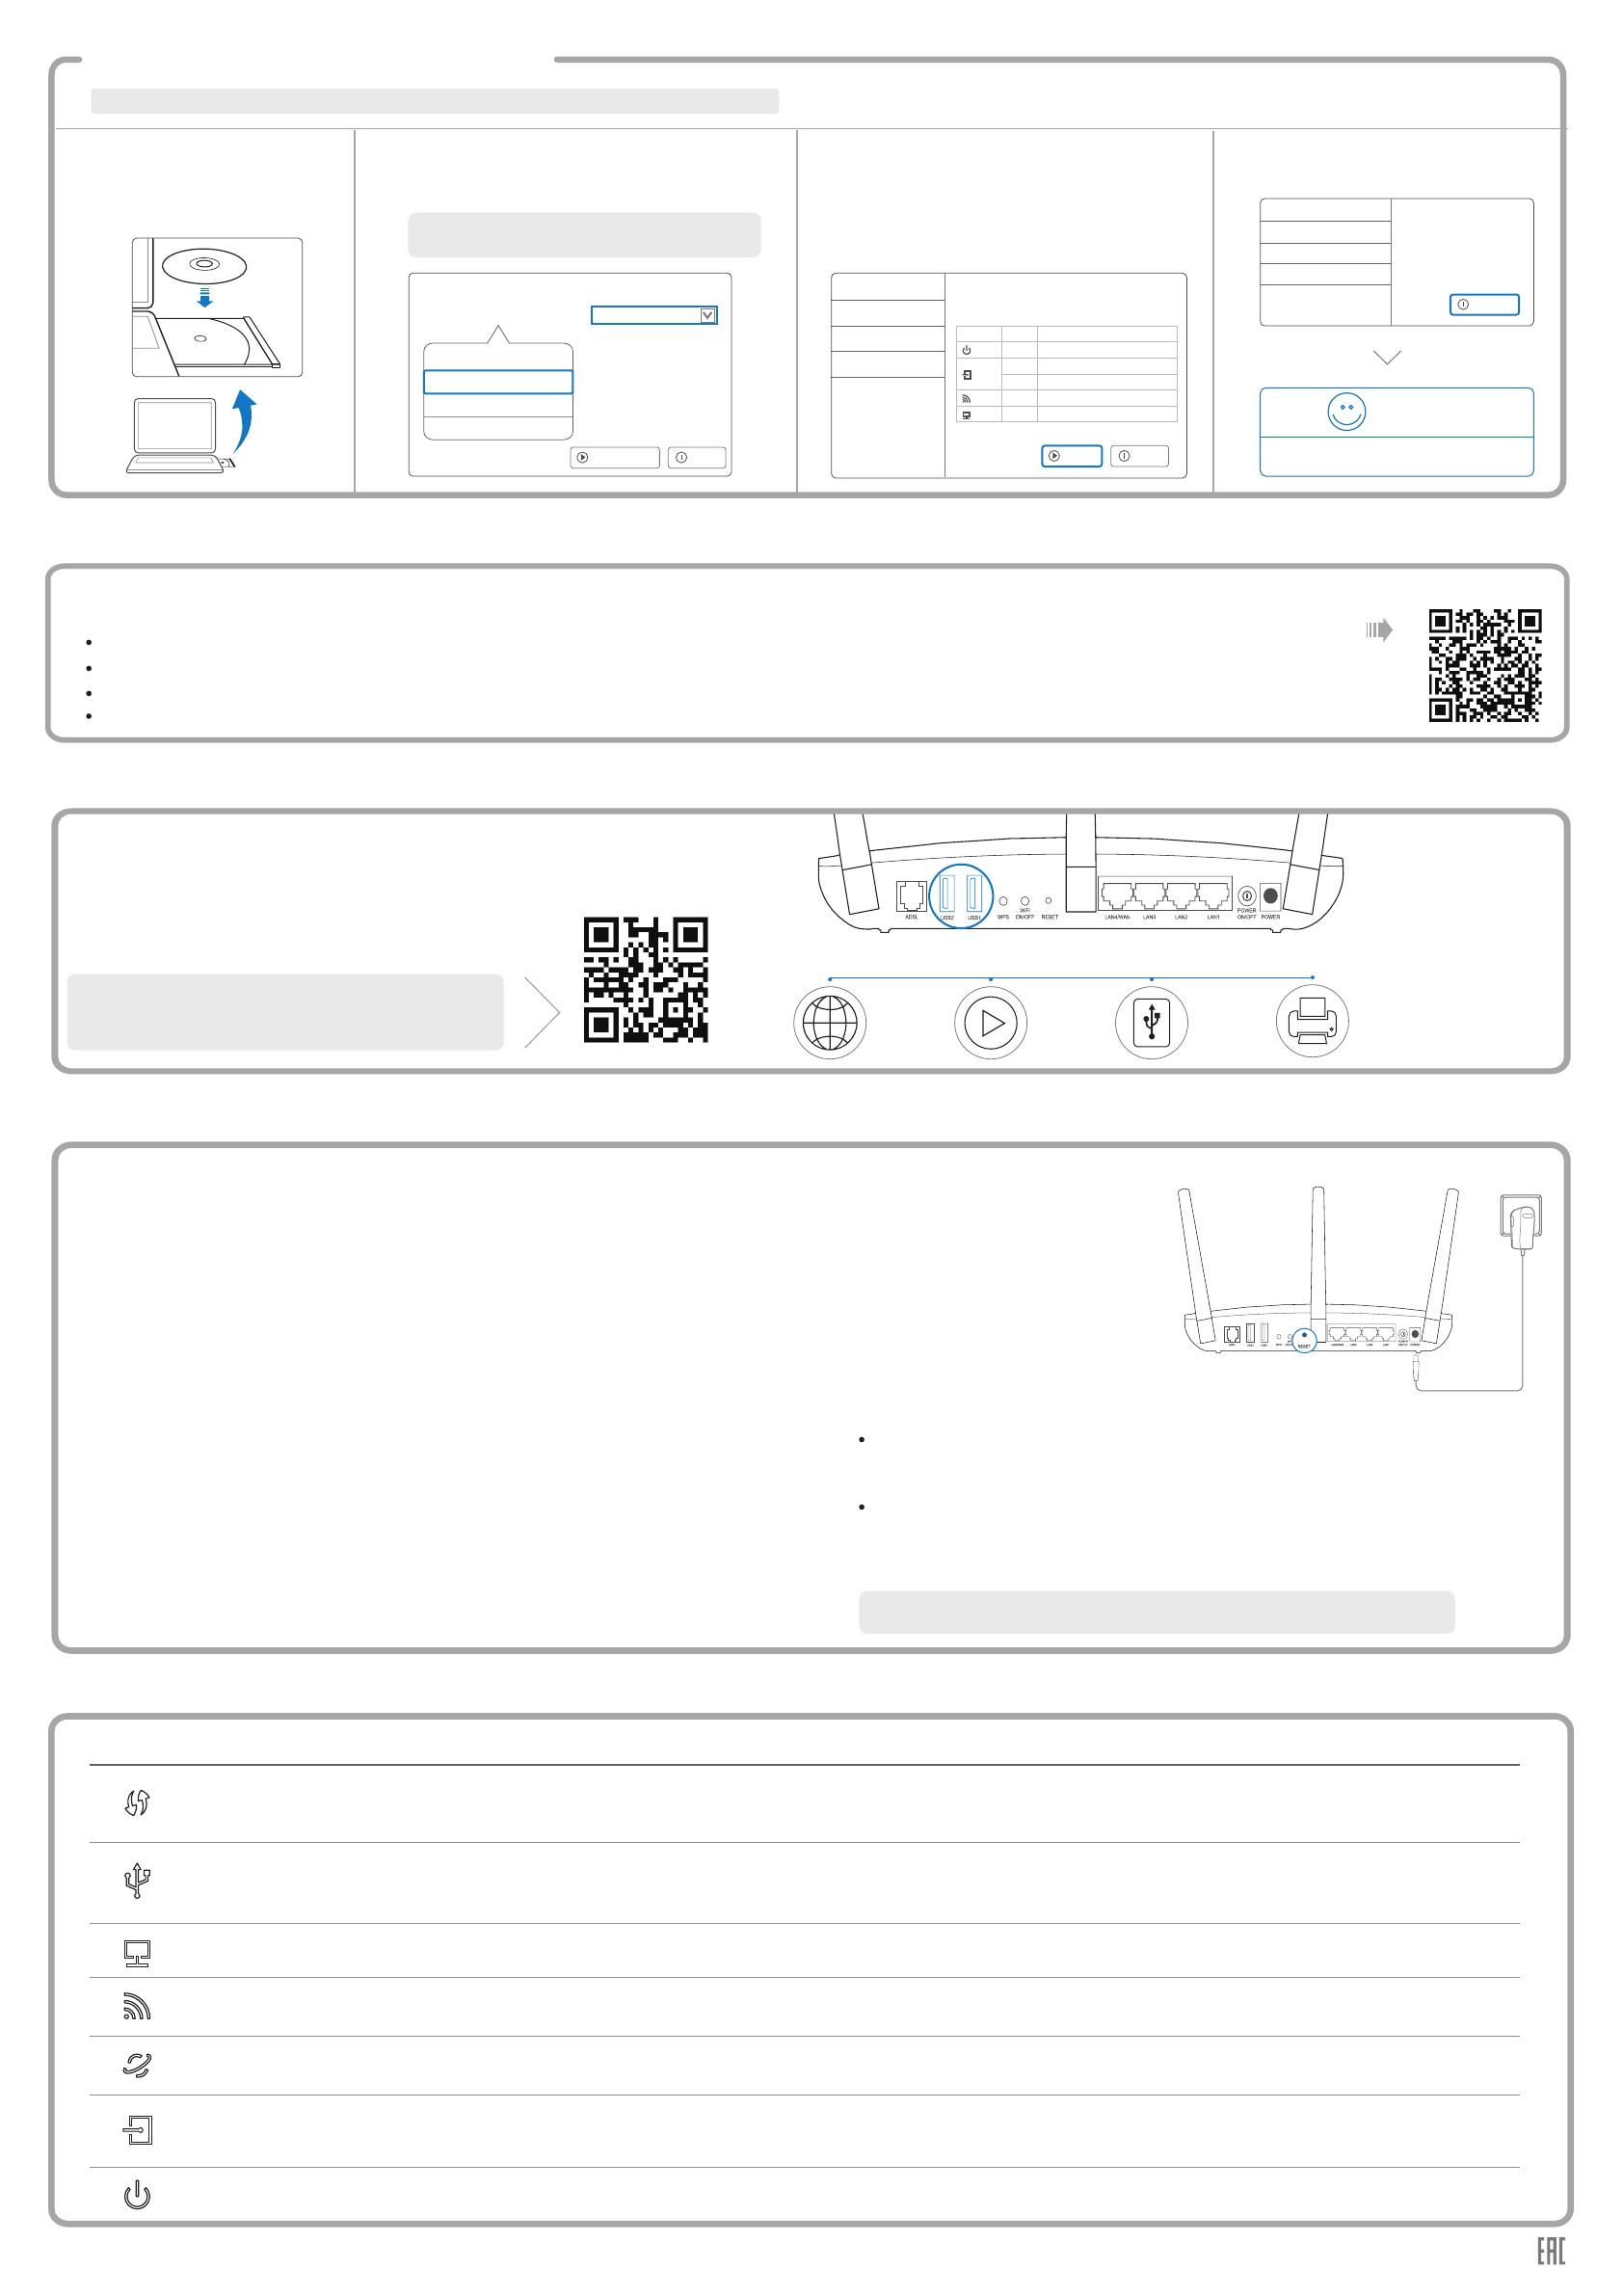
Via CD Setup Wizard
Method 2
The USB port can be used for media sharing, storage
sharing and print sharing across your local network.
You can also set up the FTP server to access your
files remotely by connecting to the Internet.
USB sharing port
Remote
Access via
FTP Server
Media
Sharing
Local
Storage
Sharing
Printer
Sharing
Frequently Asked Questions (FAQ)
LED Indicators
Note: If the main page does not display on your computer,
browse the files on the CD and double click Autorun.exe.
Choose your language and select Archer D7.
Then click Start Setup. Follow the pop-up
flash video to connect your devices.
Please check the following LEDs. Then
click NEXT and follow the step-by-step
instructions.
2
Insert the TP-LINK Resource
CD into the CD-ROM drive.
1
Click FINISH to complete the setup.
43
USB Features
Archer D7
Start Setup
User Guide
Printer Sharing Setup
Browse CD EXIT
Choose your language:
English
Enjoy!
Now your wired and wireless devices
can connect to the Internet !
FINISH
Welcome
Install ADSL Device
Configure ADSL Device
Confirm Settings
Congratulations!
Q1. What can I do if the login window does not appear?
A1. If the computer is set to a static or fixed IP address, change it to obtain an IP address
automatically from the modem router.
A2. Verify http://tplinkmodem.net is correctly entered in the web browser and press Enter.
A3. Use another web browser and try again.
A4. Reboot your modem router and try again.
A5. Disable the network adapter used currently then enable it again.
Q2. What can I do if I cannot access the Internet?
A1. Check your cables and make sure they are all plugged in correctly, including the
telephone line, Ethernet cables and power adapter.
A2. Check to see if you can log on to the Web-Management page of the modem router.
The default address of the Web-Management page is http://tplinkmodem.net. If you
can, try the following steps. (If you can not, please set your computer to obtain an IP
address automatically from the modem router and then try to access the Internet
again.)
A3. Consult your ISP and make sure all the VPI/VCI, Connection Type, account
username and password are correct. If they are not, please replace them with the
correct settings and try again.
A4. If you still cannot access the Internet, please restore your modem router to its
factory default settings and reconfigure your modem router following the instructions
in this QIG.
A5. Please contact our Technical Support if the problem still exists.
A1. With the modem router in the Power On
mode, press and hold down the RESET
Button on the rear panel of the modem
router for approximately 8 seconds.
Q3. How do I restore the modem router to its factory default settings?
RESET Button Press & Hold 8 seconds
A2. Log in Web Management page of the
modem router, and go to System
Tools->Factory Defaults, click Restore,
then wait until the progress bar loading
finished.
Q4. What can I do if I forget my password?
Web Management page password:
Restore the modem router to its factory default settings and then use the default User Name ‘admin’ and
Password ‘admin’ to log in.
Wireless Network password:
A1.The factory default password can be found on the product label printed on the bottom of the modem router.
Note: If your questions are not answered here, please refer to http://www.tp-link.com/en/support/faq
and click Contact Technical Support for further assistance.
A2. If you have changed your password, log on to the modem router’s Web Management page, go to
Wireless->Wireless Security to obtain or reset your password.
Off
(USB)
(LAN)
(WPS)
(Internet)
(Wireless)
(Power)
On
Off
On
On/Off
The wireless function is disabled.
Slow Flash
No USB device is plugged in to the USB port.
The USB device is identified and ready to use.
Flash
At least one USB is receiving or transmitting data.
The wireless 2.4GHz/5GHz band is working properly.
Off
On
No LAN port is connected.
At least one LAN port is connected.
A wireless device is trying to connect to the network via WPS. This process may take up to 2 minutes.
It turns on when a wireless device has been successfully connected to the network via WPS.
After about 5 minutes, the WPS LED will turn off.
On
(ADSL)
Flash
Off
On
Off
The ADSL negotiation is in progress.
ADSL synchronization fails.
ADSL line is synchronized and ready to use.
Off
On
There is no successful Internet connection or the modem router is operating in Bridge mode.
The network is available with a successful Internet connection.
Power is off.
System start-up complete.
NEXT EXIT
Welcome
Install ADSL Device
Configure ADSL Device
Confirm Settings
LED Indicator Description
Name Status
on
on
on Wireless is enabled.
At least one LAN port is connected.
System start-up complete.
on
Flash
Indication
(Power)
(ADSL)
The ADSL negotiation is in progress.
ADSL line is synchronized and ready to use.
(LAN)
(WLAN)
After connecting to the Internet via Web Browser or via CD Setup Wizard
TP-LINK's Tether App lets you manage the modem router on smart devices. You can:
View the information about clients.
Use Parental Control to limit kid's access to the Internet.
Block or Unblock client's access to the Internet.
Configure some basic settings for the modem router.
Tether App
Scan the QR code and download the TP-LINK Tether App from App
Store or Google Play.
1
2
3
Ensure your smart device is wirelessly connected to the modem router.
Launch the Tether App, and enjoy the easy management of the modem router.
Then, how to start?
Note: To learn more about the USB features, please visit
http://tp-link.com/app/usb, retrieve Resource CD or simply
scan the QR code.

