Page is loading ...

Vista Remote 2
SINGLE USER REMOTE KVM ACCESS OVER IP
10707 Stancliff Road
Houston, Texas 7709
Phone: (281) 933-7673
www.rose.com
INSTALLATION
AND
OPERATIONS MANUAL


LIMITED WARRANTY
Copyright Rose Electronics 2008. All rights reserved.
No part of this manual may be reproduced, stored in a retrieval system, or transcribed in any form or any
means, electronic or mechanical, including photocopying and recording, without the prior written permission
of Rose Electronics.
Rose Electronics Part # MAN-VR2
Printed In the United States of America - Revision 1.3
Rose Electronics
®
warrants Vista Remote 2™ to be in good working order for one year from the
date of purchase from Rose Electronics or an authorized dealer. Should this product fail to be
in good working order at any time during this one-year warranty period, Rose Electronics will, at
its option, repair or replace the Unit as set forth below. Repair parts and replacement units will
be either reconditioned or new. All replaced parts become the property of Rose Electronics.
This limited warranty does not include service to repair damage to the Unit resulting from
accident, disaster, abuse, or unauthorized modification of the Unit, including static discharge
and power surges.
Limited Warranty service may be obtained by delivering this unit during the one-year warranty
period to Rose Electronics or an authorized repair center providing a proof of purchase date. If
this Unit is delivered by mail, you agree to insure the Unit or assume the risk of loss or damage
in transit, to prepay shipping charges to the warranty service location, and to use the original
shipping container or its equivalent. You must call for a return authorization number first. Under
no circumstances will a unit be accepted without a return authorization number. Contact an
authorized repair center or Rose Electronics for further information.
ALL EXPRESS AND IMPLIED WARRANTIES FOR THIS PRODUCT INCLUDING THE
WARRANTIES OF MERCHANTABILITY AND FITNESS FOR A PARTICULAR PURPOSE,
ARE LIMITED IN DURATION TO A PERIOD OF ONE YEAR FROM THE DATE OF
PURCHASE, AND NO WARRANTIES, WHETHER EXPRESS OR IMPLIED, WILL APPLY
AFTER THIS PERIOD. SOME STATES DO NOT ALLOW LIMITATIONS ON HOW LONG AN
IMPLIED WARRANTY LASTS, SO THE ABOVE LIMITATION MAY NOT APPLY TO YOU.
IF THIS PRODUCT IS NOT IN GOOD WORKING ORDER AS WARRANTIED ABOVE, YOUR
SOLE REMEDY SHALL BE REPLACEMENT OR REPAIR AS PROVIDED ABOVE. IN NO
EVENT WILL ROSE ELECTRONICS BE LIABLE TO YOU FOR ANY DAMAGES INCLUDING
ANY LOST PROFITS, LOST SAVINGS OR OTHER INCIDENTAL OR CONSEQUENTIAL
DAMAGES ARISING OUT OF THE USE OF OR THE INABILITY TO USE SUCH PRODUCT,
EVEN IF ROSE ELECTRONICS OR AN AUTHORIZED DEALER HAS BEEN ADVISED OF
THE POSSIBILITY OF SUCH DAMAGES, OR FOR ANY CLAIM BY ANY OTHER PARTY.
SOME STATES DO NOT ALLOW THE EXCLUSION OR LIMITATION OF INCIDENTAL OR
CONSEQUENTIAL DAMAGES FOR CONSUMER PRODUCTS, SO THE ABOVE MAY NOT
APPLY TO YOU. THIS WARRANTY GIVES YOU SPECIFIC LEGAL RIGHTS AND YOU MAY
ALSO HAVE OTHER RIGHTS WHICH MAY VARY FROM STATE TO STATE.
NOTE: This equipment has been tested and found to comply with the limits for a Class B digital
device, pursuant to Part 15 of the FCC Rules. These limits are designed to provide reasonable
protection against harmful interference when the equipment is operated in a commercial
environment. This equipment generates, uses, and can radiate radio frequency energy and, if
not installed and used in accordance with the instruction manual, may cause harmful
interference to radio communications. Operation of this equipment in a residential area is likely
to cause harmful interference in which case the user will be required to correct the interference
at his own expense.
IBM, AT, and PS/2 are trademarks of International Business Machines Corp.
Microsoft and Microsoft Windows are registered trademarks of Microsoft Corp.
Any other trademarks mentioned in this manual are acknowledged to be the
property of the trademark owner.

FCC / IC STATEMENTS, EU DECLARATION OF CONFORMITY
FEDERAL COMMUNICATIONS COMMISSION AND INDUSTRY CANADA
RADIO-FREQUENCY INTERFERENCE STATEMENTS
This equipment generates, uses and can radiate radio frequency energy and if not installed and
used properly, that is in strict accordance with the manufacturer’s instructions may cause
interference to radio communication. It has been tested and found to comply with the limits for
a Class B digital device in accordance with the specifications of Part 15 of FCC rules, which are
designed to provide reasonable protection against such interference when the equipment is
operated in a commercial environment. Operation of this equipment in a residential area is
likely to cause interference, in which case the user at his own expense will be required to take
whatever measures may be necessary to correct the interference.
Changes or modifications not expressly approved by the party responsible for compliance could
void the user’s authority to operate the equipment.
This digital apparatus does not exceed the Class A limits for radio noise emission from digital
apparatus set out in the Radio Interference Regulation of Industry Canada.
Le présent appareil numérique n’émet pas de bruits radioélectriques dépassant les limites
applicables aux appareils numériques de la classe A prescrites dans le Règlement sur le
brouillage radioélectrique publié par Industrie Canada.
EUROPEAN UNION DECLARATION OF CONFORMITY
This equipment complies with the requirements of the European EMC directive 89/336/EEC in
respect of EN55022 (Class B), EN50082-1 and EN60555-2 standards and the Low Voltage
Directive.

TABLE of CONTENTS
Contents Page #
System Introduction ................................................................................................................... 1
Features ................................................................................................................................ 2
Package contents .................................................................................................................. 2
Rose Electronics web site ...................................................................................................... 3
Product Registration .................................................................................................................. 3
System Overview ...................................................................................................................... 4
Vista Remote 2 Models ............................................................................................................. 5
Vista Remote 2 Installation ........................................................................................................ 6
Connecting the KVM station ................................................................................................... 6
Connecting the Computers .................................................................................................... 7
Connecting to the network ..................................................................................................... 7
Configuring the Vista Remote 2 IP Input module .................................................................... 8
Connecting Remotely .............................................................................................................. 13
Remote Configuration .............................................................................................................. 14
User Accounts ......................................................................................................................... 15
Unit Configuration .................................................................................................................... 16
Unit Advanced Configuration ................................................................................................... 17
Time and Date Configuration ................................................................................................... 19
Network Configuration ............................................................................................................. 20
Host Configuration ................................................................................................................... 21
Logging and Status ................................................................................................................. 22
KVM Switch Module Configuration .......................................................................................... 24
Change the computer names ............................................................................................... 25
Configure appearance ......................................................................................................... 26
Configure security ................................................................................................................ 28
Configure mouse type .......................................................................................................... 29
Configure keyboard type ...................................................................................................... 30
Configure miscellaneous ...................................................................................................... 31
Save .................................................................................................................................... 32
Exit ...................................................................................................................................... 32
Remote System Operation ...................................................................................................... 33
Connecting using a web browser ......................................................................................... 33
VNC Viewer Toolbar ................................................................................................................ 34
Controls Tab ............................................................................................................................ 35
Host Tab.................................................................................................................................. 37
Keyboard Commands .............................................................................................................. 39
Keyboard command description ........................................................................................... 40
Troubleshooting ....................................................................................................................... 42
Maintenance and Repair.......................................................................................................... 45
Technical Support ................................................................................................................... 45

Figures Page #
Figure 1. Vista Remote 2 Models .............................................................................................. 5
Figure 2. Connecting a KVM ..................................................................................................... 6
Figure 3. Connecting Computers .............................................................................................. 7
Figure 4. Connecting to the Network ......................................................................................... 7
Figure 5. Configuration OSD ..................................................................................................... 8
Figure 6. Unit Configuration OSD .............................................................................................. 8
Figure 7. Network Configuration.............................................................................................. 10
Figure 8. Secure Key calculation............................................................................................. 11
Figure 9. Standard Logon screen ............................................................................................ 11
Figure 10. Control menu ......................................................................................................... 12
Figure 11. Remote Configuration Menu .................................................................................. 14
Figure 12. User Accounts ....................................................................................................... 15
Figure 13. Unit Advanced Configuration .................................................................................. 17
Figure 14. Time and Date Configuration ................................................................................. 19
Figure 15. Configure Network ................................................................................................. 20
Figure 16. Configure Host ....................................................................................................... 21
Figure 17. KVM Switch Module OSD ...................................................................................... 24
Figure 18. Change computer names ....................................................................................... 25
Figure 19. Change appearance .............................................................................................. 26
Figure 20. Switch module security settings ............................................................................. 28
Figure 21. Configure mouse type ............................................................................................ 29
Figure 22. Configure Keyboard ............................................................................................... 30
Figure 23. Configure Misc ....................................................................................................... 31
Figure 24. Save Switch settings .............................................................................................. 32
Figure 25. VNC Viewer Toolbar .............................................................................................. 34
Tables Page #
Table 1. Keyboard Commands ............................................................................................... 40
Appendices Page #
Appendix A – General specifications ....................................................................................... 48
Appendix B – Part Numbers .................................................................................................... 48
Appendix C – RackMount ....................................................................................................... 49
Appendix D – IP Access Control ............................................................................................. 50
Appendix E – VNC Viewer connection options ........................................................................ 52
Appendix E – VNC viewer window options .............................................................................. 58
Appendix F – Browser viewer options ..................................................................................... 59
Appendix G – Supported video modes .................................................................................... 61
Appendix H – Typematic Rate ................................................................................................ 62

INTRODUCTION
Vista Remote 2 Installation and Operations Manual
1
System Introduction
Thank you for choosing Vista Remote™ 2 from Rose Electronics for your network access
solutions. This intelligent and innovative product is the result of Rose Electronics commitment
to providing state of the art, economical switching solutions for today’s demanding workplace.
Vista Remote 2, when installed and connected to your network, allows you full access and
control of the connected computers from the built in viewer client or any web browser from
almost anywhere. This flexible and powerful product uses the Real VNC client software that is
designed for very secure, encrypted, and password protected exchange of information between
the computers and the remote viewer. The Vista Remote 2 sets a new standard for an easy
and very secure way to remotely manage The Vista Remote 2 is available in a 4 port or 8 port
model.
The Vista Remote 2 is different in the way it manages remote access to your systems. All of
the computers that will be remotely connected remain completely unchanged and can run their
usual operating system normally. They only need to be connected to the Vista Remote 2 unit.
Being totally operating system independent, a user can remotely connect to different computers
with no problem.
Whatever your remote accessing needs are, the versatility of the Vista Remote 2 from Rose
Electronics can fulfill those needs. It can be installed at any network level and connected to
computers running most operating system.
Installing the Vista Remote 2
consists of:
1. Configuring the unit to be
compatible and accessible
with your network
2. Connecting the unit to a
local KVM station
3. Connecting your computers
to access and
4. Connecting to the network
Once installed and configured
you have full control of the
selected computer provided
your security profile permits it.
The Vista Remote 2 consists of an IP input module and a KVM switch module. Each module
serves a unique purpose in access control and KVM switching control. The IP input module
controls the accessibility, security, and state-of-the-art encryption to the unit. It can be
accessed locally, remotely over your network, or from any workstation connected to the
internet. All access methods require a user ID and password to gain access to the units IP
input module. Access to the units IP input module from any remote user is via any supported
web browser. The Vista Remote 2 is further enhanced by the use of Real VNC that allows for
the creation of ciphered user communications. Additionally, an optional user ID and password
and other set-up parameters can be set-up to gain access and use the KVM switch module.
This additional user ID can be set-up for each user needing access to the KVM switch module.

2
Vista Remote 2 Installation and Operations Manual
Features
Models available:
4-port model
8-port model
Solid-state embedded unit, has no disk drive for maximum reliability
Remote application (Real VNC or Java applet) can be installed directly from the unit
Local KVM port for configuring and direct access to the connected computers
Connect to the unit directly, from a network workstation, or over IP using any supported
web browser.
Access remote computers by simple keyboard commands or an on-screen list of
computers
Supports video resolution up to 1600 x 1200 @ 75hz
Password security prevents unauthorized configuration and Unit access
Remote access requires a user ID and password.
IP lockout feature for incorrect login (IP address shown as “Blacklisted” in log file)
All transmissions to and from a remote user are encrypted with the latest AES 128 bit
encryption technology.
Up to 16 remote user accounts can be set-up each with separate access permission
levels.
Scan function sequences through the connected computers at rates of 1 to 999 seconds
Four different screen savers are available
Rack mount kits available for 19”, 23”, or 24” racks
Package contents
The package contents consist of the following:
The Vista Remote 2 unit
RJ12 Serial Cable
+5VDC Power Adapter / Power cord
Installation and operations manual CD
Quick Start Guide
Cables are usually ordered separately. If the package contents are not correct, contact Rose
Electronics or your reseller so the problem can be quickly resolved.

Vista Remote 2 Installation and Operations Manual
3
Rose Electronics web site
Visit our web site at www.rose.com for additional information on Vista Remote 2 and other
products offered by Rose Electronics that are designed for data center applications, classroom
environments, and many other access and switching applications.
Product Registration
Take advantage of the following when you register your Rose Electronics products online at
http://www.rose.com/htm/online-registrationform.htm:
Rose Standard Warranty Plus...
Free Lifetime Firmware Updates
Free Lifetime Technical Support
30 Day Money Back Guarantee
Priority “First-in-Line” Status for Tech Support

OVERVIEW
4
Vista Remote 2 Installation and Operations Manual
System Overview
Vista Remote 2 is a versatile and powerful product that can extend the range of access to your
computers from anywhere in the world. It is designed to provide seamless and trouble-free
access from any workstation on your network or any remote user to any connected computer.
You can connect to and control any of the connected computers by simple keyboard
commands or an on-screen list of computers. Each computer can be assigned a unique name
that makes sense for your system. Names like sales, production, and administration make it
easy to recognize and connect to.
Access control for the users can be set-up to provide access restrictions to the configuration
menus and the unit. The installation and configuration section explains all the features and
functions of the Vista Remote 2 and how to customize it to fit your business needs.
The Vista Remote 2 is designed with the highest regard for security. Remote access requires a
user ID and password. All transmissions, to and from a remote workstation and Vista Remote 2
uses the versatile and very secure RealVNC viewer and are encrypted with the latest
encryption technology. Login, time-out, User ID and password add to the security of the system.
The UltraView Remote 2 consists of an IP input module and a KVM switch module. Each
module serves a unique purpose in access control and KVM switching control. The IP input
module controls the accessibility, security, and state-of-the-art encryption to the unit. The KVM
switching module controls and manages the CPU port switching.
Typical connection diagram
Vista Remote 2
Computers Local KVM Station Remote
(4 or 8) workstation
Network
Vista Remote 2 unit
Remote Users Local User

Vista Remote 2 Installation and Operations Manual
5
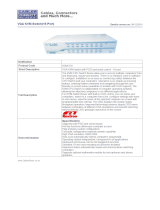
Vista Remote 2 Models
(Part Number KVL-1R4UA/OV/2)
Connector Type
Power Adapter
CPU (4) DB25F
KVM (1) DB25F
RS232 RJ11F
LINK RJ45F
(Part Number KVL-1R8UA/OV/2)
Connector Type
Power Adapter
CPU (8) DB25F
KVM (1) DB25F
RS232 RJ11F
LINK RJ45F
Figure 1. Vista Remote 2 Models

INSTALLATION
6
Vista Remote 2 Installation and Operations Manual
Vista Remote 2 Installation
Installing the Vista Remote 2 is a very easy process and should be performed by a designated
administrator. The administrator will install, configure, and set-up user access profiles. A
network administrator will need to assign an IP address to the unit (if needed) and set-up
firewall and network access to the unit.
The following installation procedure is a guide to properly install and configure the Vista
Remote 2. The following items are needed to install the Vista Remote 2:
1. A valid IP address to assign to the unit (if not using DHCP feature)
2. VGA monitor
3. PS/2 keyboard
4. PS/2 mouse
5. RJ45 network cable
6. KVM Adapter cable (DB25M to PS/2F-PS/2F-HD15F)
7. CPU Adapter cable(s) (DB25M to PS/2M-PS/2M-HD15M)
Connecting the KVM station
Connect the KVM stations PS/2 keyboard, video monitor and PS/2 mouse cables to the
corresponding connectors on the KVM adapter cable as shown in Figure 2. The KVM station’s
video monitor should be equal or better than any of the connected computers. Connect the
DB25M end of the KVM cable to the KVM DB25F port on the rear panel of the Vista Remote 2
unit.
Figure 2. Connecting a KVM
KVM Adapter Cable
KVM Station

Vista Remote 2 Installation and Operations Manual
7
Connecting the Computers
Connect each computer to the Vista Remote 2 using the appropriate CPU adapter cable
designed to interface to the type of computer being connected (PS/2, Unix, SUN, DEC, Apple,
etc). Connect the DB25M end of the CPU adapter cable to the desired DB25F CPU port on the
rear panel of the unit. Connect the other end of the cable to the corresponding ports on the
computer (keyboard, monitor, and mouse). Refer to Figure 3.
Figure 3. Connecting Computers
Connecting to the network
Connect a network cable from the RJ45 connector on the rear panel of the Vista Remote 2 and
to your network (See Figure 4)
Figure 4. Connecting to the Network
Remote computer
connections
CPU adapter
cable(s)
Network connection

UNIT CONFIGURATION
8
Vista Remote 2 Installation and Operations Manual
Configuring the Vista Remote 2 IP Input module
When you locally connect to Vista Remote 2 unit for the first time the Unit and Network must
be configured. Follow the recommended procedure below to configure all models:
Make all cable connections to the KVM station, network, and computers
Apply power to all devices (Computers, Vista Remote 2, and Monitor).
Make sure a computer is connected to CPU port #1 and that computer is powered on.
If no computer is connected to port #1, the OSD menu screens may not sync.
With power applied, a standard login screen will display on the KVM monitor
Login on to the unit using the default user ID, admin and no password
After a successful login, the remote computer’s video will display on the KVM monitor.
Press the CTRL + ALT + C keys simultaneously to display the configuration menu options
as shown below: (Unit connection screen may display after initial connection is made)
Figure 5. Configuration OSD
Select “Unit Configuration” and the below screen will display
Figure 6. Unit Configuration OSD

Vista Remote 2 Installation and Operations Manual
9
Hardware
The hardware version level is displayed in this field.
Firmware
The Vista Remote 2 firmware version is displayed in this field
Keyboard Layout
Using the left and right arrow keys, select the keyboard type expected from the host computers.
Admin password
Enter an administrator password of at least six characters that has a mix of letters and
numerals. The background color provides an indication of password suitability. It is initially red
to indicate that the password is not sufficient. When a password with reasonable strength has
been entered it changes to blue.
Unit Name
You can assign a unit name to the Vista Remote 2.
Hot Keys
Use the left and right arrow keys to select a different hot key combination. This hot key
combination is used to invoke the OSD menu and other keyboard commands
Screen saver
Use the left and right arrow keys to set the time for the screen saver to activate.
Time and Date
Set the time and date to the correct values. Use the 24 hour base inputs. All entries in the
activity log are time stamped using this information.
Encryption
Arrange this setting according to your security requirements.
When all items have been updated, click on “Next” to configure the network information. The
network information entered (IP Address, Net Mask, and Gateway) must be compatible with the
network Vista Remote 2 will be connected to.

NETWORK CONFIGURATION
10
Vista Remote 2 Installation and Operations Manual
Configuring the Network
Figure 7. Network Configuration
MAC address
Media Access Control Address – this is the unique and unchangeable code that was hard
coded within your Vista Remote 2 unit when it was built. It consists of two 6-digit hexadecimal
(base 16) numbers separated by colons. A section of the MAC address identifies the
manufacturer, while the remainder is effectively the unique electronic serial number of your
particular unit
Use DHCP/IP address/Net Mask/Gateway/VNC port/HTTP Port
1. You need to either set the DHCP option to ‘Yes’ or manually enter a valid IP address,
Net mask and Gateway. If you set the option to use DHCP, remote users must be
informed of the IP address assigned so they can remotely access the unit.
2. Change the IP Address to the IP address assigned to the unit by your network
administrator that is compatible with your network.
3. Change the Net Mask and Gateway addresses if needed.
4. The VNC and HTTP ports should remain set to 5900 and 80, respectively, unless they
clash with an existing setup within the network.
5. When all network information has been entered, click on “Next” to calculate a “Secure
Key”.

Vista Remote 2 Installation and Operations Manual
11
Screen #3 is a secure keys screen that will display after the network information has been
entered.
Figure 8. Secure Key calculation
This screen uses mouse movements and keyboard inputs to create random data. This
unpredictable information is then combined with several other factors to develop the basis of
the encryption keys that are used to establish secure remote links.
With every mouse move and key press the single dash will move across the progression bar
(unless the same key is pressed repeatedly). Periodically, a new star character will be added to
the bar as the random data are accepted as part of the new encryption key. When the bar is
full, the final encryption keys for your Vista Remote 2 will be created – this process takes
roughly 30 to 40 seconds.
Once the secure key has been calculated, the Vista Remote 2 will restart and present a
standard logon screen as shown below. Logon to the unit with the correct Username and
password.
Figure 9. Standard Logon screen

12
Vista Remote 2 Installation and Operations Manual
To view the menu options press <CTRL> <ALT> <C>. (If the default hotkeys were
altered on the Configure Unit screen, use the new hotkeys plus C)
Figure 10. Control menu
Logoff
Select this option to close your current session and display the screensaver.
Restore mouse functions
Select this tab to revive a mouse that has ceased to function correctly. The Vista Remote 2
provides a feature to reinstate PS/2 mouse communications. (Does not apply if using a USB
mouse.)
There are two main types of data formats used by current PC mice; ‘PS/2’ format and the more
recent IntelliMouse
®
’ format introduced by Microsoft. These use slightly different data
arrangements and it is important to know which type was being used before you hot-plugged
the computer to the Vista Remote 2. The previous setting depends both on the type of mouse
and the type of driver, as various combinations of PS/2 and IntelliMouse are possible. Using the
incorrect restore function may produce unpredictable results and require the computer to be re-
booted.
Using a keyboard and monitor
directly connected to the Vista
Remote 2, log on and then press the
hotkey sequence <Ctrl> <Alt> <C> to
view the options menu.
1. Select the ‘Restore mouse
functions’ option to display:
2. Select one of the following
options:
3. Restore Standard Mouse – if
PS/2 mode is required, or
Restore IntelliMouse – if
IntelliMouse mode is required.
4. Select “Back” to return to the
Control menu.

Vista Remote 2 Installation and Operations Manual
13
Configuration
Select the “Configuration” tab to gain access to the Unit and Network configuration menus.
You can also reset the Vista Remote 2 to its initial state.
Access mode
Allows you to choose between the Shared mode (where all other logged on users can see your
operations) and the Private mode (where the screens of all other users are blanked).
Host
Indicates the currently selected host computer and allows you to select others. This item will be
blank unless host details have been set-up.
Return to host
Quits the menu and returns to the host screen.
Connecting Remotely
With the Unit and the Network configured properly, start a web browser like IE or Netscape
from any workstation connected to the same network your Vista Remote 2 is connected to.
Type in the Vista Remote 2’s assigned IP address (Example (http://168.192.0.41) in the URL
field. The Vista Remote 2 will respond with the below screen. There may be initial login and
connect screens displayed.
(NOTE: See Appendix E for additional VNC Viewer options)
Click on the “Connect using built-in Java VNC viewer” option and the Vista Remote 2 will install
a temporary Java applet on the requesting computer and then display the connected
computer’s video in the browser’s VNC viewer window. In the upper right corner of the window
is a “Configure” tab. Click on this tab to display the remote configuration option menu as shown
below.

14
Vista Remote 2 Installation and Operations Manual
Remote Configuration
Connect remotely to the Vista Remote 2 unit from any network workstation. When connected,
click on the “Configure” tab in the upper right corner of the display. The below configuration
menu will display. Some of the remote configuration menus are similar to the local configuration
menus.
Figure 11. Remote Configuration Menu
(Following describes each of the Configuration Tabs.
User Accounts
Allows you to create and manage up to sixteen separate user
accounts, each with separate access permissions. Account #1 is
the admin account. Enter User name, password. Tick/un-tick the
Local and Remote options that are appropriate to the user.
Unit Configuration
Allows you to modify unit settings within the Vista Remote 2. You
can define the keyboard, set-up the admin account, assign a name
to the unit, screensaver time and encryption options
Time & Date
Set the time and date, this time stamps the log files
Network Configuration
Configures the network IP, network mask, gateway, VNC port, HTTP
port. You can alter any of the existing network settings plus you can
set-up the IP access control feature that lets you specifically include
or exclude certain addresses or networks
Host Configuration
Allows configuration of various details for each host system
connected to Vista Remote 2. 128 entries max, Add host names,
Users and Hotkey.
Logging and Status
Provides various details about the Vista Remote 2 activity
LDAP Configuration
Configures unit for LDAP
Return to Host
Exit the configuration menu system and return to the host computer
Clicking on the Configure tab
Displays the configuration window
/