Page is loading ...

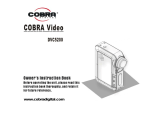
COBRA DC4200
Users Manual

1
Index
I. General introduction .........................................................2
II. Warning ..............................................................................2
III. Accessory ..........................................................................4
IV. PC compatibility.................................................................4
V. Getting to know your digital camera................................5
VI. Installation and utilization of software.............................6
Installation of Photo Express ...........................................6
Installation of driver ..........................................................6
VII. Using your digital camera.................................................7
Taking photos ....................................................................7
1. Taking still pictures .....................................................7
2. Self-Timer.....................................................................8
3. Take moving video.......................................................8
4. Take 3 photos continuous...........................................9
Adjust the setting of camera ............................................9
1. Adjusting the size of picture.......................................9
2. Modifying compression rate.....................................11
3. Modifying U-disk and webcam functions................13
4. Modifying frequency (50/60Hz).................................14
Flash-strobe light: ...........................................................16
Browsing photos .............................................................17
Deleting photos................................................................17
Loading battery and memory card.................................18
VIII. Downloading photos.......................................................19
IX. Using the webcam function............................................20
1. WEB Cam.................................................................21
2. Netmeeting...............................................................21
X. Technical specifications .................................................22

2
I. General introduction
We congratulate you on your acquisition of this digital camera.
Before using it please read this instruction manual carefully in
order to be able to use all its functions correctly, thus avoiding
mistakes.
You can use your camera to take photos or use its webcam
function to conduct a face-to-face conversation with images
through the internet.
We built in 4X16Mb SDRAM memory and a SD/MMC card slot,
where you can insert a SD or MMC card, in this camera and use
this memory to save the pictures you take with the camera. You
can connect your camera to your computer with a USB cable,
the computer will automatically detect a new portable device and
now you can download or copy the photos saved to the memory
to your computer.
II. Warning
1. Before using your camera to take photos of an important event,

3
Photos saved to SD/MMC card will not lose during battery
please sample some photos to check that the camera works well.
2. Do not use batteries that do not agree with the camera listed in
technical specifications. Because improper battery may result in
battery leakage, explosion, fire or human body hurt.
Before loading batteries, do please check the electric polarity.
Insert batteries in the direction shown on the diagram on the
battery compartment door.
If you are not using the camera for a long time (months),remove
the batteries for best results.
Before you remove the batteries, make sure that you have
downloaded all of the stored pictures on the internal SDRAM
memory in the camera.
If the battery leaks in the battery compartment, clear it and reload
new batteries.
3. Before replacing batteries, please transfer the photos saved to
the 4X16 SDRAM memory to your computer or replacing
batteries must be within 20 seconds after the camera is properly
and correctly closed. Or all photos saved will lose.
Check for power supply of the camera or replace new batteries
before using it in order not to lose saved photos from improper
battery replacing.

4
replacing.
4. Using your camera when there is body static-electricity may
power off your camera, only restart it and the camera works
again.
III. Accessory
•digital camera •manual •software CD •USB cable
•3 AAA alkaline batteries
IV. PC compatibility
1. CPU:486/66MHz or above
2. memory:64MB or above
3. monitor: 800X600 or above, 24bit or above
4. Windows 98SE/Windows Me/Windows 2000/Windows XP
5. USB port and USB cable, CD driver

5
V. Getting to know your digital camera
1. Menu/on/off
6
5
1
2
4
3
7
8
2. UP
3. Down/Flashlight on/off
4. Screen on/off
5. Preview/ submenu
6. Screen switch
7. Charge light
8. Viewfinder
9. Lens
Digital Camera
8
10
11
12
15
13
9
14
10. Working-on light
11. Flash-strobe light
12. Shutter button
13. USB port
14. Battery
compartment
15. strap holder

6
VI. Installation and utilization of software
Load software CD, the following installation interface will
automatically appear:
Install driver
Install photo express
Exit
Installation of Photo Express
Click on <Install Photo Express>, and then follow the
step-by-step instructions to complete the installation.
Installation of driver
Click on <Install Driver> and follow the step-by-step instructions
to complete the installation.
After successful installation of driver, restart your computer.

7
VII. Using your digital camera
Power On:
Press and hold <Menu/on/off> button 1 second to power on
your camera.
Power Off:
The camera shuts down automatically after 60 seconds of
inactivity. Or by pressing <Menu/on/off> for 3 seconds, a
distinct beep can be heard, the camera goes off.
All other operations can be fulfilled after the camera is
turned on.
Taking photos
1. Taking still pictures
By pressing <shutter>, two distinct beeps can be heard,
the photo has been taken. Automatically the number
displayed on the screen is increased by one. For
example, if the screen displays 000 when the camera is
powered on, after one photo has been captured, 001 will
appear. If the memory is full, FUL will appear on screen.
When taking photos,keep the camera stable.

8
Insufficient light will result in bad photo quality or
failure of capture.
2. Self-Timer
Press <menu/on/off> button, until LCD display
;
Then press <shutter> immediately, self-timer starts and
after 10 seconds, a photo has bee automatically taken.
3. Take moving video
Press <menu/on/off>button, until LCD display
;
Then press <shutter> immediately, the camera starts up
to take AVI program. An AVI icon flashes at the screen left

9
bottom. Press <shutter> again or when the memory is full,
the camera will stop taking.
You can take an AVI program about 1 minute one time,
so if you want to take more, re-take again.
The shuttering time relies on the memory medium and
the shuttering environment.
4. Take 3 photos continuously
Press<menu/on/off>button, until LCD display
;
Then press <shutter>, three VGA photos have been taken
with distinct beeps to be heard from the camera.
Note: the camera will automatically return to preview
mode after 5 seconds of inactivity.
Adjust the setting of camera
1. Adjusting the size of picture
Press <menu/on/off> button, LCD display

10
and Press <preview> button to display the resolution
icon, then press<up> or <down> to move to a resolution
mode you want, at last press <preview> to validate your
choice.
300K 640x480
1.3M 1280X1024

11
2.0M 1600x1200
3.0M 2048x1536 (2.0M interpolated to 3.0M)
4.0M 2304x1728 (2.0M interpolated to4.0M)
2. Modifying compression rate
First press <menu/on/off> button, LCD display

12
and Press <preview> button to display
,
then press <menu/on/off> button to display compression
icon, use <up> or <down> to move to a compression rate
you want, at last press <preview> to validate your choice.
Non-compression mode

13
Compression mode
3. Modifying U-disk and webcam functions
First press <menu/on/off> button, LCD display
and Press <preview> button to display
,
then press <menu/on/off> button to display the U-disk
/webcam icon, use <up> or <down> to change to U-disk
mode or webcam mode, at last press <preview> to

validate your choice.
U-disk mode
Webcam mode
Note: after modifying the camera into a webcam, keep your
camera on and connect it to your computer. If your
camera shuts down after modification, the camera will
resume a U-disk mode again.
4. Modifying frequency (50/60Hz)
In American and Asian countries, a frequency of 60HZ is
generally used while in England, Japan and European
countries, 50HZ used mostly.
First press <menu/on/off> button, LCD display
14

15
and Press<preview>button to display
,
then press <menu/on/off> button to display 50/60HZ icon,
use <up> or <down> to change to different frequencies
you want, at last press <preview> to validate your choice.
50 Hz frequency

16
60 Hz frequency
Note: After modification, press <preview> to return a
preview mode.
Flash-strobe light
press <down> to open or close flashlight. (Within 3 meters, the
flashlight works better for photo-taking)
Flashlight off
Auto
Flashlight forced

17
Note: when the voltage is low, flash-strobe light does not
work.
Browsing photos
Press <preview> and then use <up> or <down> to view the
photos saved to the camera;
Press <preview> and then press <shutter>, the camera will
automatically start a slide show of photos every 3 seconds.
Press <preview> again to return a preview mode.
Deleting photos
Press <preview> to display a taken photo, and then press
<menu/on/off> to enter into delete mode.
Press <menu/on/off> again to change between deleting one
and deleting all.
Delete one
Delete all
Use <up> and <down> to change between
and , by
pressing <shutter> to validate your choice—delete
or

18
not delete .
Loading battery and memory card
Open the battery compartment located at the side of the
appliance and place three 1.5V AAA type alkaline batteries and
a SD or MMC card in it, inserting them in the direction shown
on the diagram at the bottom of the compartment.
Close the cover and press <menu/on/off>, the below showed
interface will appear on screen.
Unlocked locked
Tip: Do use your this camera to try the compatibility of the
card when you buy a card. After a new card
inserted, if the camera display the right
showed image,
Press <shutter> to format the new card.

19
Battery voltage
(1)voltage full (2)voltage low
(3)voltage insufficient (4)voltage lowest
Note: when voltage lowest
keeps blanking, the camera
Will shuts down automatically 5 seconds later.
VIII. Downloading photos
You can transfer the saved photos to your computer, store them,
or process them with software or send to a printer.
/