Page is loading ...

DO GUIDE
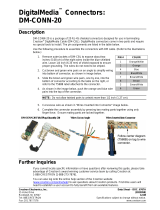
DM-CONN-ULTRA-RECP
DigitalMedia™ Ultra Keystone RJ45 Jack
DO Prepare the Cable for Termination
Prepare the Crestron
®
DM-CBL-ULTRA or DM-CBL-8G
cable for termination. Refer to the “DM-CBL-ULTRA Cable
Preparation” section or the “DM-CBL-8G Cable Preparation”
section as applicable.
DM-CBL-ULTRA Cable Preparation
To prepare the DM-CBL-ULTRA cable for termination, do the
following:
CAUTION: Do not nick the braid shield or the insulation of
the wires.
1. Strip the outer jacket of the cable about 2 inches (51 mm)
from the end of the cable—do not remove or cut the braid
shield.
2. Fold back the braid shield so that it lies over the cable
jacket.
3. Remove the foil shield from each of the four twisted pairs.
DM-CBL-8G Cable Preparation
To prepare the DM-CBL-8G cable for termination, do the
following:
CAUTION: Do not nick the foil shield or the insulation of
the wires.
1. Strip the outer jacket of the cable about 1.5 inches
(38 mm) from the end of the cable.
2. Split and fold back 0.5 inch (13 mm) of the cable jacket.
3. Fold back the foil shield so that it lies over the cable jacket.
4. Fold back the drain wire and wrap it around the
foil shield.
5. Cut and remove the clear plastic wrap.
DO Insert the Wires into the
Termination Module
To insert the wires of the DM-CBL-ULTRA or DM-CBL-8G cable
into the termination module, do the following:
1. Open the metal clip of the termination module.
2. Observe the T568B color scheme indicated by the
termination module, and then straighten and arrange the
four twisted pairs according to the color scheme.
3. Bend the four twisted pairs at approximately 90 degrees
(DM-CBL-ULTRA shown below).
For the DM-CBL-ULTRA cable, continue with step 4.
For the DM-CBL-8G cable, skip step 4 and continue with
step 5.
4. (DM-CBL-ULTRA only) Do the following:
a. Using your ngers, atten the cable into an oval
shape.
DO Check the Box
QTY PRODUCT PART NUM.
1 Module, Termination 2046513
1 Tool, Termination 2046514
Not included: Cable, Pliers, Wire Strippers, Flush Cutters
2 in
(51 mm)
1.5 in
(38 mm)
0.5 in
(13 mm)
0.5 in
(13 mm)

DO GUIDE
DOC. 7798B (2045260) 08.16
Specications subject to change without notice.
b. Seat the cable and outer braid shield into the metal clip of the termination module.
Proceed by skipping step 5 and continuing with step 6.
5. (DM-CBL-8G only) Seat the cable, foil shield, and drain wire into the metal clip of the
termination module. Continue with step 6.
6. Using your ngers or the included termination tool, close the clip by pressing down on it
until a click is heard.
7. Do the following:
a. Using the color scheme shown in step 2, untwist each wire pair just enough to be able
to insert each wire into the appropriate channel of the termination module.
b. Fully seat each wire into the appropriate channel.
c. Ensure that each wire lies below the top surface of the termination module as
indicated by the dashed line in the illustration below.
8. Trim the wire pairs so that they are ush with the edge of the channels.
9. Trim the excess DM-CBL-ULTRA braid shield or the excess DM-CBL-8G drain wire and
foil shield.
DO Terminate the Cable
To terminate the cable, do the following:
1. Properly position the termination module for insertion into the DM-CONN-ULTRA-RECP,
and then push the module into the DM-CONN-ULTRA-RECP as far as possible.
2. Position the RJ45 jack onto the keyed guide of the included termination tool, and then
press down on the DM-CONN-ULTRA-RECP to seat it as far as possible in the
termination tool.
3. Ensure that the DM-CONN-ULTRA-RECP is seated properly in the termination tool, and
then fully depress the lever until a click is heard—do not partially depress the lever and
then lift the lever to reseat the DM-CONN-ULTRA-RECP.
DO Learn More
Visit the website for additional information. To learn more about this product, use a
QR reader application on your mobile device to scan the QR image.
Crestron Electronics
15 Volvo Drive, Rockleigh, NJ 07647
888.CRESTRON | www.crestron.com
As of the date of manufacture, the product has been tested and found to comply with specications for CE marking.
This product is Listed to applicable UL Standards and requirements by Underwriters Laboratories Inc.
Ce produit est homologué selon les normes et les exigences UL applicables par Underwriters Laboratories Inc.
The specic patents that cover Crestron products are listed at http://www.crestron.com/legal/patents. The product warranty can be found at www.crestron.com/warranty.
Certain Crestron products contain open source software. For specic information, please visit www.crestron.com/opensource.
Crestron, the Crestron logo, and DigitalMedia are either trademarks or registered trademarks of Crestron Electronics, Inc. in the United States and/or other countries. UL and the UL logo are
either trademarks or registered trademarks of Underwriters Laboratories, Inc. in the United States and/or other countries. Other trademarks, registered trademarks, and trade names may be
used in this document to refer to either the entities claiming the marks and names or their products. Crestron disclaims any proprietary interest in the marks and names of others. Crestron is
not responsible for errors in typography or photography.
This document was written by the Technical Publications department at Crestron.
©2016 Crestron Electronics, Inc.
OR
/