H Koenig KM5 User manual

Category
Toys
Type
User manual

H Koenig KM5 is a versatile kitchen appliance that combines the functionality of a meat grinder, sausage maker, and biscuit maker. With its powerful motor and various attachments, it offers a range of possibilities for food preparation. The meat grinder attachment allows you to mince meat for burgers, sausages, or other dishes, while the sausage attachment lets you create your own homemade sausages using different fillings. Additionally, the biscuit attachment enables you to make a variety of biscuits and cookies with ease.

H Koenig KM5 is a versatile kitchen appliance that combines the functionality of a meat grinder, sausage maker, and biscuit maker. With its powerful motor and various attachments, it offers a range of possibilities for food preparation. The meat grinder attachment allows you to mince meat for burgers, sausages, or other dishes, while the sausage attachment lets you create your own homemade sausages using different fillings. Additionally, the biscuit attachment enables you to make a variety of biscuits and cookies with ease.

Km5
meat grinder set
for stand mixer KM120
hachoir à viande du robot pétrin km120
fleischwolfset für küchenmaschine km120
vlees maler set voor mixer km120
conjunto procesador de carnes para la batidora amasadora km120
set tritacarne per robot da cucina km120
ENGLISH
Product description
1
Driver shaft
9
Support
2
Screw
10
Mixing bowl
3
Front cover
11
Splash Cover
4
Drive arm
12
Funnel
5
Power cord
13a
Hook
6
Operation and Level regulator
13b
Beater
7
Level for raising and Lowering
arm
13c
Whisk
8
Power Switch&LED
Initial Operation - General
1.Remover the screw (2) and remover the Protector front cover (3) from the helix
drive.
2.Place the spiral housing (14) with the filler neck facing upwards into the helix drive,
With the screw (2) locking it.
14
19c
Adapter for 15
15
20
Food tray
16
21
Presser
17
22
Presser cover
18
23
Biscuit attachment
19a
24
Cookies accessories-1
19b
25
Cookies accessories-2
3.Place the food tray on the filler neck in such a way that the receptacle of the tray is
positioned under the arm.
4.Push the spiral into the horizontal section of the spiral housing until the axle
locks in place. Please see the sections on “Operating the Mincer” and
“Sausage Attachment”.
Operation Meat Mincer (see illustration A)
NOTE:
Cut the meat into pieces of about 2.5 cm. Please take care that the meat does not
contain any bones orsinews.
1.First place the blade on the end of the helix and then a screen of your choice.
Please pay attention to the screen and the recesses on the helix housing. Screw
the lock (18) on until it is “hand tight”.
2.Put the pieces of meat on to the filling tray (20) and into the filler neck.
3.Place a vessel under the exit.
4.Connect the device to a 220-240 V, 50/60 Hz safety contact power socket.
5.Turn the mincer on by the switch (8),then turn the speed to 1-8 by switch(6) ..
6.If necessary push the meat with the presser (21). Please do not follow this up with
your fingers.
Operation Sausage Attachment (see illustration B/C)
1.Place the adapter (19c) on the axle of the spiral auger.
2.Insert a sausage attachment (19a or b) into the lock. Attachment is a for thick
sausages, attachment b for thin sausages.
3.Turn the lock “hand tight” on to the spiral housing.
4.Push the sausage skin (using either real or synthetic skin) over the sausage skin
and knot the end.
5.Fill the sausage paste on to the filling tray and into the filler neck.
6.Repeat steps 4 to 7 as described in “Operation Meat Mincer”.
7.The sausage mixture is pressed through the sausage attachment and filled into
the sausage skin.
8.When the first sausage has reached the desired length, squeeze it together with
your fingers at the end of the sausage top. Turn the sausage around its own
axis once or twice.
NOTE:
Cut Levels 1 to 4 are suitable for mincer operation.
Do not operate the device for more than 15 min and then allow it to cool
down for a further10 min.
You can turn off the device after each single sausage length until you are more
experienced.
Carry out step 8 as described. Then turn on the meat mincer again.
If you decide to use real skin, let it soak in water for a while before use.
Take care that the sausage skin is filled„loosely“as during boiling or
frying the sausageexpands and the skin might tear.
Operation with Biscuit Attachment (see illustration D)
1.Please follow points 1 to 4 as described under “Initial Operation”.
2.Unscrew the biscuit attachment and select the desired biscuit cutter.
3.Put the mixture on to the filling tray and the filler neck.
4.Connect the device to a 220-240 V/50/60 Hz safety contact power socket.
5.Turn the mincer on by the screw (18).
6.If necessary, push the mixture further down with the pusher (21). Do not touch with
your fingers.
7.Hold the elongated mixture at the exit and cut it off at the desired length.
Cleaning
Before cleaning remove the mains lead from the
socket.
Never immerse the housing with motor in water!
Do not use any sharp or abrasive detergents.
After operation, all the accessories should be
cleaned as soon as possible in order to avoid
the ingredientsstick on the accessories for long
time and difficult to clean.
The meat grinder and salad maker should be
flushed against the tap and use brush to wash
(especially thefood tray and blade of meat
grinder accessories and the cutter of salad
maker)
Be careful you hand get hurt when cleaning
Motor Housing
Only a damp rinsing cloth should be used to clean
the outside of the housing.
Mixing Bowl, Mixing Equipment
CAUTION:
The components are not suitable for cleaning
in a dishwasher. If exposed to heat or caustic
cleaners they might become misshapen or
discolored.
Components that have come into contact with
food can be cleaned in soapy water.
WARNING:
Danger of injury!
Environmental protection:
The battery may pollute the environment, you must remove the battery before
discarding the appliance, or send the appliance to a designated recycling
collection point.
This symbl on the product or in the instructions means that your electrical and electronic
equipment should be disposed at the end of it’s life separately from your house hold
waste.There are separate collection systems for recycling in the EU.For more
information,please contact the local authority or your retailer where you purchased the
product.
Adeva SAS / H.Koenig Europe - 8 rue Marc Seguin, 77290 Mitry-Mory, France
www.hkoenig.com - https://en.hkoenig.com - Tél: +33 1 64 67 00 05
FRANÇAIS
Description du produit
1
Arbre d'entraînement
9
Support
2
Vis
10
Bol
3
Couvercle avant
11
Couvercle de protection
4
Bras d'entraînement
12
Entonnoir
5
Cordon d'alimentation
13a
Crochet
6
Bouton de mise en marche et
régulateur de niveau
13b
Batteur
7
Levier permettant de régler la
hauteur du bras
13c
Fouet
8
Interrupteur et LED
14
Boîtier de l’entraînement
19c
Adaptateur pour 15
15
Entraînement hélicoïdal
20
Plateau
16
Couteau à lames
21
Poussoir
17
Grilles
22
Bague du poussoir
18
Bague de fixation
23
Accessoire pour biscuit
19a
Grand embout pour saucisse
24
Accessoire 1 pour cookie
19b
Petit embout pour saucisse
25
Accessoire 2 pour cookie
Fonctionnement général
1. Retirer la vis (2) et le couvercle avant du protecteur (3) de l’entraînement
hélicoïdal.
2. Placer l'entraînement hélicoïdal dans le boîtier de l’entraînement (14) avec le
goulot de remplissage vers le haut, et le fixer avec la vis (2).
3. Placer le plateau sur le goulot de remplissage de manière à ce que le réceptacle
du plateau soit positionné sous le poussoir.
4. Pousser l'entraînement hélicoïdal dans la partie horizontale du boîtier de
l'entraînement jusqu'à ce qu'il se verrouille. Veuillez consulter les chapitres
"Utilisation du hachoir" et "Accessoires pour saucisses".
Fonctionnement du hachoir à viande (voir l’illustration A)
REMARQUE :
Couper la viande en morceaux d'environ 2,5 cm. Veillez à ce que la viande ne contienne ni
os ni tendons.
1. Placer d'abord le couteau à lames sur l'extrémité de l'entraînement hélicoïdal, puis une
grille de votre choix. Faire attention à la grille et aux évidements du boîtier de
l'entraînement. Visser la bague de fixation (18) et la serrer sans forcer.
2. Mettre les morceaux de viande sur le plateau (20) et dans le goulot de remplissage.
3. Placer un récipient sous la sortie.
4. Brancher l'appareil à une prise de courant à contact de sécurité de 220-240 V, 50/60 Hz.
5. Mettre le hachoir en marche à l'aide de l'interrupteur (8), puis réglez la vitesse sur 1-8 à
l'aide du bouton (6).
6. Si nécessaire, pousser la viande avec le poussoir (21). Ne le faites pas avec vos doigts.
Fonctionnement des embouts pour saucisse (voir illustrations B/C)
1. Placer l'adaptateur (19c) sur l'axe de l’entraînement hélicoïdal.
2. Insérer un accessoire pour saucisses (19a ou b). L'accessoire a est destiné aux saucisses
épaisses, l'accessoire b aux saucisses fines.
3. Visser la bague de fixation sur le boîtier de l'entraînement hélicoïdal.
4. Fixer la peau de la saucisse (organique ou synthétique) sur l’embout et nouer l'extrémité.
5. Verser le mélange de saucisses sur le plateau et dans le goulot de remplissage.
6. Répéter les étapes 4 à 7 comme décrites dans le chapitre : "Fonctionnement du hachoir à
viande".
7. Le mélange de saucisses est pressé à travers l'embout à saucisses jusque dans la peau
de la saucisse.
8. Lorsque la première saucisse a la longueur souhaitée, la presser avec vos doigts à
l'extrémité de la saucisse, puis la tourner autour de son propre axe une ou deux fois.
REMARQUE :
Les niveaux de coupe 1 à 4 sont adaptés au fonctionnement du hachoir.
Ne faites pas fonctionner l'appareil pendant plus de 15 minutes, puis laissez-le refroidir
pendant 10 minutes.
Vous pouvez éteindre l'appareil après chaque saucisse jusqu'à ce que vous soyez plus
expérimenté.
Effectuez l'étape 8 comme décrite. Puis remettez le hachoir à viande en marche.
Si vous décidez d'utiliser une vraie peau, laissez-la tremper dans l'eau pendant un moment
avant de l'utiliser.
Veillez à ce que la peau de la saucisse ne soit pas trop remplie, car pendant l'ébullition ou
la friture, la saucisse se dilate et la peau peut se déchirer.
Fonctionnement avec l’accessoire à biscuits (voir l’illustration D)
1. Suivre les étapes 1 à 4 décrites dans le chapitre "Fonctionnement général".
2. Dévisser l'accessoire à biscuits et sélectionner l'accessoire de coupe désiré.
3. Mettre le mélange sur le plateau et dans le goulot de remplissage.
4. Brancher l'appareil sur une prise de courant à contact de sécurité 220-240 V/50/60 Hz.
5. Mettre en marche le hachoir par la vis (18).
6. Si nécessaire, enfoncer le mélange avec le poussoir (21). Ne pas toucher avec les doigts.
7. Soutenir le mélange à la sortie et le couper à la longueur désirée.
Nettoyage
Avant le nettoyage, débrancher le câble d'alimentation
de la prise.
Ne jamais plonger le bloc-moteur dans l'eau !
Ne pas utiliser de détergents puissants ou abrasifs.
Après l'utilisation, tous les accessoires doivent être
nettoyés dès que possible afin d'éviter que les
ingrédients ne restent collés longtemps sur les
accessoires et ne soient difficiles à nettoyer.
Le hachoir à viande et l'accessoire pour salade
doivent être rincés au robinet et lavés à l'aide d'une
brosse (en particulier le plateau et le couteau à
lames du hachoir à viande).
Faites attention de ne pas vous blesser les mains en
nettoyant
Bloc-moteur
Seul un chiffon humide doit être utilisé pour nettoyer
l'extérieur du boîtier.
Bol de mélange, équipement de mélange
ATTENTION :
Les éléments ne sont pas adaptés au nettoyage
dans un lave-vaisselle. S'ils sont exposés à la
chaleur ou à des nettoyants caustiques, ils peuvent
se déformer ou se décolorer
Les éléments qui sont entrés en contact avec des
aliments peuvent être nettoyés à l'eau savonneuse.
ATTENTION :
Danger de blessure !
PROTECTION DE L’ENVIRONNEMENT
La batterie peut polluer l’environnement, vous devez donc la retirer avant de jeter
l’appareil ou de l’apporter à un point de collecte agréé.
Ce symbole sur le produit ou dans le mode d’emploi signifie que votre équipement électrique et
électronique doit être mis au rebut à l’écart des déchets ménagers. Il existe des systèmes de tri pour
recycler ce type de produit dans l’UE. Pour plus d’informations, veuillez contacter votre municipalité ou
le revendeur auprès duquel vous avez acheté le produit.
Adeva SAS / H.Koenig Europe - 8 rue Marc Seguin, 77290 Mitry-Mory, France
www.hkoenig.com - https://sav.hkoenig.com - Tél: +33 1 64 67 00 05
DEUTSCH
Produktbeschreibung
1
Treiberwelle
9
Halterung
2
Schraube
10
Rührschüssel
3
Vordere Abdeckung
11
Spritzschutz
4
Antriebsarm
12
Trichter
5
Stromkabel
13a
Knethaken
6
Geschwindigkeitsregler
13b
Rührbesen
7
Hebel zum Einstellen der Höhe
13c
Schneebesen
8
Powertaste&LED
Inbetriebnahme- Allgemein
1. Entfernen Sie die Schraube (2) und nehmen Sie die vordere Schutzabdeckung (3) von dem
Helix Getriebe ab.
2. Platzieren Sie das Spiralgehäuse (14) in dem Helix Getriebe mit dem Einfüllhals nach
oben, befestigen Sie es mit der Schraube (2).
3. Platzieren Sie das Essenstablett auf dem Einfüllhals in einer Weise, dass der Behälter des
Tabletts unter dem Arm platziert ist.
14
Spiralgehäuse
19c
Adapter für 15
15
Spirale
20
Essenstablett
16
Klingen
21
Schieber
17
Sieb
22
Schieber-Abdeckung
18
Kontermutter
23
Keksen Aufsatz
19a
Wurstaufsatz, groß
24
Keksenzubehör-1
19b
Wurstaufsatz, klein
25
Keksenzubehör-2
4. Schieben Sie die Spirale in den senkrechten Bereich des Spiralgehäuses, bis die
Achse einrastet. Überprüfen Sie bitte den Abschnitt "Bedienung des Fleischwolfs" und
"Wurstzubehör".
Bedienung des Fleischwolfs (siehe Abbildung A)
Hinweis:
Schneiden Sie das Fleisch in ca. 2,5cm große Stücke. Achten Sie bitte darauf, dass das
Fleisch keine Knochen oder Sehnen beinhaltet.
1. Platzieren Sie die Klinge zuerst auf dem Ende des Helixes, dann setzen Sie den
Aufsatz Ihrer Wahl auf. Achten Sie bitte auf den Aufsatz und die Aussparrungen auf
dem Helix-Gehäuse. Schrauben Sie die Kontermutter (18) auf, bis diese "handfest"
angezogen ist.
2.Legen Sie die Fleischstücke auf das Essenstablett (20) und in den Einfüllhals.
3.Platzieren Sie einen Behälter unter dem Auslauf.
4. Schließen Sie das Gerät an eine 220-240V,/50/60 Hz Schuko-Steckdose an.
5.Schalten Sie den Fleischwolf mithilfe der Powertaste (8) ein und wählen Sie eine
Geschwindigkeit von 1-8 mit dem Geschwindigkeitsreglers (6) aus.
6.Wenn nötig, schieben Sie das Fleisch mit dem Schieber (21). Schieben Sie das Fleisch
bitte nicht mit Ihren Fingern.
Bedienung des Wurstzubehörs (siehe Abbildung B/C)
1. Platzieren Sie den Adapter (19c) auf der Achse der Spiralschnecke.
2. Setzen Sie den Wurstaufsatz (19a oder b) in die Sperre ein. Der Aufsatz a ist für dicke
Wurste geeignet, der Aufsatz b für dünne Wurste.
3. Ziehen Sie die Sperre auf dem Spiralgehäuse "handfest" an.
4.Ziehen Sie die Wursthülle (Sie können entweder einen natürlichen oder künstlichen
Wurstdarm verwenden) über die Wurst und machen Sie am Ende einen Knoten.
5. Befüllen Sie das Einfülltablett und den Einfüllhals mit der Wurstpaste.
6.Wiederholen Sie Schritte 4 bis 7, wie in "Bedienung des Fleischwolfs" beschrieben.
7.Die Wurstmischung wird durch den Wurstaufsatz gepresst und in die Wursthülle eingefüllt.
8.Wenn die erste Wurst die gewünschte Länge erreicht hat, pressen Sie diese mit Ihren
Fingern am Ende der Wurst zusammen. Drehen Sie die Wurst ein- oder zweimal um die
eigene Achse.
HINWEIS:
Die Stufen 1 bis 4 sind für die Bedienung des Fleischwolfs geeignet.
Bedienen Sie die Maschine für nicht länger als 15 Minuten, danach lassen Sie das Gerät
für weitere 10 Minuten abkühlen.
Sie können das Gerät nach der Zubereitung jeder Wurst ausschalten, bis Sie mehr Erfahrung
gesammelt haben.
Führen Sie Schritt 8 wie beschrieben aus. Danach schalten Sie den Fleischwolf wieder ein.
Wenn Sie natürlichen Wurstdarm verwenden, lassen Sie diesen in Wasser für einige Zeit vor
der Verwendung einweichen.
Achten Sie darauf, dass die Wursthülle "locker" befüllt wird, da sich die Wurst während
des Kochens oder Bratens ausdehnt, wobei die Hülle reißen kann.
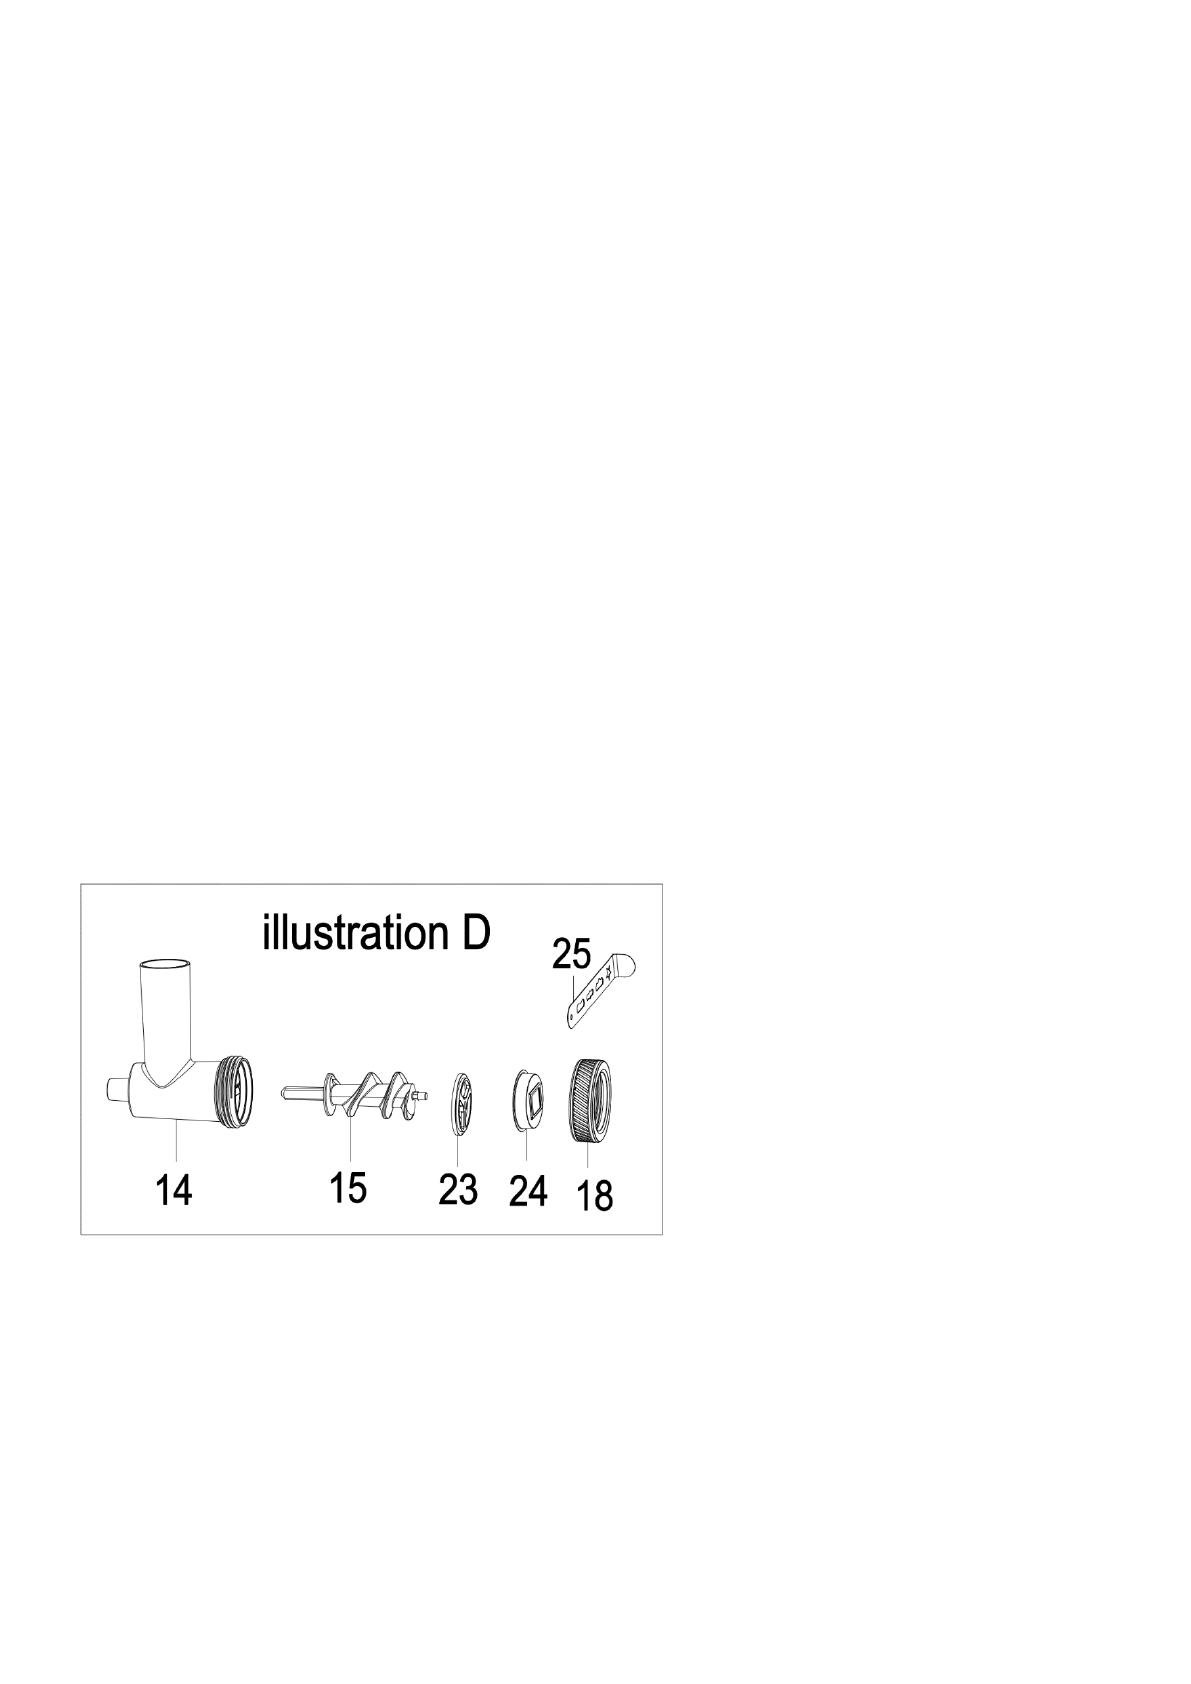
Bedienung des Keksen Aufsatzes (siehe Abbildung D)
1.Befolgen Sie bitte Schritte 1 bis 4, wie unter "Inbetriebnahme" beschrieben.
2. Schrauben Sie den Keksen Aufsatz auf und wählen Sie den gewünschten Keksen
Schneider aus.
3.Befüllen Sie das Einfülltablett und den Einfüllhals mit der Mischung.
4. Schließen Sie das Gerät an eine 220-240V,/50/60 Hz Schuko-Steckdose an.
5. Schalten Sie den Fleischwolf mit der Schraube (18) ein.
6.Wenn notwendig, schieben Sie die Mischung mit dem Schieber
  • Page 1 1
  • Page 2 2
  • Page 3 3
  • Page 4 4
  • Page 5 5
  • Page 6 6
  • Page 7 7
  • Page 8 8
  • Page 9 9
  • Page 10 10
  • Page 11 11
  • Page 12 12
  • Page 13 13
  • Page 14 14
  • Page 15 15
  • Page 16 16
  • Page 17 17
  • Page 18 18
  • Page 19 19
  • Page 20 20
  • Page 21 21
  • Page 22 22
  • Page 23 23
  • Page 24 24
  • Page 25 25
  • Page 26 26
  • Page 27 27
  • Page 28 28
  • Page 29 29
  • Page 30 30
  • Page 31 31
  • Page 32 32
  • Page 33 33
  • Page 34 34
  • Page 35 35
  • Page 36 36
  • Page 37 37
  • Page 38 38
  • Page 39 39
  • Page 40 40
  • Page 41 41
  • Page 42 42
  • Page 43 43
  • Page 44 44

H Koenig KM5 User manual

Category
Toys
Type
User manual

H Koenig KM5 is a versatile kitchen appliance that combines the functionality of a meat grinder, sausage maker, and biscuit maker. With its powerful motor and various attachments, it offers a range of possibilities for food preparation. The meat grinder attachment allows you to mince meat for burgers, sausages, or other dishes, while the sausage attachment lets you create your own homemade sausages using different fillings. Additionally, the biscuit attachment enables you to make a variety of biscuits and cookies with ease.

Ask a question and I''ll find the answer in the document

Finding information in a document is now easier with AI