Acer K335 Quick start guide

Type
Quick start guide
Acer projector provides powerful networking
display (via source LAN/WiFi, DLNA),
multimedia display (via source MEDIA), and
USB display (via source USB B) functions.
A. Projector Settings
Press the Source button on the projector
keypad or remote control. You will see a source
list allowing you to choose your desired source.
Insert the USB WiFi adapter into the USB A
port or plug in the LAN cable (for selected
models with LAN port) for WiFi Display &
DLNA functions.
You can play multi-media contents from RAM,
USB handy drive, SD hard via the MEDIA
source.
You can plug the mini USB cable into the USB
B port for USB display.
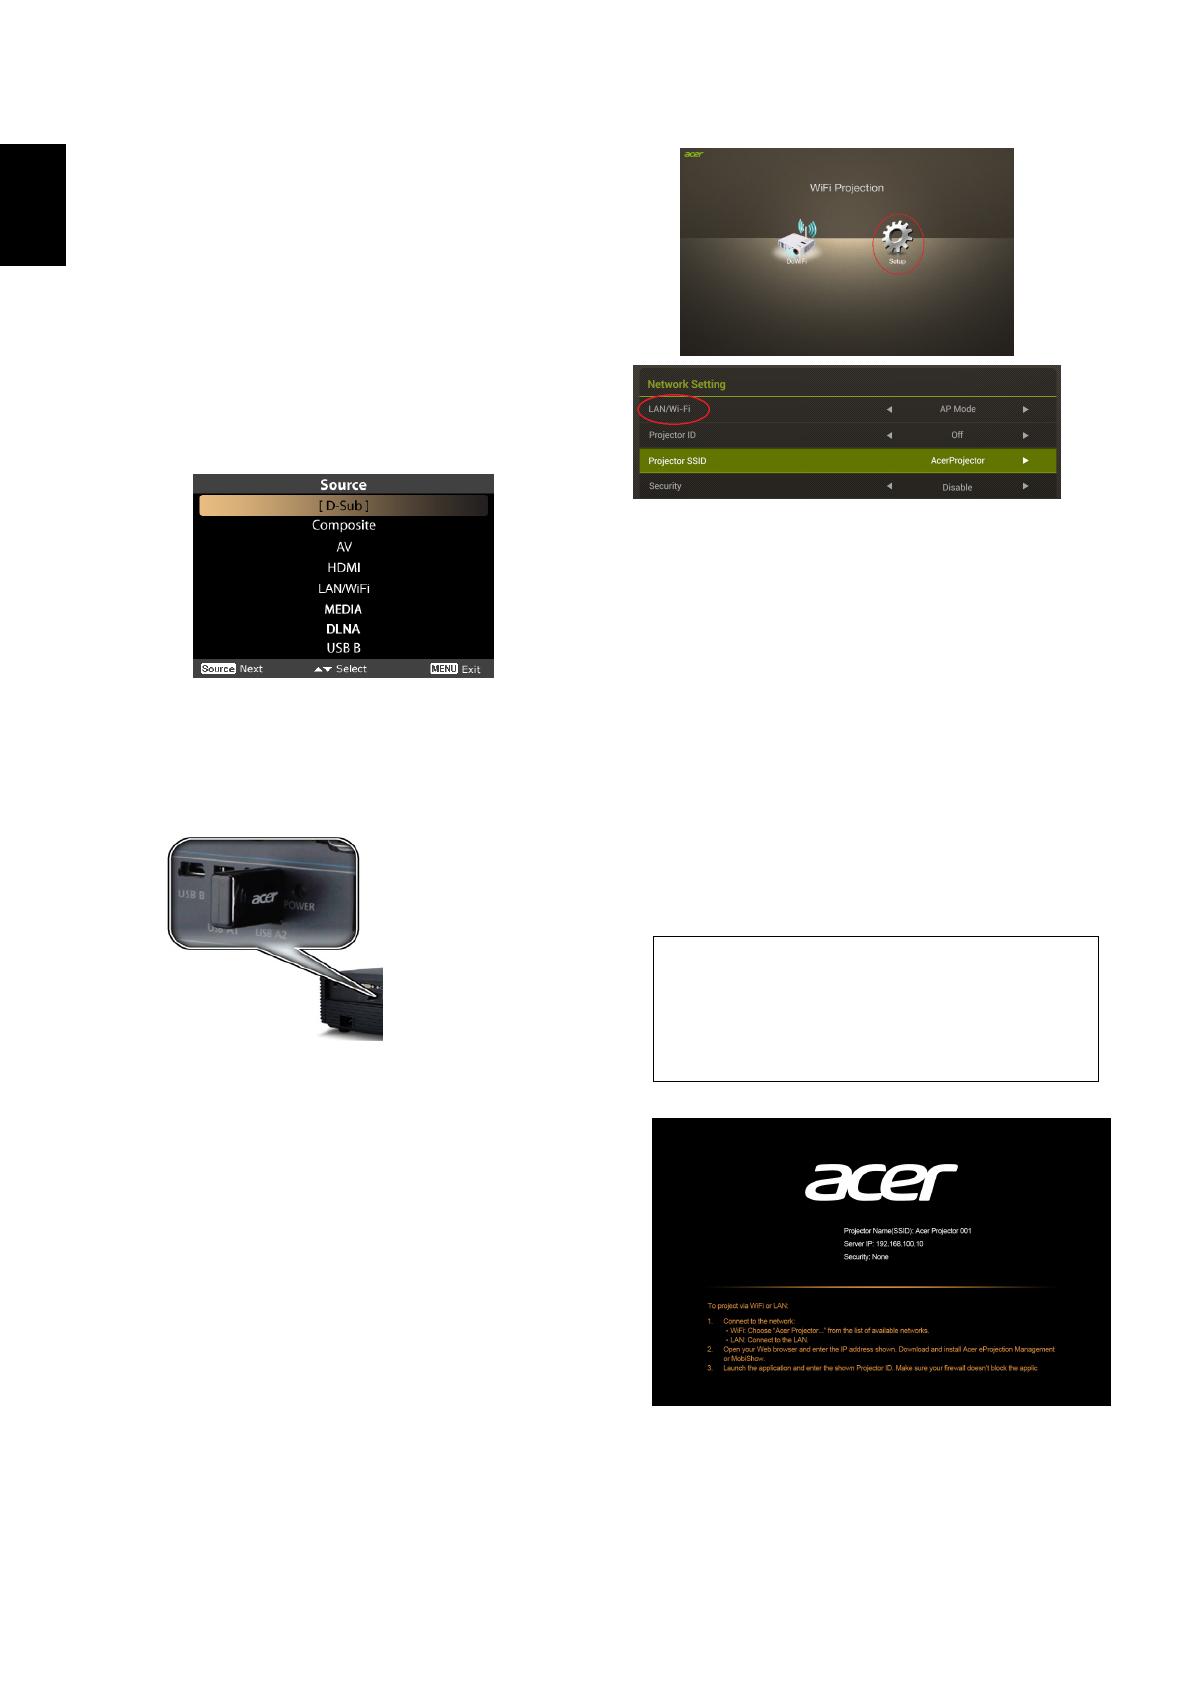
WiFi Display
Select the source “LAN/WiFi, and you will see
the WiFi Display welcome screen. Acer
Projector can play the following 3 roles: AP
Mode (Default), Client Mode or WiFi Direct by
changing settings in the Setup LAN/WiFi
menu.
(1) Select AP Mode in the LAN/Wi-Fi setting
(the projector plays an AP role). Tap
“DoWiFi” and you will see below splash
screen. Check out below information:
Projector ID (if enabled, a 4-digit random
number will display on the upper-left
corner of the screen), Projector Name (SSID,
default name is AcerProjector), WiFi IP
(default IP is 192.168.100.10), Security
(default is None), and LAN IP.
Press Apply/Enter when you finish the
adjustment.
Projector Name(SSID) : AcerProjectorXXX
WiFi IP : 192.168.100.10
Security : None (default)
LAN IP : 0.0.0.0 (if no LAN cable plugged in)
English
(2) Select Client Mode in the LAN/WiFi setting,
you will see below screen.
Please connect to an available AP and input
password if necessary.
Then the splash screen displays with below
information:
Connected AP Name(SSID) : Depended
Client IP : Depended
Security : Depended
LAN IP : 0.0.0.0 ( if no LAN cable plugged in)
You can project the screen from your tablet or
smartphone to the projector by using the
application “eDisplay. In Client mode, the
projector is also able to access the internet.
(3) Select WiFi Direct in the LAN/WiFi setting,
and you can connect the projector to other
WiFi Direct-certified devices. Below
information will show on splash screen.
Projector Name : AcerProjectorXXX
WiFi Mode : WiFi Direct
WiFi Direct : On (Default is Off)
DLNA Mode
When the source “DLNA” selected, you can
choose DMP or DMR mode after you complete
the network settings (the same way as you do
for WiFi Display).
Media Console (DMP) : You can tap the media
libraries detected and play contents from the
selected library.
Media Display (DMR) : projector under the
DMR mode (digital media renderer) is ready for
displaying the contents from other DLNA
devices.
English
MEDIA Mode
Select the source “MEDIA, and there are 5
options for you to choose from Music, Photo,
Video, Document, and Setup. You can play
contents from RAM (Internal memory), USB
storage devices, or SD card (for selected
models).
USB Display
Select the source “USB B, and you will see
below main page for you to choose from USB
storage (RAM) or USB display.
You can access the internal memory (RAM) via
USB Storage (RAM) or do USB projection via
USB Display.
Please make sure the USB cable is plugged in
first.
For USB display, please install Acer_USB.exe on
your NB and remember to reboot after the
installation completes.
Below shortcut icon will be on the desktop of
your NB.
Double click on the shortcut, and you can
mirror or extend your screen and
enable/disable audio streaming.
English
B. Device Installation (WiFi Display)
NB eDisplay (Windows & Mac OS)
You can download the application (acer
eDisplay Management) from CD or webpage
(192.168.100.10) when the projector is in AP
Mode.
Click RUN and follow the wizard to install, you
will get a shortcut Acer Projector Gateway W7
on your desktop and execute it.
“Projection mode” supports “Full, L/R, 4-Split
Mirror projection” & “Full, L/R, 4-Split
Extension projection”, Audio On/Off, and
controls the projected screen to be frozen or
hidden.
Video mode” supports video streaming.
Tablet & Smartphone eDisplay
(Android & iOS)
You can get the application “eDisplay” from
Android’s Google Play or iOS’s Apple Store.
Execute the app to project the small screen
from your device to a bigger one via the
projector.
Support the following functions: EZ Remote,
Streaming Doc, Dropbox, Streaming Web, Pix
Viewer, & Sketch.
Note :
1. Android 4.0 and above supported.
2. iOS 5.0 and above supported.
3. If you want to use Dropbox or Streaming Web,
please set the projector to be in Client mode.
(Android eDisplay)
(iOS eDisplay)
English
B. 裝置安裝WiFi 顯示)
NB eDisplayWindows Mac OS
投影機處於AP 模式」您可從光碟或網
頁(192.168.100.10)下載公用程式(Acer
eDisplay Management
按一下RUN(執行)並依照精靈說明執行
安裝,隨後請執行桌面上出現的 Acer
Projector Gateway W7 捷徑。
「投影模式」支援「完整、L/R4 格分割螢
Mirror(鏡映)投影」「完整L/R4
分割螢幕 Extension(延伸)投影」「音訊開
/關閉」,且可將投影的螢幕控制為鎖定或
隱藏。
「視訊模式」支援視訊串流。
適用於平板電腦與智慧型手機的 eDisplay
Android iOS
您可透過 Android 的「Google Play」和 iOS
的「Apple 商店」,取得「eDisplay」應用程
式。執行應用程式,即可透過投影機將裝置
上的小螢幕投影至大螢幕。
支援下列功能:EZ RemoteStreaming Doc
DropboxStreaming WebPix Viewer
Sketch
注意:
1. 支援 Android 4.0 和以上。
2. 支援 iOS 5.0 和以上。
3. 若您想要使用 Dropbox Streaming Web
請將投影機設為「用戶端模式
Android eDisplay
iOS eDisplay
繁體中文
B. 设备安装WiFi 显示)
NB eDisplayWindows Mac 操作系统)
当投影机设置为 AP 模式后您可从 CD
网页(192.168.100.10)下载实用程序(Acer
eDisplay Management
单击 RUN(运行)并按向导安装,您将在桌
面上看到快捷方式 Acer Projector Gateway
W7 并执行它。
投影模式 支持全屏、/右、4 分区屏幕
Mirror(镜像)投影 全屏、/右、4
区屏幕 Extension(扩展)投影、音频开/
以及控制要冻结和隐藏的投影屏幕。
视频模式 支持视频串流。
适用于平板电脑和智能手机的 eDisplay
Android iOS
您可从 Android Google Play iOS
Apple Store 上获取应用程序 “eDisplay。执
行此应用程序可通过投影机将设备中的小屏
幕投影到较大的屏幕。
支持以下功能:EZ Remote、串流文档、
Dropbox、串流网页、Pix Viewer(照片查看
器)和 Sketch(素描)
注:
1. 支持 Android 4.0 和更高版本。
2. 支持 iOS 5.0 和更高版本
3. 如果您要使用 Dropbox 和串流网页,请将投
影机设置为客户端模式。
Android eDisplay
iOS eDisplay
简体中文
  • Page 1 1
  • Page 2 2
  • Page 3 3
  • Page 4 4
  • Page 5 5
  • Page 6 6
  • Page 7 7
  • Page 8 8
  • Page 9 9
  • Page 10 10
  • Page 11 11
  • Page 12 12
  • Page 13 13
  • Page 14 14
  • Page 15 15
  • Page 16 16
  • Page 17 17
  • Page 18 18
  • Page 19 19
  • Page 20 20
  • Page 21 21
  • Page 22 22
  • Page 23 23
  • Page 24 24
  • Page 25 25
  • Page 26 26
  • Page 27 27
  • Page 28 28
  • Page 29 29
  • Page 30 30
  • Page 31 31
  • Page 32 32
  • Page 33 33
  • Page 34 34
  • Page 35 35
  • Page 36 36
  • Page 37 37
  • Page 38 38
  • Page 39 39
  • Page 40 40

Acer K335 Quick start guide

Type
Quick start guide

Ask a question and I''ll find the answer in the document

Finding information in a document is now easier with AI