Page is loading ...

DW090-90901
3 Preparing the host
IMPORTANT: Refer to www.tandbergdata.com for detailed compatibility
information about operating systems and software applications.
SAS cable and port
A standard SAS cable (not supplied) with integrated power connector is appropriate
for this installation. The server must have a SAS HBA that supports internal SAS
ports. See
www.tandbergdata.com
for recommended products. If necessary, install
a new HBA and any associated drivers before you install the tape drive.
Drivers
For Windows systems, download the latest drivers from www.tandbergdata.com.
For other operating systems, patch to the latest version of the operating system,
following the instructions in the patch documentation.
Backup software
Always upgrade your software application to ensure it works correctly with the tape
drive. We do NOT recommend native backup applications, such as Windows Backup,
because they do not support the full features of the tape drive and may cause
performance problems.
NOTE:
Some backup applications require you to use their own drivers. Refer
to the documentation of your software application to ensure you are using the
recommended driver.
Hardware encryption
The DAT320 tape drive includes hardware capable of supporting data encryption.
To make use of this feature you need a backup application that supports hardware
encryption and DAT320 media.
Power requirements
Mounting bay
You need one industry-standard, 5 1/4-inch, half-height bay in which to install the
Tandberg Data DAT320 tape drive.
Different models of server require different mounting methods. Refer to your server
documentation for detailed information. You may need to purchase mounting
hardware separately.
Printed on at least 50% total recycled fiber with at least 10%
post-consumer paper
© 2009 Tandberg Data
Printed in the EU
www.tandbergdata.com
Part No. 1018928
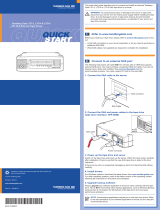
1 Introduction
This poster describes how to install your Tandberg Data DAT320 tape drive.
• Use the fixing screws supplied with the tape drive
• Is connection to your SAS server supported?
• Can you connect to the host SAS controller or do you need to purchase an
additional HBA?
WARNING:
To avoid personal injury or damage to the server or tape drive,
disconnect your server from the mains power supply before installing the tape
drive.
To avoid damage to server or tape drive observe all recommended anti-static
and power-grounding precautions, as specified in your server and tape drive
manuals.
Tandberg Data DAT320 SAS
Internal Tape Drives
Typical Current
0.7 A
0.25 A
1.4 A
1.3 A
Voltage Maximum Current
5 V
12 V
2 Other sources of information
There is a more detailed "User Guide" on www.tandbergdata.com.
If you need technical support or have any problem with your DAT320 tape storage
solution, please visit the support pages at www.tandbergdata.com.
C
M
Y
CM
MY
CY
CMY
K
DW090-90901 Tandberg DAT320 SAS Int Eng front.pdf 11/9/09 10:32:11

6 Choosing and looking after media
Your high-performance tape drive works best with high-performance Tandberg
Data DAT media. For optimum performance always use a data cartridge that
matches the specification of your tape drive (see table) and normally only use one
cartridge per day.
NOTE:
The DAT320 tape drive is not compatible with 4mm media. It may only
be used with 8mm media.
Table: Tandberg Data DAT data cartridge compatibility
* Capacity assumes 2:1 compression.
The recommended cleaning cartridge is the Tandberg Data DAT320 cleaning
cartridge for DAT320 tape drives. Only use the cleaning cartridge if the Clean LED
is flashing.
7 Understanding the LEDs
DAT320
Clean – amber
• Off: the drive does not require cleaning
• Flashing: the drive needs cleaning
• Flashing (with Ready flashing): Cleaning is in progress
Tape – amber
• Off: no fault has been detected
• Flashing: the drive believes the current tape or the tape just ejected is faulty
(damaged or unsupported)
• Flashing (with Ready and Clean flashing): the cleaning cartridge has expired,
The drive ejects it automatically
Drive – amber
• Off: no fault has been detected
• Flashing: the drive mechanism has detected a hardware error
Encrypt – blue
• Off: no encryption activity, encryption parameters are not loaded
• On: encryption parameters loaded, drive is ready to read/write encrypted data
• Flashing blue (with Ready flashing): Reading/writing encrypted data
• Solid blue (with Ready flashing): Encryption parameters loaded, but drive is
reading/writing unencrypted data. This is the normal Ready LED operation
• Fast flash (with Drive LED): encryption related error
Ready – green
• On: the drive is ready for use and there is a cartridge in the drive
• Off: there is no cartridge in the drive. If the Ready LED remains off when a
cartridge is loaded, the drive power may be off or there may have been a failure
during self-test
• Flashing: the drive is busy
5 Power on the tape drive and verify connection
• Plug in the host server or workstation and all attached devices.
• Turn on any other devices you turned off earlier. Turn on the server.
• Check the LEDs on the front panel to make sure the tape drive is ready for use
(See section 6: Understanding the LEDs).
• Verify the connection.
4 Connecting the tape drive
CAUTION:
Turn off and remove the power cords from the server and all
attached accessories.
1 SAS conector to tape drive 2 Power connector
3 SAS connector to server 4 SAS HBA
SAS cable (not supplied)
Connect the SAS cable to the server's internal SAS port and the tape drive.
Power connection
Connect the power connector on the SAS cable to the server's internal power
supply.
It pays to look after your media
Many tape drive and backup failures are caused by damaged or badly handled
tape media.
• Keep media in the case provided.
• Follow the temperature, humidity and acclimitization guidelines on the media
packaging.
• Avoid dropping it or rough handling, as this is likely to damage the cartridge.
• Inspect it regularly for damage.
• Do not exceed normal cartridge life.
For detailed information on media care and best handling please visit
www.tandbergdata.com.
1 Write-protect switch off 2 Write-protect switch on
Read/Write
(
Recommended)
DAT72 & All DDS DAT160 DAT320
Read/Write
Tandberg Data
DAT320
Not
Supported
C
M
Y
CM
MY
CY
CMY
K
DW090-90901 Tandberg DAT320 SAS Int Eng back.pdf 11/9/09 10:40:54
/