Primo 300 Assembly Instructions

Type
Assembly Instructions

This manual is also suitable for

Primo Kamado Grill Assembly Instructions
Two Adults are Needed to Assemble the Grill.
Tools Needed: Box Cutter, 11mm or Adjustable Wrench & Large Phillips Head Screwdriver.
IMPORTANT: DO NOT LIFT GRILL BY THE HINGE WHEN INSERTING INTO CRADLE
3
Remove the two
side shelves and
four brackets and
set them aside.
4
Use a box cutter
and cut vertically
down one of the
corners. Firmly pull away
the four cardboard sides
and discard.
1
When the Primo
Kamado Grill
arrives, select a
level area with plenty of
working space such as a
driveway or parking lot.
2
Open the top of
the box, remove
the two main
cradle parts and set
them aside. Note: one
has a notched top bar.
5
Open the grill and
remove the ash
tool, grate lifter,
owners manual and
the cradle hardware
package.
6
Insert the cradle
part with the
notched top bar
horizontally then turn
upright to form an “X”
shape and align holes.
7
Insert Phillips Head
Screw through the
two bottom bars.
Use a locking washer,
then nut.
FINGER TIGHTEN ONLY
AT THIS TIME.
8
Insert a threaded
stud into the two
top bars. Use a
locking washer and one
of the nuts
FINGER TIGHTEN ONLY
AT THIS TIME.
9
Align the metal
cross-member
bar with the holes
and use the remaining
threaded studs and
nuts. TIGHTEN ALL
FASTENERS FROM
PRIOR STEPS.
10
Align the
cradle with the
grill. Make sure
the locking casters are
locked and the furthest
from the grill.
11
Remove
the internal
components
of the grill while one
person holds the grill in
place to prevent it from
tipping over.
12
Two adults are
required on each
side of grill. Lift
grill by placing one hand
under the bottom of the
grill and one on the base
just below the hinge.
DO NOT LIFT BY HINGE
13
Make sure the
draft door is
centered and
the locking casters are in
front. You may need to
push down on the grill
to seat it properly.
14
Insert the fire
box into the
grill. Make sure
the opening in the fire
box is aligned with the
draft door opening.
15
Insert the
charcoal grate
in the bottom
of the fire box, then add
the cooking grate as
shown in the photo.
16
Attach the two
brackets to the
side shelves
with 4 screws per shelf
in the outermost holes
as shown. Repeat for
opposite shelf assembly.
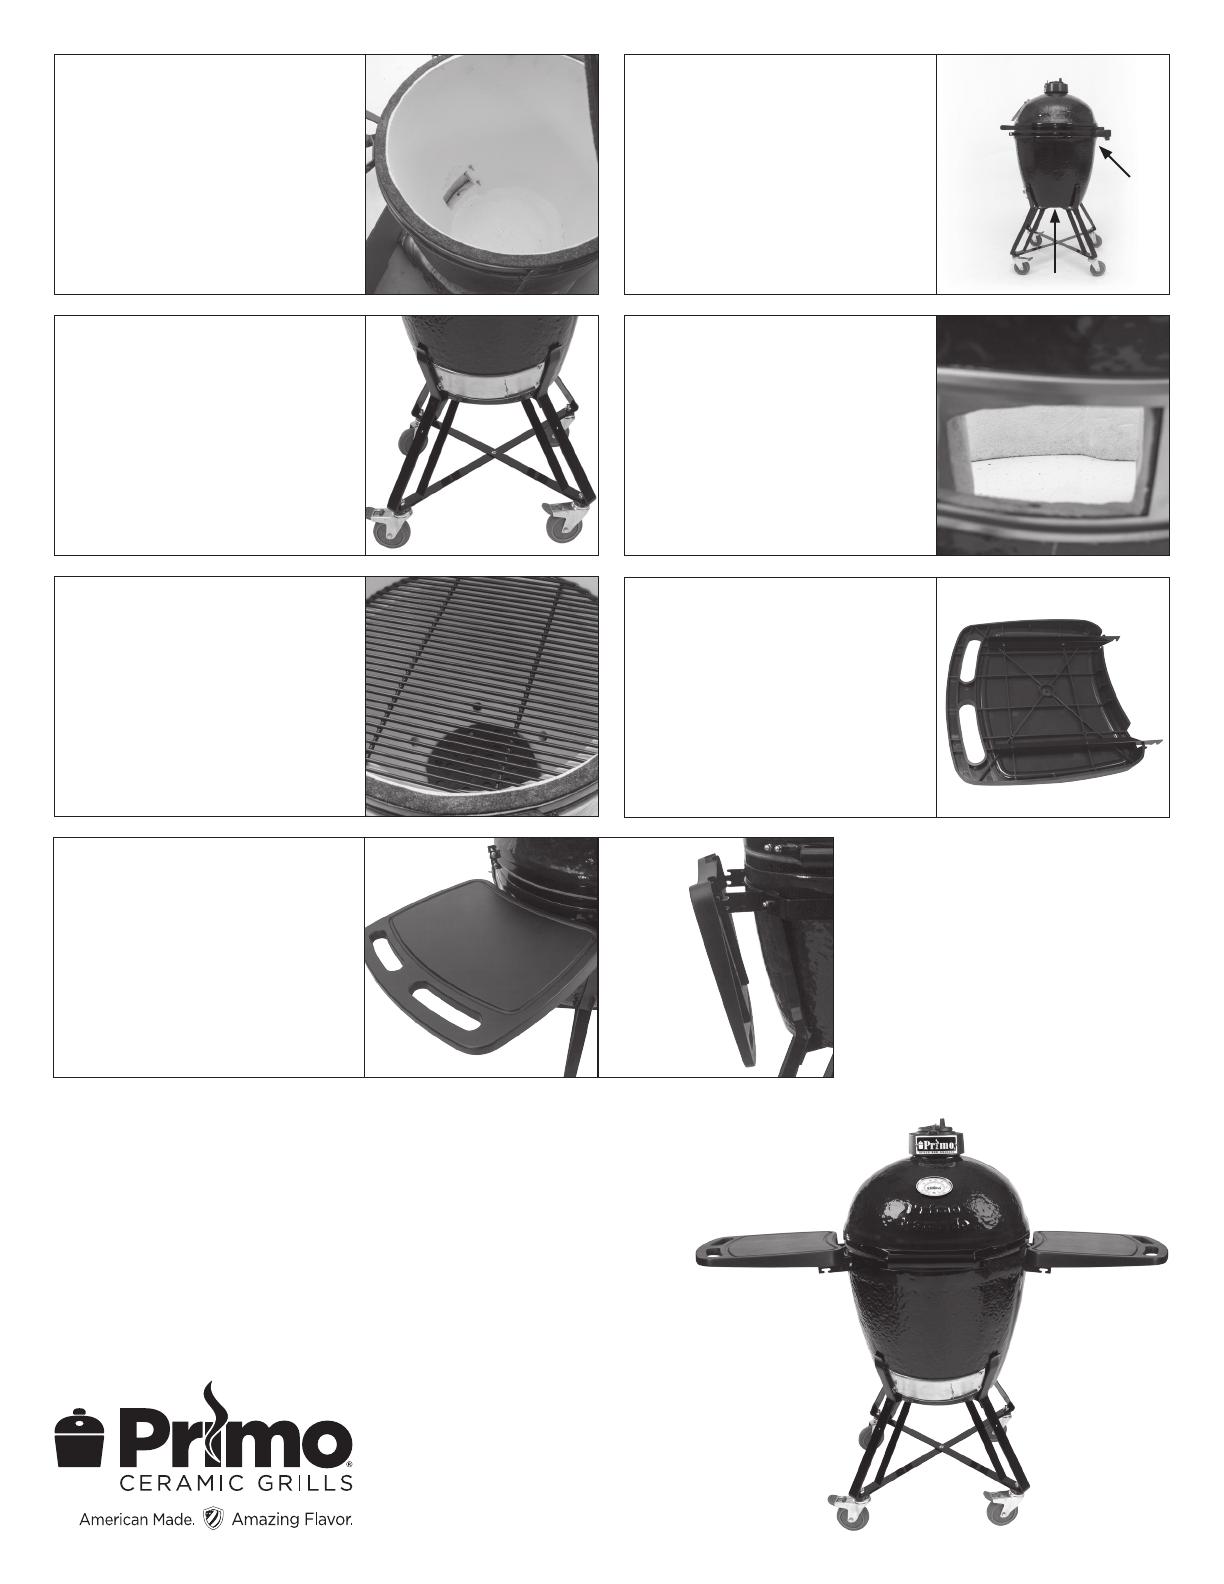
17
Attach the
side shelves
as shown. Side
shelves may be folded
downward or removed
when not in use.
Final Notes After Assembly
- Always pull the grill carefully when moving.
Never push grill to prevent the potential of it tipping it over.
- When the grill is in the desired location, push down
the tabs on the locking casters to set the locks.
Place one
hand here.
Place one hand here.
DO NOT LIFT BY THE HINGE
3289 Montreal Industrial Way
Tucker, GA 30084
770-492-3920
www.PrimoGrill.com
Folded Down
  • Page 1 1
  • Page 2 2

Primo 300 Assembly Instructions

Type
Assembly Instructions
This manual is also suitable for

Ask a question and I''ll find the answer in the document

Finding information in a document is now easier with AI