Page is loading ...

Retain For Future Reference
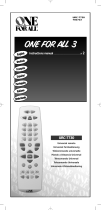
Topline
TM
USER GUIDE & CODE BOOK
Universal Remote Control
URC-5550

BASIC FUNCTIONS
ABOUT YOUR Topline 5…
3
INSTALLING THE BATTERIES…
4
FEATURES AND FUNCTIONS…
6
LANGUAGE SELECTION…
8
SETTING THE CLOCK…
9
SETTING UP YOUR DEVICES…
Setting Up Your TV…
10
Setting Up Your Other Devices…
11
Searching For Your Code
13
Recording Your Codes...
14
REASSIGNING THE DEVICE KEYS…
15
THE SCAN KEY…
16
TELETEXT & FASTEXT…
16
ADVANCED FUNCTIONS
SEQUENCES…
Power Sequence…
17
Installing Other Sequences…
18
Deleting a Sequence…
18
TIMED SEQUENCES…
19
Recording When Your Not Home…
19
Deleting a Timed Sequence…
20
THE SHIFT KEY…
Shifted Functions
20
Sleeptimer…
21
VOLUME LOCK...
23
CHANNEL +/- SIMULATION...
24
CLEAR ALL...
24
TROUBLE SHOOTING...
25
CUSTOMER SERVICE…
Product Support…
26
Key Magic…
27
Telephone Upgrade…
28
SET-UP CODES
Televisions
29
Video Recorders
31
Satellite Receivers
33
Cable Converters
34
Video Accessories
35
CD Players
35
Miscellaneous Audio
35
Home Automation
35
Audio Amplifiers
35
Tuners
35
Table of Contents
2

Thank you for purchasing the ONE FOR ALL Topline 5 Home Theater
Universal Remote Control. Your Topline 5 package contains:
• Your Topline 5 remote control
• Your Topline 5 manual
Your User Guide & Codebook is divided into three parts: Basic Functions,
Advanced Functions and Set-Up Codes. You may need this guide again in the
future, so please be sure to keep it.
Your Topline 5 needs four new AAA/LRO3 Akalines batteries.
Your ONE FOR ALL Topline 5 is designed to let you use one remote to
operate 5 Devices: any combination of Television, Videos, Satellites, Cable
Converters, CD Players, Amplifiers and Tuners. This also includes those
devices wich operate over 100kHz. You can choose any combination of 5
devices you would like to operate.
Also, what makes the Topline 5 even more unique is it includes “Timed
Sequences” which allows you to initate a sequence of key presses at a
specific time - a feature which is great for video programming, for example.
The following pages explain in simple steps how to set up the Topline 5 and
customize it for your home entertainment environment.
3
About your Topline 5

Your Topline 5 requires four (4) new alkaline AAA/LRO3 batteries. To install
the batteries:
Remove the battery cover by pressing down on the
bottom portion and sliding the cover off.
Match the batteries to the + and - marks inside the
battery case, then insert the batteries.
Slide the battery cover back into place.
Once the batteries are inserted all the segments in the display screen will
show. If the display screen is blank or if the screen reads [BATTERY LO], the
batteries are running low and you must replace them with fresh batteries to
ensure proper functioning. The Topline 5’s internal back-up batteries ensure
that programming information is not lost if the batteries are changed;
however, you will need to reset the clock upon changing batteries.
Installing the Batteries
4
2
3
1

Basic Features
5
Device
Keys
TV/VCR
Magic
Volume
Scan
A
B
Channel
Menu Keys
Stop
Pause
Slow
Play Fast Forward
Record
Rewind
Number
Keys
Power
ESC
Lite
Enter
Shift
Mute
LCD
Teletext
Fastext

6
FEATURES AND FUNCTIONS
Key Function
The LCD screen guides you through setting up and
operating your home entertainment equipment.
Device Keys
The TV, VCR, SAT, CD and AUX keys select the device to be
controlled. For example, pressing the TV key allows the
remote to control the functions of your Television, after
pressing VCR you can operate your Video, etc. For more
detailed information, please see page 10.
Power
The Power key controls the same function it did on your
original remote. When SHIFT is pressed first, this key is
also used to access the Sleeptimer of your device (see page
20).
Menu
If available on your orginal remote, these directional keys
are used to access the menu function or programming
guides.
During set-up and programming your Topline 5, the up
and down keys are used to scroll through the LCD
screens.
Magic
The MAGIC key is used to set up your Topline 5 and to
access the menu and special features.
Esc
The Esc (Escape) key is used to exit the LCD screen and go
back to normal operation.
Lite
The LITE key is used to turn On and Off the Topline 5’s
backlit keypad and LCD. Press the LITE key once to turn on
the backlight feature. The backlight will stay on for
approximately ten seconds each time a key is pressed. To
deactivate the backlight, press the LITE key again.
Enter
The Enter Key is used to make selections on the LCD
menu. It is also used to make selections in your on-screen
programming menus.
Shift
The Shift key accesses advanced features which are
located under the following keys: POWER, VOL+/-, CH+/-,
MENU+/-, left, right.
Volume +/-, Channel +/-, Mute
These keys operate just as those on your original remote
control. When SHIFT is pressed first, volume and channel
can be used to control color and brightness (see page 20).
Basic Features
ESC
LITE
ENTER
SHIFT
TV VCR SAT
CD AUX
POWER
POW
MENU+
MENU-
( )
()
MUTE VOL- VOL+
CH- CH+
MAGIC
S

7
FEATURES AND FUNCTIONS
Key Function
Number Keys
The Number keys (0-9, 10, 20) provide functions just like
your original remote, such as direct access programme
selection. If your original remote uses one/two digit input
switching (-/-- symbol), this function can be obtained by
pressing the -/-- key, which is the same as the 10 key.
If your original remote used an AV key, this can be found
by pressing the 20 key.
Scan
The Scan key allows you to easily browse through the
programmes on your TV, VCR or Satellite. See page 16 for
more details.
A, B
These keys can be used for programming Sequences. See
page 17 for more detail.
Video Recorder Keys
After pressing VCR, these keys operate the functions of
your VCR. To prevent accidental recording, the Record key
must be pressed twice to start recording.
Teletext/Fastext Keys
After pressing the TV key, the top row of VCR keys are
used to operate the main Teletext functions of your
Television. The symbols below the top row of keys are for
Teletext. Of course, your Television must be Teletext
capable. For an explanation of the teletext symbols, please
refer to page 16.
After pressing the TV key, the bottom row of VCR keys
marked red, green, yellow and blue allow you to access
the Fastext functions of your television. Again, your
television must be fastext capable to operate these
functions. For a more detailed explanation of how
Teletext and Fastext work, please refer to the manual of
your Televison.
Also, some devices require you to use the fastext keys to
operate menu control. If so, these keys will function the
same way as on your orginal remote.
Basic Functions
0
9
10
20
-/--
SCAN
PL
REW
FF PAU
TV/VCR
SLOW
STOP REC
A
B
AV
STOP
TV/VCR
REC
SLOW
(red)
(green)
(yellow)
(blue)

8
LANGUAGE SELECTION
It is possible to choose between three languages for the text which is
displayed on the LCD of the Topline 5. You can chose between English,
French and German. The default setting is English. To change the language
selection, follow the procedure below.
Press and hold the MAGIC key until the display screen
changes from [DEVICE and the TIME] to [TIMED SEQ].
Press MENU- twice, the display will change to
[CONFIGURE]. Press ENTER and the display will change to
[TIME SETUP].
Press MENU+ two times and the display will read
[LANGUAGE]. Press ENTER.
The display will read [ENGLISH]. Use the Menu- key to
cycle through the language choices. When you get to the
desired language, press ENTER. The display will return to
the main screen.
Basic Functions
1
2
4
3
ENTER
ENTER
MENU-
MENU-
P
MENU+
P
MENU+
ENTER
MENU-
Notes:
- If you make a mistake in your selection, press ESC and repeat the
procedure starting with step number 1.
- When you replace the batteries, the language you have selected will
stay programmed.
MAGIC

9
SETTING THE CLOCK
The Topline 5 comes with both a 24hr clock and a 12hr clock. After installing the
batteries for the first time, the Topline 5 will default to the 24hr clock setting. To
set the clock, follow the procedure below. It is also possible during this
procedure to change to a 12hr clock setting, if desired.
Press and hold the MAGIC key until the display screen
changes from [DEVICE and the TIME] to [TIMED SEQ].
Press MENU- twice, the display will change to
[CONFIGURE]. Press ENTER and the display will change to
[TIME SETUP].
Press ENTER. The display will read [24HR CLOCK]. If this is
the setting you want, press ENTER, OR if you wish to
change to a 12hr clock, press MENU- and the display will
read [12HR CLOCK]. Then press ENTER.
The display will change to [TIME] and the first digit in the
clock will blink. Enter the first digit of the time, then the
next digit will blink. Continue entering the time until all
four digits of the clock have been set.
If you are using a 24hr clock, press ENTER. If you are using
a 12hr clock, the AM/PM will blink. Press MENU- to toggle
between AM and PM. Once this is selected, press ENTER.
The display will then change to the day of the week. Use
the MENU- key to cycle through the days until the proper
day is displayed on the screen, then press ENTER. The
display will return to the main screen [DEVICE and the
TIME] showing the selections you have made.
Basic Functions
Notes:
- If you make a mistake in your selection, press ESC, and repeat the
procedure starting with step number 1.
- When you replace the batteries, you will need to set the clock again.
2
4
5
6
3
ENTER
MENU-
MENU-
ENTER
ENTER
MENU-
ENTER
MENU-
or
MENU-
ENTER
ENTER
ENTER
or
()
()
MAGIC
1

10
SETTING UP YOUR TV
To set up the Topline 5 for your television:
Find your Television code in the Set-Up Code section
(starting on page 28). Codes are listed by brand name. The
most popular code is listed first. Make sure your Television
is switched on; any programme is fine.
Press the TV key, then press and hold the MAGIC key
until the display screen changes from [TV and the TIME] to
[TIMED SEQ].
Press MENU- once, the display will change to [CODE
SETUP]. Press ENTER and the display will change to [DEV
SET UP].
Press ENTER and the display will change to [TV].
Enter your three-digit TV code using the number keys,
then press ENTER.
Aim the Topline 5 at your TV and press POWER. Your
Television should turn off. If your TV turns off, press the
ESC key to return to the main screen [TV and the TIME].
If your TV does not turn off, enter the next code in the
list then press ENTER. Press POWER to see if your TV turns
off. Once your TV turns off, you have found the correct
code. Turn your device back on and try all the remote’s
functions to ensure they are working properly. Press the
ESC key to return to the main screen [TV and the TIME].
Write your code in the three boxes on page 14 for easy future reference.
Basic Functions: Setting Up Your Devices
1
2
4
5
3
TV
ENTER
ENTER
ENTER
MENU-
ESC
POWER
Her finder du kodern
Admiral 087, 093, 418, 213, 264
Adyson 217, 216
Agazi 264
AGB 516
Agef 087
Aiko 216, 009, 037, 371, 035, 072, 361,
191
Aim 037, 274
Akai 361, 208, 371, 037, 191, 035,
009, 072, 218, 163
Akiba 218, 282, 455, 037
6
Notes:
- To control your Television, [TV] must be displayed on the screen. This can
be obtained by pressing the TV key.
- To set up more than one device, before pressing the ESC key during step
6, you can press the next device key you want to program and enter the
code for that device.
- If a code is entered which is not in the memory of the Topline 5, the
display will read [NOT FOUND]
- If your TV does not respond, try every code listed for your brand during
step 6. If none of the codes listed operate your TV, try the Search Method
described on page 13, even if your brand is not listed at all.
MAGIC

11
SETTING UP YOUR OTHER DEVICES
To set up the Topline 5 for your other devices:
Find the code for your device in the Set-Up Code section
(starting on page 28). Codes are listed by brand name. The
most popular code is listed first. Make sure your device is
turned on.
Press the Device key on the Topline 5 for the device you
wish to control. Devices can be found under the following
key (for example to set up a Cable Converter you would
press SAT):
LCD
Device Abbreviation Key
Television TV
Video Recorder VCR
Satellite Receiver SAT
Cable Converter CABLE
Video Accessories VID AC
CD Player CD
Miscellaneous Audio MISC AU
Home Automation HOM CT
Amplifier AMP
Tuner TUNER
Then, press and hold the MAGIC key until the display
screen changes to [TIMED SEQ].
Press MENU- once, the display will change to [CODE
SETUP]. Press ENTER and the display will change to [DEV
SET UP].
Basic Functions
TV VCR SAT
CD AUX
1
2
Her finder du kodern
Admiral 087, 093, 418, 213, 264
Adyson 217, 216
Agazi 264
AGB 516
Agef 087
Aiko 216, 009, 037, 371, 035, 072, 361,
191
Aim 037, 274
Akai 361, 208, 371, 037, 191, 035,
009, 072, 218, 163
Akiba 218, 282, 455, 037
4
3
MENU-
ENTER
TV
VCR
SAT
CD
AUX
MAGIC

12
Press ENTER. Then, if necessary, use the MENU- key to
locate the device you want based on the chart above (for
example, if you are setting up a Cable Converter, you
would need to press MENU- once until CABLE is displayed
on the screen).
Then, enter your three-digit device code using the
number keys, then press ENTER.
Aim the Topline 5 at your device and press POWER. Your
device should turn off. If your device turns off, press the
ESC key to return to the main screen.
If your device does not turn off, enter the next code in
the list then press ENTER. Next, press POWER to see if
your device turns off. Once your device turns off, you have
found the correct code. Press the ESC key to return to the
main screen.
Write the code for your device(s) in the boxes on page 14 for easy future
reference.
Basic Functions
Notes:
- To control your device, press the device key first.
- Only one device (CD, amplifier, etc.) can be assigned to a device key. If
your original remote operates more than one device (for example, a
receiver and CD player in one remote), you will need to set up each
device separately.
- If your device’s original remote control does not have a power key, press
PLAY instead of POWER during step 7. (Make sure a tape or disc is
inserted.)
- To set up more than one device, before pressing the ESC key during step
7, you can press the next device key you want to program and enter the
code for that device.
- If your Device does not respond, try every code listed for your brand
during step 7. If none of the codes listed operate your Device, try the
Search Method described on page 13, even if your brand is not listed at
all.
5
6
7
ENTER
MENU-
ESC
POWER
ENTER

13
SEARCHING FOR YOUR CODE
If your device did not respond to the Topline 5 after you have tried all the
codes listed for your brand, try the Search Method described below. The
Search Method may also work if your brand is not listed at all.
For example, to search for the code to operate your TV:
Make sure your TV is switched on, any channel is fine.
Press the TV key, then press and hold the MAGIC key
until the display screen changes from [TV and the TIME]
to [TIMED SEQ].
Press MENU- once, the display will change to [CODE
SETUP]. Press ENTER and the display will change to [DEV
SET UP].
Press MENU- once, the display will change to [DEV
SEARCH]. Press ENTER and the display will change to [TV
and code].
Note: code represents the last 3-digit code which was
entered prior to starting the search. This code will now be
displayed in the screen.
Aim the Topline 5 at your TV and press POWER. If your TV
turns off, press ENTER to lock in your code. The display
will then return to the main screen. If your TV does not
turn off, press MENU+. The next available code will be
displayed on the screen. Press POWER again. If your TV
turns off, press ENTER. If your TV does not turn off,
continue pressing MENU+ and POWER until your
Television responds.
Once your TV turns off, press ENTER to lock in your code
and return to the main screen.
Basic Functions
1
2
4
5
6
3
ENTER
ENTER
MENU-
ENTER
MENU-
P
MENU+
POWER
POWER
TV
Notes:
- Be patient. You may need to alternate between MENU + and POWER
many times. When you have reached the end of the list, the display will
read [LIST END]. Remember you must aim the Topline 5 at your device
the entire time you are searching for your code.
- To search for the code for your other devices, repeat the steps above,
only substitute the appropriate device key in place of “TV” during step 2.
- If you are searching for the code for a VCR or CD Player, you may want to
use PLAY instead of POWER during step 5 (make sure a tape or disc is
inserted.).
()
+
MAGIC

RECORDING YOUR CODES
After you have set up the Topline 5 with your devices, you should record
your codes. If you are not sure which code the Topline 5 responded to, you
can display the code on the LCD for each device you have set up.
For example, to display your TV code:
Press the TV key, then press and hold the MAGIC key
until the display screen changes from [TV and the TIME] to
[TIMED SEQ].
Press MENU-once, the display will change to [CODE
SETUP]. Press ENTER and the display will change to [DEV
SET UP].
Press MENU- twice, the display will change to [DEV
NUMBER]. Press ENTER and the display will change to [TV
and your code]. Record your code below. Once you have
recorded your TV code in the space provided below,
continue by pressing the next device key and record the
code below.
Press ESC to return to the main screen.
TV CODE
VCR CODE
SAT/CBL CODE
CD CODE
OTHER
14
Basic Functions
1
2
3
4
TV
ENTER
MENU-
MENU-
ENTER
ESC
MENU-
■■■■■■
■■■■■■
■■■■■■
■■■■■■
■■■■■■
VCR
MAGIC

REASSIGNING THE DEVICE KEYS
The Topline 5 can operate any combination of five devices you want (for
example: 2-TVs, 1-VCR, 1-Satellite, 1-Amplifier). To do this, you must reassign
the necessary keys.
For example, to place a second TV on the CD key:
Press and hold the MAGIC key until display screen
changes from [DEVICE and the TIME] to [TIMED SEQ].
Press MENU- twice, the display will change to
[CONFIGURE]. Press ENTER and the display will change to
[TIME SETUP].
Press MENU- two times and the display will read [DEV
CHANGE]. Press ENTER. The display will read [FROM DEV]
Press the DEVICE KEY you would like to move. In this
example, you would press TV. The display will read [COPY
TO]. Then press the unused DEVICE KEY you would like
to replace. In this example, you would press CD. The
display will change to [TV2 and TIME]. Now your second
TV can be programmed under the CD key.
Continue with setting up this device with the appropriate
3-Digit Code as was described on page 11.
To reset a device key back to its orginal function repeat the steps above only
press the same device key twice during step 4.
15
Basic Functions
1
2
4
5
3
ENTER
ENTER
MENU-
MENU-
MENU-
MENU-
TV
Notes:
- To reassign any device key, follow the instructions above only substitute
the correct device keys during step 4.
- If you have moved a device key which contains more than one type of
device (ie: SAT key contains Satellite and Cable), you will need to refer to
the chart on page 11 during step 4.
CD
MAGIC

SCAN
The Scan key on the Topline 5 allows you to go through every programme
available on your TV, Video or Satellite.
For example, to scan through the programmes on your Television:
Aim the Topline at your TV and press TV, then SCAN.
Your TV will begin to scan through all the programmes
available on your Television, stopping at each programme
for about three seconds. Remember, the Topline 5 must
remain aimed at your TV the entire time you are using
Scan.
When you find a programme you would like to watch,
simply press the SCAN key again to stop the Scan feature.
To use Scan with your Video Recorder or Satellite, simply press the
appropriate device key during step 1 (VCR orSAT), then Scan.
TELETEXT AND FASTEXT
The Topline is designed to operate the basic functions of teletext (text on,
text off, mix and hold/stop).
Symbol Title Description
TEXT Puts the television in the teletext mode.
TV Switches the television back to regular
viewing mode. On some televisions, this
may be done by pressing the TEXT key
several times.
MIX Shows both teletext and regular
television simultaneously. Also used for
subtitling. On some televisions, this
function is accessed by pressing the
TEXT key twice.
HOLD/STOP Stops changing pages.
The keys marked red, green, yellow and blue are used to access the fastext
functions of your television.
16
Note: For a more detailed explanation of teletext and fastext, please refer
to the manual of your television. Remember, different televisions control
teletext and fastext features in different ways. Not all teletext functions
may be available for your particular model.
Basic Functions
Note: Scan may not function with devices which do not have programme
+/- keys on the original remote.
1
2
SCAN
SCAN
TV

SEQUENCES
POWER SEQUENCE - Turning on your
components with one key.
After you have set up the Topline 5 with your components, you can then set
up a Sequence on the Akey which will allow you to turn on all these com-
ponents with the touch of a key. A Sequence can be assigned to any key
EXCEPT: TV, VCR, SAT, CD, AUX, MAGIC, ESC, LITE,ENTER, SHIFT and SCAN.
To program the Power Macro:
Press and hold MAGIC until the display screen changes to
[TIMED SEQ].
Press the Menu- key twice until the display changes to
[CONFIGURE]. Press ENTER and the display will change to
[TIME SETUP].
Press the Menu- key three times until the display
changes to [KEY SEQ]. Press ENTER and the display will
read [SEL SEQKEY] (select sequence key).
Press A(to assign the sequence to this key). Now enter
the sequence for all the devices you want to turn “ON”.
For example:
AUX + POWER + TV + POWER + SAT + POWER + etc.
until you have entered all devices you want to be
included.
While entering the sequence, the display will read [ESC TO
END]. When you have entered the sequence, press ESC to
save. The display will return to [DEVICE and the TIME].
To activate the Power Sequence, aim the Topline 5 at your
devices and press Ato activate.
17
Advanced Functions
Notes:
- During step 4, it is important to enter the sequence in the order you
want your components to turn on. For example, if you would like your
tuner or amplifier to turn on before your TV, you must enter the
sequence in this order.
- If your original remote requires that you press a number key to turn on
your device, you should do this in place of pressing Power during step 4.
2
3
1
MENU-
MENU-
MENU-
ENTER
ENTER
x 3
ESC
4
5
A
6
A
MAGIC

INSTALLING OTHER SEQUENCES
You can program the Topline 5 to issue a sequence of commands at the
press of a key. For example, you may want to turn on your Satellite and TV
at the same time then set your TV to programme 5. Any sequence of
commands you regularly use can be reduced to one key stroke for your
convenience. The keys labeled Aand Bare for installing Sequences. Also
Sequences can be installed on any key EXCEPT: TV, VCR, SAT, CD, AUX,
MAGIC, ESC, LITE,ENTER, SHIFT and SCAN.
To set up a Sequence:
PRESS: DISPLAY WILL READ:
1. HOLD MAGIC TIMED SEQ
2. MENU- x 2 CONFIGURE
3. ENTER TIME SETUP
4. MENU- x 3 KEY SEQ
5. ENTER SEL SEQKEY (select sequence key)
6. A (or B) ENTER SEQ
7. Enter the sequence of commands in the order you want them to activate.
For the example mentioned above, you would press:
SAT + POWER + TV+ POWER + 5 (enter the channel number exactly as
you would on your original remote). While you are entering the
sequence, the display will read [ESC TO END]. Press ESC to save.
The display will return to the main screen.
Deleting a Sequence
To erase any Sequence from a key, repeat steps 1-6 above, then press ESC to
delete.
18
Advanced Functions
Notes:
- Once you program a Sequence on a specific key, the sequence will work
regardless of the mode (TV, VCR, SAT, etc.) you are in.
- If your original remote requires that you press a number key to turn on
your device, you should do this in place of pressing Power.
- If you have placed an extended function on a key using “Key Magic” and
then include this key in a Sequence, the extended function will be
included in the Sequence NOT the original function of this key.
- Besides the A and B key, you can install a Sequence on any key EXCEPT
the following: TV, VCR, SAT, CD, AUX, MAGIC, ESC, LITE, ENTER, SHIFT,
SCAN.

19
TIMED SEQUENCES
The Topline 5 is equipped with a special feature which allows you to initiate
your Sequence at a specific time, up to seven days in advance. It will also
allow you to program the sequence to initiate Daily or Weekly. For example,
this feature can be used to record programmes, act as an alarm clock by
turning on your stereo at a certain time, or initiate any other series of
keystrokes you would like to start at a specific time. You can store up to
ten sequences in the memory of the Topline 5 with each sequence having a
maximum number of 15 keystrokes.
For example, to record a programme from your Satellite:
Press and hold MAGIC until the display screen changes
to [TIMED SEQ]. Press ENTER. The display will change to
[ADD SEQ]. Press ENTER again.
The display will change to [START and the TIME] with the
first digit of the clock blinking. Enter the time you
would like to start your recording. (If you have a 12h clock
setting, AM/PM will then blink. Press MENU- to toggle
between AM and PM.) Once this is selected, press ENTER.
The display will change to [ONCE]. Use the MENU- key to
cycle through [ONCE], [DAILY] or [WEEKLY] depending on
when and how often the sequence should record. After
you have made your selection, press ENTER.
If you are recording either Once or Weekly, the display
will change to the day of week you want the sequence to
begin. Use MENU- to cycle through the days of the week
until the proper day is on the screen. Press ENTER to
select.The display will read [ENTER SEQ]
Enter the sequence of commands in the order you want
them to activate. For example,
SAT + POWER + 27 + VCR + POWER + RECORD + RECORD
This Sequence will turn on your Satellite, change the
channel to 27, turn on the VCR and start the VCR
recording.
While entering the sequence, the display will read [ESC TO
END]. Once the Sequence has been entered, press the ESC
key to return to the main screen. A clock symbol will be
displayed at the bottom of the LCD to indicate that there
is a Timed Sequence in memory.
It is important to note for the above example, if you would like to stop the
recording at a certain time, you will need to install another Timed Sequence
to do this.
Advanced Functions
2
3
4
5
6
1
ENTER
ENTER
ENTER
MENU-
ENTER
MENU-
ENTER
MENU-
ESC
MAGIC

To delete a Timed Sequence:
Press and hold MAGIC until the display screen changes
to [TIMED SEQ]. Press ENTER and the display will change
to [ADD SEQ].
Press MENU- once and the display will read [DEL SEQ].
Press ENTER. The display will then change to [DEL (the
Day, W = Weekly or D = Daily) and the time of the
sequence].
If this is the selection you would like to delete, press
ENTER. The display will read [DELETED] and then go to
the next timed sequence in memory.
Note: If you have more than one timed sequence saved,
use the MENU- key to scroll through the sequences until
you find the one you would like to delete. Once this
sequence is displayed on the screen, press ENTER.
Press ESC to save your changes and return to the main
screen.
THE SHIFT KEY
There are many features on the Topline 5 keypad which can be accessed
using the SHIFT key. For example, to adjust the colour of your Television,
you would press: SHIFT then VOL+/- keys
The following keys have functions that are shifted:
KEY: SHIFTED FUNCTION:
POWER: SHIFT THEN POWER = SLEEP
VOL +/-: SHIFT THEN VOLUME +/- = COLOUR +/-
CH +/-: SHIFT THEN CH +/- = BRIGHTNESS +/-
MENU+: SHIFT THEN MENU+ = CENTER+
MENU-: SHIFT THEN MENU- = CENTER-
MENU LEFT: SHIFT THEN MENU LEFT = DELAY-
MENU RIGHT: SHIFT THEN MENU RIGHT = DELAY+
20
Advanced Functions
2
3
4
1
ENTER
ENTER
ENTER
ESC
MENU-
Notes:
- Once you have pressed the SHIFT key, the Topline 5 will remain in the
Shift mode, indicated by the S on the LCD screen, for 10 seconds after
the last key press, or until the SHIFT key is pressed again.
- Remember, in order for you to access the PIP features with the Topline 5,
your original remote control must have had these features.
MAGIC
/