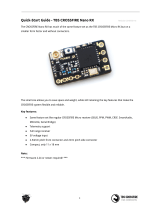
Page is loading ...

©2017 Horizon Hobby, LLC. All Rights Reserved.
4105 Fieldstone Rd • Champaign, IL • 61822 • 800.535.5551 • fastserve.horizonhobby.com
This Document is meant to educate how a Spektrum DX9 owner can upgrade their transmitter to
provide a serial data port for use with the Team Black Sheep Crossfire Module.
Currently there are 2 methods.
Please read this disclaimer before using a Spektrum DX9 with the TBS Crossfire Module.
- - DX9 Crossfire Disclaimer - -
Using the Crossfire firmware
By downloading this firmware, you acknowledge that you understand the use and liability of
long range radio systems, such as the Team Black Sheep Crossfire long range system, and that flying
beyond line of sight can be hazardous and potentially illegal. Horizon Hobby in no way endorses
hazardous and/or illegal activities, and it is the user’s responsibility to understand and follow all local
laws and regulations. Furthermore, Horizon is not responsible for any loss of control that may result in
damages or loss of property when using external RF modules with Spektrum Equipment.
Modification for use of the Team Black Sheep Crossfire System
The TBS Crossfire long range system is intended to provide less latency and greater range than
standard systems in the DX9 radio. However, installing the Crossfire system requires soldering a new
serial port onto the transmitter circuit board. We have provided a comprehensive tutorial to perform
this modification on a Spektrum DX9 Transmitter correctly. Please be aware that any self-modification of
the transmitter will void your transmitter warranty. Future service on a self-modified transmitter will not
be denied, but any future service performed will not be covered under warranty, and repairs will be
billed accordingly. As a result, Horizon strongly recommends sending your Spektrum radio in for service
and allowing our professional service technicians to perform the Crossfire system installation and
preserve your warranty. Click here to start the service request process. Please include a note in the
service request asking for this modification.
Once we receive your Transmitter, an authorized Spektrum Service Technician will perform the
modification and confirm that the Transmitter functions properly post upgrade. Once the modification is
completed, your radio will have a common servo connector leading out the back of the radio that offers
serial port signal and ground. Use this plug to connect and communicate with your serial input module.
The cost for this modification is $75 plus shipping and is currently only offered for the Spektrum DX9 and
DX9 Black Edition transmitters.
* PLEASE NOTE THAT THIS SERVICE IS CURRENTLY AVAILABLE ONLY FOR US AND CANADA
*** PLEASE NOTE THAT HORIZON HOBBY DOES NOT SUPPORT OR WARRANTY TEAM BLACKSHEEP
PRODUCTS. IF YOU HAVE QUESTIONS OR NEED SERVICE WITH A TBS CROSSFIRE OR OTHER TBS
PRODUCTS, PLEASE CONTACT TEAM BLACKSHEEP DIRECTLY.

©2017 Horizon Hobby, LLC. All Rights Reserved.
4105 Fieldstone Rd • Champaign, IL • 61822 • 800.535.5551 • fastserve.horizonhobby.com
Method 1 – Self Modification – How to install a serial port on your Spektrum DX9
These instructions are geared toward the Do it Yourself enthusiast, if you do not possess the
knowledge and confidence to perform a minor modification to your RC equipment, or if your radio is still
with in the 1 year warranty period, please continue to Method 2.
***Note there is a video going over this procedure found Here that is a great companion to these
instructions.
Step 1) Remove the back of the Transmitter
There are 8 Screws. Use a #1 Phillips screw driver to remove. The antenna housing can be
removed by pushing forward, toward the front of the transmitter, then pulling up to remove. Gently lift
the rear case away from the front. Be careful not to tug on any wires going from the front to rear. None
of the connections need to be removed but removing the Handle antenna wire from its anchor can
make the inside easier to access.
Step 2) Install your serial output cable
The cable used will need to have at least 2 wires. One for
signal, another for ground. In our example we will use the male end
of a common 3 wire servo lead, and remove the middle lead.
Suggested Lead Part # EFLREX12L
Once you have that cable prepared we will “tin” the two pin holes
used for the serial out port.

©2017 Horizon Hobby, LLC. All Rights Reserved.
4105 Fieldstone Rd • Champaign, IL • 61822 • 800.535.5551 • fastserve.horizonhobby.com
Find the pin holes labeled J16. We are using the 2
nd
and 3
rd
holes down for TX and Ground respectively.
Proceed to “tin” these two locations and solder the signal and ground leads to them, being
careful not to bridge the gap. For extra precaution, use a multi-meter to check that you have no
continuity between these points once soldering is complete.

©2017 Horizon Hobby, LLC. All Rights Reserved.
4105 Fieldstone Rd • Champaign, IL • 61822 • 800.535.5551 • fastserve.horizonhobby.com
Step 3) Secure your serial data out lead
It is important that the wire being installed has no chance
of rubbing against sharp edges or getting into any moving parts.
To prevent this, anchor the wire to one of the anchor points
already available inside the DX9, such as this example.
Step 4) Route the lead outside of the transmitter case
There are a number of ways to do this, but an easy route that does not require and
modification to the back case is to take it thru one of the rubber grommets as shown here.
Once complete, replace the back case, being careful to reroute the antenna lead back in its anchor point
and making sure no wires are pinched while re-attaching the rear case of the transmitter.
Step 5) Create a interface cable
The DX9 will be interfacing this serial port with the EXP Port on the TBS Crossfire. This is the 6
Pin port. Here is a diagram for the cable and an example.

©2017 Horizon Hobby, LLC. All Rights Reserved.
4105 Fieldstone Rd • Champaign, IL • 61822 • 800.535.5551 • fastserve.horizonhobby.com
Either utilize a cable that comes off the TBS Crossfire
module bay adapter or aquire the connector seperately.
In our example we used the iX12 Crossfire adapter
(SPMA3090) and attached a female servo lead to the
blue (TX) and Black (GND) leads.
Step 6) Update the DX9 Airware for Serial Port Access
Proceed to Spektrumrc.com to download the firmware required to turn on this serial data port.
Once logged in, find your registered DX9 (if you have not done so, do so now) and then find Update
Firmware. Browse through until you locate the latest firmware that incorporates Crossfire/Serial data
port. Please reference the change log readme file for the update download to find this information.
Once the DX9 is updated, the Serial Port Setup menu will be located in the system setup menu. Inside
that menu change the settings as shown and the radio is ready to utilize the TBS Crossfire via the CRSF
Protocol.
(Protocol = Crossfire , Spektrum RF = Inhibit)

©2017 Horizon Hobby, LLC. All Rights Reserved.
4105 Fieldstone Rd • Champaign, IL • 61822 • 800.535.5551 • fastserve.horizonhobby.com
Method 2 – Send in your Spektrum DX9 for Serial Port Upgrade
Horizon strongly recommends sending your Spektrum radio in for service and allowing our
professional service technicians to perform the Crossfire system installation and preserve your warranty.
Click here to start the service request process. Please include a note in the service request asking for this
modification.
Simply state that you would like to have your DX9 to have the serial port added.
Once we receive your Transmitter, an authorized Spektrum Service Technician will perform the
modification, install the latest DX9 firmware that uses the Serial Port Setup menu and confirm that the
Transmitter functions properly post upgrade. Once the modification is completed, your radio will have a
common servo connector leading out the back of the radio that offers serial port signal and ground. Use
this plug to connect and communicate with your serial input module.
The cost for this modification is $75 plus shipping and is currently only offered for the Spektrum
DX9 and DX9 Black Edition transmitters. With this service your DX9 will have a male servo lead out of
the back of the transmitter and we will include an adapter used for the EXP port on a TBS Crossfire to
this lead.
* PLEASE NOTE THAT THIS SERVICE IS CURRENTLY AVAILABLE ONLY FOR US AND CANADA
*** PLEASE NOTE THAT HORIZON HOBBY DOES NOT SUPPORT OR WARRANTY TEAM BLACKSHEEP
PRODUCTS. IF YOU HAVE QUESTIONS OR NEED SERVICE WITH A TBS CROSSFIRE OR OTHER TBS
PRODUCTS, PLEASE CONTACT TEAM BLACKSHEEP DIRECTLY.
Available Spektrum Crossfire Mount
There is a STL file that can be used to 3D print the Crossfire mount that can be attached to the back of a
DX9 via Double sided tape. Makes attaching and removing the module easy and clean. The file can be
found HERE.
/