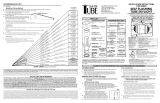
ALVIN Satin-Glow Lightboxes
MODEL No. Cut Glass to This Size
LB1218 11
15
⁄
16
" x 17
15
⁄
16
"
LB1620 15
15
⁄
16
" x 19
15
⁄
16
"
LB1824 17
15
⁄
16
" x 23
15
⁄
16
"
LB2436 23
15
⁄
16
" x 35
15
⁄
16
"
Degrees of Illumination
MODEL No.
Lumens
Tubes Lumens at
per Tube per Box Light Box Surface
LB1218
650
1 F15T8
650
LB1620 650 2 F15T8 1300
LB1824 650 2 F15T8 1300
LB2436 1750 3 F30T8 5100
All electrical components are U.L. listed.
Instructions for Cutting Glass
• Double-strength window glass* • Thickness:
1
⁄
8
" • Chamfer smooth all edges
* It is best to purchase glass from a glass dealer rather than a hardware or home center.
IMPORTANT NOTE
It is highly r
ecommended that these dimensions be
double-checked against your lightbox before cutting glass.
1. To install glass, remove the two aluminum
strips on the top surface of the lightbox. For
your own safety, use gloves when handling
glass. Place the glass on top of the Plexiglas
sheet and replace the aluminum strips.
2. To operate, depress the on/off switch and
hold for one or two seconds until the lights
illuminate. Note: Bulbs may loosen during
shipping. If bulbs don’t illuminate check that
they are properly seated in fixture.
3. The Satin-Glow Lightbox is designed to
operate on 110V AC, 60 cycle. Please do
not use any other power source.
4. Removal of the back panel or tampering
with the electrical circuitry will void the
warranty and releases the manufacturer
from all responsibility for damages, loss
of property and/or personal injury.
Care and Use Instructions
To Replace Fluorescent Tubes
4. Remove the hold-down screws and lift
off the light diffusers.
5.
Remove and r
eplace fluor
escent tubes.
6. Return diffusers, glass and Plexiglas
panels to their original positions.
Re-install aluminum strips and scr
ews.
1. “Daylight” bulbs with CRI of 70 or
gr
eater are recommended. Always use
dir
ect r
eplacement lamps in or
der to
prevent overheating.
2. Disconnect the power cord.
3. Remove the screws and aluminum strips from
the top surface of the lightbox. Carefully
remove glass and Plexiglas panels.
Alvin & Company, Inc. Bloomfield, CT Grand Prairie, TX www.alvinco.com
/
