Wentronic WZ CRIMP 10 User manual
- Category
- Cable assembly tools
- Type
- User manual
This manual is also suitable for

Betriebsanleitung
User‘s Manual
WZ Crimpzangen | Crimping pliers
11366
11366
11366
Page is loading ...
Page is loading ...
Page is loading ...
Page is loading ...
Page is loading ...
Page is loading ...

8
User‘s Manual
Fixpoint
®
- Crimping Pliers
ATTENTION! Read the manual completely and
carefully. It is part of the product and contains
important advices for correct implementing and use.
Retain this manual for availability when passing to
other persons and if there are further questions.
Content: Page:
1 Safety Instructions 8
2 Description and Function 9
3 Intended Use 9
4 Scope of Delivery 9
5 Field of Application and Conguration 9
6 Construction 10
7 Instructions 10
8 Cutting, Stripping and Crimping 11
9 Care, Maintenance, Storage and Transport 11
10 Troubleshooting 12
11 Warranty and liability 12
12 Specications 13
13 Disposal Notes 13
1 Safety Instructions:
ATTENTION! Demounting of the product is only
permitted to skilled mechanics!
• This product is no toy and children must not use it
anyway, because it contains fragile, small and
swallowable parts such as mechanics, which can
bruse or cut people with incorrect use!
• Remove and dispose packaging materials, because
playing children could cut on it. Furthermore there is a
danger of swallowing and inhaling of incidentals and
insulating of materials.
• Do not interrupt the product to extreme heat, coldness or
direct sun insulation.
• Lock the tool after use, if a lock is included.
• Work under good light conditions to minimize the risk of
injuries.
• Do not modify or alter the device or its accessories!
Therefor mind chapter “warranty and liability“.
ATTENTION! Risk of injury by bruises!
Never hold limbs between moveable product parts!

9
• Furthermore avoid liquid or dust effects.
• If defects, mechanical damages, disturbances or other
problems occur, which are not solvable with this manual,
take the device out of work immediately and consult your
dealer for questions, repairing or change like it is
described in chapter “warranty and liability“.
• Mind the specications for transporting and use
applicable methods for it, e.g. by transporting in the
original packaging.
• Do not use any damaged parts.
• Please attend to the terms of use in chapter 3.
• Don‘t put limbs between movable parts to avoid brusing
and cutting.
2 Description and Function:
This product is a crimping plier for connecting different plug
types to unshielded or shielded cables, depending on the
model. Depending on the model it is useable for different
plug types and can cut and strip cables. Pliers with ratch
come with nishing mechanism and emergency release.
3 Intended Use:
This
product is provided for using like described in chapter
1. It is only allowed to use it in dry interior rooms. Disregar-
ding and non-compliancy of these terms and of the Notes
on Safety may cause massive accidents and damages to
people and things.
4 Scope of Delivery:
• 1 pc. crimping tool
• 1 pc. user‘s manual
5 FieldofApplicationandConguration:
11366 BNC, TNC,
SMA, N
+ useable for RG 55, 58, 59, 62, 140,
141, 142, 210, 223, 303 and 400
+ Ratchet
+ Crimping diameter: 6.5/5.41/1.72 mm
+ lock mechanism and ratch
77187 RG 59 (4C9,
RG 6 (5C)
+ for F compression plugs
+ lock mechanism and ratch
77268 F, BNC, IEC,
RCA
+ automatic Stop
+ ratchet with auto lock
+ incl. 3 adaptors
+ ratch

10
User‘s Manual
6 Construction:
11366:
77187:
Plier F connector cable
lock mechanism
77268:
adaptor
lock mechanism
Front view
Ejection: closed open
7 Instructions:
• The crimping plier must be in correct and cleaned

11
condition before starting work.
• Remove crimping residues from cheeks and plier after
each crimping.
• Protect the angles from dirt and grease them regularly
with light machine oil.
8 Cutting, Stripping and Crimping:
• If a cutter and stripper is included, cut cables by putting it
into the tool from the labeled site and compress the tool
until opening automatically.
1. Strip the cable in a way, until app. 5-10 mm of the inner
conductor, app. 5-10 mm dielectric and app. 10 mm
of the shielding are visible.
By using a compression plug or at too lose tting, the
stripping lengths may be varied and the shielding may be put
over the cable jacket, to get xed tting.
2. Turn the plug onto the cable as close as possible until
tting well.
3. Insert the cable into the crimping plier together with the
plug.
4. Close the ejection at the front site, if included.
5. Adjust the plier until no tolerance is detectable.
6. Press together the crimping plier closely.
7. Unlock the plier, when necessary. Remove cable and
plug from the crimping plier.
9 Care, Maintenance, Storage and Transport:
• Clean the product only with a dry and soft cloth. Be
careful with cleaning to avoid scratches. For intensive
Staining you can damp the cloth with some water. Do not
use cleaning supplies and chemicals, because they can
corrode the plastic material.
• Remove residues with a small knife carefully.
• Store your product in a dry and dustproof surround when
not used for longer time. The product must be stored
impenetrable for children.
• Retain the packaging to avoid damages during transport.
• Protect the angles from dirt and grease them regularly
with light machine oil.

12
User‘s Manual
10 Troubleshooting:
11 Warranty and Liability:
• The producer grants a 2 years guarantee to a new
device.
• As the manufacturer has no inuence on installation,
warranty of the product only applies to the product itself.
• If any fault or damage is detected on your device, please
contact your dealer and provide your sales slip or invoice
as evidence of the purchase, if necessary. Your dealer
will repair the fault either on site, or send the device to
the manufacturer. You make the work of our technicians
considerably easier, when you describe possible faults in
detail – only then you can be assured that faults
occurring only rarely will be found and repaired with
certainty!
• The manufacturer is not liable for damages to persons or
property caused by improper installation or operation not
described in this guide. This includes, among others, any
alteration and modication of the product and its
accessories.
• Any use other than described in this user‘s guide is not
permitted, and causes loss of warranty, loss of guaran-
tee, and non-liability.
• We reserve our right for misprints and changes of the
device, packing, or user‘s guide.
Problem Help
The tool does not
open.
Compress the tool strongly until
opening automatically.
Open a trapped tool by using the
emergency release by turning the
small wheel or by pressing.
Unlock the tool like described in
chapter “Construction“.
bad crimping Mind orthogonal and complete put-
ting in the cable.
Strip the cable and compress the
tool.
Remove residues from the tool.
other questions Consult your dealer.

13
12Specications:
13 Disposal Notes:
This product should not be disposed together with domestic
waste. Please return your device free of charge at the end of
its service life at public collection points established for this
purpose, or at the sales outlet. Details for disposal are
regulated in the relevant federal state law. Potential
recyclable materials are fed into the recycling cycle to obtain
new raw materials from them. Following recyclable materials
are collected a local collection points:
• Waste glass, plastic, waste metal, metal sheet, and more.
This type of recycling of waste equipment contributes
signicantly to the protection of our environment.
Model 11366 77187 77268
dimensions
(mm)
215 x 65 x 20 210 x 80 x 25 223 x 65 x 22
weight (g) 464 455 469
plug type BNC, TNC,
SMA, N
RG 59 (4C9,
RG 6 (5C)
F, BNC, IEC,
Cinch

14
User‘s Manual
Page is loading ...
Page is loading ...
-
 1
1
-
 2
2
-
 3
3
-
 4
4
-
 5
5
-
 6
6
-
 7
7
-
 8
8
-
 9
9
-
 10
10
-
 11
11
-
 12
12
-
 13
13
-
 14
14
-
 15
15
-
 16
16
Wentronic WZ CRIMP 10 User manual
- Category
- Cable assembly tools
- Type
- User manual
- This manual is also suitable for
Ask a question and I''ll find the answer in the document
Finding information in a document is now easier with AI
in other languages
Related papers
Other documents
-
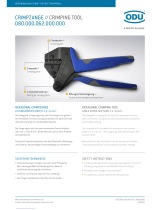
 ODU 080.000.062.000.000 User manual
-
LogiLink WZ0033 Datasheet
-
Hilti NPR 032 PE-A22 Operating instructions
-
Hilti NPR 032 PE-A22 Operating instructions
-
Cabstone DeskScope 380 User guide
-
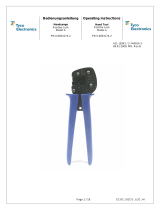
 Tyco Electronics 0-0654174-2 Operating Instructions Manual
-
Fixpoint WZ HK 8 Specification
-
e+p TZ 7 Datasheet
-
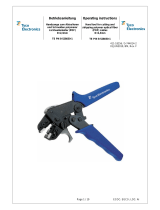
 Tyco Electronics 8-528030-1 Operating Instructions Manual
-
Harting 09 99 000 0881 Owner's manual


