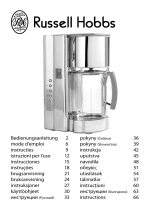
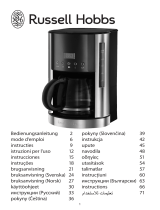
Unold 28016 Owner's manual

Category
Coffee makers
Type
Owner's manual
5
Deutsch English Français Nederl. Italiano Espanol Česky Polska
1 Kontroll-
leuchte EIN
Control light
ON
Témoin
MARCHE
Controle-
lampje
EIN (aan)
Spia ON/
Accesso
Luz de control
ON
Kontrolka ZAP lampka
kontrolna
(urządzenie
włączone)
2 Kontroll leuchte
AUTO
Control light
AUTO
Témoin
AUTO
Controle-
lampje AUTO
Spia AUTO Luz de control
AUTO
Kontrolka
AUTO
lampka
kontrolna
(opcja auto)
3 Taste EIN/AUS
(EIN / AUTO /
AUS)
Button EIN/
AUS (ON/
AUTO/OFF)
Bouton EIN/
AUS
MARCHE/
AUTO/ARRET
Toets EIN/AUS
(AAN / AUTO
/ UIT)
Pulsante EIN/
AUTO/AUS
Acceso/Spento
Tecla EIN/AUS
(ON/AUTO/OFF
Tlačítko ZAP/
VYP (ZAP/
AUTO / VYP)
włączone/
automatyczne/
wyłączone
4 Taste PROG
(Progammie-
rung)
Button PROG
(Program)
Bouton PROG
(rogrammer)
Toets PROG
(Programme-
ren)
Pulsante
PROG
(Programmare)
Tecla PROG
(Programación)
Tlačítko PROG
(programování)
programo-
wanie
urządzenia
5 Taste STD
STUNDEN
Button STD
HOURS
Bouton
HEURES
Toets STD
UREN
Pulsante STD
Ore
Tecla HOUR
HORAS
Tlačítko HOD
HODINY
godziny
6 Taste MIN
MINUTEN
Button MIN
Minutes
Bouton
MINUTES
Toets MIN
MINUTEN
Pulsante MIN
Minuti
Tecla MIN
MINUTOS
Tlačítko MIN
MINUTY
minuty
1
2
3
4
5
6
BEDIENFELD
11
1. Please read the following information and keep
it for future reference.
2. This appliance is not intended for use by per-
sons (including children) with limited physical,
sensory or mental abilities or with lack of ex-
perience or lack of knowledge, unless they are
supervised by a person who is responsible for
their safety or have been instructed on how to
use the appliance.
3. Children should be supervised in order to ensu-
re that they do not play with the appliance.
4. Keep the appliance out of the reach of child-
ren.
5. Connect appliance only to an AC power supply
with voltage corresponding to the voltage on the
rating plate.
6. Do not operate this appliance with an external
timer or remote control system.
7. For reasons of electrical safety, never immerse
the appliance or the power cord in water or
other liquids.
8. For reasons of electrical safety, do not clean the
appliance in the dishwasher.
9. The switch and power cord should never come
into contact with water or other liquids. In case
this ever happens, all parts must be completely
dry before operating the appliance again.
10. Never touch the appliance or power cord with
wet hands.
11. This appliance is intended to be used in
household and similar applications such as:
staff kitchen areas in shops, offices and
other working environments;
farm houses;
by client in hotels, motels and other working
environments;
bed and breakfast type environments.
Power Rating:
1.000 W, 230 V~, 50 Hz
Housing / Lid
Stainless steel, brushed,
Plastic parts black, textured
Water tank:
Plastic, semi-transparent, with water level indicator
Carafe:
Glass carafe with insulated plastic handle
Volume:
approx. 1,5 l, 10 – 15 cups
Dimensions W/D/H):
Approx. 29,0 x 23,5 x 35,5 cm
Weight:
Approx. 2,4 kg
Cable length:
Approx.
90 cm, rmly mounted
Features:
Electronic display with
Timer function (24 hrs preset)
Clock
Automatic disconnection after 2 hours
Warming plate
Swing-out folter with removable lter holder and drip stop
Permanent lter
Accessories:
Measuring spoon
Instructions
Spare parts:
Glass carafe with lid
Filter holder with drip stop
Permanent lter
Art. no. 2801640
Art. no. 2801663
Art. no. 2801665

INSTRUCTIONS FOR USE
TECHNICAL SPECIFICATION MODEL 28016
IMPORTANT SAFEGUARDS
12
12. For safety reasons, never place the app-liance
on hot surfaces, a metal tray or a wet surface.
13. Do not place the appliance or power cord near
open ames during operation.
14. Always use the coffeemaker on a level, unclut-
tered and heatresistant surface.
15. The appliance is approved for household use
only and may be used only for brewing cof-
fee, never for heating milk or other liquids or
keeping them warm.
16. Make sure that the power cord does not hang
over the edge of the countertop or table, since
this can cause accidents, for example if small
children pull on the cord.
17. Route the power cord so that there is no possi-
bility of the cord being pulled or tripped over.
18. Do not wrap the power cord around the appli-
ance and avoid kinking of the power cord to
prevent damage.
19. Use the coffeemaker only indoors.
20. When in use, never cover the coffeemaker,
since this could cause the appliance to over-
heat.
21. Only use fresh, cold water to brew coffee. Fill
the water container at least up to the lowest
marking (2 cups) and do not overll.
22. Do not switch on the appliance until after you
have lled the water tank with water.
23. In case of repeated use, allow the appliance to
cool off at least 5 minutes between use.
24. Never use the coffee pot in the microwave; it is
not suitable for such use.
25. Do not move the appliance as long as it is in
operation, to prevent injuries.
26. Make sure that all users, especially children,
are aware of the danger of injury from emerging
steam and hot splashing water – danger of
burns!
27. Do not use the appliance with accessories of
other manufacturers or brands, to prevent
damage.
28. Unplug the appliance from the power supply
after use and prior to cleaning. Never leave the
appliance unattended when it is plugged in to
the power supply.
29. Check the appliance, the plug and the power
cord regularly for wear or damage. In case of
damage to the power cord or other parts, please
send the appliance or the power cord for in-
spection and repair to our after sales service.
Unauthorized repairs can result in serious risks
to the user and void the warranty.
30. If the supply cord is damaged, it must be re-
placed by the manufacturer or its service agent
or a similarly qualied person in order to avoid
a hazard.
1. Keep your coffeemaker always clean and
free from calcium (see chapter Cleaning and
Descaling).
2. Keep coffee beans and powder in well closed
box and in a dark and fresh place, but not in
the refrigerator.
3. For optimum coffee taste we recommend to
grind the coffee beans immediately before use
and to use fresh water.
4. Freshly brewed coffee is best. If it is kept warm
for a certain time, coffee be comes bitter.
5. To pour out the coffee, the lid of the carafe
must not be opened.
1. Carefully unpack your coffee maker.
2. Check if all parts as per description are con-
tained.
3. Clean the carafe, the complete water tank, and
the lter cone in warm soapy water, rinse them
with clear water and dry them thoroughly.
4. Wipe the surface of the appliance with a damp
cloth and dry it.
5. Remove the water tank and ll it up to the MAX
marking with fresh cold water. Close the lid and
place the tank on the housing.
6. Put the plug into the socket.
7. Before using the appliance for the rst time or
after a longer period, ll the water container up
to the maximum with clear cold water and run
it two or three times with water only.
TIPS FOR A PERFECT COFFEE
BEFORE USING THE APPLIANCE
The manufacturer will not be liable in the event of incorrect assembly, improper or incorrect use or if
repairs are carried out by unauthorized third parties.
13
1. After connection the appliance witht the power
socket, the display shows 12:00 .
2. Press once the button PROG. The display gets
lighted.
3. In the upper right corner of the display CLOCK
is shown.
CLOCK
12:00
4. Press the buttons STD and MIN until the cor-
rect time is shown.
5. After approx. 10 seconds without operating any
key, the display returns into the basic dialogue,
the lighting is switched off.
PRESETTING OF THE CLOCK
The coffeemaker from allows to prepare coffee either manually or with the timer function which can be
preset 24 hours in advance.
1. Take out the water tank (open the lid and use
the integrated handle to pull it out) and ll it
with the desired volume of cold water. The mar-
king refers to the number of cups. Place the
water tank on the machine.
Attention:
For safety reasons, the water tank has an over-
ow opening at the back. Please observe the
MAX mark and do not overll the tank, as water
may ow out.
2. Please keep in mind that a certain portion of
the water may evaporate during brewing.
3. For lling in ground coffee, open the swing-
out lter. Insert the lter holder. Take care that
the projection of the lter holder ts into the
recesses of the swing out lter. If not placed
correctly, the lter cannot be closed.
4. Insert the permanent lter into the lter hol-
der.
5. Optionally you can also use lter paper (size
1x4, 0994) after having folded the edges. The
lter paper must not project over the lter hol-
der.
6. Add the desired amount of ground coffee, de-
pending on your taste 5-7 g (max. 1 measuring
spoon) of medium ground coffee. If the cof-
fee is ground too ne, the lter paper may be
clogged up and the coffee may overow.
7. Close the swing lter, until it clicks into place.
8. Place the carafe with lid on the warming plate.
9. Press the button EIN/AUS (On/OFF). The red
control light EIN (ON) will turn on and brewing
starts.
10. After the end of brewing you can switch off the
appliance pressing twice the button EIN/AUS
(On/OFF).
11. If the appliance is not switched off, the war-
ming plate keeps warm. Two hours after begin-
ning of the brewing, the appliance will switch
off automatically.
12. If the appliance is switched off earlier the
appliance can be scaled. In this case please
follow the instructions of the chapter Cleaning
and Descaling.
PREPARATION OF COFFEE WITHOUT TIMER FUNCTION
PREPARATION OF COFFEE WITH TIMER FUNCTION
1. Please follow steps 1-8 of the previous chapter
Preparation of coffee without timer function.
2. Then press the PROG button once and check,
if the clock has been set correctly (see chapter
Presetting of the clock).
3. Then press again the button PROG to preset the
brewing. The display shows TIMER in the upper
left corner.
CLOCK
12:00
Press the buttons STD and MIN until the re-
quired time is preset.
14
1. Unplug the coffeemaker before cleaning and
wait until it is completely cool.
2. Never immerse the appliance into water or any
other liquid.
3. Open the swing lter and take out the perma-
nent lter or the used paper lter and dispose
it.
4. If any condensation water has occurred above
the lter, just wipe it with a cloth.
5. The removable parts such as water tank, glass
carafe with lid, lter holder and permanent l-
ter can be cleaned in warm soapy water.
6. For easy cleaning the lid of the carafe can
be opened by pressing the key on top of the
handle.
7. Wipe the appliance and the warming plate with
a damp cloth.
8. Do not use strong detergents or abrasive cloths/
liquid, as this will damage the surface.
9. Ensure that all parts have been thoroughly
dried before using.
CLEANING
4. Then press twice the EIN/AUS button (on/off)
to activate the AUTO function.
5. The green control light AUTO turns on and
keeps on lighting.
6. To check the preset time, press the PROG but-
ton twice. The display shows TIMER and the
preset time. If necessary you can change the
time.
7. If not button is pressed, the display will return
to the actual settings after approx. 10 seconds
and the lighting turns out.
8. You can stop the AUTO-function at any time by
pressing the EIN/AUS button twice.
9. When reaching the preset time, the green con-
trol light turns out and the red one turns on,
brewing starts.
10. After the end of brewing you can switch off the
appliance pressing twice the button EIN/AUS
(On/OFF).
11. If the appliance is not switched off, the war-
ming plate keeps warm. Two hours after begin-
ning of the brewing, the appliance will switch
off automatically.
12. If the appliance is switched off earlier the
appliance can be scaled. In this case please
follow the instructions of the chapter Cleaning
and Descaling.
13. The preset time is kept and can be reactivated
by pressing the EIN/AUS button twice.
14. If you want to change the time presetting, just
restart as described above.
DESCALING
1. Regular descaling increases the lifetime and
the performance of your coffeemaker
2. If the appliance switches off before the end
of the keep-warm period of 2 hours or if water
stays in the water tank after brewing, the appli-
ance should be descaled.
3. We recommend to us a commercial descaler
according to the instructions of the respective
manufacturer.
4. Fill the water tank up to the MAX mark with the
descaler solution.
5. Optionally you can use citric acid. Use 25-50 g
per liter water.
6. Place the carafe on the warming plate.
7. Press the EIN/AUS button and let about 1/3 of
the solution ow through.
8. Then switch off the appliance and leave it for at
least 15-30 minutes. In case of strong calclim
deposits you can also leave it overnight.
9. Then press the EIN/AUS button again to empty
the water tank.
10. Pour away the descaler solution and rinse the
appliance two to three times with fresh cold wa-
ter.
40
GARANTIEBESTIMMUNGEN
GUARANTEE CONDITIONS
CONDITIONS DE GARANTIE
GARANTIEVOORWAARDEN
Wir gewähren auf unsere Geräte eine Garantie von 24 Monaten, bei gewerblichem Gebrauch 12 Monate, ab dem Kaufda-
tum für Schäden, die bei bestimmungsgemäßem Gebrauch nachweislich auf Werksfehler zurückzuführen sind. Innerhalb
der Garantiezeit beheben wir Material- und Herstellungsfehler nach unserem Ermessen durch Reparatur oder Umtausch.
Unsere Garantieleistungen gelten ausschließlich für in Deutschland und Österreich verkaufte Geräte. Bei anderen Ländern
wenden Sie sich bitte an den zuständigen Importeur. Geräte, für die eine Mängelbeseitigung beansprucht wird, senden Sie
bitte zusammen mit einer Kopie des maschinell erstellten Kauf belegs, aus dem das Kaufdatum ersichtlich sein muss, sowie
einer Fehlerbeschreibung gut verpackt und freigemacht an unseren Kundendienst. Im Garantiefall werden dem Kunden ent-
standene Versandkosten zurückerstattet. Von der Garantie ausgeschlossen sind Schäden durch Verschleiß, unsachgemäße
Handhabung und Nichteinhaltung der Wartungs- und Pflegeanweisungen. Der Garantieanspruch erlischt, wenn Reparaturen
oder Eingriffe am Gerät von dritter Stelle vorgenommen werden.
Eventuelle Ansprüche des Endverbrauchers gegenüber dem Verkäufer oder Händler werden durch diese Garantie nicht ein-
geschränkt.
We grant a 24 months guarantee, and in case of commercial use a 12 months guarantee, starting from the date of purchase
for any damage demonstrably due to manufacturing defects and when the appliance has been used according to its intended
use. Within the warranty period we will remedy defective materials or workmanship through repair or replacement, at our
option.
Our warranty terms apply only to appliances sold in Germany and Austria. For other countries, please contact the responsible
importer. In the event of a claim for remedy of defects, please send the appliance to our after sales service, properly packaged
and postage paid, together with a copy of the automatically generated sales receipt, which must show the date of purchase,
and a description of the defect. If the defect is covered by the warranty, the customer will be reimbursed for the shipping
costs. The warranty does not cover damage from normal wear, improper handling and failure to comply with the maintenance
and care instructions. The warranty is void if repairs or modifications are made to the appliance by third parties.
Any claims of the end consumer vis-à-vis the retailer are not limited by this warranty.
En cas d’utilisation conforme et lors de dégâts manifestement dus à des défauts de fabrication, nos appareils sont garantis
24 mois, lors d’utilisation professionnelles 12 mois, à dater de l’achat. Notre garantie n’est valide que pour les appareils
vendus en Allemagne et en Autriche. Dans tout autre pays veuillez contacter l’importateur. Veuillez envoyer à notre adresse
les appareils, pour lesquels vous réclamez une suppression de défauts, avec le bon d’achat montrant la date d’achat, port
payé et proprement emballé. Les coûts de transport seront remboursés en cas de garantie en Allemagne et en Autriche. Les
défauts causés par usure, utilisation incorrecte ou non-respect des instructions de maintenance sont exclus. Notre obligation
de garantie cesse, si de réparations ou des interventions sont accomplies par des tiers. Cette garantie n’affecte pas les droits
du consommateur contre le commerçant.
Wij geven op onze apparaten een garantietermijn van 24 maanden (12 maanden bij commerciële gebruik), gerekend vanaf de
dag van aanschaf. Deze garantie geldt voor schade, die bij correct gebruik aantoonbaar is veroorzaakt door een fout in de pro-
ductie. Binnen de garantietermijn verhelpen wij materiaal- en productiefouten door herstelling of vervanging naar onze keuze.
Onze garantie is slechts geldig voor in Duitsland en Oostenrijk verkopte apparaten. In andere landen a.u.b. de importeur
aanspreken. Apparaaten, waarvoor garantie in aanspraak wordt genomen, moeten ons samen met een kopie van de machineel
gegenereerde kassabon waaruit de koopdatum duidelijk wordt, alsmede een beschrijving van de fout goed verpakt aan onze
klantenservice worden toegezonden, porto betaald. Als er sprake van garantie is, worden de verzendingskosten in Duitsland
en Oostenrijk aan de klant vergoed. De garantie dekt geen schade veroorzaakt door slijtage, onbehoorlijk gebruik/foutieve han-
delingen en niet-naleving van de onderhouds- en reinigingsaanwijzingen. Het recht op garantie vervalt, wanneer reparaties
of manipulaties aan het apparaat door derden worden doorgevoerd. Eventuele rechten van de eindgebruiker t.o.v. de verkoper
of distributeur worden door deze garantie niet aangetast.
42
ENTSORGUNG / UMWELTSCHUTZ
WASTE DISPOSAL / ENVIRONMENTAL PROTECTION
TRAITEMENT DES DÉCHETS / PROTECTION DE L’ENVIRONNEMENT
VERWIJDEREN VAN AFVAL / MILIEUBESCHERMING
Unsere Geräte werden auf hohem Qualitätsniveau für eine lange Nutzungsdauer
her ge stellt. Regelmäßige Wartung und fachge rechte Reparaturen durch unseren
Kunden dienst können die Nutzungsdauer des Gerätes verlängern. Wenn ein Gerät defekt
und nicht mehr zu reparieren ist, beachten Sie bitte:
Dieses Produkt darf nicht zusammen mit dem normalen Hausmüll entsorgt werden.
Sie müssen dieses Produkt an einer ausgewiesenen Sammelstelle zum Recycling
von elektrischen oder elektronischen Geräten ab liefern.
Durch das separate Sammeln und Recyceln von Abfallprodukten helfen Sie mit, die natürlichen Ressourcen zu schonen und
stellen sicher, dass das Produkt in gesundheits- und umweltverträglicher Weise entsorgt wird.
Our appliances are produced on a high quality level for a long lifetime. Regular maintenance and expert repairs by our after-
sales service can extend the useful life of the appliance. If an appliance is defective and repair is not possible we ask you to
follow the following instructions for disposal.
Do not dispose this appliance together with your standard household waste. Please bring this product to an approved collec-
tion point for recycling of electric and electronic products.
By separate collection and disposal of waste products you help to protect natural resources and ensure, that the product is
disposed in an adequate way to protect health and environment.
Nos appareils sont produits selon un standard élevé de qualité pour une longue durée d’utilisation. Un entretien régulier et
des réparations compétentes par notre service après-vente prolongent cette durée d’utilisation. Si néanmoins l’appareil est
endommagé et ne peut plus être réparé, veuillez suivre les instructions suivantes.
Ne jamais disposer ce produit avec les dégâts de ménage. Apportez ce produit à une station de collection pour récupération
de produits électriques et électroniques.
Par la collection séparée vous aidez à protéger les ressources naturelles et prenez soin, que le produit est démonté sans risque
pour la santé et l’environnement.
Onze apparaten zijn geproduceerd met een hoge qualiteit voor een lange gebruik. Regelmatige onderhoud en vakkundig
reparaties door onze klantenservice verlengt de gebruiksduur. Wanneer het apparat defekt is en kan niet meer gerepareerd
worden, let op de volgende instructies.
Dit product mag niet samen met het normale huishoudelijke afval worden afgevoerd. U dient dit product bij een voor het
recycleren van elektrische of elektronische apparaten aangewezen verzamelplaats in te leveren.
Door het separaat inzamelen en recycleren van afvalproducten helpt u mee bij het zuinig omgaan met de natuurlijke hulpbron-
nen en zorgt u ervoor dat het product op een gezondheids- en milieuvriendelijke manier afgevoerd wordt.
  • Page 1 1
  • Page 2 2
  • Page 3 3
  • Page 4 4
  • Page 5 5
  • Page 6 6
  • Page 7 7
  • Page 8 8
  • Page 9 9
  • Page 10 10
  • Page 11 11
  • Page 12 12
  • Page 13 13
  • Page 14 14
  • Page 15 15
  • Page 16 16
  • Page 17 17
  • Page 18 18
  • Page 19 19
  • Page 20 20
  • Page 21 21
  • Page 22 22
  • Page 23 23
  • Page 24 24
  • Page 25 25
  • Page 26 26
  • Page 27 27
  • Page 28 28
  • Page 29 29
  • Page 30 30
  • Page 31 31
  • Page 32 32
  • Page 33 33
  • Page 34 34
  • Page 35 35
  • Page 36 36
  • Page 37 37
  • Page 38 38
  • Page 39 39
  • Page 40 40
  • Page 41 41
  • Page 42 42
  • Page 43 43
  • Page 44 44

Unold 28016 Owner's manual

Category
Coffee makers
Type
Owner's manual

Ask a question and I''ll find the answer in the document

Finding information in a document is now easier with AI