Page is loading ...

TRO220
TRO520
Electronic
Toast-R-Oven
™
Broiler
Series TRO220 - TRO520
English, see page 2
Save this use and care book
Electrónico
Horno Tostador
Asador
Series TRO220 - TRO520
Español, consulte la página 7
Lease este instructivo antes de usar producto
Eletrônico
Forno Elétrico
Grelha
Series TRO220 - TRO520
Português, consulte a página 14
Leia estas instruções antes de usar produto
*

TRO220-TRO520
English
IMPORTANT
SAFEGUARDS
SAVE THESE INSTRUCTIONS
When using electrical appliances, in
order to reduce the risk of fire, electric
shock, and/or injury to persons, basic
safety precautions should always be fol-
lowed, including the following:
■ Do not touch hot surfaces. Use han-
dles or knobs.
■ To protect against risk of electrical
shock, do not immerse cord, plug, or
any non-removable parts of this oven
in water or other liquid.
■ Close supervision is necessary when
any appliance is used by or near
children.
■ Unplug from outlet when not in use
and before cleaning. Allow to cool
before putting on or taking off parts
and before cleaning.
■ Do not operate any appliance with a
damaged cord or plug or after the
appliance malfunctions or is dropped
or damaged in any manner. Return
the appliance to an authorized service
facility for examination, repair, or elec-
trical or mechanical adjustment.
■ The use of accessory attachments
not recommended by Black & Decker
may cause injuries.
■ Do not use outdoors.
■ Do not let cord hang over edge of table
or counter, or touch hot surfaces.
■ Do not place on or near a hot gas or
electrical burner, or in a heated oven.
■ Extreme caution must be used when
moving an appliance containing hot
oil or other hot liquids. Use extreme
caution when removing tray or dis-
posing of hot grease.
■ Turn all controls to OFF before insert-
ing or removing plug from wall outlet.
■ To turn off toasting, press STOP. To
stop cooking, baking, or broiling, turn
the control to OFF.
■ In the event of food flare up, keep door
shut and unplug the toaster oven.
■ To disconnect, grasp plug body and
remove from outlet. Do not pull by
the cord.
■ Do not use oven for other than
intended use.
■ Oversize foods, airtight foil packages,
cardboard containers, plastic wrap-
ped food or utensils must not be
inserted in this appliance, as they may
create a fire or electrical hazard.
■ A fire may occur if the toaster oven
is covered or touching flammable
material including curtains,
draperies, walls and the like, when in
operation. Keep this appliance at
least 1” (2.54 cm) away from wall or
rear of counter. Do not store any
item on top of unit when in operation.
■ To avoid a fire hazard, do not store or
place flammable materials (including
packaged bread, paper towels, etc.)
on top of or inside the toaster oven at
anytime.
■ Do not allow grease to build up
inside this appliance.
■ Do not clean with metal scouring
pads. Pieces can break off the pad
and touch electrical parts resulting in
a risk of electric shock.
2
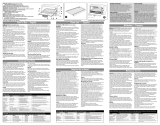
Cover

OVEN FEATURES
Easy-Clean
Interior
Control Panel
Slide Rack
■ Do not place any of the following
materials in the oven: Paper, card-
board, or plastic. Refer to “Cooking
Containers.”
■ Do not operate in the presence of
explosive and/or flammable fumes.
■ This product is intended for house-
hold use only, not commercial or
industrial use.
If this product is mounted under a
cabinet:
■ To reduce the risk of fire, do not
place any heating or cooking appli-
ance beneath the appliance.
■ To reduce the risk of fire, do not
mount unit over or near any portion
of a heating or cooking appliance.
– To reduce the risk of electric
shock, do not mount over a sink.
– Do not store any materials other
than the manufacturer’s recommend-
ed accessories in this oven when not
in use.
– Do not cover crumb tray or any
parts of the oven with metal foil. This
will cause overheating of the oven.
Electrical Cord
The cord length of this appliance was
selected to reduce the possibility of tan-
gling in or tripping over a longer cord. If
more length is needed, use an approved
extension cord. When using an extension
cord, be sure not to let it drape over the
working area or dangle where someone
could accidentally pull or trip over it.
3
How To Use
THE CONTROL PANEL
Bake/Broil ON/OFF
Control Dial
Signal Light
Start Toast
Stop Toast
Toast Color
Selector/Top
Brown Setting
A
Electrical Cord
The cord length of this appliance was
selected to reduce the possibility of tan-
gling in or tripping over a longer cord. If
more length is needed, use an approved
extension cord. When using an extension
cord, be sure not to let it drape over the
working area or dangle where someone
could accidentally pull or trip over it.
Toasting
1. Select the toast color setting.
2. Close the door and press the Start Toast
Button. The Oven will automatically shut
off when the toast cycle is done.
3. To stop toasting in the middle of a cycle,
press “Stop” or open the door. To con-
tinue toasting, shut the door and press
the Start Toast Button. (A)
Top Browning
NOTE: Always use the Oven Pan when
melting, crisping, and top browning.
1. Turn the Toast Color Selector to Top Brown
and press the Start Toast Button.
2. When top browning, both the top and
bottom heating elements will glow to dif-
ferent degrees of red and orange.
3. The Oven will automatically shut off
when the Top Brown cycle is complete.
4. To interrupt top browning, open the door
or press “Stop.” To continue, shut the
door and press the Start Toast Button.
Cover

Baking and Heating
1. Turn the Bake Control Dial to the
desired temperature setting. Always
preheat for 5 minutes and use the Oven
Pan.
2. When baking, both the upper and lower
heating elements will cycle on and off
during baking to maintain the selected
temperature. Operation is interrupted
when the door is opened. To continue
operating, close the door. Watch for
doneness. (See “Cooking/Baking Guide”)
3. When finished baking, turn the Bake
Control Dial to OFF.
Broiling (selected models)
1. Always use the Oven Pan and Broil Grid
together. (B) Turn the Bake Control Dial
to BROIL and close the door.
2. Only the upper heating elements will
operate and glow when broiling: The
heating elements will cycle on and off.
3. Watch food carefully and remove the
Pan and Grid when finished broiling. Be
sure to turn the Control Dial to OFF. (See
“Broiling Guide”)
Upper Position Lower Position
B
Broil Grid
Oven Pan
4
Oven Pan and Broil Grid Tips
– Use Upper Position for faster browning
and broiling. Allow at least 1” (2.54 cm)
between food and heating elements. (B)
– Use Lower Position for longer broiling
times or delicate foods (such as fish or
chicken) when you want less brown-
ing. (B)
– Do not cover Broil Grid with aluminum
foil as this prevents fats/juices from
dripping into the Oven Pan.
Defrosting
1. Remove all plastic and paper wrapping.
Rewrap in aluminum foil and place in
Oven Pan.
2. Do not preheat. Turn the Control Dial to
200º F. (93˚ C)
3. The thickness of meats determines
how long to defrost. Start by allowing
15 to 20 minutes per side for meats 1/2”
(1.27 cm) or thicker. Always cook meat
promptly after thawing.
Care and Cleaning
Cleaning Your Oven
IMPORTANT: Before cleaning any part, be
sure the Oven is off, unplugged, and cool.
Always dry parts thoroughly before using
oven after cleaning.
1. Clean the Glass Door with a nylon pad
and sudsy water. Dry thoroughly before
using the Oven. Do not use a spray glass
cleaner.
2. To remove the rack, open the door and
tilt it up slightly until the Rack can be pulled
out through the Rack Hooks. (C) NOTE:
Selected models have Rack Hooks. For
other models, simply pull the rack forward
and out.
Wash the Rack in hot, sudsy water. To
remove stubborn spots, use a polyester or
Cover

C
nylon pad. To replace the Rack, open the
door completely and slide the back of the
Rack into the Rack Support Grooves. Tilt
the door up until the front of the Rack slides
into the Rack Hooks. Open and close the
door to be sure the Rack is seated properly.
3. Wash the Oven Pan and Broil Grid
after each use in hot, sudsy water. To
minimize scratching, use a polyester or
nylon pad.
Crumb Tray
To open, tip the Oven onto its back and
unscrew the bottom panel or pull down on
the Crumb Tray knob (depending on the
model). Wipe away crumbs and food spills
with a slightly damp cloth. Stubborn spots
can be removed with a nylon pad. Be sure
to dry thoroughly and close tightly before
using Oven.
Continuous Clean Coating
(Selected models)
1. For models with the dark, speckled
interior coating, wipe away heavy
splatters with a nylon pad and warm
water. DO NOT USE any cleaning
agent, scouring pad, or abrasives as
they may harm the coating
2. Blot dry — DO NOT RUB. The porous
coating disperses and partially absorbs
spatters with regular use.
Easy Clean Coating
(Selected Models)
1. For best results, allow the oven to cool,
then wipe after each use with a
sponge or nylon pad and sudsy water.
5
Do not use chemical oven cleaners.
2. DO NOT use any abrasive cleansers or
scouring pad, as they may harm the
Coating. Dry with a paper or cloth
towel.
Exterior and Chrome Top
Be sure the oven has cooled complete-
ly before wiping the brushed chrome top
(Selected Models) and exterior walls with
a damp cloth or sponge. Dry afterward.
Cooking Containers
1. The inside dimensions of this Oven are
11” x 7 1/2” x 3” (28 cm x 19 cm x 7.6 cm).
This size allows for many different types
of everyday baking containers. Before
buying a container for your Oven, be
sure it fits.
2. Metal, ovenproof glass without lids, or
ceramic bakeware may be used in your
Oven. Follow manufacturer’s instruc-
tions. Be sure the top edge of the con-
tainer is at least 1” (2.54 cm) away from
the upper heating elements.
3. Some frozen foods are packaged in con-
tainers suitable for microwave or regular
ovens. Check package instructions to
see if the container can be used in a reg-
ular oven.
4. Remove any plastic wrapping or paper-
board covers which may be suitable for
microwave oven use only. Replace with
foil if food begins browning too quickly.
5. Some items which should NEVER be used
in your Toaster Oven:
• Glass lids on glass or metal bakeware.
(If desired, cover containers with alu-
minum foil making sure it does not
touch heating elements.)
• Air-tight packages such as sealed
pouches or cans.
• Plastic wrapping or paperboard covers.
• Containers larger than those recom-
mended.
• Containers with warnings against use in
range-type or toaster ovens.
Cover

FOOD BROIL GRID POSITION AMOUNT TIME SUGGESTIONS
Bacon Upper 4 slices 4-6 mins. Turn when slices look brown. If
browning too fast, use lower Grid
position.
Chicken Lower 4 pieces 40-50 mins. Turn halfway through cooking. Broil
until well done — juices run clear.
Frankfurters Upper 8-10 franks 10-13 mins. Turn frequently.
Hamburgers Upper 4 (1/4 lb. ea./.113 kg) 14-16 mins. Turn halfway through cooking. Time
shown is for medium doneness.
Pork Chops Upper 2 (3/4”/1.91 cm thick) 15-30 mins. Always broil pork until well done.
Fish Steaks Lower 1 large (1”- 1-1/4” 20-30 mins. Broil until it flakes easily.
2.54-3.18 cm thick)
Cheese Sandwiches Lower 1-2 Slices Use broil setting. For a crispier
(Open Faced) sandwich, toast bread first. Place
on Oven Pan. Top with cheese and
tomato. Bake until cheese bubbles.
Broiling Guide (Selected Models)
When broiling meat, fish, or poultry,
always place food on the Broil Grid over
the Oven Pan. Turn the Bake Control Dial
to BROIL. Do not preheat. Watch for done-
ness. Use minimum times for models with
plain (not Continuous Clean or Easy Clean)
interiors.
6
COOKING/BAKING GUIDE
NOTE: Always preheat for 5 minutes before cooking/baking.
MEATS AMOUNT TEMP. SETTING/ PROCEDURE
APPROX. TIME
Chicken Pieces To fit Bake 400° F (200˚ C) Place in Oven Pan or Broil Grid (lower
Oven Pan for 40-50 minutes. position) over Oven Pan.
Ham, Meat Loaf, To fit Bake following Place on Oven Pan. If browning too
Lamb or Pork Chops Oven Pan favorite recipe. rapidly, cover with foil or turn frequently.
BREADS & DESSERTS
Leftover Pizza Oven Pan 400° F (200˚ C) Bake until crisp or until cheese bubbles.
Watch for doneness.
Cookies 6-8 cookies Follow package Bake on Oven Pan.
(drop or refrigerator) or recipe directions.
Cakes/Bar Cookies, To fit Follow package or Bake until done and browned as
Biscuits/Dinner Rolls Oven Pan recipe directions. desired.
(Refrigerated)
VEGETABLES
Baked Potatoes 1-5 Potatoes Bake at 450° F (230˚ C) Wash and pierce potatoes and place
med. 1 to 1-1/4 hours. directly on Rack.
Tomatoes 1-6 Halves Bake at 350° F (180˚ C) Slice in half, place on Oven Pan. Sprinkle
12-15 minutes. with bread crumbs or shredded cheese.
French Fries/ To fit Oven Pan Follow package Spread single layer on Oven Pan.
Onion Rings (frozen) directions. Watch browning.
Broiling Guide (Selected Models)
Cover

7
Service, if necessary, must be performed by a
Black & Decker Company-Owned or Authorized
Household ApplianceService Center. The Service
Center nearest you can usually be found in the
yellow pages of your phone book under
“Appliances - Small - Repairing”. For your conve-
nience, a complete listing of our Company-Owned
Service Centers can be found on insert sheet.
If shipping or mailing the Toast-R-Oven, clean
it, then pack the unit carefully in a sturdy carton
with enough packing material to prevent damage.
The original carton is not suitable for mailing.
Include a note describing the problem to our
Service Center and be sure to give your return
address and phone number. We also suggest that
you insure the package for your protection.
Full Two-Year Warranty
Household Products, Inc. warrants this prod-
uct against any defects that are due to faulty
material or workmanship for a two-year period
after the original date of consumer purchase.
This warranty does not include damage to the
product resulting from accident, misuse or
repairs performed by non-authorized repair
shops. If the product should become defective
within the warranty period, we will repair it or
elect to replace it free of charge. To honor this
warranty, the product with the correspondent
registration card and/or proof of purchase are
required. This warranty gives you specific legal
rights and you may have other rights which
may vary in your country. Should you have any
questions, contact your nearest Black &
Decker owned or authorized service center,
see list included.
Service or Repair
INSTRUCCIONES
DE SEGURIDAD
CONSERVE ESTAS INSTRUCCIONES
Cuando se usan aparatos electrónicos,
deben tomarse algunas precauciones,
incluyendo las siguientes:
Por favor lea todas las instrucciones.
TRO220-TRO520
Español
■ No toque las superficies calientes,
utilice las asas o las perillas.
■ Para evitar el riesgo de un choque
eléctrico, no sumerja el cable, el
enchufe ni ninguna parte de este
horno que no sea removible, en agua o
cualquier otro líquido.
■ La supervisión de un adulto es nece-
saria cuando el aparato sea usado
cerca de o por un niño.
■ Desconecte la unidad antes de
limpiarla y cuando no esté en uso.
Permita que se enfríe antes de ponerle
o quitarle partes y antes de limpiarla.
■ No opere ningún aparato eléctrico si
el cable y/o el enchufe han sido
dañados. Si el aparato no funciona o
ha sufrido algún daño, devuélvalo a
un centro de servicio autorizado para
que lo examinen, reparen o ajusten.
■ El uso de accesorios no recomen-
dados por Black & Decker puede
causar lesiones personales.
■ No use aparato a la intemperie.
■ No permita que el cable cuelgue
del borde de la mesa o del
mostrador o tenga contacto con
superficies calientes.
■ No coloque sobre ni cerca de una
hornilla de gas o eléctrica, ni cerca
de un horno caliente.
■ Debe tomarse mucha precaución
al mover la unidad cuando tenga
líquidos o aceite caliente.
■ Tenga mucho cuidado al retirar la
bandeja y al desechar grasa caliente.
Cover

O
Copyright © 1997-1998 Household Products, Inc.
Pub. No. 174048-00
Printed in U.S.A.
*
*
is a trademark of The Black & Decker Corporation, Towson, Maryland, USA
Marca registrada de The Black & Decker Corporation, Towson, Maryland, E.U.
Cover
/