Page is loading ...

Série CTO9000 Series
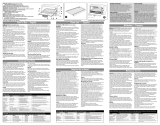
SAVE THIS USE AND CARE BOOK
LEASE ESTE INSTRUCTIVO ANTES DE USAR EL PRODUCTO
CONSERVER CE GUIDE D’ENTRETIEN ET D’UTILISATION
Electronic/Electrónico/Électronique
Dining-In
™
Convection Counter Top Oven/Broiler
Horno y asador de convección
(
Español pg. 11
)
Four-rôtissoire à convection de comptoir (Français p. 21)
®
*
U.S.A./CANADA 1-800-231-9786
MEXICO 01-800-714-2503
http://www.householdproductsinc.com
90
80
70
60
50
40
30
20
10
O
F
F
N
O
s
y
a
w
l
A
Household Products Limited
de México S. de R.L. de C.V.
1500W 120V~ 60 Hz

When using electrical appliances, basic safety precautions should always be followed,
including the following:
READ ALL INSTRUCTIONS.
■ Do not touch hot surfaces. Use handles or knobs. Vent area is hot during operation.
■ To protect against risk of electrical shock, do not immerse cord, plug, or any
non-removable parts of this oven in water or other liquid.
■ Close supervision is necessary when any appliance is used by or near children.
■ Unplug from outlet when not in use and before cleaning. Allow to cool before putting
on or taking off parts and before cleaning.
■ Do not operate any appliance with a damaged cord or plug or after the appliance
malfunctions or is dropped or damaged in any manner. Return the appliance to an
authorized service facility for examination, repair, or adjustment.
■ The use of attachments not recommended by the appliance manufacturer may cause
injuries.
■ Do not use outdoors.
■ Do not let cord hang over edge of table or counter or touch hot surfaces.
■ Do not place on or near a hot gas or electrical burner or in a heated oven.
■ Extreme caution must be used when moving an appliance containing hot oil or other
hot liquids.
■ Turn the unit OFF before inserting or removing plug from wall outlet. To turn off
toasting, press STOP TOAST.
■ In the event of food flare up, keep the door closed and unplug the unit.
■ To disconnect, grasp plug and remove from outlet. Do not pull by the cord.
■ Do not use oven for other than intended use.
■ Oversize foods, airtight foil packages, cardboard containers, plastic-wrapped food
or utensils must not be inserted in this unit, as they may create a fire or risk of electric
shock. Extreme caution should be exercised when using containers constructed of
other than metal or glass. Refer to “Cooking Containers” in this manual.
■ A fire may occur if the oven is covered or touching flammable material, including
curtains, draperies, walls and the like, when in operation. Keep this appliance at
least 1” (2.54 cm) away from wall or rear of counter. Do not store any item on top
of unit when in operation.
■ Do not allow grease to build up inside this appliance.
■ Do not clean with metal scouring pads. Pieces can break off the pad and touch
electrical parts resulting in a risk of electric shock.
■ Do not store any materials other than the manufacturer’s recommended accessories
in this oven when not in use.
■ Do not cover crumb tray or any parts of the oven with metal foil. This will cause
overheating of the oven.
■ Do not operate in the presence of explosive and/or flammable fumes.
■ Use extreme caution when removing tray or disposing of hot grease.
■ This product is intended for household use only, not commercial or industrial use.
2
IMPORTANT SAFEGUARDS
SAVE THESE INSTRUCTIONS
Cover

POLARIZED PLUG
This appliance has a polarized plug — one blade is wider than the other. To reduce the
risk of electric shock, this plug will fit into a polarized outlet only one way. If the plug does
not fit fully into the outlet, reverse it. If it still does not fit, contact a qualified electrician.
Do not attempt to defeat this safety feature by modifying the plug in any way.
ELECTRICAL CORD
The cord of this appliance was selected to reduce the possibility of tangling in or tripping
over a longer cord. If more length is needed, use an Underwriters Laboratories (UL) -
Listed or Canadian Standards Association (CSA) or NOM-approved extension cord rated
no less than 15-amperes and 120 volts. When using an extension cord, do not let it
drape over the working area or dangle where someone could accidentally trip over it.
3
How To Use
9
0
8
0
7
0
6
0
5
0
4
0
3
0
2
0
1
0
O
F
F
N
O
s
y
a
w
l
A
OVEN FEATURES
Control
Panel
Slide Rack
Crumb
Tray
Vent
ThermaGuard™ Top & Sides
Easy
Clean
Interior
CONVECTION COOKING
This convection oven circulates the air for faster, more even cooking, baking, and broiling
than traditional ovens. The convectioning is automatic in the bake and broil modes and
does not affect toasting. Use the cooking and broiling guides in this manual to help you
approximate times for meal, casserole, side dish, dessert, and snack preparation in this
counter top convection oven.
TOASTING/TOP BROWNING
NOTE: Always use the Oven Pan when melting, crisping, and top browning.
1. Select the toast color setting or Top Brown and be sure the Temperature Control
Dial is set on “Toast.” Press the Start Toast Button (A). The Signal Light will come
on. A bell will ring, the oven will automatically shut off, and the Signal Light will go
out when the desired toast cycle is done.
2. To stop toasting or top browning, in the middle of a cycle, press Stop Toast. To continue
toasting, be sure the door is shut and press the Start Toast Button.
A
Temperature
Control Dial
Signal Light
Start/Stop
Toast
Toast Color
Selector
Worry-Free
Timer™ Dial
Cover

BROILING
1. Always use the Oven Pan and Broil Rack together. Turn the Temperature Control Dial
to BROIL (A), set the Timer, and close the door.
2. Only the upper heating elements will glow when broiling; the heating elements will cycle
on and off.
3. Watch food carefully and remove when finished broiling (see “Broil Guide”). Be sure
the Timer Dial is OFF.
OVEN PAN AND BROIL RACK TIPS
– When using the Broil Rack (B), allow at least
1” (2.54 cm) between food and heating elements.
– Do not cover Broil Rack with aluminum foil as
this prevents fats and juices from dripping into
the Oven Pan.
4
USING THE WORRY-FREE
™
TIMER
IMPORTANT: You MUST turn the dial to a time OR “Always On” to operate the baking
or broiling functions.
1. Turn the Temperature Control Dial to the desired temperature setting for baking or broiling.
2. Turn the Timer Dial (A) to the appropriate time for the food being cooked up to 90 minutes.
A bell will signal when time is up, the oven will shut off, and the Signal Light will go out.
3. To use the Oven for untimed cooking, turn the Timer Dial to the LEFT to “Always On” (A)
and the Temperature Control Dial to the desired temperature. Watch for doneness.
Remember to turn the Timer to OFF when finished cooking.
BAKING AND DEFROSTING
1. Turn the Temperature Control Dial (A) to the desired temperature setting and set the
Timer. Always preheat 10 minutes.
2. When baking, the upper and lower heating elements will cycle on and off to maintain
the temperature — this is normal. The Oven will automatically shut off when the door
is opened. To continue operating, close the door. Watch for doneness.
3. When defrosting, remove all plastic/paper wrappings and rewrap in aluminum foil.
Do not preheat. Turn the Temperature Control Dial to the 200˚ F (93˚C) mark. Start by
allowing 15 to 20 minutes per side for meats/fish 1/2” (1.27 cm) or thicker to defrost.
Always cook foods promptly after thawing.
4. When finished cooking or defrosting, be sure the Timer Dial is OFF.
Care and Cleaning
CLEANING YOUR OVEN
IMPORTANT: Before cleaning any part, be sure the Oven is off, unplugged, and cool.
Always dry parts thoroughly before using the oven after cleaning. Only the Oven Pan is
B
Cover

5
dishwasher-safe or it may be hand washed. To minimize scratching if hand washing, use
a polyester or nylon mesh pad.
1. Clean the Glass Door with a nylon pad and sudsy
water. Dry thoroughly before using the Oven.
Do NOT use a spray glass cleaner.
2. To remove the Slide Rack, open the door and push
the rack as far back as it will go. Lift it up and out
as you slide the Rack forward. Wash the Slide Rack
(and Broil Rack) in hot, sudsy water. To remove
stubborn spots, use a polyester or nylon mesh pad.
3. To replace the Rack, sit it onto the front of the supports
and slowly push it back until each rack guide drops
down into place.
CRUMB TRAY
Grasp the handle at the front of the Oven and pull the Crumb Tray out (C). Dispose of
crumbs and wash the Tray in hot, sudsy water. You can remove stubborn spots with a
nylon mesh pad. Be sure to dry thoroughly before slipping the Tray back into the Oven.
EASY CLEAN COATING
1. For best results, allow the oven to cool, then wipe with a soapy sponge or nylon pad
after each use.
2. Do not use a chemical oven cleaner. Do not use any abrasive cleaners or scouring
pads as they may harm the coating. Dry with a paper or cloth towel.
EXTERIOR
The ThermaGuard™ top & sides won’t burn your hand if accidentally touched. However,
allow the oven to cool completely before cleaning. Wipe the exterior with a damp cloth
or sponge and dry with a paper towel.
COOKING CONTAINERS
1. The inside dimensions of this Oven are 10.3” x 4.9” x 14.25” (26 cm x 12 cm x 36 cm).
This size allows you to use many different types of baking containers. Before buying
a container for your Oven, be sure it will fit. A standard 9” x 13” (23 cm x 33 cm) pan
may not fit.
2. Metal, ovenproof glass or ceramic bakeware may be used in your Oven. Follow
manufacturer’s instructions. Be sure the top edge of the container is at least
1” (2.54 cm) away from the upper heating elements.
3. Some frozen foods are packaged in containers suitable for use in microwave as well
as regular ovens. Check package instructions. If there are any questions regarding
the use of a specific container, contact the food manufacturer.
Some items should NEVER be used in your Counter Top Oven:
• Air-tight packages such as sealed pouches or unopened cans.
• Plastic wrapping or paperboard covers.
• Containers larger than those recommended.
• Containers with warnings against use in range-type or toaster ovens.
C
Cover

6
BROILING GUIDE
FOOD AMOUNT APPROX. TIME SUGGESTIONS
Chops – Lamb 2-7, 1-1/2” (3.81 cm) thick 42-47 mins. For lamb, use minimum time for pink interior.
Chops – Pork 2-6, 3/4” (1.91 cm) thick 45-50 mins. For pork, always broil until well done.
Frankfurters 4-10, 5” (12.7 cm) long 11-13 mins. Turn frequently for even browning.
Hamburgers 2-7, 1/4 lb. (113 g) each 24-26 mins. Broil minimum time for medium doneness.
London Broil 2-2-1/2 lbs., (1.14 kg) 38-45 mins. Turn occasionally for uniform browning.
1-1-1/4” (2.54-3.18 cm) thick
Sausage, fresh 6 links, about 1-1/2 lbs. (681g) 24-27 mins. For uniform browning, turn frequently.
Steak, rib 2-4, 3/4” (1.91 cm) thick 24-27 mins. Broil minimum time for less done interior.
Salmon Steaks, 3-4, 1” (2.54 cm) thick 30-35 mins. Broil just until fish flakes easily when
with bone pierced with a fork.
FOOD AMOUNT APPROX. TIME SUGGESTIONS
APPETIZERS
Nachos Cover oven pan Top Brown using Cover oven pan with foil for easier
with chips Broil setting. clean up. Watch browning.
Mozzarella Up to 12 10-13 mins., Follow manufacturers’ directions.
sticks, frozen or until heated.
BREADS
English muffins, 1-6 halves Top Brown using For crisper results, toast lightly on Rack
bagels, buttered Broil setting. first. Then butter and place on Oven Pan.
Biscuits, dinner 1-12 Use package temperature. Preheat and follow package directions.
rolls (refrigerated) Check doneness early.
French/Garlic Maximum length Heat at 350˚F (177˚C) Preheat. Slice, butter, and season
Bread 14” (35.6 cm) for 15-20 mins. bread. Wrap in foil. If frozen, heat an
additional 10-15 mins.
Quick Bread 1 9x5” (23 x 13 cm) Follow package or recipe Cover with foil if browning too quickly.
loaf pan directions for temperature.
Check doneness early.
MEATS/ENTREES
Whole Chicken 4-5 lbs. 350˚F (177˚C) for Preheat. Use Oven Pan.
(1.8-2.3 kg) 18-20 mins./lb.
Chicken Pieces, To fit Oven Pan 400˚F (204˚C) for 55-60 Preheat. Line Oven Pan with foil for
crumb coated (about 6-8 pieces, mins, or follow package easier cleanup.
3.5 lbs. (.6 kg) total) directions.
Frozen Lasagna Family Size, about Cook until thoroughly Preheat. Cover top with foil if browning
2 lbs. (.91 kg) heated. Check too quickly.
doneness early.
Meatloaf 1-1/2 lbs. Bake following favorite Place on Oven Pan. If browning too
(.68 kg) recipe. Shorten cooking rapidly, cover with foil.
time slightly.
When broiling meat, fish or poultry, always place food on Broil Rack over Oven Pan. Turn
Temperature Control Dial to BROIL position. Broil as desired, turning halfway through cooking.
This large convection counter top oven fits many foods and standard pans, including some
13”x9”x2” (33 x 23 x 5 cm) baking pans, and a 8” (20 cm) foil pie pan. Use package and/or
recipe recommended oven temperatures. Cooking times will often be slightly shorter than
standard package and recipe times. Start checking doneness of foods 10-15 minutes earlier.
Some roasts cook up to 5 minutes/pound (kg) faster than conventional ovens.
COOKING GUIDE
Cover

7
FOOD AMOUNT APPROX. TIME SUGGESTIONS
MEATS/ENTREES
Sirloin Tip Beef 3-4 lbs. 325˚F (163˚C) for 22-26 Place roast on Oven Pan. Surround with
Roast or Pork Loin (1.36-1.81kg) mins./lb. for beef, 35-40 vegetables if desired.
Roast, boneless mins./lb. for pork.
VEGETABLES
Potatoes, baked 1-6 450˚F (232˚C) for Prick and place directly on Rack for
or Sweet 55-60 mins. crisp results.
Squash, acorn 1-4 halves Bake until tender per Place on Oven Pan, season, dot with
favorite recipe. butter.
French Fries, To fit Oven Pan Follow package Spread single layer over Oven Pan. For
Onion Rings, directions. Turn early and crisper results, try broiling. Watch
(frozen) check doneness early. browning.
DESSERTS
Cookies, drop or 6-12 cookies Follow package or recipe Preheat. Use Oven Pan or small cookie
refrigerated directions for tray.
temperature. Shorten
cooking time slightly.
Cakes Oven Pan (holds Check cake doneness Preheat. Use Oven Pan or 13x9x2”
standard – 18.25 3-5 mins. prior to 33x23x5 cm) pan.
oz. – (518g) package or recipe time.
cake mix
Bar Cookies Oven Pan or Same as above. Preheat. Bake until done and browned.
Brownies Container to
fit Rack.
Fruit Pie, frozen 8” (20 cm) foil Follow package Preheat. Cover pie with foil if browning.
(2 lb.5 oz./10.5kg pie pan temperature directions; too quickly.
size) check doneness prior
to package time.
WARMING AND HEATING
Leftover pizza Up to 4 pieces 300-350˚F (154˚C-177˚C) Preheat. Watch to prevent overbrowning.
on Oven Pan. until cheese bubbles.
Leftover Use Oven Pan or 300-350˚F (154˚C-177˚C) Preheat. Check often; heat only until
casserole casserole dish for 20-30 mins. bubbling and hot.
to fit oven.
Recipes
1. Preheat Dining-In™ Convection Counter Top Oven/Broiler at 400˚F (204˚C) for 10 minutes.
2. Sprinkle chicken pieces with lemon juice. Season with salt and pepper. Dredge in bread
crumbs. Arrange in oven pan, meaty side up. Sprinkle any leftover bread crumbs on top.
3. Bake at 400˚F (204˚C) for 45 minutes. Meanwhile, combine yogurt, mustard and green onions.
Stir to blend.
4. Drizzle yogurt mixture over chicken pieces. Return to oven and bake 15 minutes more. Sprinkle
Parmesan cheese over chicken and broil until cheese melts and browns slightly, about 4 to 5 minutes.
5. Serve immediately.
Makes: 6 servings (1 breast/serving)
6 split chicken breasts, skin removed
(3-3 1/2 pounds) (1362-1589g)
2 tablespoons lemon juice
Salt and pepper to taste
1 cup seasoned bread crumbs
Parmesan Yogurt Chicken
1 cup plain yogurt
2 tablespoons dijon mustard
1/3 cup thinly sliced green onions (about 4)
1/2 cup grated Parmesan cheese
Cover

8
1. In 10-inch (25.4 cm) skillet, brown meat over high heat. Drain fat, if necessary. Add onion and
garlic. Sauté 3 to 4 minutes. Remove from heat. Stir in tomato sauce, spices and salt and pepper.
2. In large bowl or food processor, combine flour, yeast, sugar and salt. Add water and vegetable
oil. Process or stir vigorously until ingredients are well blended. Let dough rest 10 minutes.
3. Preheat Dining-In Convection Counter Top Oven/Broiler at 425˚F (218˚C) for 10 minutes.
4. On floured board, fold dough over 3 or 4 times to knead slightly. Divide dough in half. Roll one
piece of dough to form a 14”x10” (36 x 25.4 cm) rectangle. Carefully transfer to well-greased
13”x9” (33 x 23 cm) baking pan and shape crust partially up sides of pan to form crust edge.
(Dough will be thin.)
5. Cover crust evenly with half the meat sauce. Sprinkle with half the olives, mushrooms and cheeses.
6. Bake at 425˚F (218˚C) for 18 to 20 minutes, or until crust is golden brown and cheese is melted.
Repeat with second piece of dough.
Makes: 16 pieces (about 4” x 3”/10 x 8 cm each)
1 pound (454g) ground beef chuck
1 large onion, chopped
2 cloves garlic, minced
1 can (15 ounces) (425g) tomato sauce
1/2 teaspoon basil
1/2 teaspoon oregano
Salt and pepper to taste
2 cups all-purpose flour
1 package (1/4 ounce) (7g) active dry yeast
Rainy Day Pizza
1. Combine marinade ingredients in shallow baking dish. Add the opened flank steak and turn
to coat. Cover and marinate at room temperature for about 2 hours.
2. After steak has marinated, lay it open on a piece of aluminum foil. Reserve marinade.
3. Preheat Dining-In Convection Counter Top Oven/Broiler at 350˚F (177˚C) for 10 minutes.
4. Cover steak with roasted pepper halves. Sprinkle with 2 tablespoons cilantro. Cover
with prosciutto. Sprinkle surface evenly with olives. Top with spinach leaves, remaining
1 tablespoon cilantro, and black pepper to taste.
5. Starting at long side of steak, roll steak up tightly, jelly-roll fashion. Tie steak roll at 2-inch
(5 cm) intervals using kitchen string.
6. Place meat in lightly greased oven pan, and pour marinade over top. Bake until browned and
cooked through, about 40-50 minutes. Remove from oven and let stand 10 minutes before slicing.
7. To serve, slice steak into 1/2-inch (1.27 cm) slices. Garnish with parsley or watercress, if desired.
Makes: 6 servings (2 slices per serving)
Marinade
1/4 cup olive oil
1/4 cup red wine flavored vinegar
3 cloves garlic, minced
5 tablespoons chopped fresh
cilantro leaves
Coarsely ground black pepper, to taste
Italian Stuffed Flank Steak
1 tablespoon sugar
3/4 teaspoon salt
3/4 cup hot tap water
1 tablespoon vegetable oil
1/2 cup sliced ripe olives
8 medium mushrooms, sliced
1 package (8 ounces) (227g) shredded
mozzarella cheese
1/4 cup grated Parmesan cheese
1-1/4 pounds (567g) flank steak, butterflied
2 red peppers, halved lengthwise and roasted
3 tablespoons chopped fresh cilantro leaves
8 thin slices prosciutto or other cured ham
1/4 cup chopped black olives
12 to 16 fresh spinach leaves, stems removed
Freshly ground black pepper, to taste
Kitchen string
Cover

9
2 tablespoons vegetable oil
2 medium zucchini, sliced into 1/4-inch
(.64 cm) slices (about 1 pound/454g)
3/4 cup frozen corn
1/4 cup ricotta cheese
1-1/4 cups shredded Monterey Jack cheese
with jalapeno peppers, divided
Spicy Tortilla Lasagna
1. Brush bottom of oven pan with oil. Arrange zucchini slices on bottom and sprinkle corn over
top. Broil for 5 minutes in the Dining-In Convection Counter Top Oven/Broiler. Turn zucchini
over and broil 5 minutes more. Remove from oven and transfer vegetables to bowl. Preheat
oven at 450˚F (232˚C) for 10 minutes.
2. While vegetables are broiling, stir together ricotta cheese, 1 cup Monterey Jack cheese,
cumin and salt and pepper to taste.
3. Place 2 tortillas on bottom of oven pan. Spread 1/4 cup salsa over tortillas. Top with half the
cheese mixture, half the zucchini/corn mixture, half the red peppers, and 1 tablespoon cilantro.
Repeat with another layer of tortillas, salsa, cheese, and vegetables in same order.
4. Top with remaining 2 tortillas, salsa, cilantro and 1/4 cup Monterey Jack cheese. Cover pan
with aluminum foil and bake at 450˚F (232˚C) for 30 minutes. Let stand, covered, for 5 minutes
before serving.
Makes: 2 servings (1 layered tortilla stack/serving)
1/2 teaspoon ground cumin
Salt and pepper to taste
3/4 cup bottled salsa, favorite kind
6 corn tortillas (6-inch/15 cm size)
1 jar (7 ounces/198g) roasted red peppers,
drained and patted dry
3 tablespoons chopped fresh cilantro
1. Position sausage links on drip tray over oven pan and broil 12 to 13 minutes in Dining-In Convection
Counter Top Oven/Broiler. Turn and broil until done on other side. Remove from oven and cut into
1/4-inch (.64 cm) slices.
2. Cook ziti according to package directions; drain when done.
3. In medium bowl, combine ricotta cheese, 4 ounces (113g) mozzarella cheese, Parmesan
cheese, basil, salt and pepper. Blend well.
4. Preheat oven at 400˚F (204˚C) for 10 minutes. Transfer ziti to oven pan. Dot with cheese mixture;
top with sausage slices, pushing slices down into mixture. Pour spaghetti sauce over top. Add
water to spagetti jar, cover and shake. Drizzle over contents of oven pan. Spread sauce evenly
over top to cover all ziti and sausage pieces.
5. Bake at 400˚F (204˚C) for 30 minutes. Sprinkle with remaining mozzarella cheese and cook
5 to 10 minutes longer, or until cheese melts and is lightly browned.
Makes: 8 servings (1-1/4 cups/serving)
1 pound (454g) Italian flavored chicken
sausage links
2-1/2 cups ziti pasta
16 ounces (454g) ricotta cheese
1 package (8 ounces) (227g) shredded
mozzarella cheese, divided
1/4 cup grated Parmesan cheese
Baked Ziti with Chicken Sausage
1 tablespoon chopped fresh basil
1/2 teaspoon salt
1/8 teaspoon pepper
1 jar (25 to 32 ounces) (708-908g) spaghetti
sauce
1/4 cup water
Cover

10
NEED SERVICE
Service, if necessary, must be performed by a Black & Decker Inc. Household Appliance
Company-Owned or Authorized Service Center. The Service Center nearest you can be
found in the yellow pages of your phone book under “Appliances — Small — Repairing.”
If mailing or shipping your unit, pack it carefully in a sturdy carton with enough packing
material to prevent damage. Include a note describing the problem to our Service
Center and be sure to give your return address and phone number. We also suggest that
you insure the package for your protection.
FULL ONE-YEAR WARRANTY
Household Products warrants this product against any defects that are due to faulty
material or workmanship for a one-year period after the original date of consumer
purchase. This warranty does not include damage to the product resulting from
accident or misuse.
If the product should become defective within the warranty period, we will repair it or
elect to replace it free of charge. We will return your product, transportation charges
prepaid, provided it is delivered prepaid to any Black & Decker Household Appliance
Company-Owned or Authorized Service Center.
This warranty gives you specific legal rights and you may also have other rights which
vary from state to state or province to province.
Answers to any questions regarding warranty or service locations may be obtained by
calling Consumer Assistance and Information toll free: 1-800-231-9786.
Pumpkin Nut Cake with Creamy Frosting
To Prepare Cake
1. Preheat Dining-In Convection Counter Top Oven/Broiler at 350˚F (177˚C) for 10 minutes. In large
mixing bowl, combine eggs, sugar, and vegetable oil. Beat well.
2. Add pumpkin and blend until smooth. Combine dry ingredients; add to pumpkin mixture, and mix
until blended. Stir in walnuts.
3. Pour into ungreased 13”x9” (33 x 23 cm) baking pan. Bake for 40 to 50 minutes, or until cake
tests done when tested with toothpick in center.
To Prepare Frosting
1. In medium bowl, combine cream cheese and butter. Blend together. Stir in confectioners’
sugar and cinnamon.
2. Spread on cooled cake.
Makes: 16 servings (about 3”x2”/7.6 x 5.0 cm each)
Frosting
2 packages (3 ounces/85g each) cream
cheese, softened
1/2 cup butter, softened
1-1/2 cups confectioners’ sugar
1 teaspoon cinnamon
Cake
4 eggs
1 cup vegetable oil
1 can (15 ounces/425g) pumpkin
2 cups sugar
2 cups all-purpose flour
2 teaspoons cinnamon
1 teaspoon baking soda
1 teaspoon salt
1/2 cup chopped walnuts
Cover

*
Listed by Underwriters Laboratories, Inc.
Copyright © 1998-1999 Household Products, Inc.
Pub. No. 174977-00-RV00
Product made in Mexico • Printed in Mexico
Enlistado por Underwriters Laboratories, Inc.
Aprobado por NOM
FABRICADO POR- Household Products Limited de México
S. de R.L. de C.V. Acceso III No. 26 Fracc. Industrial B. Juarez
C.P. 76120, Querétaro, QRO.
Teléfono: (42) 11-7800
Producto hecho en México
• Impreso en
México
Certifié par l’organisme Underwriters Laboratories, Inc.
Approuvé par l’organism NOM
Produit fabriqué au Mexique • Imprimé au Mexique
32
*
is a trademark of The Black & Decker Corporation, Towson, Maryland, USA
* Marca registrada de The Black & Decker Corporation, Towson, Maryland, E.U.
* Marque de commerce déposée de la societé The Black & Decker Corporation, Towson, Maryland, É.-U.
®
Cover
/