Page is loading ...

#61-521
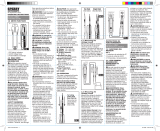
Phase/Motor Rotation Tester
Instruction Manual
61-521 Features:
• Phase rotation
• Motor rotation
• Low battery indicator
• Cat III 600V
Read First: Safety Information
Understand and follow operating instructions carefully. Use the tester only as
specied in this manual; otherwise, the protection provided by the tester may
be impaired.
WARNING
To avoid possible electric shock, personal injury or death, follow these guidelines:
• Do not use if tester appears damaged. Visually inspect the tester to ensure case is not cracked and back case is
securely in place.
• Inspect and replace leads if insulation is damaged, metal is exposed, or probes are cracked. Pay particular
attention to the insulation surrounding the connectors.
• Do not use tester if it operates abnormally as protection maybe impaired.
• Do not use during electrical storms or in wet weather.
• Do not use around explosive gas, dust, or vapor.
• Do not apply more than the rated voltage to the tester.
• Do not use without the battery and the back case properly installed.
• Replace battery as soon as the low battery indicator “ OK” LED unlights to avoid false readings.
• Remove the test leads from the circuit prior to removing battery cap.
• Do not attempt to repair this unit as it has no user-serviceable parts.
• If in doubt, check the fuses using an ohmmeter.
Important Note: There will be no indication of voltage or phasing if the tester’s fuses are blown. Always verify
tester operation on a known live circuit.
CAUTION
To protect yourself, think “Safety First”:
• Voltages exceeding 30VAC or 60VDC pose a shock hazard so use caution.
• Use appropriate personal protective equipment such as safety glasses, face shields, insulating gloves, insulating
boots, and/or insulating mats.
• Use the proper terminals for your measurements.
• Never ground yourself when taking electrical measurements.
• Always work with a partner.
• When using the probes, keep ngers as far behind the probe tips as possible.
OPERATING INSTRUCTIONS:
Determination of the rotary field direction and phase presence:
On a 3 Phase System, the sequence of the 3 phases determines the rotation of a 3 phase motor connected to that
system. The correct 3 phase sequence results in a clockwise rotation of a connected motor.
• Insert the test leads to the matching color coded sockets of the instrument. Red to R, White (or yellow) to S,
Blue (or black) to T.
• Clip the test probes to the three phases (R,S,T). When connecting to a voltage greater than 100VAC,
the corresponding neon lamp will start to glow, indicating the presence of the voltage on its corresponding lead
(R,S,T lamps).
• Press the TEST button to turn the instrument “ON”. The green LED indicates that the instrument is ON and is
testing. The battery is OK when the green “ OK” LED is ON. Should the Green LED not come on while
depressing the TEST button, replace the battery (see Battery Replacement).
If the LED L1-L2-L3 is illuminated, a clockwise rotary eld is present.
If the LED L2-L1-L3 is illuminated, a counter clockwise rotary eld is present.
Please note that the phase voltage is indicated even if the neutral conductor N is connected in place of a
phase conductor.
Determination of motor connections and motor rotation:
• Insert the test leads into the instrument using the color codes then to the motor wiring per the chart below.
Test Lead Tester Input Motor Wiring
Red R/L1 L1
White (or yellow) S/L2 L2
Blue (or black) T/L3 L3
• Press the button. The green “ OK” LED indicates that the instrument is ready for testing.
Turn the motor shaft by at least a half rotation clockwise. Look at the LED’s while the shaft is spinning.
Note: A relatively low RPM is sufcient to perform the measurement.
It is important to ensure that the user faces the drive shaft, looking toward the motor and the front side of the
tester at the same time, so that motor rotation can be conrmed.
The red LED L1-L2-L3 indicates clockwise motor rotation if the leads are properly connected as follows: L1 to R,
L2 to S, and L3 to T.
The red LED L2-L1-L3 indicates counter- clockwise motor rotation if the leads are improperly connected, such as
L1 to R, L2 to S, and L3 to T. Switch the red and white test lead connections and conrm the proper clockwise
rotation now exists.
2

N12966
Battery Replacement:
• Ensure test leads are disconnected from circuit or components.
• Remove test leads from input jacks on tester.
• Remove the two screws from the back case.
• Remove the back case.
• Replace battery with a new 9V battery.
• Assemble the back case to the tester and re-tighten the screws.
Fuse Replacement:
Unscrew the back cover, replace fuse(s) with the same type fuse (5 x 20mm, 200mA/250V). Screw the cover back
into place.
Maintenance:
Clean the case with a damp cloth and mild detergent. Do not use abrasives or solvents.
Service and Replacement Parts:
This unit has no user-serviceable parts.
For replacement parts or to inquire about service information contact IDEAL INDUSTRIES, INC at (877)-201-9005 or
visit our website www.testersandmeters.com.
SPECIFICATIONS:
Nominal Voltage for Phase Presence Indication: 100 - 600VAC (10-400Hz)
Phase Rotary Field Direction: 1– 600VAC (2-400Hz)
Determination of Motor Rotation (requires > ½ turn): 1-600VAC (2-400Hz)
Over Load Protection: 550V (between all terminals)
Fuses: 5 x 20mm, 200mA/ 250V fuse
Low Battery Indicator: The “ OK” LED unlights when battery voltage
drops below operating level.
Battery: (1) 9V, IEC 6LR61
Current Consumption: Max 18 mA.
Size: 6.0”Hx2.8”Wx1.4”D (151mmHx72mmW x 35 mmD)
Weight: 6.4oz (181g) including battery
Display: Neon Lamps and LEDs
Accessories included: Carrying Case, Alligator Clip Leads, (1) 9V battery,
operating instructions.
Operating Temperature Range: 5ºF to 131ºF (-15°C to + 55°C)
Storage Temperature: -4ºF to 158ºF (-20°C to + 70°C)
Safety: Cat III – 600V
Double Insulation
Instrument has been evaluated and complies with insulation category III (overvoltage category III). Pollution degree
2 in accordance with IEC-644. Indoor use.
Dispose of waste electrical and electronic equipment
In order to preserve, protect and improve the quality of environment, protect human health
and utilize natural resources prudently and rationally, the user should return unserviceable
product to relevant facilities in accordance with statutory regulations. The crossed-out
wheeled bin indicates the product needs to be disposed separately and not as municipal waste.
Disposal of used batteries/accumulators!
The user is legally obliged to return used batteries and accumulators. Disposing used batteries in the household waste
is prohibited! Batteries/accumulators containing hazardous substances are marked with the crossed-out wheeled bin.
The symbol indicates that the products forbidden to be disposed via the domestic refuse. The chemical symbols for the
respective hazardous substances are Cd = Cadmium, Hg = Mercury, Pb = Lead. You can return used batteries/
accumulators free of charge to any collecting point of your local authority, our stores, or where batteries/accumulators
are sold. Consequently you comply with your legal obligations and contribute to environmental protection.
Warranty Statement:
This tester is warranted to the original purchaser against defects in material and workmanship for two years from
the date of purchase. During this warranty period, IDEAL INDUSTRIES, INC. will, at its option, replace or repair the
defective unit, subject to verication of the defect or malfunction. This warranty does not cover fuses, batteries or
damage from abuse, neglect, accident, unauthorized repair, alteration, or unreasonable use of the instrument.
Any implied warranties arising out of the sale of an IDEAL product, including but not limited to implied warranties of
merchantability and tness for a particular purpose, are limited to the above. The manufacturer shall not be liable for
loss of use of the instrument or other incidental or consequential damages, expenses, or economic loss, or for any
claim or claims for such damage, expenses or economic loss.
State laws vary, so the above limitations or exclusions may not apply to you. This warranty gives you specic legal
rights, and you may also have other rights which vary from state to state.
3 4
/